


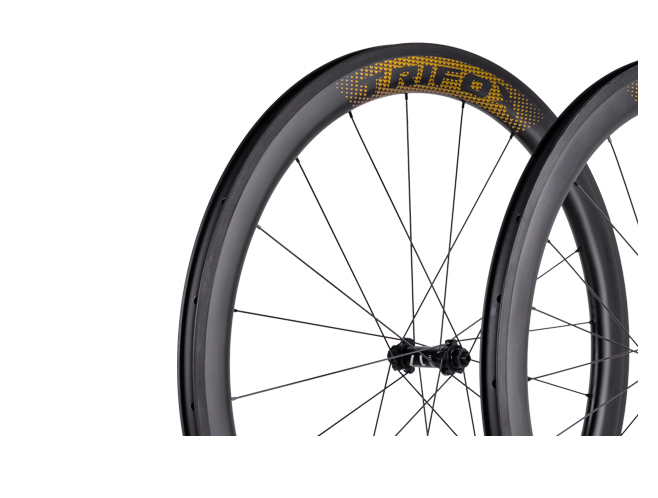
Selecting a good road wheelset is crucial for enhancing both speed and durability on your bike. The right wheelset can significantly impact your performance, whether you're racing or enjoying a long ride. Here’s how to choose the perfect road wheelset to meet your needs.
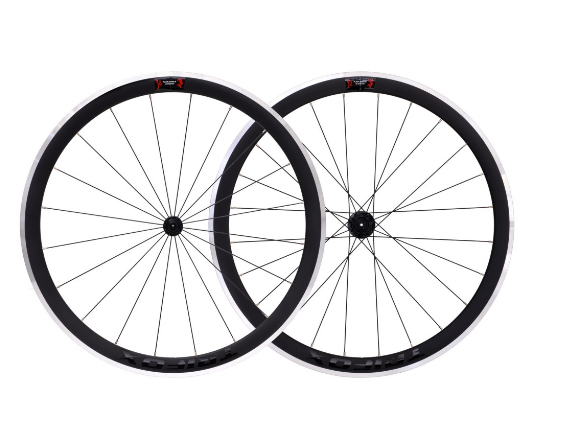
First, consider the material of the wheelset. Alloy wheels, like those available on [Trifox Alloy Road Wheels], are a popular choice due to their excellent balance of weight, strength, and affordability. Alloy wheels are durable and can withstand the rigors of various road conditions, making them an ideal choice for many cyclists.
Next, assess the wheel size and rim depth. The most common road bike wheel size is 700c, which offers a good blend of speed and stability. Rim depth plays a crucial role in aerodynamics: deeper rims (40mm and above) provide better aerodynamic benefits, reducing drag and helping you maintain higher speeds with less effort. However, deeper rims can be heavier and more susceptible to crosswinds. If you frequently ride in windy areas or prefer climbing, a shallower rim (20-30mm) might be more suitable.
The spoke count is another important factor. Wheels with fewer spokes (16-24) tend to be lighter and more aerodynamic, making them ideal for racing. However, they may not be as robust as wheels with more spokes (28-36). If durability and strength are your primary concerns, especially if you ride on rough roads, opt for a higher spoke count.
Hub quality also affects performance. High-quality hubs provide smoother rotation and greater reliability. Look for wheels with sealed bearings, which require less maintenance and offer better protection against dirt and moisture.
Consider the weight of the wheelset. Lighter wheels accelerate faster and make climbing easier, but they should not compromise strength and durability. Alloy wheels strike a good balance here, offering lightweight properties without sacrificing robustness.
Lastly, think about your budget. Investing in a quality wheelset can significantly enhance your riding experience. While high-end wheels can be costly, there are many excellent options available at different price points. The [Trifox Alloy Road Wheels] provide a range of choices that combine performance and value.

In conclusion, selecting a good road wheelset involves considering material, size, rim depth, spoke count, hub quality, weight, and budget. By taking these factors into account, you can find a wheelset that boosts your speed and durability, ensuring a better ride. Happy cycling!
Selecting the right performance wheelset can drastically improve your bike's speed and efficiency. Here's how to make an informed choice to elevate your cycling experience.
1. Understand Your Riding Style
Consider whether you're into road racing, mountain biking, or long-distance touring. Each discipline demands different wheel characteristics. Road cyclists often prefer lightweight, aerodynamic wheels, while mountain bikers need robust, durable options.
2. Focus on Material
Carbon fiber wheelsets are a top choice for serious cyclists due to their lightweight and strength. They provide excellent stiffness and responsiveness, crucial for both acceleration and maintaining speed. However, they are more expensive than aluminum alternatives.
3. Consider Rim Depth
Rim depth affects aerodynamics and handling. Deeper rims (50mm+) are more aerodynamic, making them ideal for flat courses and time trials. Shallow rims (30mm or less) are better for climbing due to their lighter weight and improved maneuverability.
4. Check Hub Quality
High-quality hubs reduce rolling resistance and enhance overall performance. Look for sealed bearings that offer smooth rotation and require less maintenance.
5. Evaluate Spoke Count
Wheelsets with fewer spokes are generally lighter and more aerodynamic but might sacrifice durability. Opt for higher spoke counts if you’re heavier or ride on rough terrains frequently.
6. Factor in Budget
Performance wheelsets can be a significant investment. Balance your budget with your riding goals to find the best value without compromising essential features.

Installing the Ultra Light SF-QR 2.0 Quick Release on your bike may seem daunting, but with a few straightforward steps, you can ensure a secure and efficient setup. This quick release skewer, available at Trifox, offers lightweight performance and reliability ideal for serious cyclists. Here's a detailed guide to help you install it correctly.
Step 1: Gather Your Tools
Before starting, gather the necessary tools:
Bike stand (optional but helpful)、Allen wrench or quick-release lever、Grease or lubricant
Step 2: Prepare Your Bike
Place your bike on a stable surface or bike stand. Make sure the bike is stable and won't tip over during the installation process.
Step 3: Remove the Old Skewers
If your bike already has skewers installed, you'll need to remove them first. Open the quick-release lever and unscrew the nut on the opposite side. Slide the skewer out of the hub and set it aside.
Step 4: Apply Lubricant
Apply a small amount of grease or lubricant to the threads of the quick-release skewer. This helps ensure smooth operation and prevents seizing.
Step 5: Insert the Ultra Light SF-QR 2.0 Skewer
Insert the new Ultra Light SF-QR 2.0 skewer through the hub axle. Ensure the lever side is positioned on the non-drive side of the bike (the side opposite the chain).
Step 6: Attach the Nut
Thread the nut onto the skewer from the drive side. Tighten the nut by hand until snug, but do not fully tighten yet.
Step 7: Adjust the Lever Position
Position the lever in an open position. The lever should be parallel to the fork or frame for proper alignment. Ensure the lever won’t interfere with any components when closed.
Step 8: Close the Quick Release
Close the quick-release lever. It should require firm pressure to close securely. If too loose, open the lever and tighten the nut slightly before closing again. A properly adjusted lever should leave an imprint on your palm when closed.
Step 9: Check Alignment
Ensure the wheel is properly aligned in the dropouts and centered between the forks or stays. Spin the wheel to check for any wobbling or misalignment.
Step 10: Test and Secure
Ensure the quick release is securely fastened by pressing down on the lever. There should be no movement in the wheel. For added safety, double-check that the lever is tightly closed and locked.

By following these steps, you can easily install your Ultra Light SF-QR 2.0 Quick Release, ensuring a secure and smooth ride. Proper installation not only enhances performance but also ensures your safety on the road.
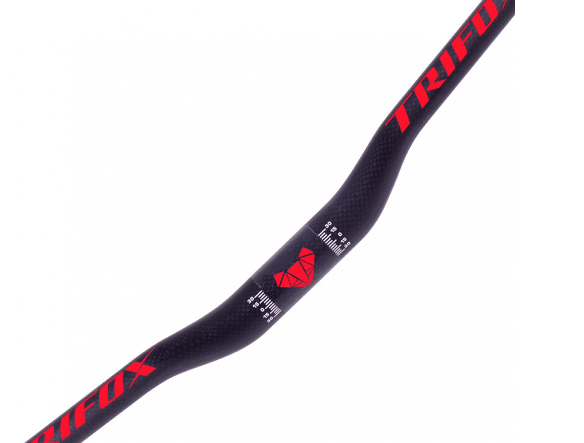
Choosing the right handlebar can significantly enhance your cycling experience, providing comfort, control, and efficiency. With options like the high-quality carbon bike handlebars from Trifox, it's essential to understand which type suits your riding style best. Here's a guide to help you make the perfect choice.
1. Identify Your Riding Style
Your riding style is the first consideration when selecting a handlebar. Are you into road racing, mountain biking, or casual commuting? Each style demands different handlebar characteristics for optimal performance.
Road Racing: For speed and aerodynamics, drop bars are usually preferred. They offer multiple hand positions and reduce drag;Mountain Biking: Flat or riser bars are ideal for control and stability on rugged trails;Commuting: Comfort and ease of use are key, making flat bars or cruiser bars a good choice.
2. Consider the Material
Carbon handlebars, like those offered by Trifox, provide several advantages. They are lightweight, strong, and absorb vibrations better than aluminum, offering a smoother ride. This is particularly beneficial for long-distance cyclists and competitive racers.
3. Understand Handlebar Dimensions
Width: A wider handlebar offers more control, especially in technical terrains, while a narrower bar can be more aerodynamic;Drop and Reach: For drop bars, consider the drop (vertical distance) and reach (horizontal distance). A deeper drop allows for a more aerodynamic position, while a shorter reach is more comfortable for casual rides;Rise: For flat and riser bars, the rise (height difference between the center of the bar and the ends) affects your riding posture. More rise means a more upright and comfortable position.
4. Test Different Shapes
Handlebars come in various shapes to suit different preferences:
Drop Bars: Ideal for road cyclists needing aerodynamic positions.Flat Bars: Common in mountain bikes for improved control;Riser Bars: Provide a higher position, enhancing visibility and comfort;Bullhorn Bars: Offer an aggressive position suitable for time trials and track racing.
5. Ergonomics and Comfort
Pay attention to ergonomics. Some handlebars have ergonomic bends or specific shapes designed to reduce fatigue and increase comfort on long rides. Carbon bars, such as those available from Trifox, often include these features, making them a great investment for serious cyclists.
6. Installation and Adjustments
Ensure proper installation and adjustment. Handlebars need to be securely fitted and adjusted to your preference. Seek professional help if necessary to avoid any mishaps that could affect your ride quality or safety.
Conclusion
Choosing the perfect cycling handlebar is crucial for enhancing your cycling experience. With options like the Trifox carbon bike handlebars, you can find the balance between weight, strength, and comfort tailored to your riding style. Take the time to assess your needs, try different options, and invest in the best handlebar for a more enjoyable and efficient ride.

Explore Trifox's range of carbon bike handlebars here.
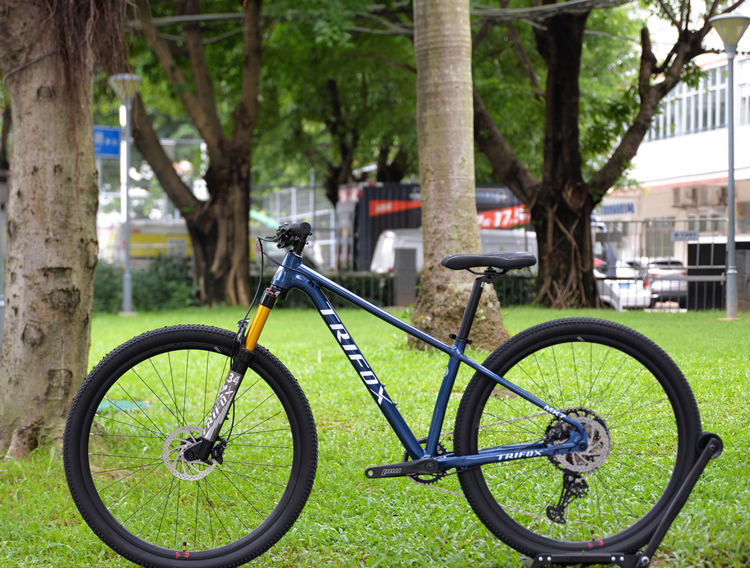
Conquering mountain trails demands not only skill but also the right equipment. The Trifox PeakTrail Xtreme bike, with its top-tier components and design, is engineered to help you tackle the roughest terrains with confidence and style. Here's how you can master mountain trails with this exceptional bike.
1. Understand Your Equipment
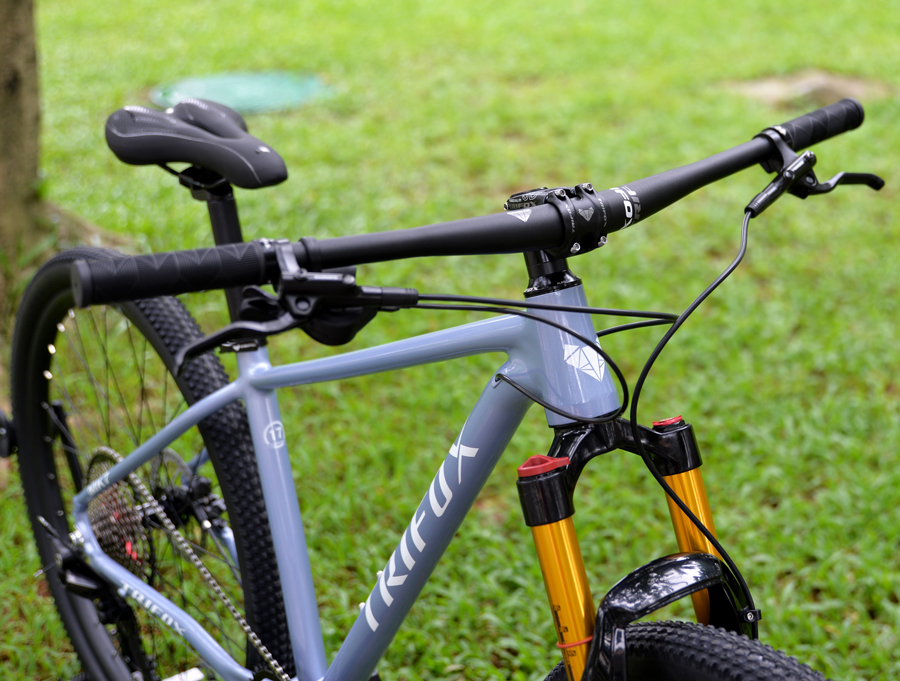
The PeakTrail Xtreme bike features a TRIFOX suspension fork, which plays a crucial role in handling the various obstacles you'll encounter on the trail. Its butted aluminum frame, combined with hydroformed top and downtubes, offers both durability and a sleek appearance. This frame is designed for higher deformation resistance and tensile strength, ensuring reliability on challenging terrains.
2. Optimize Your Gear Shifting
Equipped with the SHIMANO DEORE M6100 12-speed Groupset, the PeakTrail Xtreme provides a wide range of gears to handle steep climbs and fast descents efficiently. Knowing when and how to shift gears can significantly impact your ride. Practice smooth transitions between gears to maintain momentum and avoid unnecessary strain on your bike’s components.
3. Leverage the 1x Drivetrain
The 1x Shimano drivetrain on the PeakTrail Xtreme simplifies gear shifting and reduces the chances of chain drops, allowing you to focus more on the trail ahead rather than managing multiple gears. This simplicity doesn’t compromise performance but rather enhances reliability and ease of use, especially useful in technical sections.
4. Utilize the Lightweight Design
One of the standout features of the PeakTrail Xtreme is its lightweight construction, which allows for faster acceleration and easier maneuverability. This is particularly advantageous when navigating sharp turns or climbing steep inclines. Use this to your advantage by practicing quick sprints and agile movements.
5. Regular Maintenance
Maintaining your PeakTrail Xtreme bike is essential for optimal performance. Regularly check the suspension fork, drivetrain, and brakes. Proper maintenance ensures that your bike remains reliable and ready for any trail.
6. Benefits Beyond the Bike
When you purchase the PeakTrail Xtreme bike, Trifox offers top-quality items, 24/7 live chat support, fast and reliable delivery options, and secure payment methods. These additional benefits ensure a seamless purchasing experience, allowing you to focus on enjoying your ride.
Mastering mountain trails requires both skill and the right bike. The PeakTrail Xtreme, with its robust features and performance-oriented design, is your ideal partner for any mountain adventure. Start exploring with confidence and elevate your riding experience today.
Learn more and get your PeakTrail Xtreme bike here.

Optimizing your ride with an aero bike can make a significant difference in your cycling performance, especially if you're aiming for speed and efficiency.
Understanding Aero Bikes
Aero bikes are designed to reduce aerodynamic drag, allowing you to cut through the air more efficiently. They feature streamlined frames, integrated components, and often deeper wheel rims. Here's how to optimize every aspect of your aero bike for maximum performance:
1. Perfect Your Bike Fit
A proper bike fit is crucial. Visit a professional fitter to ensure your aero bike is adjusted to your body dimensions. A good fit reduces wind resistance and increases comfort, allowing you to maintain an aerodynamic position for longer periods.
2. Choose the Right Wheels
Wheels play a vital role in aerodynamics. Deep-section wheels (50mm-80mm) are ideal for flat terrains and time trials due to their reduced drag. However, they can be susceptible to crosswinds, so consider mid-section wheels (35mm-50mm) for versatility.
3. Optimize Your Riding Position
An aero position minimizes frontal exposure. Lowering your handlebars, tucking your elbows in, and maintaining a flat back can significantly reduce drag. Practice holding this position to improve endurance and efficiency.
4. Use Aero Components
Invest in aero handlebars, stems, and seat posts. These components are designed to slice through the air more effectively than standard parts. Additionally, consider using an integrated cockpit system for seamless airflow.
5. Wear Aerodynamic Gear
Your clothing should be tight-fitting and designed for aerodynamics. Opt for aero helmets, skinsuits, and overshoes to reduce air resistance. Every small improvement can add up to noticeable gains in speed.
6. Mind the Accessories
Minimize accessories like saddle bags and bottle cages that can disrupt airflow. Use aero water bottles and mount them strategically to maintain the bike’s streamlined profile.

Conclusion
Optimizing your ride with an aero bike involves a combination of proper fit, equipment choices, and riding techniques. By paying attention to these details, you can maximize your efficiency and enjoy faster, more enjoyable rides.

Building a carbon bike from scratch can be a rewarding experience that allows you to customize every component to your liking. Here's a step-by-step guide to help you build, adjust, and maintain your carbon bike.
Building Your Carbon Bike
1. Gather Your Components
Frame: Start with a high-quality carbon frame.
Groupset: Choose a groupset (gears, derailleurs, brakes) that fits your riding style.
Wheels: Opt for lightweight, durable wheels.
Handlebars, Saddle, and Seatpost: Select components that offer comfort and performance.
2. Assembly
1. Install the Bottom Bracket: Use a torque wrench to ensure proper tightness.
2. Attach the Crankset: Align it with the bottom bracket.
3. Mount the Derailleurs: Attach the front and rear derailleurs.
4. Install the Chain: Thread it through the derailleur and crankset.
5. Attach the Wheels: Secure them to the frame.
6. Install the Handlebars and Saddle: Ensure they are comfortable and correctly aligned.
Adjusting Your Carbon Bike
1. Saddle Height: Adjust the saddle height so your leg is nearly straight at the bottom of the pedal stroke.
2. Handlebar Position: Adjust the handlebars for a comfortable reach and angle.
3. Derailleur Tuning: Fine-tune the derailleurs for smooth shifting.
4. Brake Adjustment: Ensure the brakes are centered and provide adequate stopping power.
Maintaining Your Carbon Bike
1. Regular Cleaning: Wipe down the frame and components after each ride.
2. Inspect for Damage: Regularly check for cracks or chips in the carbon fiber.
3. Lubricate the Chain: Apply lubricant to keep the chain running smoothly.
4. Check Bolts: Periodically check all bolts with a torque wrench to ensure they are properly tightened.
5. Wheel Maintenance: Check for true wheels and adjust spokes if necessary.
By following these steps, you’ll ensure your carbon bike remains in peak condition, providing you with an excellent riding experience. Happy cycling!


Upgrading to carbon handlebars on your bike can significantly enhance your riding experience. Carbon handlebars are lighter, more comfortable, and can absorb road vibrations better than their aluminum counterparts. However, installing and maintaining them requires some specific steps and attention to detail to ensure safety and longevity.
Why Choose Carbon Handlebars?
Before diving into the installation and maintenance, it’s worth understanding why carbon handlebars are a popular choice among cyclists:
Weight: Carbon handlebars are significantly lighter than aluminum, reducing the overall weight of your bike;Comfort: They offer better shock absorption, leading to a more comfortable ride over long distances;Aerodynamics: Many carbon handlebars come with aerodynamic designs that reduce drag;Aesthetics: Carbon handlebars often have a sleek, modern look that can enhance the appearance of your bike.
Tools You’ll Need
To install and maintain carbon handlebars, you’ll need the following tools:
Torque wrench;Allen keys (appropriate sizes for your bike);Carbon assembly paste;Clean cloth;Bike stand (optional but recommended).
Installation Guide
Step 1: Remove Old Handlebars
Secure Your Bike: Place your bike on a stable surface or use a bike stand to keep it steady;Remove Accessories: Remove any accessories attached to the handlebars, such as lights, bells, or GPS mounts;Loosen Stem Bolts: Use an Allen key to loosen the bolts on the stem to release the handlebars. Be careful not to lose any bolts or parts.
Step 2: Prepare for Installation
Clean the Stem: Wipe down the inside of the stem clamp with a clean cloth to remove any dirt or debris;Apply Assembly Paste: Apply a thin layer of carbon assembly paste to the clamping area of the stem and the new carbon handlebars. This paste increases friction and helps prevent slippage without the need for excessive tightening.
Step 3: Install Carbon Handlebars
Position Handlebars: Align the new carbon handlebars with the stem. Make sure they are centered and at the desired angle;Tighten Stem Bolts: Using a torque wrench, gradually tighten the stem bolts in a cross pattern. Refer to the manufacturer's torque specifications to avoid over-tightening, which can damage the carbon fiber. Typically, the recommended torque settings range from 4-6 Nm.Reattach Accessories: Attach any removed accessories back onto the new handlebars.
Step 4: Final Adjustments
Check Alignment: Ensure the handlebars are perfectly aligned with the front wheel;Test Ride: Take the bike for a short test ride to check for any movement or creaking noises. If you notice any issues, recheck the torque settings.
Maintenance Tips
Maintaining carbon handlebars is crucial for safety and performance. Here are some tips to keep them in top condition:
Regular Inspections
Visual Checks: Regularly inspect your handlebars for any cracks, chips, or other signs of damage. Carbon fiber can be damaged without obvious signs, so pay close attention;Torque Checks: Periodically check the torque on all bolts to ensure they are within the recommended range. Over time, bolts can loosen slightly
Cleaning
Gentle Cleaning: Use a soft cloth and mild soapy water to clean the handlebars. Avoid harsh chemicals or abrasive cleaners that could damage the carbon fiber;Dry Thoroughly: Make sure to dry the handlebars thoroughly after cleaning to prevent any moisture from affecting the material.
Handling
Avoid Impact: Handle your bike carefully to avoid impacts that could damage the carbon fiber. Always support the bike correctly, especially when placing it on bike racks or stands;Proper Storage: Store your bike in a safe place where it won’t be at risk of falling or being knocked over.
Replacements
Replace When Necessary: If you notice any signs of significant wear or damage, replace the handlebars immediately. Don’t take risks with compromised components;Follow Manufacturer Guidelines: Always adhere to the manufacturer’s guidelines regarding the lifespan and replacement intervals for carbon handlebars.
Conclusion
Installing and maintaining carbon handlebars is a worthwhile investment for enhancing your cycling experience. By following this guide, you can ensure a safe and efficient installation process and keep your handlebars in excellent condition for years to come. Remember, regular maintenance and careful handling are key to maximizing the benefits of your carbon handlebars. Happy riding!
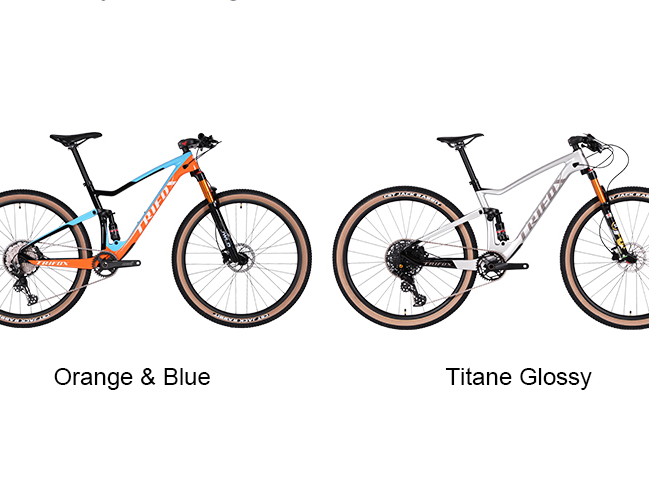
Setting up and adjusting a double suspension frame, such as the Trifox MFM100 Full Suspension Carbon MTB Frame, can significantly enhance your mountain biking experience. A well-tuned suspension system ensures better control, improved traction, and a more comfortable ride over rough terrain.
Understanding Double Suspension
Double suspension, or full suspension, refers to a bike that has both front and rear shock absorbers. This system helps absorb impacts from rough trails, allowing for a smoother ride and better handling. The Trifox MFM100, with its carbon construction, offers a lightweight yet durable option for serious riders.
Tools and Materials Needed
Shock Pump: For adjusting air pressure in the suspension.Allen Wrench Set: For making adjustments.Torque Wrench: For precise tightening.Sag Setup Tool (optional): For setting correct sag.Lubricant: For maintaining smooth operation.
Step-by-Step Setup and Adjustment Guide
Step 1: Install the Frame
If you haven't already installed your double suspension frame, follow these steps:
Install Headset and Fork: Begin by installing the headset and fork according to the manufacturer's instructions.Attach Rear Shock: Securely attach the rear shock to the frame using the provided hardware. Ensure bolts are torqued to the manufacturer's specifications.
Step 2: Setting the Sag
Sag is the amount of suspension travel used when you’re sitting on the bike in a neutral position. Proper sag setup is crucial for optimal performance.
Measure Sag: Ideally, sag should be around 25-30% of the total travel for both front and rear suspension.Adjust Air Pressure: Use a shock pump to add or release air from the front fork and rear shock until the desired sag is achieved. Most shocks have a recommended pressure range based on rider weight.
Step 3: Adjusting Rebound and Compression
Rebound and compression adjustments control how quickly the suspension returns to its original position after compression and how it handles impacts, respectively.
Rebound Adjustment: Locate the rebound adjustment knob, usually marked with a '+' and '-'. Start by setting it to the midpoint. Test the bike and adjust to your preference—slower rebound for rougher terrain, faster for smoother trails;Compression Adjustment: If your suspension has compression adjustment, start at the recommended factory setting. Adjust accordingly based on trail conditions and personal preference. More compression for smoother trails and less for rough, technical terrain.
Step 4: Fine-Tuning
Test Ride: Take your bike for a short ride over varied terrain. Pay attention to how the suspension feels and make note of any adjustments needed;Adjust as Needed: Based on your test ride, fine-tune the sag, rebound, and compression settings. Small adjustments can make a significant difference in performance.
Step 5: Maintenance Tips
Proper maintenance is essential for keeping your double suspension frame performing at its best.
Regular Cleaning: Clean the frame and suspension components regularly to prevent dirt and grime buildup;Inspect for Wear: Check for any signs of wear or damage, particularly on the stanchions and seals;Lubricate: Apply appropriate lubricant to moving parts as per manufacturer’s recommendations.

Conclusion
Setting up and adjusting a double suspension frame like the Trifox MFM100 Full Suspension Carbon MTB Frame can dramatically improve your riding experience. By carefully following the steps for installing, setting sag, adjusting rebound and compression, and maintaining your bike, you’ll enjoy a smoother, more controlled ride.
Whether you're tackling technical descents or cruising over rocky trails, a well-tuned suspension system ensures maximum performance and comfort. Happy riding!


