


Mountain biking is becoming increasingly popular among outdoor enthusiasts looking for adventure with a healthy dose of adrenaline. A critical component of every mountain bike is the wheels it uses to navigate through the rugged terrain. If you are looking for high-quality and durable MTB wheels, the Chinese bicycle industry has got you covered. One such trustful brand is Trifox MTB that offers the most robust and innovative bikes for mountain biking. 1) Innovation in design Trifox MTB Wheels are made from high-quality materials, ensuring you get an innovative and durable set of wheels. The alloy cross-country and mountain wheels come with a unique design that offers the perfect balance between strength and weight. With a distinct U profile design, the WM823 boost model provides excellent rigidity and greater torsion resistance hence better control in tricky rocky terrains. This design ensures that your mountain bike is agile enough to provide enjoyable and safe biking experiences. 2) Durability and strength Durability is a crucial aspect that you need to consider when looking for MTB Wheels, and Trifox offers some of the most durable wheels you can find. Made with high-quality materials, the 29er MTB wheelset, WM823, guarantees the strength to handle the most challenging mountain biking terrains. Made of 6061 aluminum alloy, these wheels provide strength and lightness, ensuring your bike is reliable and stable when going on extreme terrain. 3) Affordable price The price of any product is an essential consideration when making a purchase decision. Trifox MTB wheels are both affordable and of exceptional quality. WM823 alloy cross-country and mountain wheels come at a very fair price while maintaining the highest quality. These wheels are scratch-resistant, ensuring prolonged durability, a critical factor in ensuring you get the best value for your money. 4) Compatibility with disc brakes Trifox MTB Wheels are compatible with disc brakes, which means they are the perfect fit for mountain bikes that use these kinds of brakes. Disc brakes are much better than traditional rim brakes, providing better stopping power, especially in wet or muddy conditions, making the ride more secure. Conclusion: Trifox MTB wheels are a perfect fit for anyone looking for quality and affordable MTB wheels. Several factors make Trifox MTB wheels stand out in the market, including their innovative design, durability, affordability, compatibility with disc brakes, and an excellent warranty. If you are planning on going mountain biking soon, make sure you invest in the best, and Trifox MTB Wheels have just that.
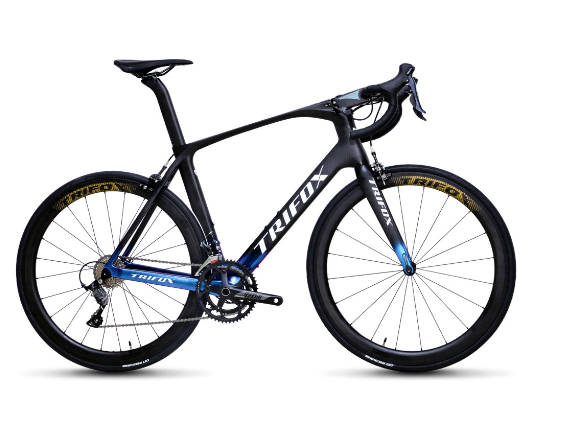
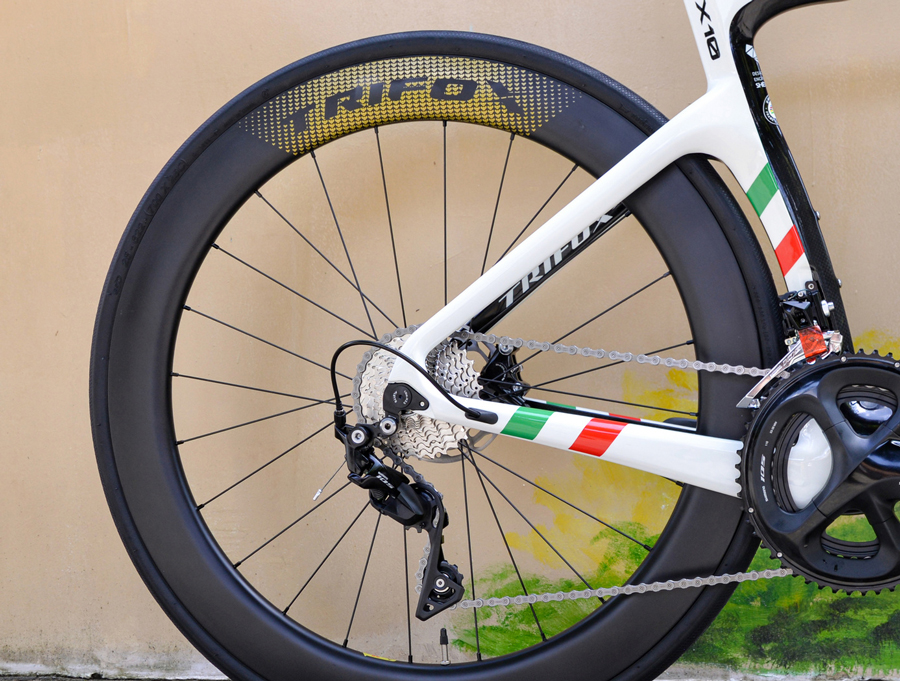
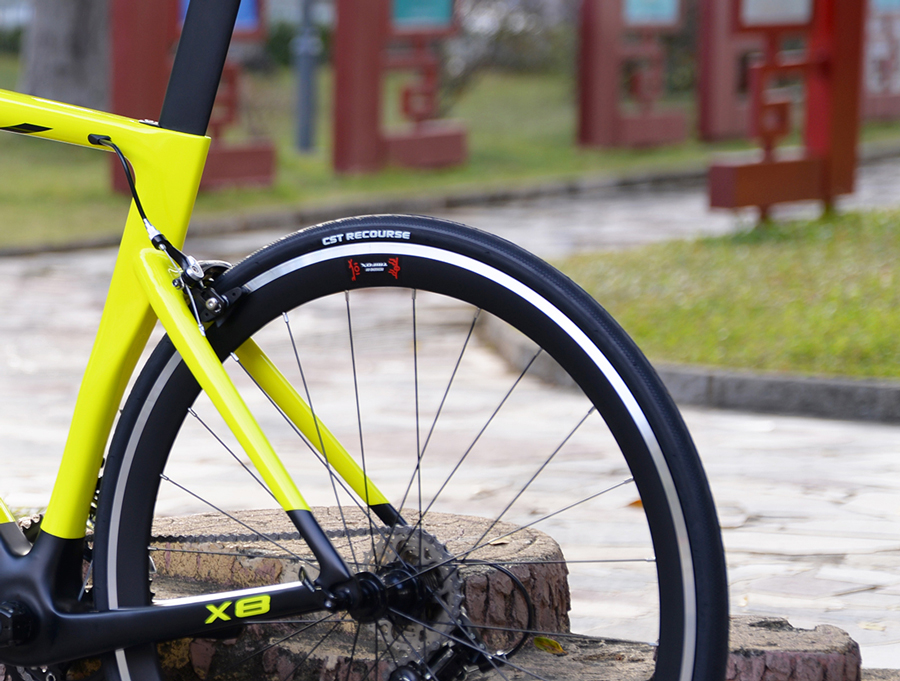
Aero road bikes have extremely crucial features that allow for a faster ride through air resistance reduction. Carbon fibre technology and the incorporation of aerodynamics have greatly improved the performance of the modern road bike in comparison to the traditional one. Here is what you need to know about aero road bikes that will help you make an informed decision. 1) AERO ROAD BIKE FRAME An aero bike frame is designed to reduce air resistance which makes it more aerodynamic. The frame plays a crucial role in the aerodynamics of the bike because it is the first point of contact with the wind. Aero road bike frames are designed to be thin, dynamic, and sleek because this reduces the surface area which makes a lot less for the wind to push against. It is, therefore, important to choose a frame that is both aerodynamic and structurally sound for a safe and fast ride. 2) WHEELS The wheels of an aero bike add to its aerodynamic properties. Different wheel designs typically have different levels of drag and lift coefficients, which determine their aerodynamic performance. Aero road bikes usually have deep dish rims, which provide the bike with a more stable ride in crosswinds and aid in reducing drag coefficient. The wheels should be wider than traditional road bikes and made of high-grade carbon fiber materials to enhance the stiffness and reduce weight. 3) HANDLEBARS Handlebars of an aero road bike are designed to steer the bike when cycling and should be leaned on when racing. The unique handlebars can come in a variety of shapes ranging from oval, square, or teardrop, but they all play a significant role in reducing drag while the cyclist is in an aggressive riding position. The ideal handlebars should provide comfort to the rider and promote a low, aerodynamic riding position. 4) FIT An essential aspect of aero road bikes is the rider's fit to the bike. It is crucial to ensure that the bike fits the rider correctly. A bike that is too small or too large causes discomfort for the cyclist. A good fit is necessary for effective power transfer from the rider to the bike; this makes the experience more enjoyable, with less energy waste. Before purchasing an aero road bike, it is advisable to conduct bike fitting to ensure compatibility with your body size and riding style. 5) COST Aero road bikes are in high demand due to their high-quality features, which translates to cost. They are generally more expensive compared to traditional road bikes. You get what you pay for, but this does not mean that you must break the bank to own one. Choose an aero road bike that is within your budget range and still has the necessary features for your desired purpose. Buying an aero road bike requires some thought and research. Please make sure you take your time to evaluate the different options in the market carefully. Consider the frame structure, wheels, handlebars, fit, and cost. An aero road bike with the right specifications will provide an excellent cycling experience and ride much faster. Remember, the right bike is the one tailored to suit your specific riding needs and will help you achieve your goals.
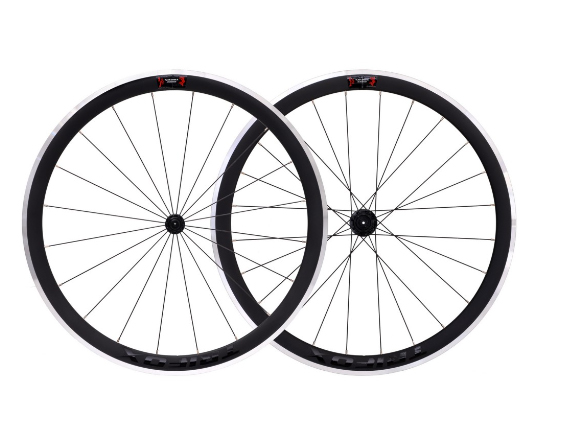
Changing your bike's wheelset can greatly improve your ride experience, but with so many options available, it can be challenging to choose the right one. Aluminum wheelsets are an excellent choice for road bikes, and they have become increasingly popular in recent times. Choosing the right aluminum wheelset can be challenging, but in this blog post, we will outline some of the things you should look out for when going for an aluminum wheelset for your bike. 1. Rim Profile: The rim profile is the cross-section of the rim. And it determines the wheel's aerodynamics, stability, and handling. The most common rim profile is the shallow rim profile, which is about 30mm or less in rim depth. They are lightweight and provide excellent handling for fast riding and climbing. On the other hand, the deep-rim profile is over 40mm in rim depth and provides better aerodynamics, stability, and handling at higher speed. So choose your rim profile depending on what's important to you. 2. Rim Width: The industry has now moved to wider rims than the traditional 13-15mm internal widths. The wider internal width increases the tire's volume and leads to an increase in the tire's contact patch with the ground. This, in turn, increases braking performance, cornering grip, and stability. We recommend a rim with an internal width of 17-19mm for road bike use. 3. Spoke count: The spoke count of a wheelset impacts its ride quality, aerodynamics, and durability. A low spoke count wheelset (16-20 spokes) would provide better aerodynamics but may not be as durable and may require more maintenance. High spoke count wheelsets (24-28 spokes) provide better durability and stability, but their aerodynamics suffer. It's best to choose a wheelset with a spoke count in-between, 20-24 spokes, which is a perfect balance of aerodynamics and durability. 4. Hub Bearings: The hub is an essential component of any wheelset, and it is crucial to ensuring smooth and efficient riding. The quality of the bearings used in the hub determines its performance. We recommend wheelsets with high-quality sealed cartridge bearings. These bearings offer better durability, smoother performance, and easier maintenance. 5. Price: Finally, the cost of the wheelset is also an essential factor that you should consider. The best value aluminum wheelset is one that strikes the perfect balance between price and quality. You should be able to get a reliable and durable wheelset for between $350 -$700. Choosing the best value aluminum wheelset can be challenging, but with the right information, you can make the right choice. The rim profile, rim width, spoke count, hub bearings, and price are some of the critical factors to consider when choosing an aluminum wheelset. Ultimately, when you find a wheelset that fits your budget and meets your requirements, you can be sure that it will be an excellent upgrade to your riding experience.
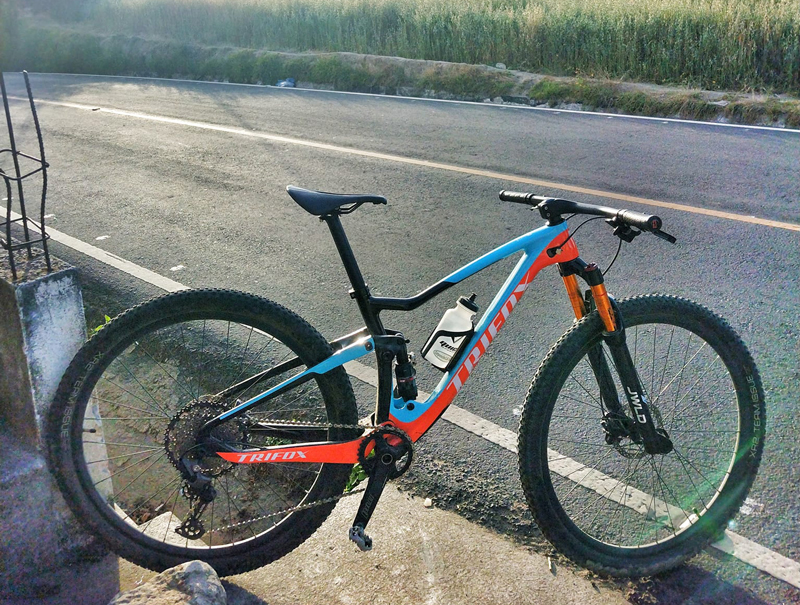
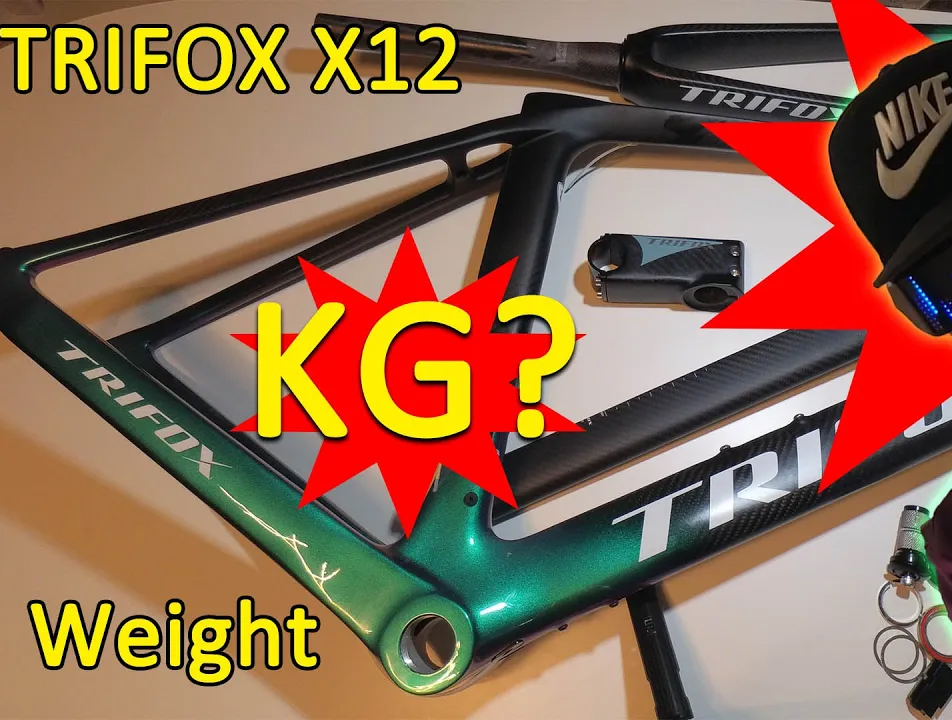
Mountain biking offers a unique experience for those who enjoy the thrill of the outdoors, the rush of speed, and the satisfaction of exploring new terrain. But for 1.70m tall riders, getting the perfect mountain bike can be a daunting task. That's why we've done the research for you and recommend Trifox mountain bike frames as the ultimate choice for all levels of mountain biking enthusiasts who are of average height. 1. Trifox Mountain Bike Frames: The Perfect Match for 1.70m Tall Riders Trifox Mountain Bike Frames are a great choice for 1.70m height as they are made with high-quality carbon fiber material and designed with a unique geometry that offers a comfortable, efficient, and responsive ride. The frames have various features that are perfect for riders of this height - including their lightweight construction, efficient power transfer, and precise handling. 2. Why Trifox Mountain Bike Frames Stand Out Trifox understands the different needs of mountain bikers, and they design their frames to deliver exceptional performance. The frames are built with an emphasis on speed, durability, and stability, all while being featherlight. The frames have a slightly suspended design with an upward curve, allowing for plenty of clearance for 1.70m riders while still providing ample control and precision. 3. Which Trifox Mountain Bike Frame Is Best for 1.70m Tall Riders? Trifox offers a range of mountain bike frames to choose from, and each is designed with distinct specifications to meet the unique needs of different riders. We recommend the Trifox Carbon MTB Frame, which is not only affordable but perfect for 1.70m riders. The frame is made of high-quality carbon fiber, making it ultra-lightweight without sacrificing strength and durability. The frame is also designed with a tapered head tube, which enhances handling and control. 4. Additional Features of the Trifox Carbon MTB Frame Apart from its lightweight carbon fiber construction and tapered head tube, the Trifox Carbon MTB Frame has an advanced suspension system that maximizes performance and reduces fatigue. With a compact and ergonomic design, it provides ample clearance and stability for 1.70m tall riders while still allowing for free and comfortable movement. The frame's aesthetic appeal is also worth mentioning as it's sleek, modern, and visually appealing. 5. Why Trifox Is the Best Choice for 1.70m Tall Riders Trifox is an exceptional brand that has established a solid reputation in the cycling industry for designing quality mountain bike frames. The brand's commitment to producing high-quality products that provide an excellent riding experience is evident in the Trifox Carbon MTB Frame. For 1.70m tall riders, this frame makes the perfect balance of weight, durability, and agility, ultimately enhancing your overall riding experience. If you're a 1.70m tall rider looking for a mountain bike frame that's efficient, lightweight, and comfortable to ride, the Trifox Carbon MTB Frame should be top of your list. With its advanced suspension system, aesthetic appeal, and high-quality carbon fiber material, it offers the best performance for riders of this height. Whether you're an experienced or novice rider, Trifox delivers the best in terms of durability, agility, speed, and overall riding experience. Get your Trifox frame, take your biking experience to the next level, and explore the great outdoors with ease.
As a cyclist, you know the importance of maintaining your bike's tire pressure. One way to ensure that your tires are inflated to the right level is by checking your valve stems. However, if you're not sure how long your valve stems should be, you're not alone. 1. Know Your Rim Profile The first thing to consider when choosing valve stem length is your rim profile. The valve stem should be long enough to reach the base of the rim, but not so long that it is prone to bending or breaking. If you have deep section wheels, you'll need a valve stem with a longer extension than if you have shallow section rims. 2. Consider Your Tire Width The width of your tire is another important factor in determining valve stem length. If you have wider tires, you'll need a longer valve stem to make it easy to access the valve for inflation and deflation. Conversely, if you have a narrow tire, a shorter valve stem can work well. 3. Take Your Valve Type into Account Valve type is another critical factor to consider when choosing valve stem length. There are two main types of valve stems: Presta and Schrader. Schrader valves are typically found on mountain bikes, while Presta valves are commonly found on road bikes. Schrader valves have a wider diameter than Presta valves, so you'll need a longer stem if you have a Schrader valve. 4. Get the Best Fit with Measuring Tools If you're still uncertain about the correct valve stem length for your bike, one way to determine the perfect fit is by using measuring tools. Use a caliper or ruler to measure the distance from the rim bed to the top of the valve hole, and add 10 millimeters to that measurement. This gives you the minimum length of valve stem you need to buy. In conclusion, selecting the right valve stem length for your bike is essential for maintaining the correct tire pressure. To find the perfect length, you should consider your rim profile, tire width, valve type, and use measuring tools to get an accurate fit. It may take some trial and error to find the right valve stem length, but once you do, you'll be able to keep your bike's tires inflated and running smoothly.
Tubeless rims on your road bike can provide excellent performance and comfort advantages over traditional tubed tires. But, setting up tubeless rims requires proper preparation and installation. One of the critical components of the entire setup is taping. Applying the tape correctly to the rim is crucial to prevent air loss and accommodate the tubeless tire. Step 1: Remove Your Old Tape. The first step in replacing your tubeless rim tape is removing the old tape from your rim. You can use a flat tool or a screwdriver to pry up and remove the old tape carefully. Be sure to clean the rim sidewalls and spoke holes thoroughly before installing the new tape. Step 2: Measure Your Rim. Measuring the rim diameter is key to choosing the right size tape for your rim. Check your rim specification or measure the rim diameter with a tape measure. Choose a tape that fits the rim diameter precisely, leaving a bit of an overlap for the seam or valve opening. Step 3: Start Taping. Start your taping by fixing the end of the tape inside the rim bed. Press down the tape firmly to stick it to the bed. Then, slowly and evenly wrap the tape around your rim bed. Take care to avoid wrinkling and overlapping the tape edges. Stretch the tape to get it into the rim's edges, but don't overstretch to prevent tearing or wrinkling. Step 4: Seal The Edges. Sealing the edges of the tape is crucial to prevent air or moisture from leaking through. You can use a small piece of tape or a thin strip of rubber material to seal the edges of the tape. Secure the seal by pressing on it firmly, above the valve opening, and around the rim's edges. Step 5: Trim The Excess. After finishing taping and sealing, trim off excess tape around the rim's edges to achieve a clean and smooth finish. Use a sharp scissors or a razor blade to cut off the excess. Take care not to cut the sealing material you've just applied. Your tubeless rim is now ready to go. Taping tubeless rims on your road bike is an essential part of the entire tubeless tire installation process. With the right tools, careful preparation, and attention to detail, you can tape your tubeless rims correctly and avoid flat tires or air loss. Always remember to remove the old tape, measure the rim diameter, start the taping accurately, seal the edges correctly, and trim the excess to achieve a clean and smooth finish. Happy cycling on your newly tubeless road bike rims!
Cycling is a great way to improve your fitness and overall health. Whether you're a beginner or an experienced rider, you may be looking for ways to enhance your cycling performance. Bike aerodynamics is one of the key factors that can help you achieve your goals. Aerodynamics is the study of how air flows around an object. In cycling, aerodynamics refers to the ability of a bike to cut through the air without creating too much resistance. This is important because the less resistance your bike encounters, the faster and more efficiently you can ride. One way to improve your bike's aerodynamics is to invest in an aero bike frame. For example, Trifox offers carbon road bike frames that are designed for speed and efficiency. These frames are lightweight and have a streamlined shape that minimizes drag. Another way to enhance your cycling performance is to optimize your riding position. This involves adjusting your body position on the bike to reduce wind resistance. The most important factor in achieving an optimal riding position is bike fit. To achieve a proper bike fit, consult a professional bike fitter who can help you adjust your saddle height, handlebar height, and reach. With the right bike fit, you can reduce your frontal area and improve your aerodynamics. In addition to investing in an aero bike frame and optimizing your riding position, there are other factors that can affect your bike aerodynamics. One of the most important is clothing. Wearing tight-fitting, aerodynamic clothing can help reduce drag and improve your cycling performance. Look for cycling-specific clothing that is designed to be aerodynamic and lightweight. Another important factor is wheel selection. Deep section wheels are more aerodynamic than standard wheels, but they can also be heavier. Consider your riding conditions and personal preferences when selecting wheels. Another way to improve your bike aero is to use aerodynamic accessories. These include items such as aerodynamic helmets, water bottles, and even shoe covers. These accessories are designed to reduce drag and improve your speed. However, keep in mind that some accessories may compromise comfort. For example, an aerodynamic helmet may not be as comfortable as a regular helmet, so test out different options before committing to an accessory. In conclusion, there are various ways to enhance your cycling performance through bike aerodynamics. Investing in an aero bike frame, optimizing your riding position, selecting aerodynamic clothing and wheels, and using aerodynamic accessories are all strategies that can help you ride faster and more efficiently. However, keep in mind that improving your aerodynamics requires a balance between speed and comfort. Find the right mix of aerodynamic features that fit your personal preferences and riding style. Happy cycling!
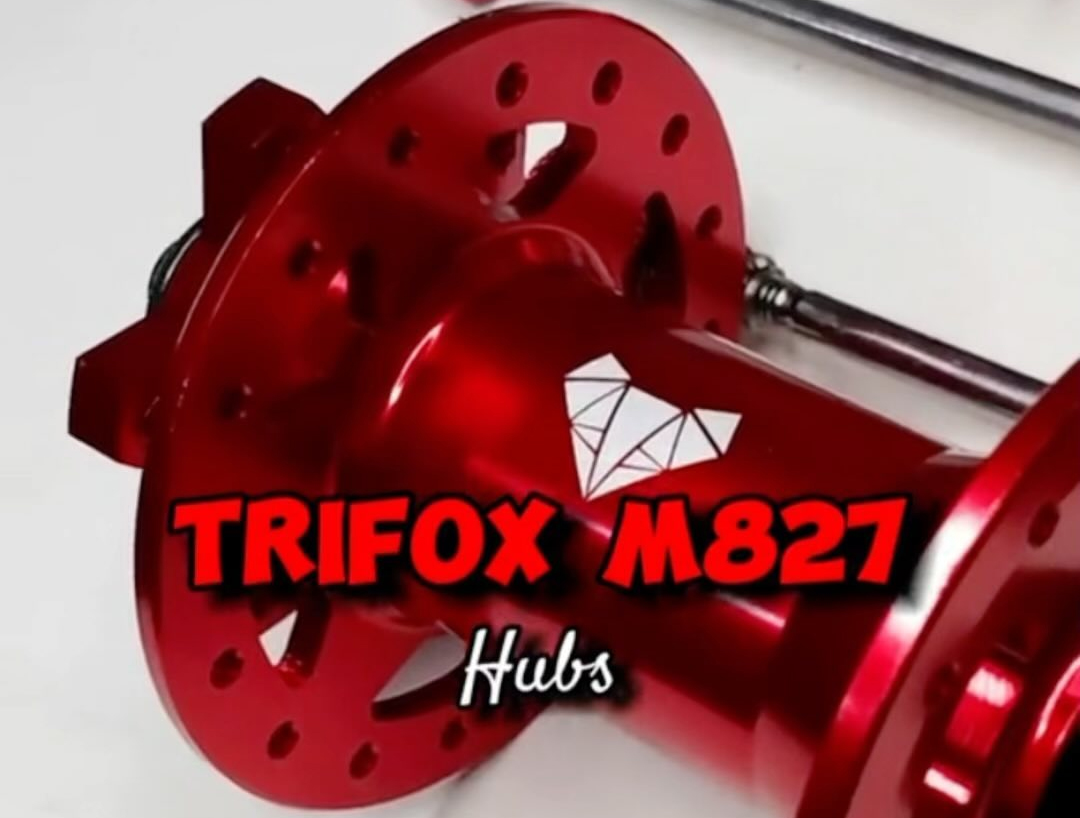
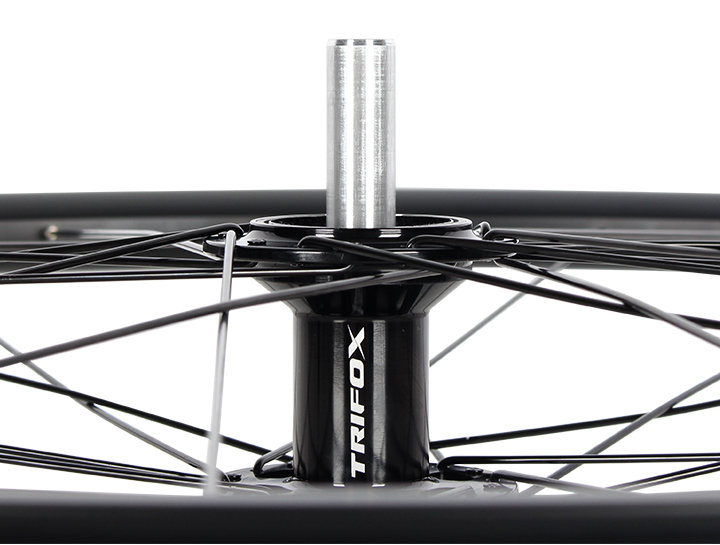
When it comes to bicycles, even the smallest components play a huge role in determining performance. One such component that often goes unnoticed but has a significant impact on both stability and efficiency is the bicycle hub. 1. Enhancing Strength and Durability: Hubs with different spoke numbers offer varying degrees of strength and durability. By increasing the spoke count, the hub becomes sturdier and can distribute the load more effectively, especially in challenging terrains or during intensive rides. This means fewer chances of wheel failure or spoke breakage, providing riders with a reliable and long-lasting cycling experience. 2. Improving Power Transfer: A higher spoke count in a hub enables better power transfer from the cyclist to the road. With a larger number of spokes evenly distributing the force applied during pedaling, there is minimal energy loss, resulting in more efficient pedaling and enhanced acceleration. Hubs with higher spoke numbers make uphill climbs feel less strenuous and flat roads more rewarding. 3. Boosting Stability and Control: Hubs with different spoke numbers contribute to increased stability and control on various surfaces. A hub with a higher spoke count enhances stiffness, reducing flex under heavy loads or high-speed maneuvers. This improved stiffness translates to better handling, responsiveness, and cornering abilities, giving cyclists the confidence to push their limits without compromising safety. 4. Enhancing Aerodynamics: For those cyclists seeking every possible advantage in aerodynamics, hubs with lower spoke numbers are a game-changer. Fewer spokes mean reduced wind resistance, allowing for smoother airflow around the wheels. The decreased drag enables higher speeds and improved performance, especially in time trials, sprints, or races. So if speed is your game, opt for a hub with a lower spoke count. 5. Customization and Personalization: With hubs available in various spoke numbers, cyclists have the freedom to customize their wheels based on their preferences and riding style. Whether you prioritize strength, speed, or a balance of both, selecting the ideal spoke number allows you to fine-tune your cycling experience. This personalization helps you achieve optimal performance and ensures an enjoyable ride every time. Conclusion: Hubs with different spoke numbers bring a plethora of benefits to the world of cycling. From increasing strength and durability to enhancing power transfer, stability, and aerodynamics, they cater to the diverse needs of cyclists. So, whether you're a recreational rider or a competitive cyclist, it's time to embrace the magic of hubs with different spoke numbers and elevate your cycling game to new heights. Explore the possibilities and witness the positive impact they can have on your cycling experience. Remember, investing in a high-quality hub with the right spoke number that suits your riding style and goals is crucial. Upgrade your bicycle hub today and embark on unforgettable cycling adventures. Happy cycling!
When it comes to maintaining your bicycle's performance, a regular tune-up is essential. A bike tune-up is a comprehensive service that ensures that your bike is safe, efficient, and ready for the road. But What does a bike tune up include? 1. Inspection and Assessment: The first step of a bike tune-up is a thorough inspection and assessment process. This involves checking every part of your bike, including the frame, tires, wheels, brakes, gears, and bearings. A professional mechanic will carefully examine each component to identify any issues that may affect the bike's performance or safety. 2. Cleaning and Lubrication: A clean and well-lubricated bike is crucial for optimal performance. During a tune-up, the bike will be thoroughly cleaned to remove dirt, debris, and any residual grease or oil. After cleaning, appropriate lubrication will be applied to the chain, gears, cables, and other moving parts to ensure smooth and efficient operation. 3. Brake Adjustments: The braking system is one of the most critical safety components on your bike. A tune-up will involve inspecting and adjusting the brakes to ensure proper alignment, pad wear, and cable tension. This process will optimize brake performance, ensuring reliable stopping power and control. 4. Gear Adjustments: Smooth shifting between gears is essential for a comfortable ride. In a bike tune-up, the gear system will be evaluated and adjusted to ensure precise shifting and eliminate any skipping or chain slippage issues. This adjustment may include cable tension, limit screw adjustments, and derailleur alignment. 5. Wheel and Tire Inspection: Wheels and tires play a significant role in your bike's performance and safety. During a tune-up, the mechanic will check for any damage, wear, or misalignment. They will inspect the spokes, true the wheels if necessary, and ensure proper tire inflation. This inspection and maintenance will improve ride quality and reduce the risk of punctures and accidents. 6. Bearing Service: Your bike's bearings enable smooth rotation of various parts, such as the headset, bottom bracket, and hubs. A comprehensive tune-up involves inspecting these bearings for wear, cleaning and regreasing them if needed, and adjusting any loose or tight bearings. This process ensures optimal performance and longevity of your bike's components. Conclusion: A bike tune-up is a necessary maintenance service that keeps your bicycle in top shape. By understanding what a bike tune-up includes, you can ensure that your bike performs at its best while promoting safety and longevity. Remember, regular tune-ups and preventative care are key to a smooth, efficient, and enjoyable ride. So, if your bike is due for a tune-up, don't hesitate to schedule an appointment with a professional bike mechanic today.


