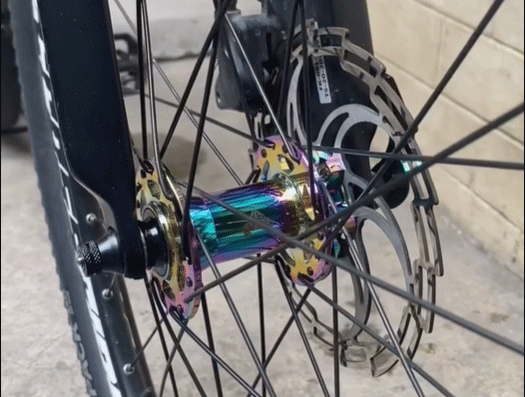
When it comes to mountain biking, choosing the right hub is critical to the performance of your bike. The hub flange spacing is something that might be overlooked, but it's an essential factor when selecting the right hub for your mountain bike. To begin, what is hub flange spacing? The hub flange spacing refers to the distance between the two flanges on a hub. The distance between the flanges affects the tension of the spokes and the lateral stiffness of the wheel. The wider the hub flange spacing, the more the spoke tension will be reduced, making the wheel less stiff. In contrast, if the hub flange spacing is narrower, the spoke tension will be higher, making the wheel stiffer. Hub flange spacing affects wheel strength, and the right spacing will ensure the longevity and durability of your wheels. The Trifox Bike Hub M827 for MTB offers an ideal hub flange spacing. It features a 110mm front hub flange spacing and a 148mm rear hub flange spacing. The wider hub flange spacing provides greater lateral stiffness of the wheel, resulting in better control and stability during your mountain biking activities. This ensures that your bike can handle demanding terrain, steep inclines, and challenging conditions. The Trifox Bike Hub M827 With a lightweight design and durability, this hub is perfect for mountain biking. The alloy construction ensures that the hub can handle the impact of rough terrain, providing a secure and stable foundation for your wheelset. You can rest assured that the hub will be able to handle the demands of your mountain biking adventures. Another essential factor when selecting the right hub for your MTB is the hub's engagement system. The Trifox Bike Hub M827 features a high-engagement system with 72 points of engagement, providing a rapid and responsive engagement experience. This means you can take on steep climbs with ease, as the hub connects directly to the drivetrain, ensuring maximum power and control. In summary, the hub flange spacing is an important consideration when selecting the right hub for your mountain biking activities. The Trifox Bike Hub M827 for MTB offers an ideal hub flange spacing, high-engagement system, durability, and lightweight design. These features ensure that you have the best experience and performance during your mountain biking adventures. Choose the Trifox Bike Hub M827 for MTB if you're looking for a robust, high-performing, and reliable mountain
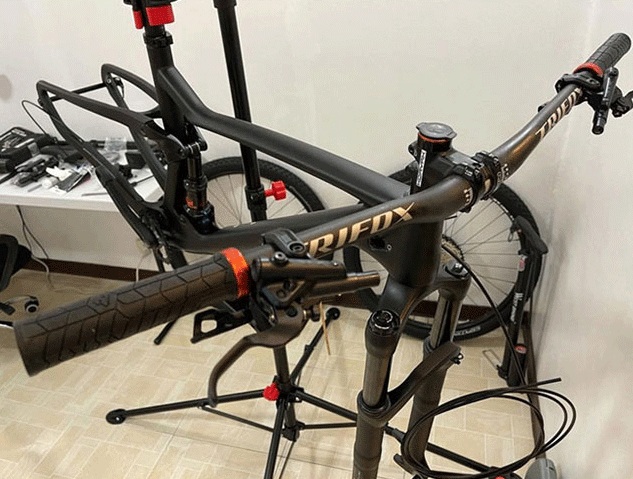
Mountain biking is an adventure sport that is cherished by many adrenaline seekers around the world. It demands strength, endurance, and technique while exploring new trails and terrains. And having the right equipment is essential for a safe and enjoyable ride. The Trifox 31.8 mm Carbon Riser Handlebar RHB300 is a game-changer in the world of mountain biking. 1. Light and Strong: The most notable feature of the Trifox 31.8mm Carbon Riser Handlebar RHB300 is its lightweight and strength. Made with T800 carbon fiber, it weighs only 230 grams, making it one of the lightest handlebars available in the market. But don't let the weight fool you; it can handle the toughest of terrains. it can absorb high impacts and reduce hand fatigue, providing a comfortable ride. 2. Incredible Stability: The handlebar's unique design and the use of high-quality material provide excellent stability on the trail. It has a 9-degree backsweep, a 6-degree upsweep, and a 31.8mm clamp diameter that helps maintain an ergonomic riding position. The handlebar's center bulge enhances stiffness and precise control on technical rides, while the 780mm width enables riders to maximize leverage and control in challenging terrain. 3. Stylish and Versatile: Trifox 31.8mm Carbon Riser Handlebar RHB300 is sleek, stylish, and versatile. It has a matte finish with smooth contours that add an aesthetic appeal to your bike. The handlebar comes in two colors, black and green, making it easy to match with your bike frame. Its compatibility with most mountain bikes, thanks to the standard 31.8mm diameter clamp, makes it accessible to all riders. 4. Easy Installation: The Trifox 31.8 mm Carbon Riser Handlebar RHB300 is easy to install. It comes with comprehensive instructions that guide you through the installation process. Additionally, it has markings on the handlebar that make customization and positioning easy. And with its lightweight, you will experience a noticeable improvement in the handling of your bike. 5. Affordable and Durable: Despite its exceptional features and quality, the Trifox 31.8mm Carbon Riser Handlebar RHB300 is very affordable. It is a great investment that will enhance your mountain biking experience without breaking the bank. And with its durability and resistance to harsh weather conditions, you will enjoy long-lasting use. Conclusion: In conclusion, the Trifox 31.8 mm Carbon Riser Handlebar RHB300 is a game-changer that every mountain biker needs to consider. Its lightweight, strength, stability, style, versatility, and affordability make it an excellent investment for a comfortable, enjoyable, and safe ride. So if you want to take your mountain biking experience to the next level, don't hesitate to try this fantastic handlebar, and you won't regret it.
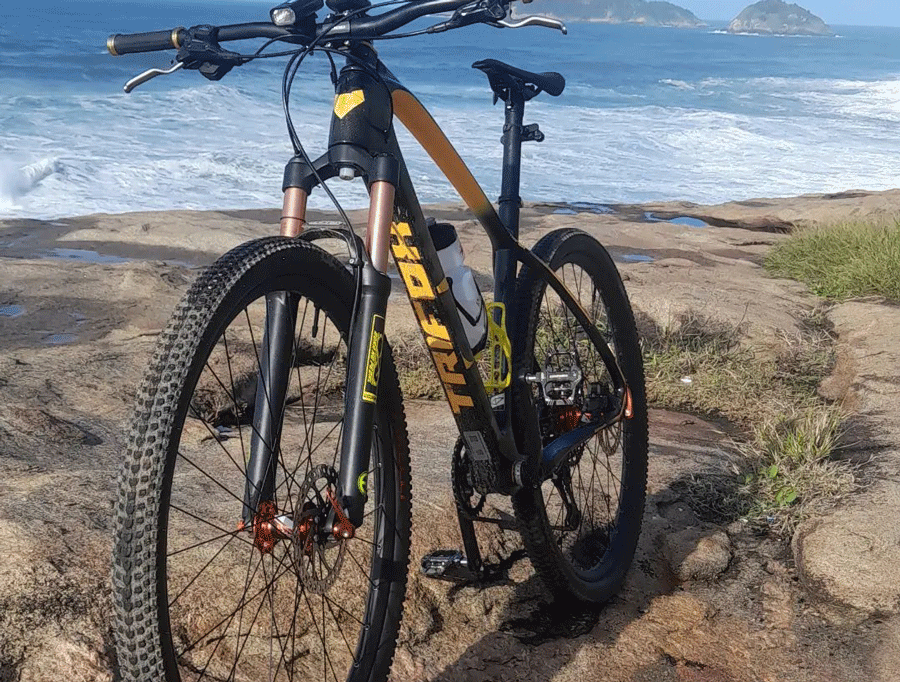
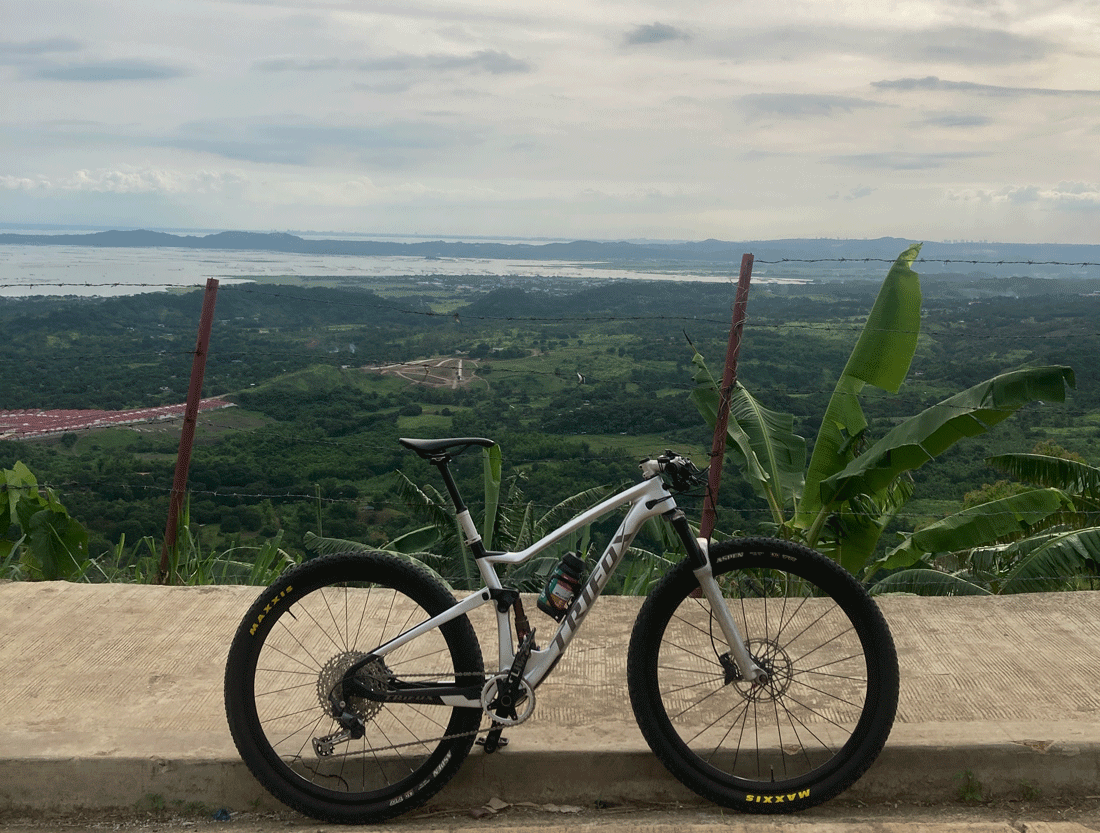
Mountain biking is a thrilling and adrenaline-pumping sport that offers enthusiasts an opportunity to explore amazing terrain and conquer new heights. Mountain bikers need reliable and sturdy bikes to tackle different terrains, and that's why most bikers swear by the Trifox framed mountain bikes. Trifox bikes are built to last, with premium components and innovative designs that cater to the needs of bikers at all levels. Adventuring on mountain bikes requires durability, strength, and flexibility, and Trifox bikes are an epitome of just that. These bikes are built with premium components that can withstand wear and tear from demanding terrains. For instance, they have a lightweight yet sturdy frame made of high-grade aluminum alloy, which makes it easier to navigate different mountain trails. The frame’s construction ensures there is little to no flex that could lead to a loss of control, especially when you're maneuvering tight corners. Additionally, Trifox framed mountain bikes often come equipped with high-quality gears that can handle the toughest conditions and deliver smooth shifting. The bike’s design ensures that the gears are well aligned and optimized for maximum performance, with precise and effortless shifting. This feature is especially important for bikers who love challenging themselves on steep inclines. The gears should be reliable, smooth, and responsive to guarantee ultimate control and speed. Another reason why Trifox framed mountain bikes are appreciated by bikers is their unique suspension systems that are designed to handle diverse terrains, from rocky paths to steep, muddy slopes. The suspension system should feel plush and provide feedback to the rider about the terrain without feeling too soft or too harsh. Trifox bikes have a full-suspension system that delivers an exceptional riding experience, reducing fatigues, and increasing control over the bike. This feature ensures that you can comfortably ride for extended periods without fear of injury or discomfort. Furthermore, Trifox framed mountain bikes have larger wheel sizes that increase the bike's stability and control. With larger wheels, you can easily roll through rough sections and maintain your speed, even on rocky terrains. They are also known for their great traction on soft surfaces, which comes in handy when negotiating slippery muddy slopes. This feature guarantees a smooth and comfortable ride on virtually any surface. Conclusion: Trifox framed mountain bikes are the perfect companion for any adventurous biker. They're durable, lightweight, designed with premium components, optimized for top performance, and built to withstand the toughest terrains. They come loaded with remarkable features that make the whole biking experience full of fun and excitement without fretting about the bike's reliability. So, if you're looking for a bike that will make your mountain biking adventures unforgettable, investing in a Trifox framed mountain bike is the way to go!
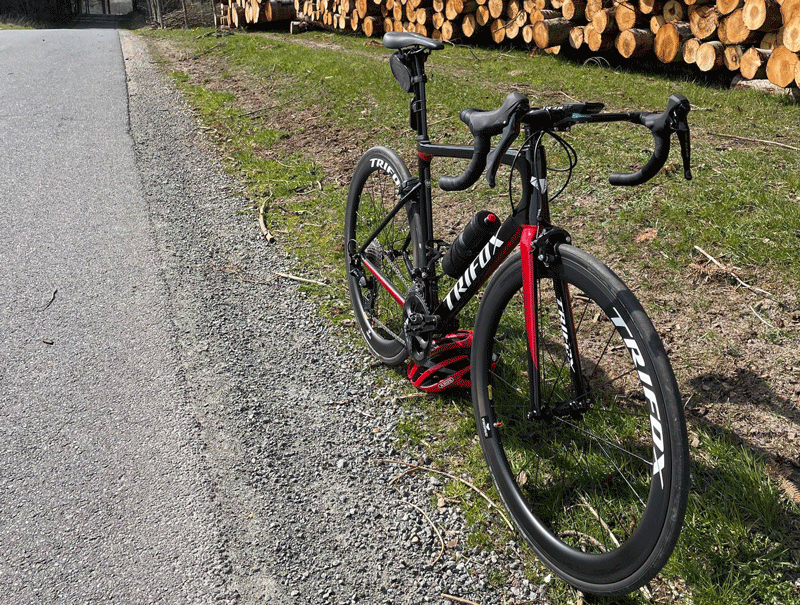
Cycling is more than just a hobby for many people. It is a way of life, a passion, a sport, an adventure, and a challenge. Whether you ride a mountain bike, a road bike, or a hybrid bike, one of the most critical parts of your ride is the wheelset. The wheelset determines your speed, stability, comfort, handling, and overall performance. That is why you should consider upgrading your stock wheels with a Trifox carbon wheelset 700c. 1. Why Trifox Carbon Wheelset 700c is a Game-Changer: Trifox is a renowned brand that has earned a reputation for producing top-of-the-line bike components, including carbon wheelsets. The Trifox carbon wheelset 700c is a game-changer for several reasons. Firstly, it is incredibly lightweight, thanks to its carbon fiber construction, which makes it faster and more agile than traditional alloy wheels. Secondly, it is more robust and more durable than conventional wheels, making it suitable for high-intensity cycling, racing, or off-road adventures. Thirdly, it offers superior aerodynamics, reducing wind resistance and drag, resulting in higher speeds and smoother rides. Finally, it looks sleek and stylish, adding to the aesthetic appeal of your bike. 2. Features of Trifox Carbon Wheelset 700c: The Trifox carbon wheelset 700c boasts several advanced features that make it stand out from the competition. Firstly, it comes in various rim depths and widths, allowing you to choose the perfect size for your riding style and terrain. Secondly, it uses advanced brake track technology that enhances rim stiffness and braking performance, ensuring you stop smoothly and quickly, even in wet or muddy conditions. Thirdly, it has a tubeless-ready design that enables you to run lower tire pressure, reducing flatting and enhancing grip and comfort. Fourthly, it features straight-pull spokes and hubs that distribute tension and stress evenly, improving the wheel's strength and integrity. Finally, it comes with a 2-year warranty, guaranteeing quality and peace of mind. 3. How to Install Trifox Carbon Wheelset 700c: Installing Trifox carbon wheelset 700c on your bike is relatively easy, provided you have the right tools and knowledge. Firstly, you need to remove the existing wheels from your bike by releasing the quick-release or unscrewing the bolts. Secondly, you need to attach the Trifox carbon wheelset to your bike, aligning the cassette, chain, and brake pads. Thirdly, you need to tighten the bolts or close the quick-release securely. Finally, you need to adjust the brakes, the gears, and the tire pressure to ensure optimal performance and safety. Conclusion: The Trifox carbon wheelset 700c is an investment that can transform your cycling experience significantly. It is lightweight, durable, aerodynamic, and stylish, offering superior performance and aesthetics. It has advanced features like brake track technology, tubeless-ready design, straight-pull spokes, and hubs, offering unmatched reliability and strength. It has impressive specifications like weight, tire pressure, rider weight, and decal option, ensuring compatibility and customization. It is relatively easy to install, ensuring that you can upgrade your bike's wheels quickly and hassle-free. So why not unleash the power of Trifox carbon wheelset 700c and take your cycling to the next level?
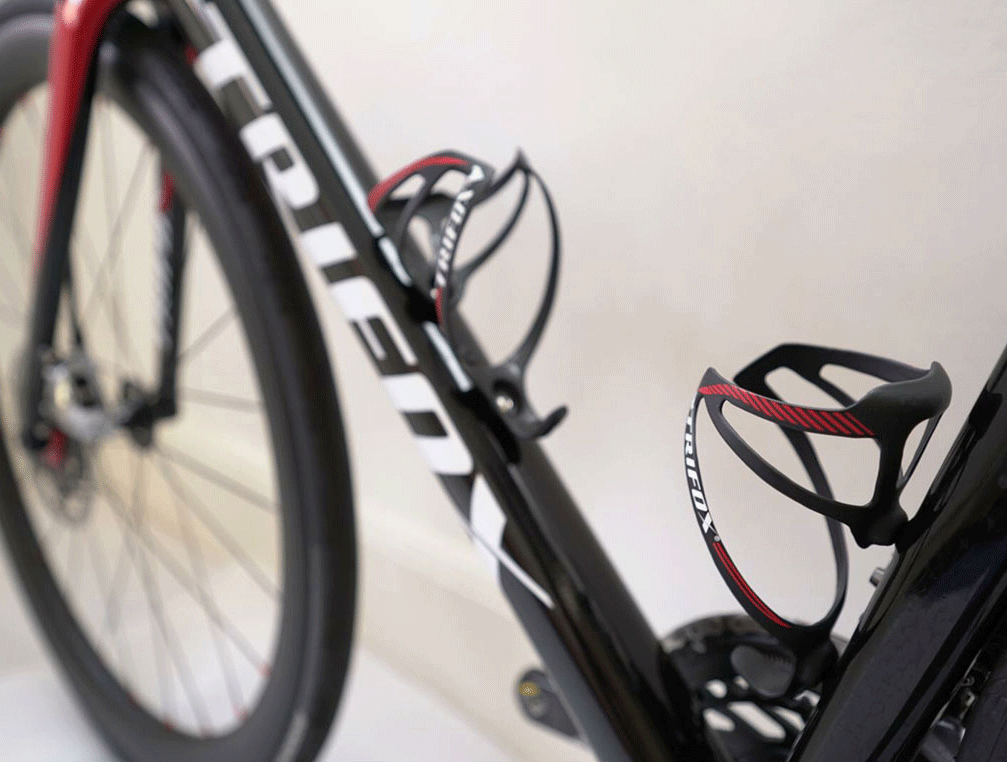
For any cyclist, staying hydrated during long and bumpy rides is essential. Having a trusty bottle of water within reach is not only essential but could mean the difference between finishing strong and having to call it quits before the finish line. And when it comes to mountain biking, the need for a secure and reliable water bottle cage is paramount. The Trifox Carbon Bike Water Bottle Holder CBC100 is an excellent option for mountain biking enthusiasts. This cage is made of high-quality carbon fiber material, which is both lightweight and durable, giving your bottle unmatched support. Its unique and aesthetically pleasing design fits snugly on your bike with no risk of slipping out. The CBC100 has two arms that secure your bottle in place firmly. Whether you’re cycling uphill or downhill, the cage is able to hold your bottle securely, ready for quick access whenever you need it. Another excellent option is the Trifox Carbon Bike Water Bottle Holder CBC200. Its sleek design and lightweight construction make it the perfect fit for mountain biking enthusiasts who place a premium on style and performance. This cage is made with top-quality carbon fiber material. It is also incredibly versatile, with adjustable arms designed to fit bottles of different sizes with ease. The CBC200 can be used with ease on mountain, road or gravel bikes, meaning it is an investment you can make for all your cycling needs. When it comes to mounting the cages, Trifox makes this as effortless as possible. Mounting the cage is easy and quick, and the compact design helps to keep your bicycle looking neat and uncluttered. You don't have to worry about the cage overheating, as the carbon fiber material can withstand extreme temperatures, which is particularly important when mountain biking in hot and humid weather. The Trifox Carbon Bike Water Bottle Holder CBC100 and CBC200 are must-have accessories if you're a passionate rider who is serious about staying hydrated when mountain biking. Their excellent designs provide secure and quick access to your bottle of water, ensuring that you can maintain your momentum during uninterrupted rides on bumpier terrain. Conclusion: When choosing the best water bottle cage for mountain bike, the Trifox Carbon Bike Water Bottle Holder CBC100 and CBC200 stand out as top options. These cages offer durability from their carbon fiber material and a secure grip on your water bottles to ensure they never come loose during your ride. Overall, they are both excellent investments for cyclists who want high-quality products that can withstand harsh terrain.
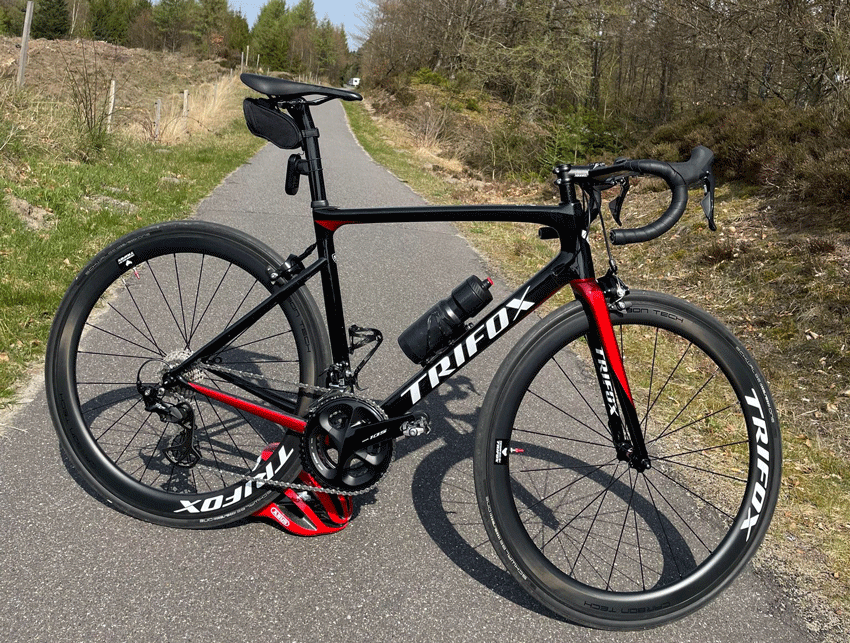
Cycling has become a popular pastime for many individuals worldwide. Whether you are a casual or serious cyclist, the type of wheelset on your bike is essential in determining your ride quality and experience. Among the most commonly used wheelset is the 700c rim brake, a versatile option that offers great functionality. 1. Features of 700c Rim Brake Wheelset: 700c rim brake wheelset comprises three main components: the rim, spokes, and hub. The rim is typically 700c in diameter and 13-32 millimeters wide, made from lightweight materials like aluminum or carbon fiber. It features flat rims that work in conjunction with rim brake pads securely. The spoke, on the other hand, runs from the rim to the hub, providing support to the wheel. Lastly, the hub houses the bearings and is available in various materials, including alloy, steel, and carbon fiber. 2. Benefits of 700c Rim Brake Wheelset: The 700c rim brake wheelset is a popular choice due to the benefits it offers. The most significant advantage is their lightweight build, which provides the cyclist with a faster ride. Additionally, they offer excellent braking power since the brake pad is in constant contact with the rim, reducing stopping distance. They are also durable, and their size enables them to cover a more substantial distance easily. Finally, they are affordable and readily available in bike shops across the globe. 3. How to Maintain 700c Rim Brake Wheelset: Maintaining a 700c rim brake wheelset is crucial in keeping its longevity and reducing the frequency for replacement. Firstly, regularly clean your wheelset to remove any dirt or debris that may accumulate. Secondly, check the brake pads for wear and tear regularly, replacing them when you notice that they need changing. Thirdly, truing the wheels is necessary to ensure that they remain straight and provide optimum performance. Finally, adequately lubricate the bearings and hubs to improve smoothness and counter rusting. 4. Alternatives to 700c Rim Brake Wheelset: If you're looking to branch out from the 700c rim brake wheelset, there are several alternatives to choose from. The 650b and 26-inch wheelset are popular alternatives that offer more tire clearance and improve adaptability to various terrain. The disc brake wheelset is also an excellent alternative, providing greater stopping power and better performance in wet conditions. All these alternatives offer varying benefits, and it's crucial to choose one that meets your cycling requirements. Conclusion: In conclusion, the 700c rim brake wheelset is an excellent choice for both casual and serious cyclists due to its numerous benefits, including being lightweight and affordable. However, it has downsides such as limited tire clearance and difficulty in wet conditions. Maintaining and checking the wheelset is crucial in prolonging its life span. While the 700c rim brake wheelset is an excellent choice, it's helpful to learn about alternative options such as the 650b, 26-inch wheelset, and disc brake wheelset, to make an informed choice that meets your needs.
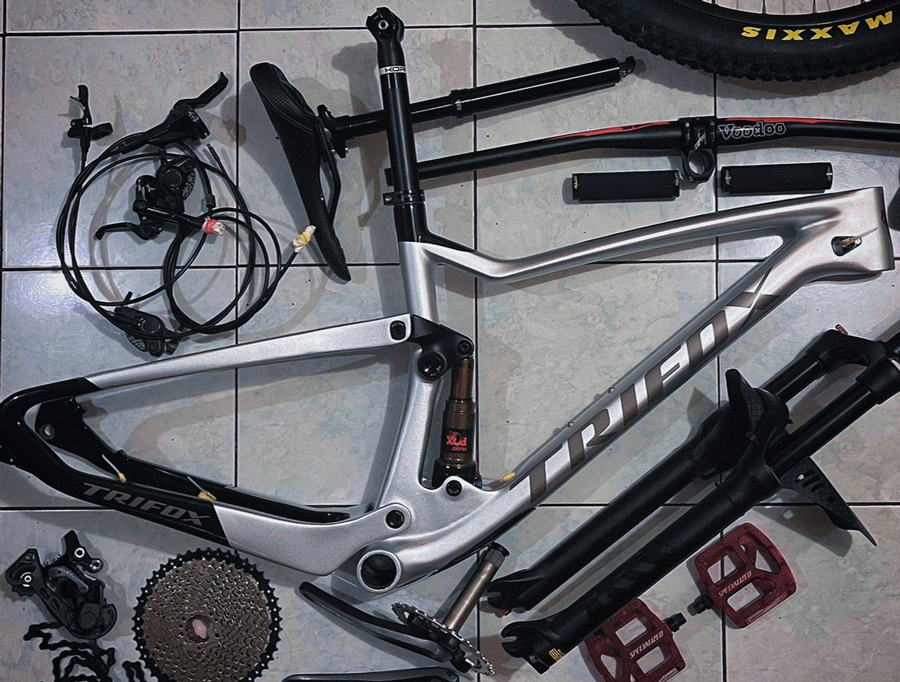
Mountain biking is an exciting and challenging sport, but it can also be an expensive one. If you’re building a bike from scratch or upgrading your current setup, the cost of a high-quality mountain bike frame can quickly add up. Luckily, there are numerous ways to find the best mountain bike frames for sale cheap. The first step in finding an affordable mountain bike frame is to seek out sales and promotions. Many online retailers offer seasonal discounts or limited-time offers on last year's models, so keep an eye out for these sales. Furthermore, retailers often offer discount codes that can reduce the price even further. Another excellent way to find affordable mountain bike frames is to shop second-hand. Craigslist, eBay, and Facebook Marketplace are all excellent resources for finding used frames at a fraction of their original cost. When shopping second-hand, be sure to inspect the frame thoroughly before making a purchase. Look for any signs of damage or wear that could compromise the frame's integrity. Additionally, it's essential to know your measurements so that you can find a frame that fits you well. If you are willing to wait, another option to consider is buying last year's models. Retailers often discount older models to make room for their latest releases. These older models are still high-quality and offer excellent performance, but they are usually much cheaper than the latest models. Whether you're buying in-store or online, it pays to do some research before making your purchase. Visit a local bike shop or check out online forums to read reviews and learn more about the frame's performance. Before making a final decision on a mountain bike frame, it's crucial to consider your riding style. Different types of frames are designed for different types of riding, so it's important to choose a frame that suits your needs. Consider factors such as the terrain you'll be riding on, the distance you'll be covering, and your level of experience. For example, cross-country riders will usually want a lightweight frame made from carbon fiber, while downhill riders benefit from a heavier, more robust frame made from aluminum. Finally, it's worth considering how much money you're willing to spend. While it's essential to find an affordable frame, you must be willing to spend enough money to purchase a frame that gives you the performance you need. Don't compromise quality over cost, as it will ultimately cost you more in the long run. Aim to find the best balance between value and cost for your budget. Whether you're looking for a frame for a new bike build or upgrading your current setup, there are numerous ways to find affordable mountain bike frames. By seeking out sales and promotions, shopping second-hand, buying last year's models, considering your riding style, and setting a budget, you can find a high-quality frame that fits your needs without breaking the bank. Do your research, take your time, and you'll be sure to find the best mountain bike frame for sale cheap.
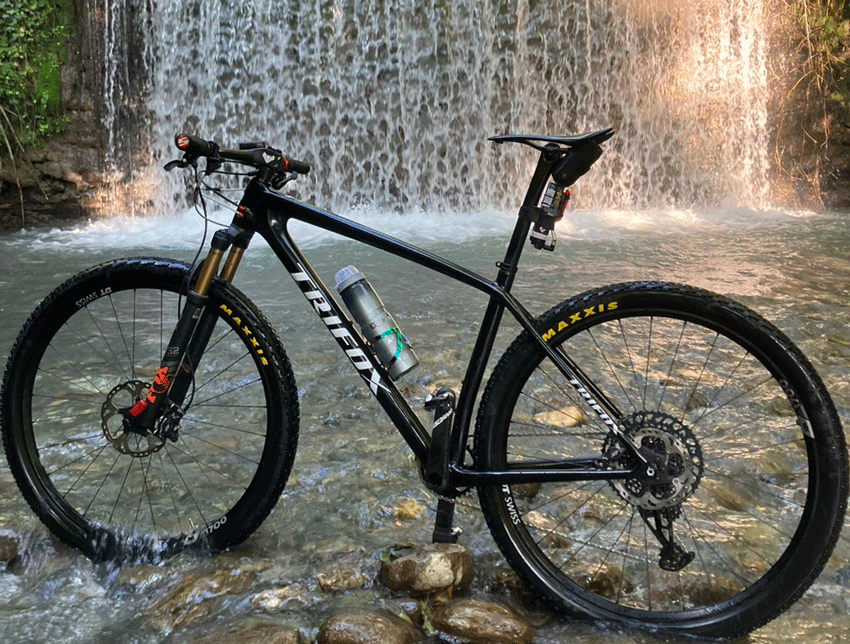
If you are a mountain biker, then you know that your handlebars are your main connection to your bike. That is why choosing the perfect handlebars is crucial for your performance, comfort, and safety. Handlebars come in various materials, shapes, and sizes, and each one has its own advantages and disadvantages. However, selecting the right handlebars can be overwhelming due to the vast options available. 1. Width The width of your handlebars determines the control and stability you have while riding. The ideal handlebar width depends on your body structure, riding style, and the terrain you ride on. Generally, wider handlebars provide more control and stability, while narrow handlebars are ideal for technical riding. To determine the ideal width, stand up and measure the distance between your shoulder blades, then add 2-4 inches. This measurement will give you the perfect handlebar width for your body structure. 2. Material Mountain bike handlebars are made of different materials, such as carbon fiber, aluminum, and titanium. Carbon fiber handlebars are the lightest and most expensive, but they offer the most shock absorption and comfort. Aluminum handlebars are the most popular choice among mountain bikers due to their affordability, durability, and stiffness. Titanium handlebars are light and strong, but they are the most expensive option. Choose the material that suits your budget and riding style. 3. Shape Mountain bike handlebars come in various shapes, including flat, riser, and drop bars. Flat handlebars are ideal for cross-country riding and provide a more upright riding position. Riser handlebars are suitable for downhill riding and provide a more aggressive riding position. Drop bars are common in road cycling, but they are not recommended for mountain biking. Choose the shape that suits your riding style, terrain, and comfort. 4. Sweep The sweep refers to the angle at which the handlebars bend back towards the rider. The sweep affects the hand position, wrist alignment, and comfort. Generally, handlebars with more sweep provide a more natural wrist position and are more comfortable for longer rides. However, too much sweep can affect steering precision and control. Choose the sweep angle that feels comfortable for your hand position and riding style. 5. Rise The rise refers to the amount of distance the handlebars rise above the stem. The rise affects the riding position and comfort. Handlebars with more rise provide a more upright position and are suitable for cross-country riding. Handlebars with less rise provide a more aggressive position and are suitable for technical riding. Choose the rise that suits your riding style, comfort, and terrain. Conclusion: Mountain bike handlebars might seem like a small component of your bike, but they play a significant role in your performance, comfort, and safety. When choosing the perfect handlebars, consider your body structure, riding style, terrain, and budget. Test different handlebars before making a final decision, and don't hesitate to seek expert advice. With the right handlebars, you'll have more control, more comfort, and more fun on the trails.
When it comes to cycling, having the right equipment can make all the difference in your comfort and performance. One key component of a bike that often gets overlooked is the handlebars. While there are many different types of handlebars available, straight handlebars have become increasingly popular over the years for their many benefits. 1. Improved control - One of the biggest benefits of using straight handlebars is the improved control they offer. Straight handlebars allow you to have a wider grip on your bike, which can help make tight turns and sudden stops easier to navigate. Additionally, the straight design gives you the ability to position your hands and body in a way that maximizes your control and stability. 2. Comfortable riding position - Another advantage of straight handlebars is the comfortable riding position they provide. When you ride with straight handlebars, you have more options for hand placement, which allows you to adjust your grip and positioning based on your preference. This can help to reduce fatigue and discomfort during longer rides, as well as alleviate strain on your wrists and upper body. 3. Versatility - Straight handlebars are also known for their versatility, as they can be used for a variety of cycling activities. Whether you’re commuting to work, riding for leisure, or tackling off-road trails, straight handlebars have the flexibility to accommodate your needs. They can also be customized with different grips, bars, and attachments to enhance your cycling experience. 4. Great for beginners - If you’re new to cycling, straight handlebars are a great option to start with. Their simple design and easy handling make them ideal for beginners who are still getting used to the feel of a bike. Plus, they are typically less expensive than other handlebar options, so you can experiment with different styles without breaking the bank. 5. Better visibility - Lastly, straight handlebars provide better visibility while cycling. When you are sitting upright with straight handlebars, you have a clearer view of the road or trail ahead, as well as your surroundings. This can help you to avoid obstacles or hazards, and stay aware of traffic or other cyclists on the road. Conclusion: In conclusion, straight handlebars are an excellent option for any cyclist looking to improve their control, comfort, and versatility on the bike. From beginners to experienced riders, the benefits of using straight handlebars are clear. So why not give them a try and see how they can enhance your cycling experience?


