


For cyclists chasing every second, the allure of a carbon aero road bike frame is undeniable. Sleek, wind-cheating designs promise speed gains—but with premium price tags, are they worth it?
Why Carbon Aero Frames?
Carbon aero frames, like Trifox’s X8, are engineered to minimize drag while maximizing stiffness. Key benefits include:
Aerodynamics: Tube shapes and frame profiles slice through wind, saving watts at high speeds.
Lightweight: High-quality carbon shaves grams without sacrificing strength.
Responsive Ride: Optimized stiffness ensures efficient power transfer during sprints or climbs.
For racers and time-trialists, these features can translate to tangible performance gains—think seconds saved over miles.
The Cost Consideration
Carbon aero frames aren't cheap. The Trifox X8 sits in the mid-to-high range, offering pro-level engineering at a fraction of boutique brand prices. However, budget-conscious riders might question if the speed boost justifies the cost.
Ask yourself:
How competitive are you? Marginal gains matter most in races or timed events.
Do you ride long distances? Aero savings compound over miles, reducing fatigue.
Is your current bike holding you back? Upgrading a heavy or outdated frame can unlock new PRs.
Durability & Practicality
While carbon is durable, aero frames can be less forgiving on rough roads compared to endurance-focused designs. The X8’s V-brake compatibility adds versatility, but disc brakes (not featured here) offer better stopping power in wet conditions.
Who Should Invest?
Racers: Every watt saved counts.
Tech-Savvy Enthusiasts: Love cutting-edge gear? The X8’s blend of aerodynamics and classic V-brake compatibility offers a unique edge.
Upgraders: Pairing the frame with high-end components (wheels, groupset) maximizes ROI.

If speed is your obsession, a carbon aero frame like the Trifox X8 is a worthy investment. Its balance of aerodynamics, weight, and stiffness caters to riders hungry for performance. For casual cyclists, the cost may outweigh the benefits—but for those chasing podiums, it's a game-changer.


If you're considering diving into the world of road cycling, one of the first questions you’ll likely ask is, “How much does a good road bicycle cost?” The answer isn’t straightforward, as road bikes come in a wide range of prices depending on their components, materials, and intended use. Let’s break down the factors that influence the cost and help you determine what you can expect to pay for a quality road bike.
Entry-Level Road Bikes ($500 - $1,000)
For beginners or casual riders, entry-level road bikes are a great starting point. These bikes typically feature aluminum frames, basic components, and mechanical shifting systems. While they may lack the advanced features of higher-end models, they are reliable, lightweight, and perfect for commuting, fitness riding, or weekend adventures. Brands like Trifox Bike offer affordable options that deliver excellent value for money.
Mid-Range Road Bikes ($1,000 - $3,000)
Mid-range road bikes strike a balance between performance and affordability. These bikes often feature carbon fiber frames, which are lighter and more efficient than aluminum, along with better-quality components like hydraulic disc brakes and mid-tier drivetrains (e.g., Shimano 105 or SRAM Rival). If you’re serious about cycling and want a bike that can handle longer rides, faster speeds, and more varied terrain, this price range is a solid investment.
High-End Road Bikes ($3,000 - $7,000+)
High-end road bikes are designed for performance enthusiasts and competitive cyclists. They boast top-tier carbon frames, advanced aerodynamic designs, and premium components like electronic shifting (e.g., Shimano Dura-Ace or SRAM Red). These bikes are incredibly lightweight, stiff, and responsive, making them ideal for racing or high-intensity training. While the price tag is steep, the performance gains are undeniable.
Custom and Premium Options ($7,000+)
For those seeking the ultimate road bike, custom or premium models offer unparalleled craftsmanship and performance. These bikes often feature bespoke designs, cutting-edge materials, and the latest technological innovations. If you’re a professional rider or simply want the best of the best, this category is worth considering.
Why Choose a Carbon Road Bike?
Carbon fiber is the material of choice for high-performance road bikes due to its lightweight, stiffness, and vibration-damping properties. Trifox Bike offers a range of carbon road bike frames that combine affordability with top-tier performance, making them an excellent option for riders looking to upgrade without breaking the bank.
The cost of a good road bicycle depends on your needs, goals, and budget. Entry-level bikes are perfect for beginners, while mid-range and high-end models cater to more experienced riders. If you’re looking for a balance of performance and value, a carbon road bike from Trifox Bike is a fantastic choice. Whether you’re commuting, training, or racing, investing in the right road bike will enhance your riding experience and help you achieve your cycling goals. Happy pedaling!

When it comes to high-performance cycling, the material of your bike frame plays a pivotal role in your overall experience. Carbon fiber has become the go-to choice for serious cyclists due to its light weight, incredible strength, and superior ability to absorb road vibrations.
Trifox Carbon Fiber Frames: A Commitment to Performance
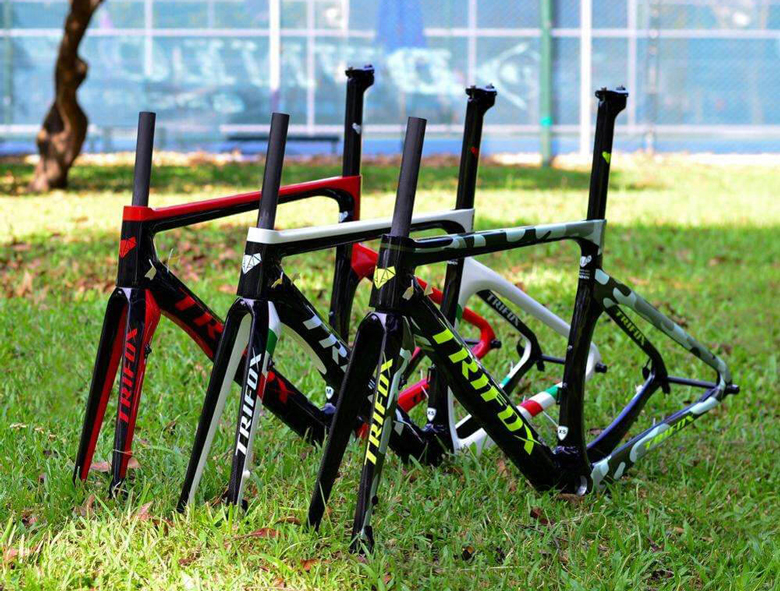
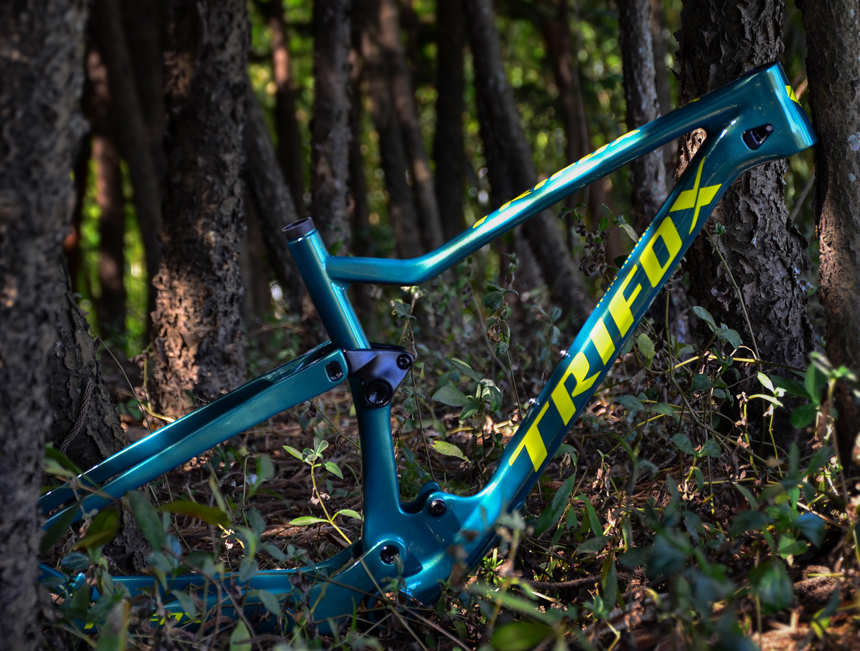
Trifox has quickly earned a reputation for producing some of the most advanced carbon fiber frames on the market. Specializing in road, mountain, and gravel bikes, the brand uses only high-quality carbon materials, ensuring lightweight yet incredibly strong frames. Whether you’re a competitive racer or a recreational rider, Trifox frames are designed to meet the needs of all cyclists, delivering a perfect balance of speed, comfort, and durability.
The frames are engineered using advanced carbon technology that helps reduce weight without compromising structural integrity. This results in bikes that are easy to handle, incredibly stiff for efficient power transfer, and smooth over various terrains. Riders will notice how responsive Trifox frames are, with precise steering and a comfortable ride, even on the longest or roughest journeys.
Why Choose Trifox?
Trifox's carbon fiber frames offer numerous benefits that set them apart from others in the industry:
1. Lightweight Design: With their use of premium carbon materials, Trifox bikes are significantly lighter than their aluminum counterparts, making climbs easier and handling sharper.
2. Enhanced Comfort: The vibration-damping properties of carbon fiber allow for a smoother ride, even on long distances or bumpy roads, reducing fatigue and increasing endurance.
3. Durability: Trifox frames are built to last, offering high strength while maintaining their lightweight properties. Carbon is also resistant to rust, ensuring your frame stays in top condition for years to come.
4. Aerodynamics & Performance: Trifox frames are designed with aerodynamics in mind, ensuring that you get the maximum performance from your bike, whether on the road or trail.
Innovative Designs
Trifox continues to innovate, developing new frame designs that push the boundaries of what carbon fiber can achieve. Their commitment to perfection is evident in every frame they produce, offering cyclists a blend of performance and aesthetic appeal.
Conclusion
For cyclists looking for superior performance, durability, and comfort, Trifox carbon fiber bicycle frames are the ideal choice. Whether you’re racing, riding for fitness, or exploring the outdoors, Trifox provides frames that can handle it all. With cutting-edge designs and materials, Trifox is at the forefront of carbon fiber technology.
When it comes to choosing the right bicycle frame, two materials dominate the conversation: carbon fiber and aluminum. Each offers distinct advantages, so the decision often depends on your riding style, budget, and performance goals. At Trifox, we specialize in both carbon and aluminum frames, ensuring that you have the perfect bike for your needs. Let's dive into the key differences between these two materials.
Carbon Fiber Frames: Lightweight & High Performance
Carbon fiber frames are renowned for their lightweight properties and superior performance. The material’s high strength-to-weight ratio allows for more efficient power transfer, which means you can accelerate faster and ride longer without feeling weighed down. Carbon also absorbs vibrations from the road or trail, offering a smoother, more comfortable ride.
However, carbon frames come with a higher price tag due to their advanced manufacturing process and performance benefits. They are also less durable when exposed to significant impact or crashes, though their lightweight and ride quality often make them the preferred choice for competitive cyclists and long-distance riders.
Aluminum Frames: Durable & Affordable
Aluminum frames are known for their durability and cost-effectiveness. They are heavier than carbon but still relatively lightweight, making them a great option for riders who want solid performance at a more affordable price point. Aluminum is also more resistant to impact damage, making it a popular choice for rugged terrains and beginners.
While aluminum doesn't offer the same level of vibration damping as carbon, it is still a reliable material that provides excellent strength and longevity at a lower cost.
Which Should You Choose?
If you prioritize high performance, a lightweight feel, and a smooth ride, a carbon frame is the way to go. On the other hand, if you're looking for durability, affordability, and versatility, an aluminum frame offers great value without compromising too much on performance.
At [Trifox Official Website], we offer both carbon and aluminum frames, allowing you to choose the best option for your cycling needs.
When it comes to cycling, the right bike can make a world of difference. Whether you're a seasoned cyclist or just getting started, choosing the right materials and design can elevate your performance and enjoyment on the road. One such bike option gaining traction among enthusiasts is the aluminium aero road bike. If you're in the market for a high-performance bike that offers a balance of speed, durability, and affordability, this could be the perfect choice for your next cycling adventure. But what exactly makes aluminium aero road bikes such a great option? Let’s break it down.
1. Aerodynamic Efficiency
Aerodynamics play a pivotal role in road cycling, especially if you’re looking to boost your speed and reduce fatigue over long distances. The “aero” design of these bikes is not just a cosmetic feature – it’s all about reducing wind resistance. Aluminium aero road bikes are built with sleek, aerodynamic frames that cut through the air more efficiently, allowing you to maintain higher speeds with less effort. The shape of the frame, handlebars, and even the wheels are all designed to minimize drag, giving you a noticeable advantage when racing or pushing your limits.
If you're cycling on long stretches of road or tackling challenging climbs, the aerodynamic benefits of an aluminium aero road bike can make your ride smoother and faster, helping you get the most out of your energy.
2. Lightweight Yet Strong
Aluminium is widely recognized for its excellent strength-to-weight ratio. When compared to other materials like steel or titanium, aluminium offers the perfect balance between durability and lightweight construction. A lighter bike allows for faster acceleration and better maneuverability, which can be particularly important in competitive settings or on more challenging terrains.
Unlike heavier steel frames that can feel cumbersome, an aluminium frame provides the rigidity and strength needed for a responsive and stable ride while keeping the overall weight down. This makes the aluminium aero road bike a top choice for cyclists who want to shave off seconds during a race or simply enjoy an effortless ride on hilly or winding roads.
3. Affordability and Durability
While high-end carbon fiber bikes can cost a small fortune, aluminium aero road bikes offer exceptional value without compromising on performance. For cyclists on a budget or those who are new to the sport, aluminium bikes provide a more affordable entry point without sacrificing key features like speed and durability.
Moreover, aluminium is incredibly durable and resistant to corrosion. While it may not have the same level of shock absorption as carbon fiber, it provides a solid and sturdy feel on the road, offering long-lasting reliability. This makes aluminium aero bikes an excellent choice for cyclists who want a bike that will stand up to regular use over the years, regardless of weather conditions or road surface types.
4. Versatility for Various Terrains
One of the unique advantages of the aluminium aero road bike is its versatility. Many models, like the [Trifox 700c Aluminum Alloy Aero Gravel Road Bike], are designed to handle not just smooth paved roads but also gravel and more rugged terrain. This means you can take your bike on a variety of cycling adventures – whether you're racing down a smooth highway or exploring off-road trails.
The ability to take your bike off-road adds a layer of flexibility to your cycling experience, allowing you to explore new routes without worrying about your bike’s capability to handle different types of surfaces.
5. Modern Design and Technology
Aluminium aero road bikes come with modern design elements that enhance comfort, performance, and overall ride quality. Innovations in frame geometry and componentry ensure that you’ll have a bike that handles well and is equipped with advanced technology to suit your cycling needs. Whether it's through internal cable routing for a clean look or disc brakes for enhanced stopping power in all conditions, these bikes come ready to meet the demands of both casual riders and competitive athletes alike.

Final Thoughts
An aluminium aero road bike offers the perfect blend of aerodynamic efficiency, lightweight design, affordability, and durability. With the ability to tackle both road and gravel paths, and a host of modern features that cater to different cycling needs, it’s no wonder that this type of bike is becoming a go-to choice for cycling enthusiasts. Whether you're preparing for your next big cycling adventure or just looking to upgrade your current setup, the aluminium aero road bike is a worthy investment that promises performance, versatility, and value.

When it comes to cycling, the idea of a "one-size-fits-all" bike is simply not a reality. Every cyclist is unique, with different body types, riding styles, and needs. Whether you're a seasoned racer, a commuter, or a casual weekend rider, finding the right bike can make all the difference in your comfort, performance, and overall enjoyment. In this blog post, we’ll explore how you can choose the perfect bike for your needs and highlight some great options, such as the Trifox Disc Brake Carbon Road Bike Frame X10, that can accommodate a wide range of riders.
1. Understanding the Basics of Bike Fit
The first step in selecting a bike is understanding the importance of bike fit. A well-fitting bike can reduce discomfort, improve efficiency, and prevent injuries. When choosing a bike, there are several factors to consider, including frame size, geometry, and the type of riding you plan to do. A road bike frame, for instance, will differ from a mountain bike frame in terms of angles, material, and design to suit the intended riding environment.
If you're new to cycling or uncertain about your fit, it’s worth visiting a local bike shop where professionals can help you find the right size and adjust the bike for your specific body measurements.
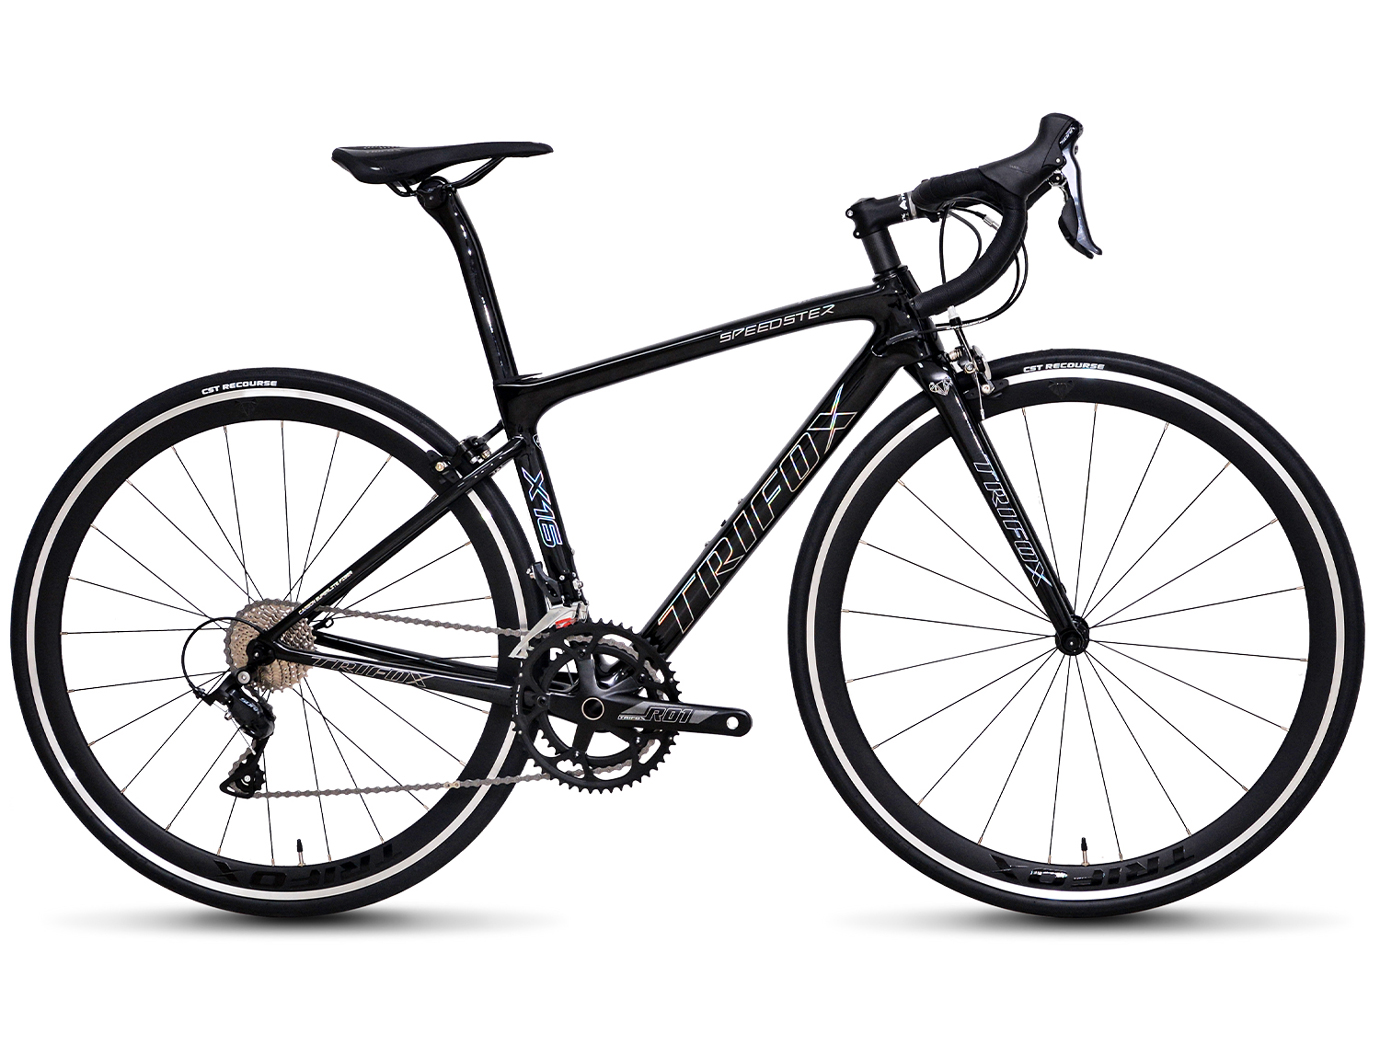
2. Versatility of the Trifox X10 Carbon Road Bike Frame
A perfect example of a bicycle suitable for a wide range of riders is the Trifox Disc Brake Carbon Road Bike Frame X10. This bike is designed with versatility in mind, offering a comfortable ride for both beginners and more experienced cyclists. Whether you're using it for commuting, weekend rides, or racing, this carbon road bike frame can be customized to meet various rider needs.
The X10 frame is made from high-quality carbon fiber, which provides a lightweight yet durable structure. Carbon fiber is known for its ability to absorb vibrations, offering a smoother ride over rough surfaces. Additionally, carbon frames can be stiffer than aluminum, improving power transfer, making the X10 ideal for riders who want an efficient bike for both speed and comfort.
3. Frame Geometry for Different Riders
The geometry of a bike frame determines its overall fit, comfort, and handling characteristics. The Trifox X10 features an aerodynamic and balanced design, with a slightly relaxed riding position that is comfortable for long rides without compromising speed. The frame is designed to accommodate different riders, from those who prioritize comfort to those who prefer a more aggressive, race-ready position.
For beginner cyclists or those who spend most of their time on flat roads, a more upright position may be preferable. The X10's geometry allows for easy adjustment of handlebars and saddle to create a more comfortable, relaxed posture. For more experienced riders or those seeking performance on faster rides, the aggressive drop of the handlebars can position the rider lower and forward, reducing wind resistance for improved aerodynamics.
4. Disc Brakes for All Conditions
One of the key features of the Trifox X10 is its disc brake system, which provides better stopping power in all weather conditions. Whether you're riding in the rain or on steep hills, disc brakes offer superior performance compared to traditional rim brakes. This makes the bike suitable for a variety of riders, including those who live in areas with challenging weather conditions or who like to explore diverse terrains. Disc brakes also provide more control and stability, which is especially important for newer riders or those who prioritize safety.
5. Customization and Future-Proofing
The Trifox X10 is built with future-proofing in mind. As cyclists' needs evolve, the ability to customize your bike is crucial. The frame can be paired with a variety of components, such as wheels, handlebars, and saddles, to suit personal preferences. This flexibility ensures that the bike grows with the rider, offering long-term value and adaptability.
Finding the perfect bike doesn’t have to be a daunting task. Whether you're a beginner or an experienced cyclist, there are plenty of options that cater to different needs. The Trifox Disc Brake Carbon Road Bike Frame X10 is a great example of a versatile bike suitable for a wide range of riders.
With its lightweight carbon frame, customizable fit, and advanced disc brake system, the X10 ensures that cyclists of all experience levels can enjoy a smooth, comfortable, and safe ride. So, take the time to explore your options and choose the bike that fits your unique riding style — your perfect fit is out there!
If you're new to cycling and thinking about getting into road biking, you might feel overwhelmed by all the options out there. But don't worry—this one-minute guide will help simplify the process and point you in the right direction. Road bikes are designed for speed, efficiency, and long-distance comfort, making them a fantastic choice for both fitness enthusiasts and casual riders. Let's break down the basics.
1. What is a Road Bike?
A road bike is a lightweight bicycle built for traveling on paved surfaces. These bikes are designed to be fast and efficient, featuring smooth tires, drop handlebars, and a geometry that places the rider in a forward-leaning position. The main differences between road bikes and other types of bikes—like mountain bikes or hybrid bikes—are the tires, frame design, and the components, which prioritize speed and agility on smooth roads.
2. Key Features to Look for:
- Frame Material: Road bike frames are made from materials like aluminum, carbon fiber, or steel. Beginners usually start with aluminum frames, as they are affordable, lightweight, and durable. For those seeking better performance or a smoother ride, carbon fiber frames, such as the ones offered by brands like **Trifox**, are a great option. Carbon bikes are lighter, absorb vibrations better, and offer enhanced stiffness for a faster ride, making them ideal for road racing and long-distance cycling.
- Gearing: Road bikes typically come with either a double or compact crankset. The double crankset is great for riders who want to tackle varied terrain, while a compact setup offers more manageable gearing for beginners or those new to cycling. Gearing is crucial because it allows you to adjust the bike's resistance to match different road inclines.
- Brakes: Modern road bikes come with two types of braking systems: rim brakes and disc brakes. Rim brakes are the traditional option, offering a more lightweight setup but less stopping power in wet conditions. Disc brakes, which are increasingly common in high-performance road bikes like those from **Trifox**, provide superior stopping power and more consistent braking in all weather conditions. They are a bit heavier but ideal for riders looking for greater reliability.
- Tires: Road bike tires are thinner than mountain bike tires, designed for higher pressures to reduce rolling resistance and make the bike faster on smooth pavement. As a beginner, you’ll find that tires in the 25-28mm width are ideal for a balance of comfort and speed.
3. Why Choose a Road Bike?
For beginners, road bikes are perfect if your goal is to get into cycling for fitness or long-distance rides. Road bikes are fast and efficient, and you'll find yourself able to cover longer distances with less effort compared to other types of bikes. Whether you're aiming to get fit, participate in group rides, or take part in charity events, a road bike will be your best companion.
4. Things to Consider Before You Buy:
- Fit: It’s essential that the bike fits you properly. A bike that is too big or small can lead to discomfort or even injury. Many bike shops offer fitting services, which is worth taking advantage of.
- Budget: Prices for road bikes vary greatly, so decide how much you're willing to spend. Beginner road bikes can start at around $500, while high-performance models with advanced features and carbon frames can exceed $2,000.
- Purpose: Think about how often you plan to ride and the terrain you'll be cycling on. If you're mostly riding on smooth roads, a standard road bike will suffice. If you want to explore gravel paths or take part in races, you may want to consider specialized bikes like gravel bikes or triathlon-specific models.
5. Final Thoughts:
A road bike is a great investment for anyone interested in cycling, whether you're starting out for fun or aiming for more serious competition. With the right fit and the right gear, you'll quickly enjoy the speed, comfort, and freedom road bikes offer. And if you're looking for quality, brands like **Trifox** offer premium carbon road bike frames designed for optimal performance—perfect for beginners looking to take their cycling to the next level.


When it comes to cycling, performance is often about the combination of factors like speed, endurance, and efficiency. One of the most noticeable trends among serious cyclists is the pursuit of lighter bikes. An ultra-light road bike has become the ultimate goal for many enthusiasts and competitive riders, promising faster speeds, better climbing ability, and more responsive handling. But can a bike that’s ultra-light really make a tangible difference in your cycling performance?
Let’s dive into why a 700C ultralight carbon fiber frame road bike, like the Trifox 700C with Shimano Tiagra R4700 2x10-speed system, can enhance your cycling experience.
1. Improved Speed and Acceleration
One of the most significant benefits of an ultra-light road bike is its ability to accelerate faster. The weight of a bike has a direct impact on how much effort is required to get it moving, especially when you’re trying to reach high speeds or make quick sprints. A lightweight bike reduces the mass that the rider needs to propel forward, allowing for quicker accelerations, particularly on flat roads or during the initial takeoff from a stop.
The Trifox ultralight carbon fiber frame offers exceptional stiffness-to-weight ratio. This means that less energy is lost in flex, and more of your pedal power is transferred directly into forward motion. Whether you’re racing, sprinting, or just riding for fitness, an ultra-light road bike will help you achieve your goals faster and more efficiently.
2. Better Climbing Performance
When climbing steep hills, weight becomes one of the most critical factors in performance. A lighter bike means less mass to carry uphill, reducing the effort needed to maintain a consistent pace during a climb. For serious cyclists, every kilogram saved can have a noticeable impact on climbing times and overall endurance.
The Trifox 700C ultralight carbon fiber frame is designed with performance climbing in mind. Thanks to the carbon construction, it’s not just light but also incredibly stiff, allowing for more responsive handling as you shift gears and power through difficult terrain. The carbon material also absorbs road vibrations, ensuring that your body doesn’t wear out prematurely, which is especially useful during longer ascents or on rougher surfaces.
3. Increased Efficiency and Power Transfer
A road bike that is ultra-light typically boasts a frame made from materials that are both strong and stiff. Carbon fiber, found in the Trifox 700C, offers a superior strength-to-weight ratio, providing riders with an efficient, responsive ride. When you push on the pedals, the energy you generate is transferred directly into forward motion, rather than being absorbed by the bike’s frame.
With a lightweight and stiff frame, the Trifox 700C ensures minimal flex, which means more of your energy is utilized to propel the bike forward. This type of efficient power transfer makes a huge difference, particularly during high-intensity efforts like sprinting or time trials, where maximizing every pedal stroke counts.
4. Responsive Handling and Cornering
Another benefit of an ultra-light bike is improved handling, particularly when maneuvering through corners or tight spaces. The Trifox 700C carbon fiber frame provides a sharp and responsive feel, which is ideal for riders who push the limits of their bike’s handling capabilities. When a bike is lighter and more responsive, it requires less effort to change direction or navigate through technical sections, such as curves or obstacles in a race or trail.
For cyclists who value control and agility in their rides, an ultra-light bike ensures that your bike responds exactly how you want it to, whether you’re taking sharp corners in a race or riding on winding roads.
5. Enhanced Comfort and Reduced Fatigue
A lighter bike doesn’t just offer performance gains—it can also improve comfort, especially on long rides. The Trifox 700C ultralight carbon fiber frame features vibration-damping properties that help absorb road shocks, reducing the strain on your body during extended rides. Less weight in the bike means less strain on the rider, particularly in the arms, legs, and back.
Additionally, the frame’s ability to absorb some of the road vibrations helps reduce overall fatigue, allowing cyclists to ride longer distances without feeling as worn out. This is particularly useful for long races or endurance events where conserving energy is crucial.
6. The Cost-to-Performance Ratio
While ultra-light bikes like the Trifox 700C with its Shimano Tiagra R4700 2x10-speed system are designed for high performance, they also offer a solid cost-to-performance ratio compared to more expensive models. Carbon fiber frames, while pricier than aluminum, provide top-tier performance without the extreme price tag associated with premium carbon models. For riders who want to boost their cycling performance without emptying their wallets, the Trifox 700C ultralight road bike provides exceptional value for the price.
An ultra-light road bike like the Trifox 700C can certainly enhance your cycling performance in several meaningful ways. From better acceleration and climbing performance to improved power transfer, handling, and comfort, the benefits are clear. While weight is not the only factor that determines cycling performance, an ultra-light bike ensures that you can ride faster, longer, and more efficiently.
For cyclists who are serious about improving their performance, the Trifox 700C ultralight carbon fiber road bike offers a high-performance solution that delivers on all fronts. Whether you’re racing, training, or simply enjoying the ride, an ultra-light bike can make a noticeable difference in your cycling experience.

When choosing a road bike, speed enthusiasts and competitive cyclists often consider performance models that offer a balance of speed, efficiency, and comfort. Among these options, the 10-speed aero road bike stands out as a popular choice for those looking to maximize performance without breaking the bank. But how does a 10-speed aero road bike compare to other high-performance models? Let’s take a closer look at its features, advantages, and limitations to help you decide if it’s the right fit for your cycling needs.
1. The Gear Advantage: 10-Speed vs. Other Configurations
A 10-speed drivetrain, like the Shimano Tiagra R4700 found on the Trifox 2024 C-Brake Road Bike, offers a solid combination of reliability and performance. While 11- and 12-speed systems provide more gears, the 10-speed configuration strikes a balance that appeals to many riders.
The main advantage of a 10-speed setup is its simplicity. With fewer gears, the system is easier to maintain and less prone to wear and tear. This makes it an excellent choice for riders who want performance without the added complexity of higher-speed drivetrains. While it may not have the micro-adjustments of an 11-speed system, a 10-speed drivetrain still provides sufficient range for most terrains, from flat stretches to moderate climbs.
2. Aerodynamics: A Key to Speed
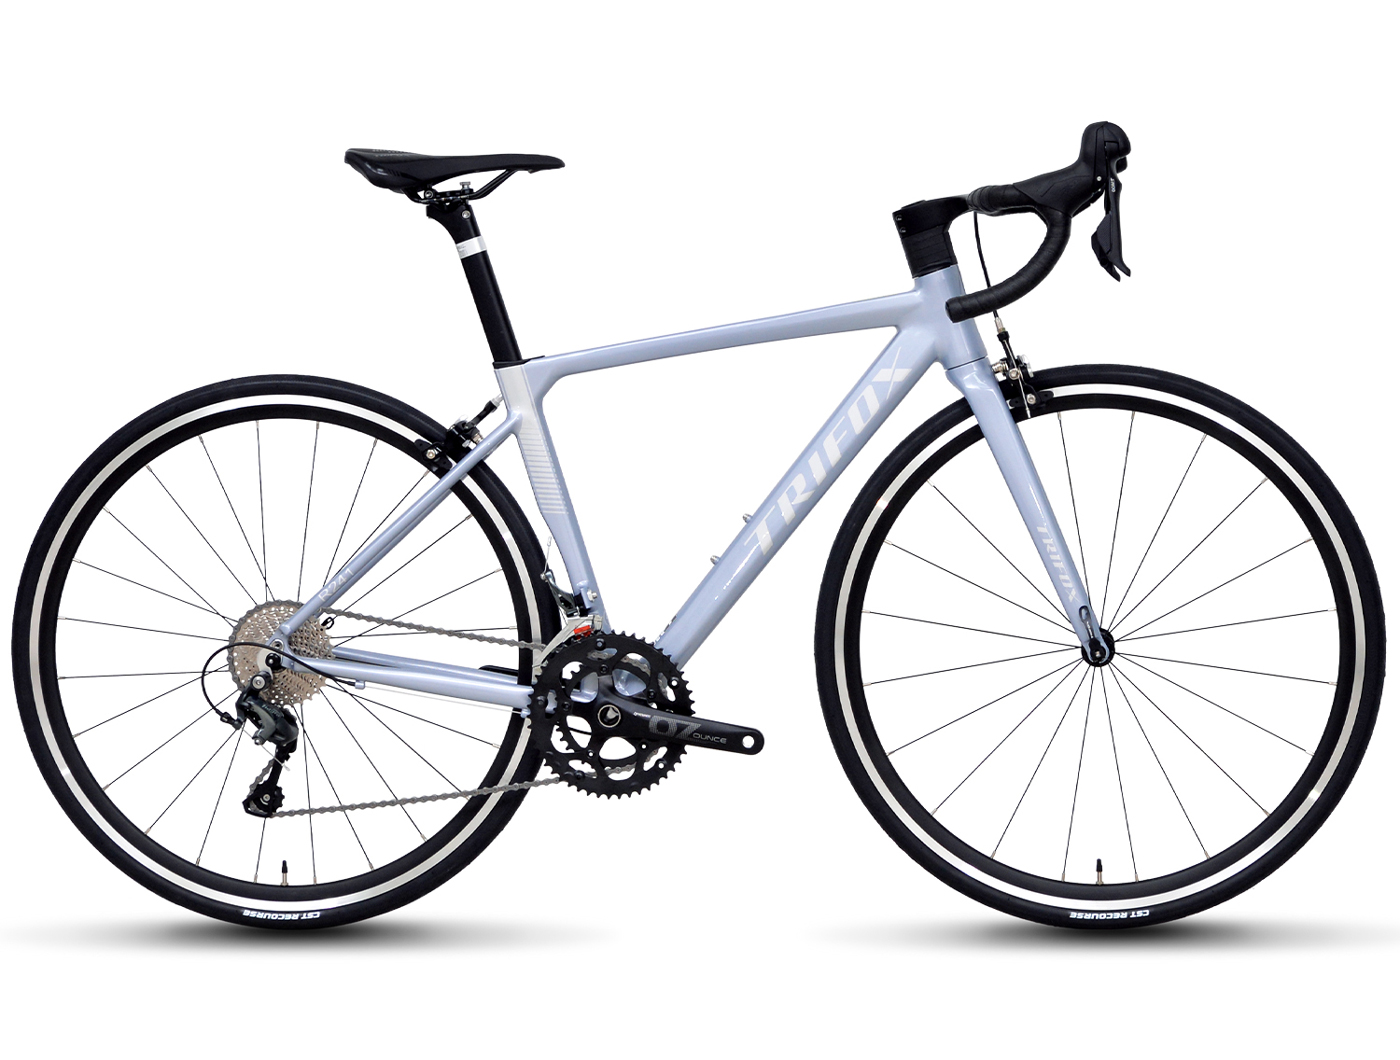
The defining feature of any aero road bike is its frame design, optimized to reduce drag and increase speed. The Trifox 2024 model, for instance, features an ultralight aluminum frame, which combines aerodynamic shaping with durability and lightweight performance. Compared to non-aero models, an aero bike allows riders to maintain higher speeds with less effort, particularly on flat and rolling terrains.
While other performance bikes may focus on weight reduction for climbing or versatility for all-road conditions, aero road bikes are specifically tailored for speed. This makes them ideal for riders who prioritize fast sprints, time trials, and efficient power transfer on smoother roads.
3. Weight and Materials
The Trifox 2024 10-speed road bike utilizes an aluminum frame, which strikes a balance between weight, strength, and affordability. While carbon fiber frames found in higher-end models may be lighter, aluminum remains a competitive choice for cyclists who want durability without significantly increasing the bike’s overall weight.
In comparison to heavier steel-framed bikes or more affordable entry-level options, the ultralight aluminum frame ensures that the bike feels agile and responsive, especially during accelerations and climbs.
4. Braking Systems: Caliper vs. Disc
This 10-speed aero road bike is equipped with C-brakes (caliper brakes), which offer reliable stopping power on dry roads and are lighter than disc brakes. While disc brakes are increasingly popular on higher-end models for their superior performance in wet conditions, caliper brakes remain a favorite for road cyclists seeking to minimize weight and maintain the classic road bike aesthetic.
For performance-focused riders who primarily cycle in dry conditions, the weight savings and streamlined design of C-brakes can be a significant advantage.
5. Cost-to-Performance Ratio
One of the standout features of a 10-speed aero road bike is its affordability compared to 11- or 12-speed models. While higher-end bikes may offer marginal gains in gear range and weight reduction, the cost difference is often significant. A 10-speed aero road bike like the Trifox 2024 delivers excellent performance for speed enthusiasts without the premium price tag, making it an attractive option for cyclists who want competitive features on a budget.

Conclusion
A 10-speed aero road bike strikes an impressive balance between performance, simplicity, and cost-effectiveness. While it may not have the gear range or ultralight materials of higher-end models, its aerodynamic design, lightweight aluminum frame, and reliable Shimano drivetrain make it a strong contender for speed-focused cyclists. Whether you’re looking to improve your average speed, tackle local races, or enjoy high-performance rides, the 10-speed aero road bike offers plenty of value and versatility for a wide range of riders.


