Imagine slicing through headwinds, floating up climbs, and feeling every pedal stroke ignite instant acceleration. This isn’t fantasy—it’s the reality of riding an ultra-light road bike. When your entire machine weighs less than a weekend grocery haul, every aspect of cycling transforms from effort to exhilaration.
Why Ultra-Light Matters:
1. Climbs Become Conquests: Shedding weight is the ultimate climbing hack. A lighter frame demands less energy to defy gravity, turning grueling ascents into rhythmic, rewarding efforts. You’ll crest hills faster—and smile wider.
2. Explosive Acceleration: Stop-and-go traffic? Sprint segments? Ultra-light bikes leap forward with minimal input. The reduced mass means near-instant response to power, making surges feel effortless and races decisive.
3. Agile Handling: Cornering tight descents or navigating technical routes becomes intuitive. A featherweight frame dances beneath you, offering surgical precision and confidence at high speeds.
4. Endurance Boost: Less weight = less fatigue. Ride longer, push harder, and finish strong without the dead-legged feeling of hauling excess mass.
The Trifox Difference:
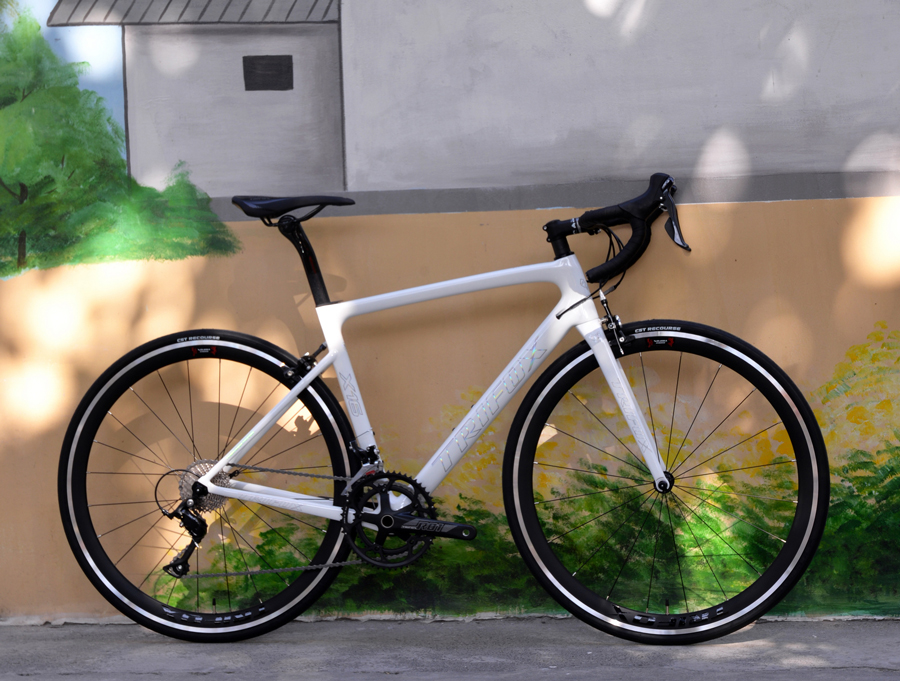
The 700c Carbon Fiber Ultra-Light Road Bicycle isn't just light—it's intelligently engineered. Its monocoque carbon frame blends minimal weight with optimized stiffness, ensuring zero power loss on sprints or climbs. Paired with aerodynamic tube shaping and compatibility with high-end components, it delivers pro-level performance without the pro-level price.
Who It's For:
Climbers: Conquer grades you once walked.
Racers: Gain seconds where they matter most.
Endurance Riders: Cover miles with leftover energy.
Upgraders: Feel your first true "race bike" epiphany.
Ready to Redefine Your Limits?
An ultra-light bike isn't an upgrade—it's a revelation. The Trifox 700C rewrites your relationship with the road, turning struggle into flow and effort into euphoria.
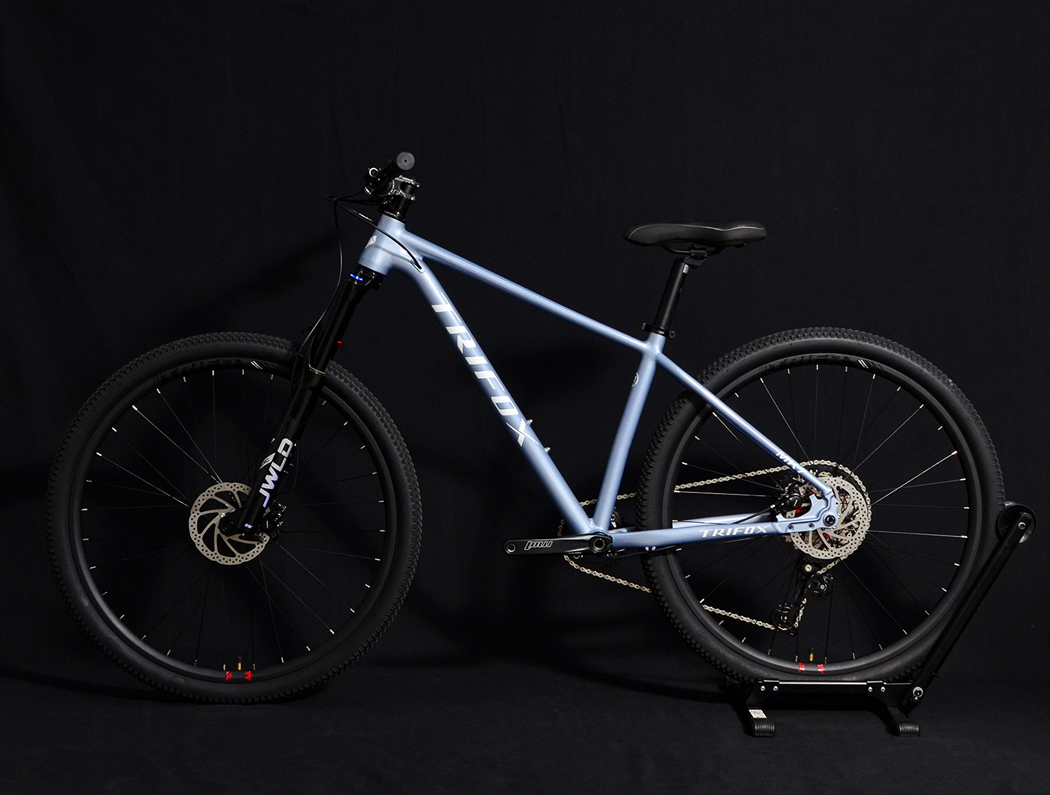
In an era of complex full-suspension rigs, the aluminium hardtail mountain bike holds a special, enduring appeal. It’s not about nostalgia; it’s about a distinct, exhilarating riding experience defined by purity, efficiency, and a direct connection to the trail that modern aluminium frames elevate perfectly.
Why Choose the Aluminium Hardtail?
- Unbeatable Efficiency: Every watt of your pedal power translates directly into forward motion. Aluminium frames offer fantastic stiffness, ensuring minimal energy loss. You feel faster, especially on climbs and flowing singletrack where acceleration is key.
- Trail Telepathy: Without rear suspension, you feel every root, rock, and contour. This direct feedback sharpens your skills, improves your line choice, and creates an incredibly immersive, connected ride. You learn to flow with the trail, not just float over it.
- Lively & Playful: Modern aluminium frames are surprisingly compliant, offering a lively, responsive feel. The hardtail design encourages popping off features, manualing, and flicking the bike around with agility – pure, unadulterated fun.
- Robust & Reliable: Aluminium is tough. It shrugs off rock strikes and minor crashes. Combine that with the inherent simplicity of a hardtail (fewer pivots, less maintenance), and you have a bike built for relentless trail duty and adventure, season after season.
- Incredible Value: You get serious performance and durability without the high cost and maintenance of rear suspension. This frees up budget for higher-quality components elsewhere.
The Modern Aluminium Hardtail: Evolved & Capable
The Trifox PeakTrail Xtreme MK7 exemplifies this allure. It’s not your grandad's rigid bike. Featuring:
- A lightweight, hydroformed aluminium frame with optimized tubing for strength and ride quality.
- Aggressive, modern geometry for confident descending and stability at speed.
- Premium suspension fork (like the Suntour Raidon) to smooth out the front end.
- High-performance drivetrain (Shimano SLX/XT) and powerful disc brakes for precise control.
Who Thrives on a Hardtail?
- Skill Builders: Learn proper technique and become a better rider.
- XC & Trail Racers: Maximize speed and efficiency.
- Value Seekers: Get top-tier performance without breaking the bank.
- Adventure Riders: Dependable, low-maintenance exploration machines.
- Riders Craving Connection: Those who want to truly feel the trail beneath them.
Ready to Embrace the Purity?
Experience the direct thrill and undeniable efficiency of a modern aluminium hardtail. The Trifox PeakTrail Xtreme MK7 delivers the perfect blend of performance, durability, and pure trail feedback. Rediscover why the hardtail remains a cornerstone of mountain biking.
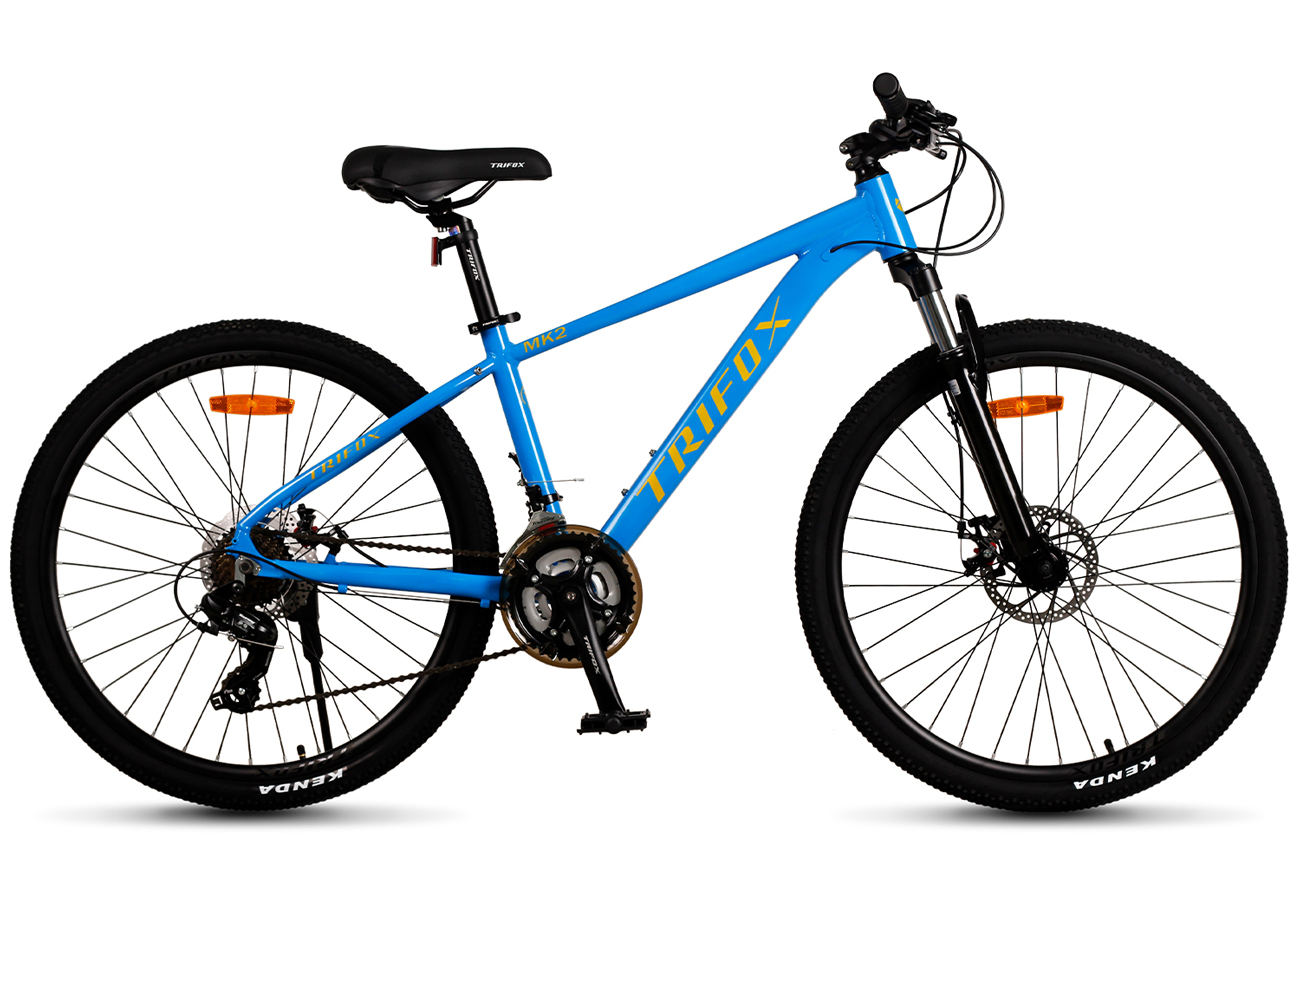
Remember when mountain biking felt pure, agile, and incredibly fun? Before plus-sized tires and complex suspensions dominated, the 26-inch aluminium hardtail reigned supreme. And guess what? It still delivers an unbeatable blend of performance and accessibility!
Why Rediscover the 26er?
Unmatched Agility: Smaller wheels mean quicker steering, tighter cornering, and a more playful, flickable ride through technical singletrack. It feels like an extension of you.
Aluminium Advantage: Modern aluminium frames offer fantastic strength, durability, and a lively ride quality at a fraction of the cost of carbon. It’s tough enough for real trails.
Simplified Fun: Less complexity often equals more smiles. Hardtails are easier to maintain and let you feel the trail directly, improving skills.
Incredible Value: You get serious trail capability without the premium price tag of larger-wheeled or full-suspension bikes. Perfect for beginners or riders seeking a nimble, reliable second bike.
Modern Touches on a Classic:
The Trifox MK2 isn't stuck in the past! It features essential modern upgrades:
Disc Brakes: Reliable stopping power in all conditions, far surpassing old rim brakes.
21-Speed Shimano Tourney: Smooth, dependable shifting for tackling varied terrain.
Updated Geometry: Ensures confident handling on today's trails.
Who Wins with a 26-Inch Aluminium MTB?
New Riders: An affordable, manageable entry point into real mountain biking.
Trail Purists: Riders who love feeling connected to the trail and honing their skills.
Commuting & Adventure: A robust, versatile bike for mixed surfaces and urban exploration.
Anyone Seeking Value: Serious fun without serious debt.
Ready to Experience Classic Trail Thrills?
Don't underestimate the enduring appeal of a well-built 26-inch aluminium mountain bike. The Trifox MK2 26-inch Aluminium Mountain Bike perfectly captures this spirit – blending timeless agility, modern disc brakes, and incredible value. Rediscover the pure joy of nimble trail riding.
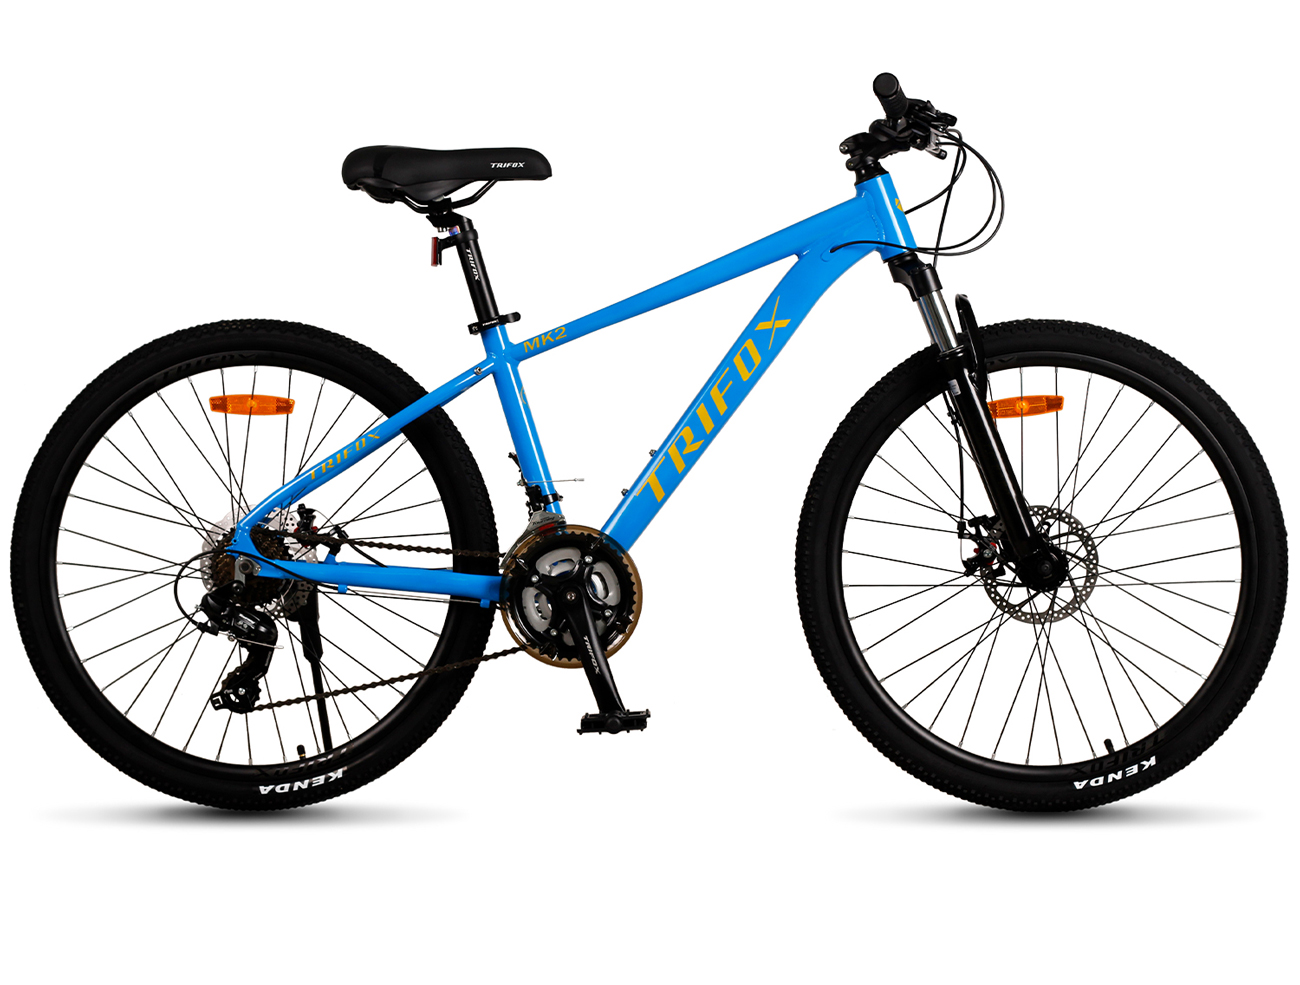
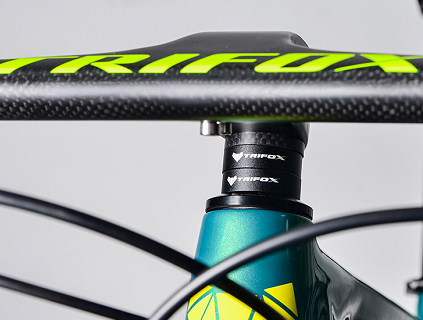
Don't underestimate those humble rings stacked on your steerer tube! Stem spacers are silent heroes in dialing your bike's feel. Positioned above or below your stem, they fine-tune your cockpit’s height – impacting comfort, control, and speed. Here's how:
1. Fit & Comfort:
Spacers directly influence your stack height – the vertical distance from the bottom bracket to the stem. More spacers (or spacers below the stem) create a taller, more upright riding position. This:
Reduces strain on your back, neck, and wrists.
Improves comfort on long climbs or endurance rides.
Opens your chest for better breathing.
Fewer spacers (or spacers moved above the stem) lowers your front end for a more aggressive, aerodynamic posture – ideal for racing or maximizing power transfer.
2. Handling & Stability:
Raising your stem with spacers shifts your weight slightly rearward. This:
Makes steering feel slightly slower and more stable, especially at high speeds or on steep descents.
Increases front-wheel traction for confident cornering.
Lowering the stem shifts weight forward:
Quickens steering response for technical, twisty trails.
3. The Sweet Spot:
Finding your ideal spacer setup balances comfort and control:
XC/Endurance Riders: Often prefer more spacers for comfort during long efforts.
Trail/Downhill Riders: May run fewer spacers (or a slammed stem) for aggressive handling and weight distribution on descents.
Experiment Wisely: Adjust in 5-10mm increments. Never exceed your fork's steerer tube limit! Always leave a 3-5mm spacer above the stem for proper headset preload.
Pro Tip: Use durable, lightweight alloy spacers like Trifox's Precision Spacers. They maintain secure clamping force, resist corrosion, and keep your cockpit clean during adjustments.
The Takeaway:
Stem spacers are free performance tuning! Dialing your stack height optimizes your body's interaction with the bike. A minor tweak can reduce fatigue, boost confidence, and transform your ride. Don't just set it and forget it – experiment safely to find your perfect balance.
They're small, often overlooked, but your connection to the bike: handlebar grips. Choosing the right pair transforms control, comfort, and confidence on the trail. Forget one-size-fits-all – your perfect grip depends on riding style, hand size, and terrain. Here’s how to find your match:
1. Diameter & Feel:
Standard grips (typically ~30mm diameter) suit most riders. Larger diameters (32-34mm) reduce pressure points and suit bigger hands or those seeking vibration damping. Slimmer grips (28mm) offer precise control for technical riders. Consider cushioning density – soft grips absorb chatter but may lack precision; firmer grips boost feedback for aggressive riding.
2. Pattern & Tread:
Ribbed/Twin-Pattern: Balages grip and vibration absorption. Versatile for trail/enduro.
Knobby/Aggressive: Maximizes grip in wet/muddy conditions or for downhill. Can feel harsh on long rides.
Smooth/Minimalist: Lightweight and comfy for XC/less technical terrain.
3. Lock-On vs. Slide-On:
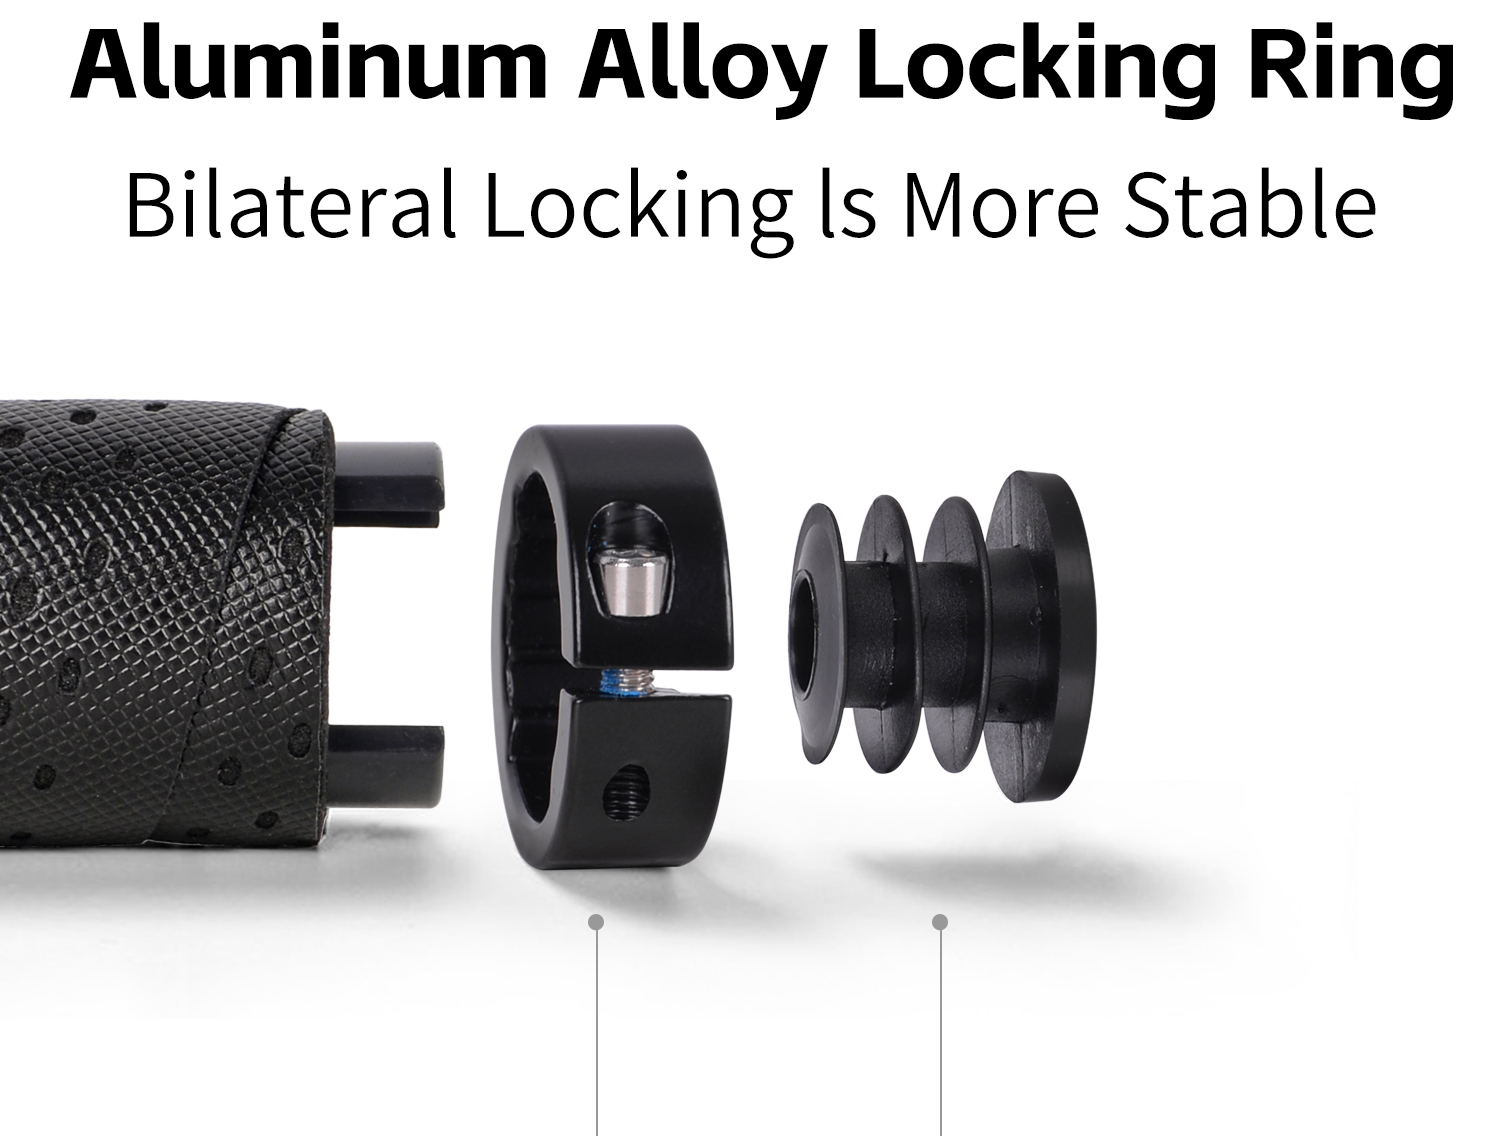
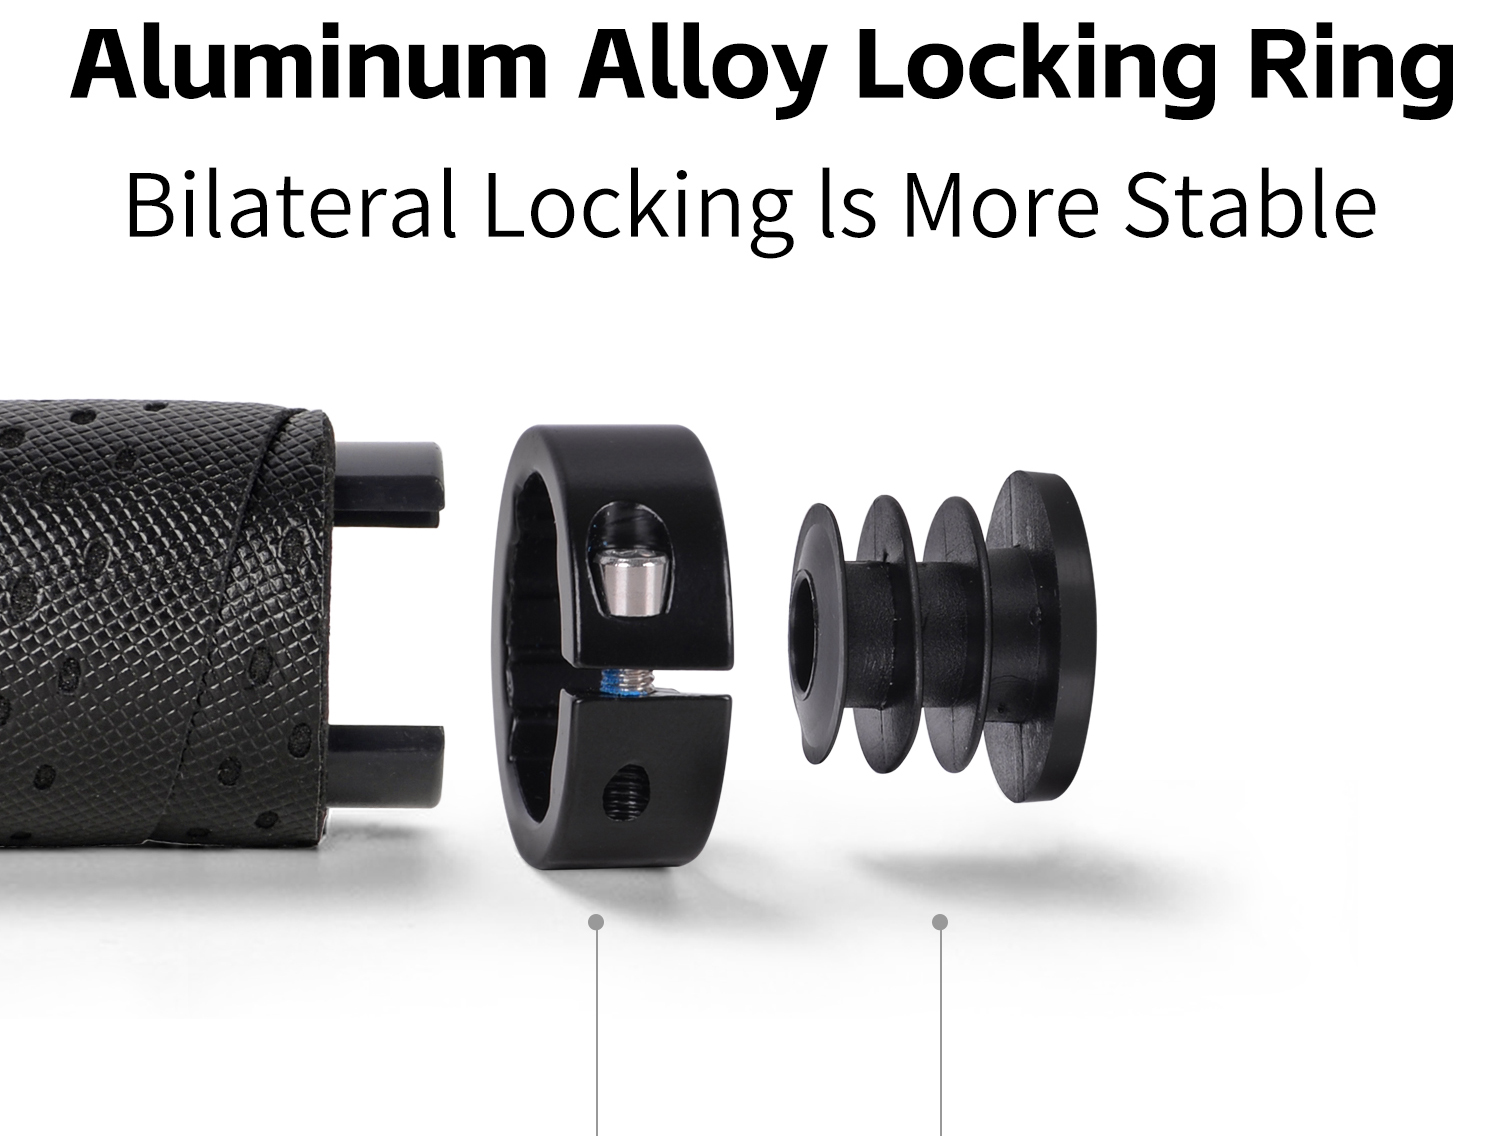
Lock-On grips (like the Trifox MBT100) feature aluminum clamps for secure, slip-free installation. Essential for rough trails, wet conditions, or riders preferring zero rotation. Slide-ons are lighter but require glue/wire and can twist.
4. Length & Flange:
Standard lengths (~130-135mm) fit most. Longer grips (~140mm) support multiple hand positions (e.g., cornering, climbing). Flanges provide a wrist stop for steep descents; flange-less offer a cleaner look and more hand placement options.
Why Consider the Trifox MBT100?
Dual-Density Construction: Firmer outer tread for precise control + softer inner base for vibration damping.
Aggressive Diamond Tread: Confident grip in all conditions without compromising comfort.
Durable Aluminum Clamps: Tool-free, secure installation that withstands impacts and mud.
Optimized Length (133mm): Versatile for most hand sizes and riding styles.
The Takeaway:
Don't settle for numb hands or slipping control. Experiment! Consider your trails, hand size, and preferences. Grips like the MBT100 offer a balanced, reliable upgrade – enhancing your connection to the trail without breaking the bank.
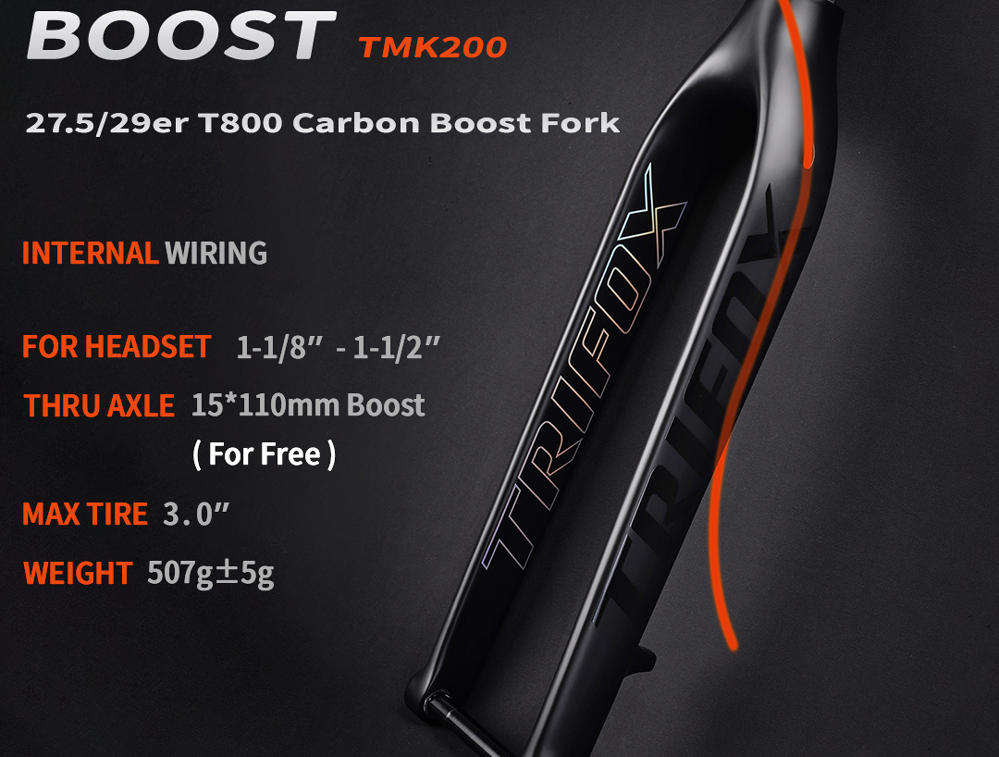
The 27.5" trail bike strikes a legendary balance: agile enough for tight corners, stable enough for chunk, and playful everywhere. But for years, a critical component often held them back – the fork. Enter high-modulus wonders like the Trifox T800 Carbon Boost Fork, fundamentally changing the game for 27.5" riders seeking pure trail performance.
The Weight Revolution:
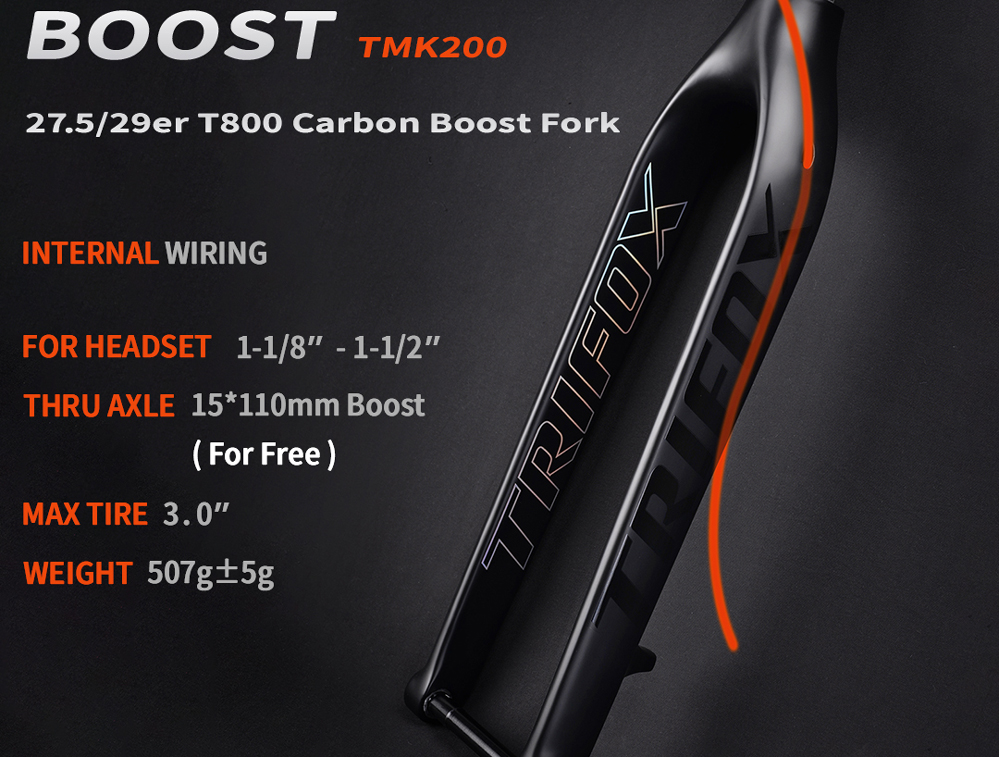
Traditional alloy or lower-grade carbon forks add significant heft up front. T800 carbon fiber, renowned for its exceptional stiffness-to-weight ratio, slashes grams dramatically. Forks like the Trifox TMK200 tip the scales around a mere 450g. This unsprung weight reduction is transformative: your 27.5" bike becomes noticeably nimbler, accelerates faster, and flicks through technical sections with telepathic responsiveness. Climbing feels less of a chore as the front end stays light and precise.
Stiffness Meets Trail Agility:
Weight savings mean nothing without control. T800 carbon delivers incredible torsional and lateral stiffness. Paired precisely with the Boost 110x15mm thru-axle standard, this fork eliminates flex under hard cornering or braking. Your 27.5" wheels track exactly where you point them, inspiring confidence through loose berms and off-camber roots. Power transfer is direct, making every pedal stroke count. This stiffness isn't harsh; modern carbon layups absorb high-frequency trail buzz beautifully, enhancing control without sacrificing comfort on long descents.
Optimized for the Platform:
The 27.5" wheel thrives on quick handling and maneuverability. A rigid carbon fork like this amplifies those traits. Without suspension bobbing or diving, you get pure, unadulterated feedback from the trail. Steering input is immediate, fostering a deeply connected, "ride the tire" experience that sharpens skills and heightens fun. The tapered steerer tube ensures precise handling and integrates seamlessly with modern frames. Plus, the Boost spacing allows clearance for wider 27.5+ tires (often up to 2.8"), adding versatility for different terrains.
Durability & Simplicity:
文字
High-quality T800 carbon isn't just light and stiff; it's incredibly strong and fatigue-resistant. Rigid forks also ditch complex suspension components – no seals to service, no oil to change, no air springs to tune. It's maintenance simplicity defined, offering reliable performance ride after ride with minimal fuss. Disc brake specific (flat mount or post mount) ensures powerful, consistent stopping power.
The Verdict:
For 27.5" trail riders prioritizing agility, efficiency, and a pure connection to the trail, the T800 Carbon Boost fork isn't just an upgrade; it's a revelation. It unlocks the platform's inherent playfulness by shedding weight, boosting stiffness, and delivering unmatched precision. If you crave a more responsive, lively, and engaging ride from your 27.5" steed, this technology is the key. It transforms your bike into a sharper, faster, and more rewarding partner on every trail.
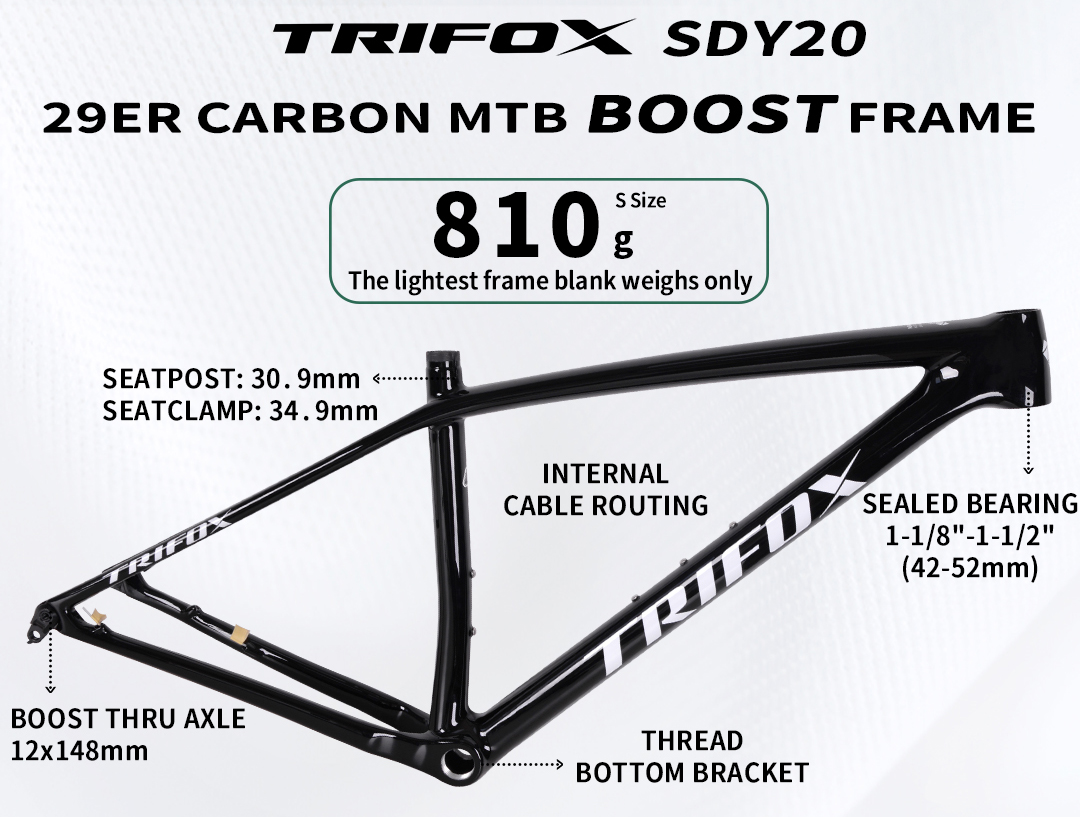
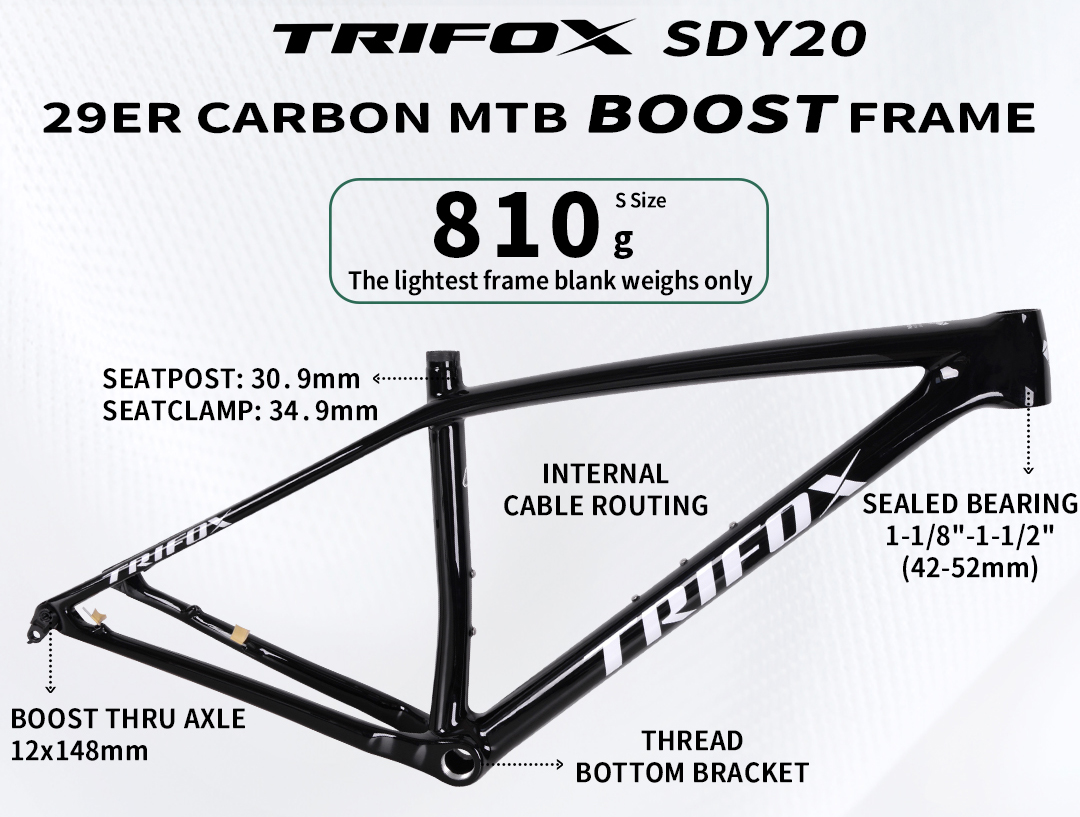
In mountain biking, weight is gravity’s currency. For racers and climb-obsessed riders, every gram shaved unlocks speed, agility, and that precious edge over rivals. At Trifox, this obsession birthed the SDY20 hardtail frame – their lightest 29er carbon chassis ever, engineered to turn ascents into triumphs.
The Magic Number: 930g
Weighing just 930 grams (size S, unpainted), the SDY20 isn’t just light – it’s a feat of carbon optimization. Using T1000 carbon with refined layering, Trifox achieves staggering stiffness-to-weight while maintaining trail-taming compliance. This frame isn’t delicate; it’s intelligently minimal.
Why Lighter = Faster?
- Acceleration: Less mass to propel uphill = instant response when you stamp the pedals.
- Agility: Flickable on switchbacks and effortless to loft over roots.
- Endurance: Reduced fatigue = more watts left for the final kick.
Race-Ready DNA Beyond Weight:
- XC Geometry: A 68.5° head angle and 445mm reach balance stability and razor-sharp precision.
- Boost Spacing: 148x12mm rear / 110x15mm front maximize stiffness and wheel compatibility.
- Stealth Integration: Full internal routing (brakes + dropper) for clean looks and snag-free rock gardens.
Modern Trail Specs: 1x-only, tapered head tube, and room for 2.4" tires.
Who Is the SDY20 For?
- XC Racers: Chase podiums with a frame born for efficiency.
- Climb Conquerors: Transform suffering into flow.
- Weight Weenies: The ultimate gram-shavers'canvas.
The Verdict:
The SDY20 isn't just a frame – it's Trifox's love letter to climbing. By ruthlessly cutting grams without sacrificing stiffness or control, it delivers a ride experience where the bike disappears beneath you, leaving only you, the trail, and the summit ahead.
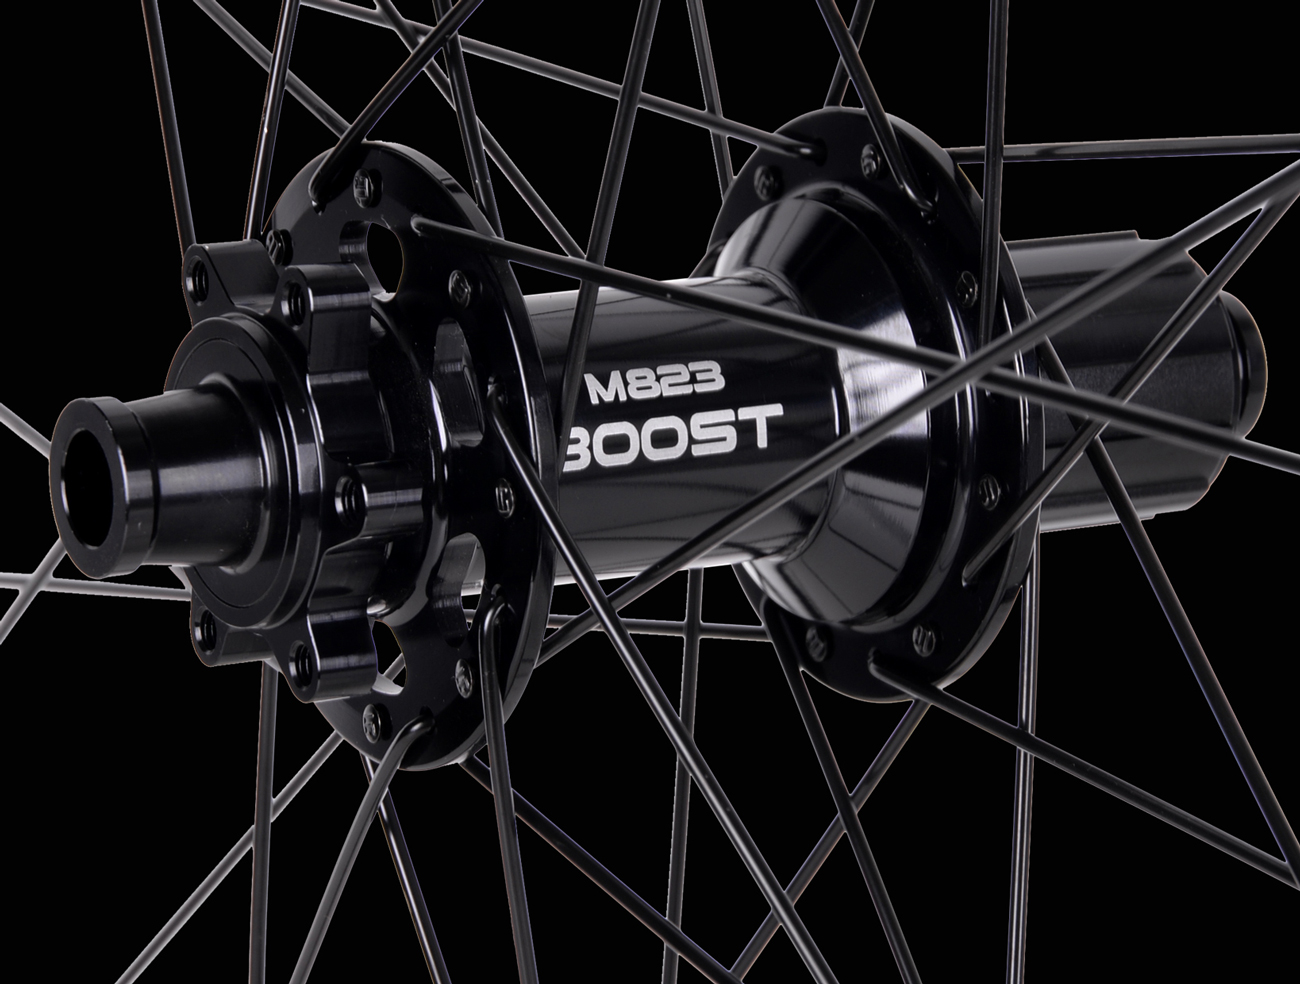
Choosing hubs isn't just about spinning wheels; it's about defining your ride. Do you crave lightning acceleration for racing, or bombproof reliability for epic adventures? The right hubs make all the difference. Here’s how to pick your perfect set:
1. The Speed Seeker’s Setup:
Lightweight Construction: Prioritize hubs made with premium alloys or carbon (like Trifox's T-Type series) to minimize rotational weight = faster acceleration.
High Engagement Points (POE): Look for 3-pawl or 6-pawl designs (e.g., Trifox T-Type hubs offer 72T/108T options). More POE means near-instant power transfer when you stomp the pedals – essential for sprints and technical climbs.
Aerodynamic Spokes: Pair with fewer, bladed spokes to cut drag.
2. The Durability Dominator’s Choice:
Robust Shell & Flanges: Choose hubs with thick, CNC-machined alloy shells (like Trifox's DH/Enduro-focused hubs). Stronger flanges better handle spoke tension and impacts.
Sealed Bearings: Double-lip, cartridge bearings (standard in quality hubs like Trifox) keep out grit, water, and grime for longer life in harsh conditions.
Higher Spoke Count: 32h or 36h builds offer greater strength and redundancy for rough trails or heavy loads.
3. The Sweet Spot? Know Your Terrain:
Road/Gravel Racing: Ultra-light hubs (like Trifox T-Type Carbon) + High POE. Weight savings reign supreme.
XC/Trail Riding: Balance is key. Moderate weight, good POE (e.g., Trifox T-Type Alloy), and reliable sealed bearings.
Enduro/Downhill: Durability first! Heavy-duty alloy hubs (like Trifox Titan), max sealing, and 32h/36h builds. POE still matters for control.
4. Don't Forget Compatibility!
Ensure the hub matches your:
Axle Standard (Quick Release, Thru-Axle size)
Brake Type (Rotor mount: 6-bolt or Centerlock)
Drivetrain (Cassette body: Shimano HG/SRAM XD/XDR, Microspline)
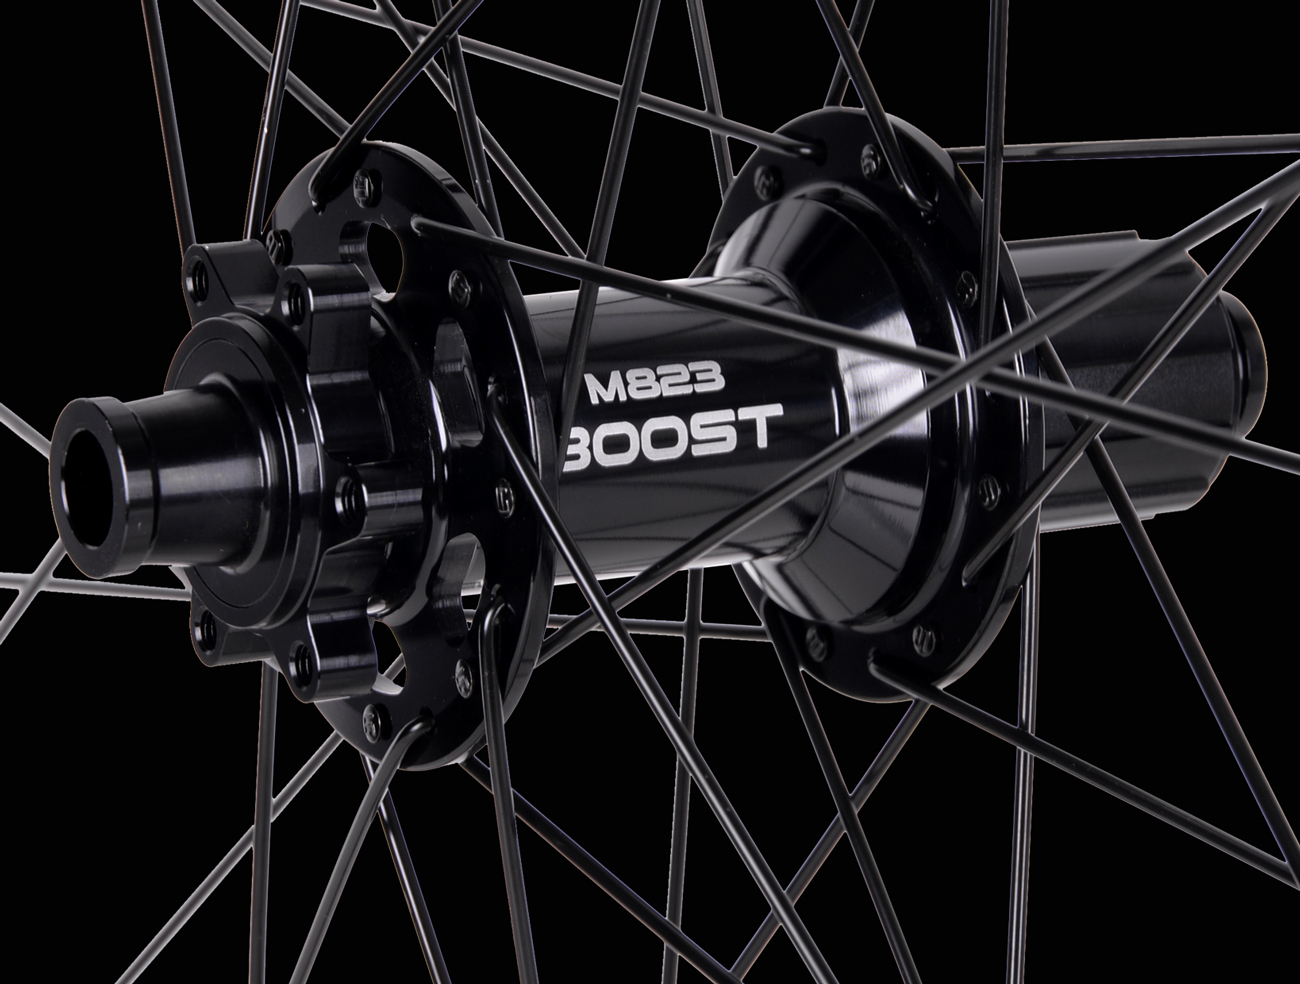
TrifoxBike: Engineered for Your Need
Whether you're chasing KOMs (T-Type Carbon Hubs for minimal weight & max engagement) or conquering rugged trails (Titan Alloy Hubs for ultimate strength & reliability), Trifox offers precision-engineered hubs designed to excel. Explore their range to find your perfect balance of speed and durability!
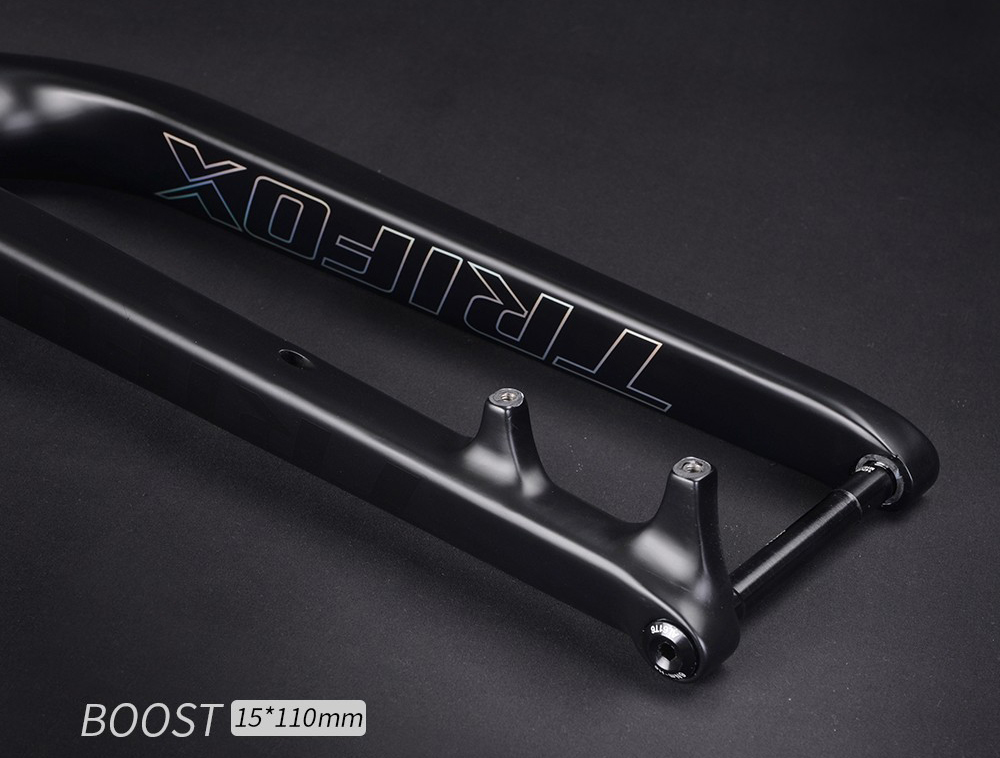
In a world dominated by full-suspension mountain bikes and plush gravel rigs, rigid frames and forks might seem outdated. Yet, for many riders and disciplines, rigid suspension (i.e., no suspension at all) offers compelling advantages. Here’s why going rigid could transform your ride:
1. Unmatched Efficiency:
Every bump absorbed by suspension saps pedaling energy. Rigid bikes convert 100% of your power into forward motion. This makes them ideal for climbing, smooth trails, gravel roads, or urban commuting where speed and efficiency trump impact absorption.
2. Lighter Weight:
Eliminating shocks, springs, and pivots slashes weight significantly. A lighter bike accelerates faster, feels nimbler, and is easier to carry – a major perk for bikepacking, cyclocross, or long-distance riders.
3. Lower Maintenance & Cost:
No suspension means no seals to service, no air springs to tune, and no pivot bearings to replace. Rigid setups are simpler, cheaper to buy/maintain, and less prone to mechanical issues on long adventures.
4. Enhanced Direct Feel & Control:
Experience unparalleled connection to the trail. Rigid bikes offer instant feedback through the bars and saddle, allowing precise line choice, sharper cornering, and improved bike handling skills. You feel the terrain, fostering greater rider engagement.
5. Increased Frame Stiffness & Compatibility:
Without suspension constraints, frames can be designed for optimal stiffness and weight distribution. Rigid forks also simplify compatibility with any wheel size, tire width, or braking system (rim or disc).
6. Better Power Transfer:
No suspension bob means power surges – sprints or steep climbs – transfer directly to the rear wheel without energy loss. This responsive feel is cherished by racers and performance-focused riders.
Where Rigid Reigns Supreme:
Gravel & Road Riding: Efficiency and speed rule.
Smooth Singletrack/Hardpack: Where precision trumps plushness.
Commuting/Touring: Reliability and low maintenance win.
Cyclocross: Lightweight agility is critical.
Bikepacking: Weight savings and durability matter most.
The Trade-Off:
Rigid isn't for everyone. On technical, rocky, or rooty terrain, suspension smooths impacts and reduces fatigue. Your hands, arms, and back absorb more vibration.
Maximizing Rigid Comfort:
Wider Tires: Run lower pressures (within safe limits) for natural cushioning.
Compliance Tuning: Look for carbon forks/frames designed to flex subtly.
Eronomic Touchpoints: Quality grips, a supportive saddle, and padded gloves help.
The Verdict:
Rigid suspension champions purity, efficiency, and connection. It rewards skilled riders with lightning-fast responses and liberates you from complex maintenance. If your terrain allows, embracing rigidity means rediscovering the joy of direct control and unadulterated speed. It’s not about rejecting suspension; it’s about choosing the right tool for your ride.
Ready to simplify? A rigid bike might redefine "smooth" for you.


