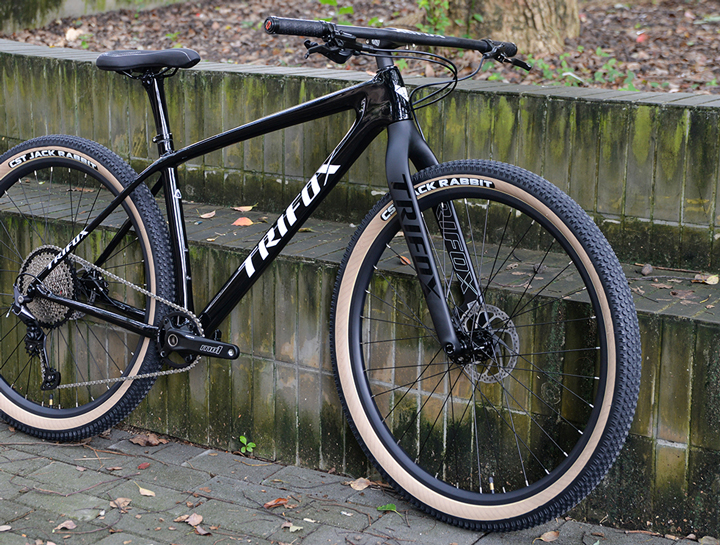
Customizing a rigid fork for your bike can significantly enhance your riding experience, particularly when using high-quality carbon models. Rigid forks, such as those offered by Trifox Bike, provide a unique blend of lightweight performance and durability, making them an excellent choice for mountain biking enthusiasts. Benefits of Rigid Forks Rigid forks are known for their simple design and efficiency. Unlike suspension forks, they do not have moving parts that can wear out, leading to less maintenance and a lighter overall bike weight. This simplicity also translates into improved responsiveness and precision, which is ideal for riders tackling smooth trails or urban environments. Carbon rigid forks, like Trifox's QMK100 and TMK200, further enhance these benefits by offering exceptional strength-to-weight ratios. This means you can enjoy a sturdy ride while minimizing the load you carry, which is crucial for long-distance rides or climbing steep terrains. Customization Options 1. Weight Adjustments: Depending on your riding style, you might prioritize either weight or strength. Carbon rigid forks are inherently light, but you may want a specific weight distribution for your setup. Choosing a fork like the Trifox Carbon MTB Fork QMK100 allows you to enjoy a balanced ride with an optimized weight for climbing or sprinting. 2. Terrain Suitability: Your choice of rigid fork can be adapted to different terrains. For instance, the TMK200 model is designed to handle rugged trails with ease, providing stability and control. Customizing your fork to match your primary riding terrain can enhance your bike’s performance, whether you’re navigating city streets or mountain paths. 3. Riding Style: Consider your riding style when customizing your fork. If you’re a commuter, you might want a fork that offers quick handling and precision. Mountain bikers, on the other hand, might prioritize strength and durability to withstand challenging off-road conditions. Installation and Maintenance Customizing your rigid fork also involves proper installation and maintenance to ensure optimal performance. Here are some tips: - Installation: When installing a new rigid fork, ensure that it is compatible with your bike's frame and wheel size. Follow the manufacturer’s guidelines closely, and consider having a professional bike mechanic assist you if you’re unsure. - Maintenance: Keep your rigid fork clean and regularly check for any signs of damage or wear. Although rigid forks require less maintenance than suspension forks, inspecting them periodically ensures longevity and reliability. Choosing the Right Fork Selecting the right rigid fork involves balancing performance and comfort. Trifox’s range of carbon rigid forks offers various options to suit different preferences. The QMK100, for example, is an excellent all-rounder that offers a good blend of weight and durability, while the TMK200 might cater more to those seeking a rugged, trail-ready option. Conclusion Customizing a rigid fork for your bike is more than just a technical upgrade; it’s about enhancing your overall biking experience. By knowing how to adjust your fork for weight, terrain, and riding style, you can significantly improve your bike’s performance and your comfort on the ride. Whether you're choosing a Trifox QMK100 for its lightweight advantage or the TMK200 for its robust design, understanding the customization process and maintenance needs will help you make the most out of your biking adventures. Embrace the simplicity and precision of rigid forks and enjoy the ride!
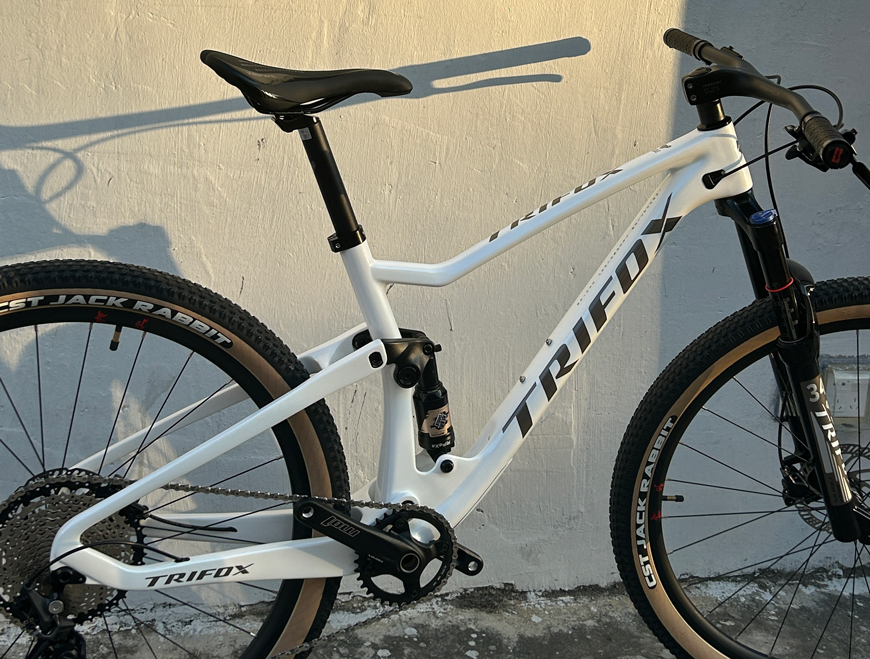
In the rapidly evolving world of mountain biking, the best MTB bikes of 2024 are pushing the boundaries of design and technology, offering riders unparalleled performance and experience on the trails. Emerging trends showcase bikes that are not only lighter and faster but also more durable and versatile, catering to a wide range of riding styles and terrains. Innovative Use of Carbon Materials One of the standout features of 2024’s best mountain bikes is the extensive use of carbon fiber. Known for its incredible strength-to-weight ratio, carbon fiber allows for the creation of frames that are both lightweight and robust. This material is a game-changer in the MTB world, providing riders with bikes that can handle rugged trails and steep climbs with ease. Trifox Bike’s carbon mountain bikes, such as the Pioneer and M2, exemplify this trend, offering frames that are not only aesthetically pleasing but also performance-optimized. Advanced Suspension Systems The latest mountain bikes boast highly sophisticated suspension systems that significantly enhance comfort and control. Full suspension bikes, like those offered by Trifox, help absorb shocks from rough terrain, allowing for smoother rides and better traction. This technology is crucial for riders tackling technical trails, as it maintains stability and maximizes power transfer, ensuring that every pedal stroke counts. Whether you’re a downhill enthusiast or a cross-country racer, the improved suspension in 2024 models makes navigating challenging paths a breeze. Cutting-Edge Technology and Components Modern MTB bikes are also incorporating advanced technology to optimize rider performance. From electronic shifting systems that provide precise gear changes to smart sensors that monitor bike metrics, these innovations offer an edge to tech-savvy cyclists. Trifox’s high-end models are equipped with such features, enabling riders to fine-tune their rides and push their limits safely and efficiently. Versatility and Customization The best mountain bikes of 2024 are designed to cater to a broad spectrum of riders and conditions. Whether you’re an adrenaline junkie seeking downhill thrills or a leisure rider exploring scenic trails, there’s a bike tailored for your needs. Trifox offers a range of customization options, allowing cyclists to choose components that match their riding style and preferences. This versatility ensures that every rider can find a bike that feels like a natural extension of themselves, enhancing their overall experience. Performance-Driven Design A focus on aerodynamic and ergonomic design is another hallmark of top MTB bikes this year. Streamlined frames and components reduce drag, while ergonomic adjustments improve rider comfort, particularly on long rides. The Pioneer model, for example, emphasizes both speed and stability, making it a preferred choice for competitive riders. Meanwhile, the M2 model offers a balance of power and agility, suitable for those who enjoy a mix of terrains. Eco-Friendly Manufacturing Sustainability has become a significant consideration in the manufacturing of 2024’s best mountain bikes. Brands like Trifox are adopting eco-friendly production practices, using recyclable materials and reducing waste. This commitment not only benefits the environment but also appeals to the growing number of environmentally conscious consumers. In conclusion, the best MTB bikes of 2024 stand out due to their innovative use of materials, advanced technology, and thoughtful design. By incorporating cutting-edge features and eco-friendly practices, these bikes offer an enhanced riding experience that meets the demands of modern cyclists. Whether you’re drawn to the sleek design of the Pioneer or the versatile performance of the M2, Trifox’s offerings provide excellent examples of what to expect in this exciting new era of mountain biking.
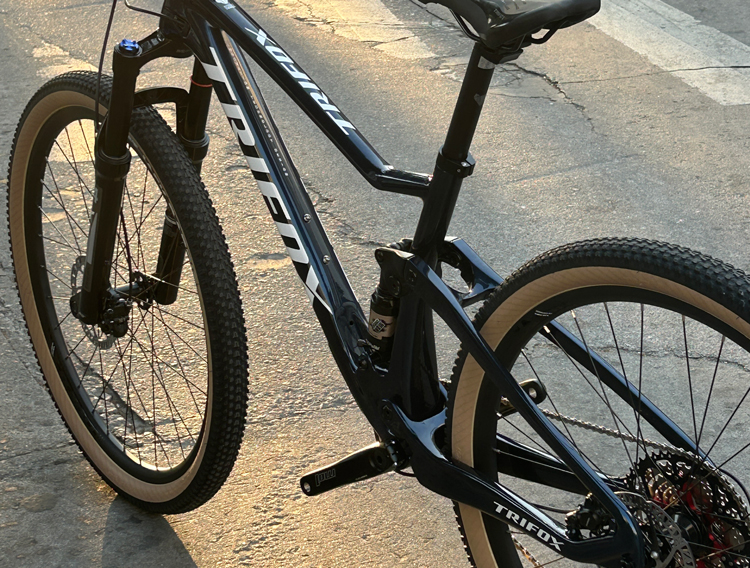
In the world of competitive cycling, the choice of bicycle can be as critical as the training regimen itself. Top riders often select bikes that enhance their performance through a combination of advanced technology, superior materials, and innovative designs. The Allure of Carbon Frames One of the most sought-after features in professional-grade bicycles is the carbon frame. Carbon fiber is favored for its remarkable combination of lightweight and strength, allowing riders to achieve higher speeds with less effort while maintaining durability. Trifox Bike, known for its high-quality carbon products, offers frames that are not only light but also robust, providing a solid foundation for competitive racers. Performance and Durability The demands of professional cycling require bikes that not only perform well but also withstand rigorous use. Trifox's carbon frames and components ensure that durability does not come at the cost of performance. Models like the Pioneer and the Ultra Light SF-QR 2.0 exemplify this balance, providing riders with the agility needed for swift maneuvers and the toughness required for endurance. Technological Advancements Top riders also gravitate towards bicycles that incorporate the latest technological advancements. Features such as aerodynamic designs, integrated components, and enhanced suspension systems can make a significant difference in a race. Trifox's commitment to innovation is evident in their bike designs, which often include cutting-edge technology that optimizes speed and efficiency. Benefits of High-Quality Materials The use of high-quality materials extends beyond just the frames. From carbon wheels to handlebars, every component can impact the overall performance of a bike. Trifox ensures that each part contributes to a cohesive, high-performing machine, allowing cyclists to focus on their ride without worrying about equipment failure or inefficiencies. Specific Models for Different Needs Professional cyclists often choose bikes tailored to their specific disciplines or racing conditions. Trifox offers a variety of models to cater to these diverse needs. The Pioneer, for example, is an excellent choice for those prioritizing stability and power transfer, making it ideal for road races. Meanwhile, the Ultra Light SF-QR 2.0, true to its name, is designed for those who need a feather-light ride that doesn't compromise on speed or control. Influence on Professional Choices Ultimately, the choice of bicycle among top riders comes down to how well the bike can enhance their natural abilities and complement their training. The precision engineering and thoughtful design of Trifox bikes offer these athletes the tools they need to excel. With features that maximize performance and provide a competitive edge, it's no wonder that such bicycles are the go-to choice for many professionals. In conclusion, the preferences of top riders reflect a blend of innovation, material excellence, and performance-focused design. As cycling technology continues to evolve, brands like Trifox are at the forefront, providing bicycles that meet the high standards of elite cyclists, ensuring every ride is not just a journey, but a testament to the power of modern bike engineering.
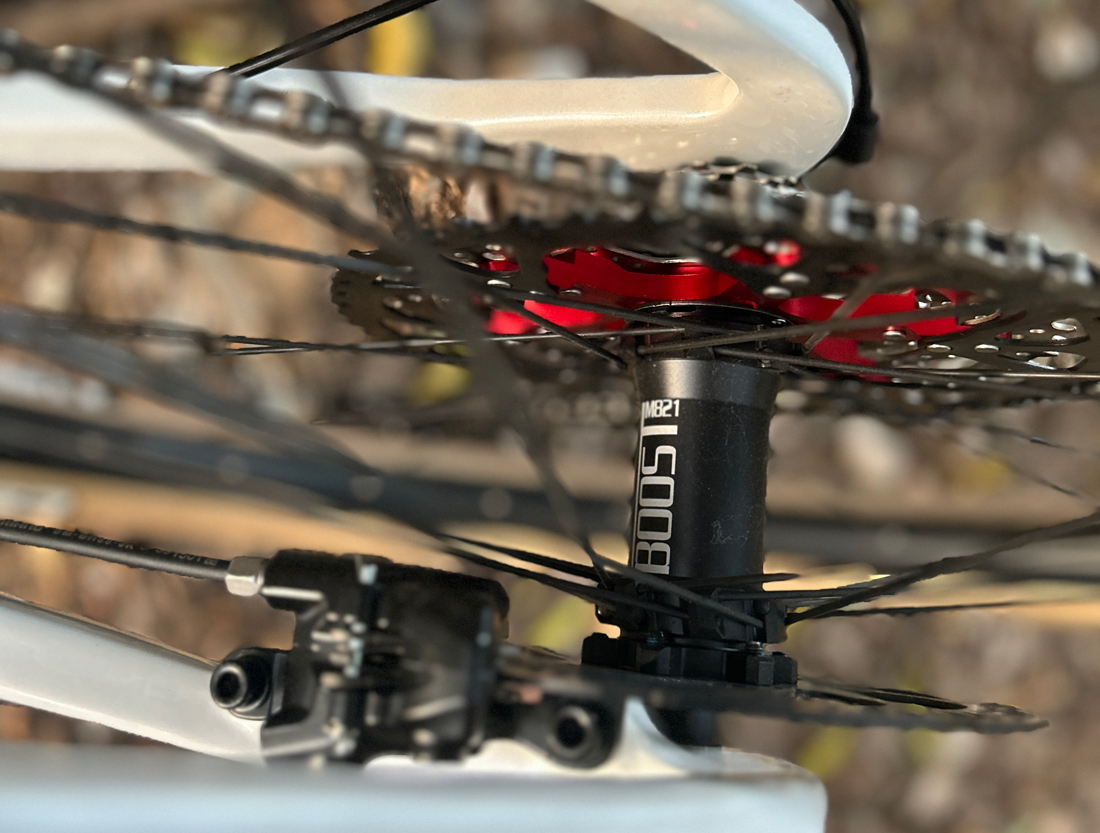
When it comes to enhancing your biking experience, every component of your bicycle plays a crucial role, and one of the unsung heroes of bike performance is the hub. Positioned at the center of your wheels, hubs are pivotal in determining how smooth, fast, and stable your ride will be. The Role of Bicycle Hubs Hubs serve as the attachment point for your bike's wheels to the frame, facilitating the wheel's rotation around the axle. The design and quality of a hub can significantly influence your bike's performance, affecting speed, stability, and comfort. A well-designed hub ensures minimal friction, allowing for efficient transfer of energy from your legs to the wheels, propelling you forward with ease. Materials and Durability One of the key aspects of a hub's design is the material used in its construction. Trifox Bike offers hubs made from durable aluminum, known for its lightweight and resilient properties. This ensures that the hubs can withstand the rigors of regular use while contributing to a lighter overall bike weight, which is advantageous for speed and maneuverability. Types of Hubs At Trifox, you can find a variety of hub designs tailored to different biking needs. For instance, the M821 Boost and M827 are standout models that cater to diverse requirements. The M821 Boost hub, with its wider stance, provides increased stability and is ideal for mountain biking where rugged terrain demands extra support. On the other hand, the M827 is designed for road bikes, focusing on delivering speed and smoothness on paved surfaces. Impact on Speed and Stability The design of a hub can directly impact your bike's speed. Hubs like the M827, designed for road use, are optimized for reduced friction and efficient energy transfer, allowing cyclists to maintain higher speeds with less effort. Conversely, hubs made for off-road use, like the M821 Boost, prioritize stability to handle uneven terrains effectively. Stability is equally critical, especially when navigating tricky paths or making sharp turns. A hub with a wider design, such as the Boost, offers enhanced lateral stability, reducing the risk of wobbling or losing control, thus providing a safer ride. Comfort and Compatibility Comfort during rides is often a byproduct of the right hub design. A smooth, frictionless ride reduces the strain on the cyclist, allowing for longer and more enjoyable rides. Trifox Bike's hubs are compatible with most standard bicycles, making them an easy upgrade for cyclists looking to enhance their ride without having to invest in a new bike. Choosing the Right Hub Selecting the appropriate hub is crucial for tailoring the biking experience to your specific needs. Whether you're an avid mountain biker requiring maximum stability or a road cyclist seeking speed, the right hub can transform your ride. Trifox Bike offers a range of options, ensuring that every cyclist can find a hub that fits their style and enhances their biking experience. In summary, while often overlooked, the hub is a critical component that can dramatically affect your ride. By understanding the various designs and materials, such as those offered by Trifox Bike, cyclists can make informed choices to improve their bike's performance and enjoy their rides to the fullest.
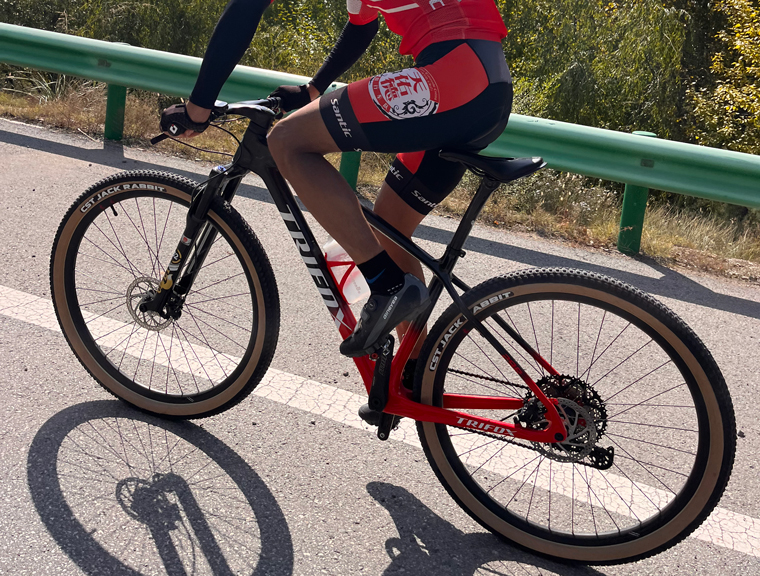
When it comes to cycling, the wheels of your bike are not just a functional component; they are crucial to enhancing your overall riding experience. Whether you are a road cyclist or prefer the rugged paths of mountain biking, choosing the right wheels can significantly impact your performance and enjoyment. But what exactly makes a cycling wheel truly stand out? Material Matters: The Case for Carbon Fiber One of the most distinguishing features of top-tier cycling wheels is the material they are made from. In recent years, carbon fiber has emerged as a leading choice for serious cyclists. This material is renowned for its exceptional strength-to-weight ratio, providing durability without the added bulk. Trifox's carbon road and mountain bike wheels exemplify these advantages, offering lightweight options that enhance speed and agility. The reduced weight of carbon wheels means less energy expenditure, allowing cyclists to ride longer and faster with greater ease. Design: Where Innovation Meets Functionality Beyond the material, the design of a wheel plays a pivotal role in its performance. High-quality wheels are engineered to optimize aerodynamics, stability, and handling. Trifox's wheels, for instance, are crafted with precision to minimize drag and enhance control, especially at high speeds or in challenging terrains. Features such as deeper rim profiles and strategically positioned spokes contribute to improved aerodynamics and increased rigidity, ensuring that every pedal stroke is efficiently converted into forward motion. Performance: The Ultimate Benchmark Ultimately, what sets a cycling wheel apart is its performance on the road or trail. A superior wheel will offer a smooth, responsive ride, capable of handling various conditions effortlessly. Trifox wheels are designed to deliver just that. With options like their carbon road bike wheels WT11 or the mountain bike wheels WM823, cyclists can experience enhanced traction, stability, and speed. The performance of these wheels is not only a testament to their quality but also to the meticulous engineering that goes into their design. The Trifox Advantage: Explore the Possibilities For riders looking to elevate their cycling experience, Trifox offers a diverse selection of wheels that cater to both road and mountain biking enthusiasts. Their commitment to quality and innovation ensures that cyclists of all levels can find a wheelset that meets their specific needs and preferences. Whether you're aiming to shave seconds off your race time or simply enjoy a more comfortable ride, the right wheels can make all the difference. In conclusion, a cycling wheel stands out not just by its appearance but through its material quality, innovative design, and outstanding performance. Trifox exemplifies these attributes with their range of carbon fiber wheels, providing cyclists with the tools they need to reach their full potential. To discover how these wheels can transform your ride, explore Trifox's comprehensive wheel selection today and take the first step towards a superior cycling experience.
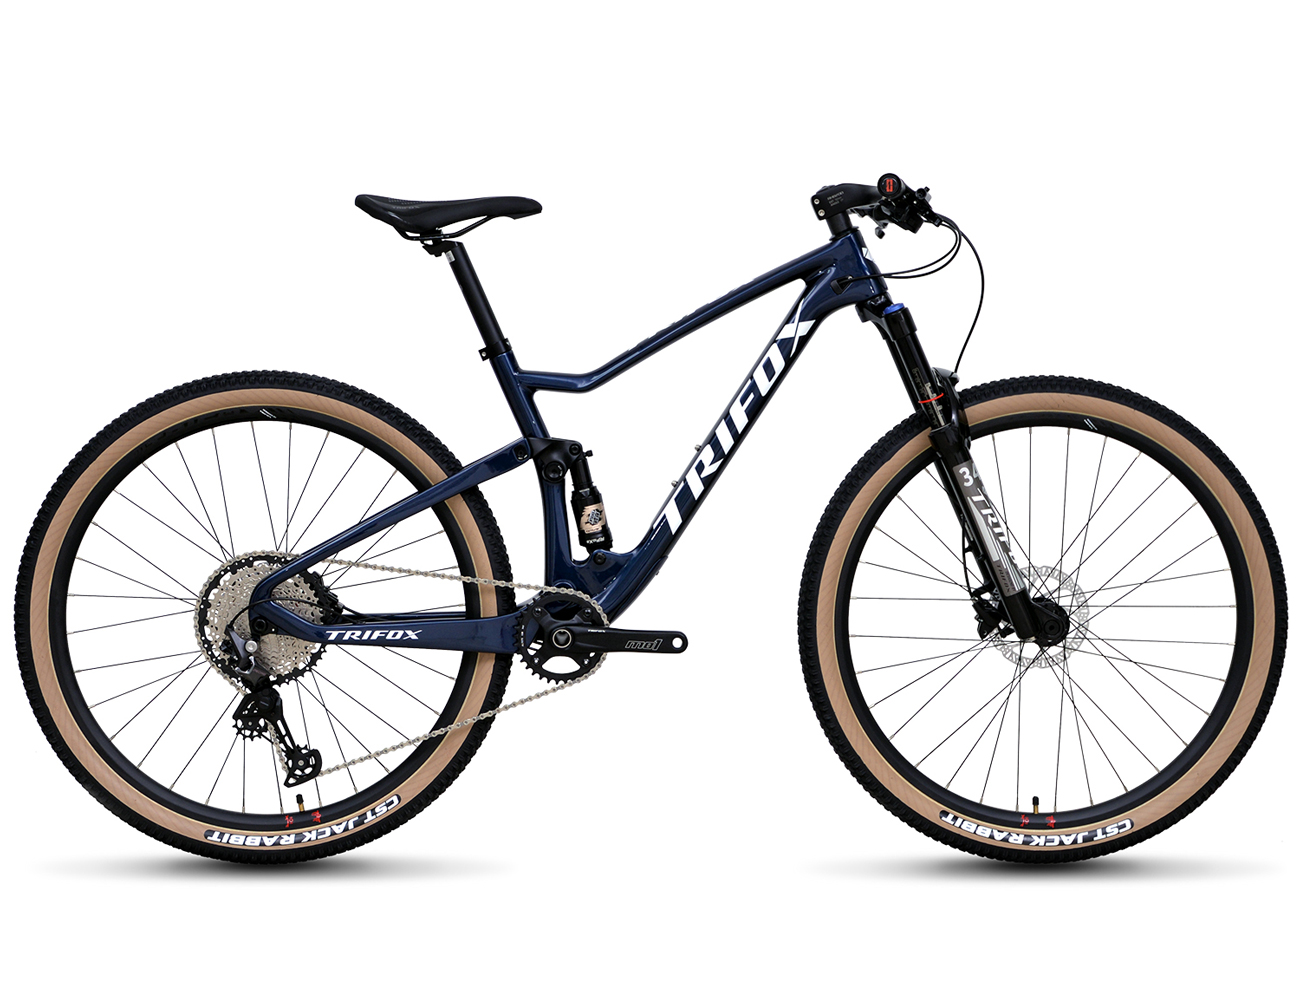
Downhill mountain biking is an adrenaline-pumping sport that challenges your skills, bravery, and ability to adapt to rapidly changing terrains. Whether you're a seasoned rider or a newbie eager to tackle the slopes, mastering downhill MTB requires the right techniques and equipment. 1. Mastering Body Positioning Your body position is crucial in maintaining balance and control during downhill rides. Follow these tips to improve your stance: - Stay Centered: Keep your body weight centered over the bike. This helps maintain traction and stability. - Lower Your Center of Gravity: Bend your knees and elbows to lower your center of gravity. This posture improves balance and allows you to absorb shocks from the terrain. - Look Ahead: Focus on the trail ahead rather than the immediate ground. This anticipatory gaze helps you prepare for obstacles and take smoother lines. 2. Effective Braking Techniques Proper braking techniques are essential for maintaining control and speed on descents: - Use Both Brakes: Apply both front and rear brakes smoothly and evenly. The front brake provides more stopping power, but relying too much on it can cause you to lose balance. - Feather the Brakes: Use a gentle, pulsing braking motion instead of a hard squeeze. This minimizes skidding and maintains traction. - Brake Before Turns: Reduce your speed before entering turns, allowing you to navigate through them with more stability. 3. Choosing the Right Gear Selecting the appropriate gear setup enhances your control and performance: - Lower Gears for Steep Descents: Use lower gears to maintain a steady and controlled speed on steep sections. - Gear Switching: Familiarize yourself with your gear shifters to make seamless transitions as the terrain changes. 4. The Advantage of a Full Suspension Carbon MTB Frame Investing in a quality frame, such as the Trifox MFM100 full suspension carbon MTB frame, can significantly enhance your downhill experience: - Superior Shock Absorption: The MFM100's dual suspension system absorbs impact, reducing rider fatigue and providing a smoother ride over rugged terrain. - Strength and Lightweight: Made from T800 carbon fiber, the frame offers an excellent balance between strength and weight, allowing for agile maneuvers and increased speed. - Boost Technology: With 148 x 12mm spacing, the frame supports wider hub flanges, resulting in a stronger rear wheel for improved stability during descents. 5. Mental Preparation and Confidence Building Downhill MTB is as much a mental challenge as it is physical. Boost your confidence with these tips: - Start Small: Begin with less challenging trails and gradually progress to more difficult descents as your skills improve. - Visualize Success: Picture yourself navigating the trail successfully, focusing on smooth lines and controlled movements. - Positive Mindset: Embrace mistakes as learning opportunities and maintain a positive outlook on your progress. 6. Safety First Always prioritize safety on the trail: - Wear Protective Gear: Equip yourself with a helmet, gloves, knee pads, and elbow pads to protect against falls. - Trail Awareness: Familiarize yourself with trail routes and conditions before heading out. Conclusion Conquering downhill MTB requires practice, the right techniques, and reliable equipment. By mastering body positioning, braking, and gear usage, and leveraging the capabilities of a full suspension frame like the Trifox MFM100, you can tackle thrilling descents with confidence. Embrace the thrill of the ride, and remember, every descent is an opportunity to refine your skills and enjoy the exhilarating freedom of the trail. Happy riding!
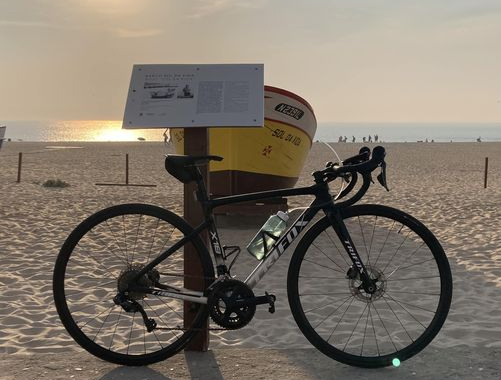
Finding a high-quality bicycle frame without spending a fortune is a top priority for many cycling enthusiasts. Whether you're building a bike from scratch or upgrading an old one, the frame is the foundation of your ride, influencing its performance and durability. Fortunately, there are strategies to find affordable yet quality frames that meet your needs. Here’s how you can get started without stretching your budget. 1. Know What You Need Start by understanding your cycling needs. Are you a road cyclist, mountain biker, or someone who enjoys leisurely rides? Knowing the primary use will help you focus on the right type of frame. For instance, road bike frames are designed for speed and efficiency, while mountain bike frames are built for durability and control on rough terrains. 2. Focus on Frame Material Frame material significantly impacts both performance and price. Common materials include aluminum, steel, titanium, and carbon fiber. Each has its pros and cons: - Aluminum: Lightweight and affordable, suitable for beginners and casual riders. - Steel: Known for its durability and smooth ride quality, though heavier. - Titanium: Offers strength and lightness but is typically more expensive. - Carbon Fiber: Lightweight and strong, ideal for performance-focused cyclists. Trifox Bike offers carbon road bike frames at a fraction of the usual cost, providing an excellent option for those seeking lightweight and durable frames without the premium price tag. 3. Look for Discounts and Deals One way to save money is by shopping during sales or looking for discounts on last season's models. Trifox Bike, for example, often offers significant discounts on their carbon road bike frames, such as the X8QR and X12 models, which are available at over 50% off with free shipping on orders over $50. 4. Compatibility with Components Ensure the frame is compatible with your existing or intended components. Check the frame’s specifications, such as wheel size, brake type (disc or rim), and bottom bracket type. Trifox provides detailed information on their frames, making it easier for you to verify compatibility. 5. Read Reviews and Get Recommendations Before finalizing your purchase, read customer reviews and seek recommendations from fellow cyclists. This can provide insights into the frame's performance and durability. Trifox Bike's website features reviews for each frame, helping you make an informed decision. 6. Consider Buying Direct Buying directly from manufacturers like Trifox can often result in better deals, as it eliminates retailer markups. This approach can offer better value for your money while still providing a high-quality product. 7. Don't Sacrifice Quality for Price While it's essential to stay within your budget, compromising too much on quality can lead to higher costs down the line due to maintenance or replacement needs. Look for frames that balance affordability with durability and performance. Conclusion Finding a quality bicycle frame without breaking the bank is achievable with the right approach and resources. By focusing on your needs, understanding frame materials, and seeking out deals, you can secure a frame that offers both performance and value. Trifox Bike stands out as a great option, providing high-quality carbon frames at competitive prices. With the right frame, you'll be well on your way to enjoying countless hours of cycling, confident that you've made a smart investment.
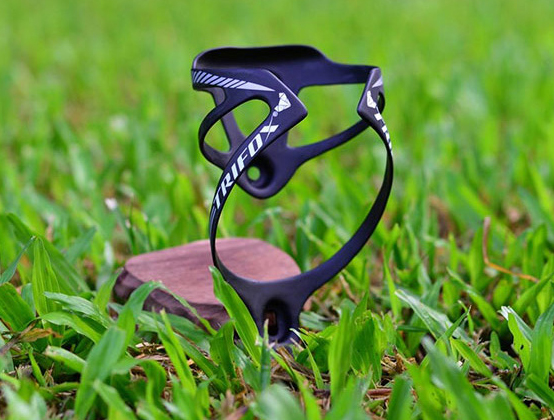
Finding the best way to store your bike efficiently can make a significant difference in preserving its condition and maximizing your space. Whether you're an avid cyclist with multiple bikes or just need a solution for your daily commuter, choosing the right adjustable bike holder is essential. 1. Assess Your Space Before purchasing an adjustable bike holder, evaluate the space where you plan to store your bike. Consider the following: - Available Space: Measure the area to ensure the bike holder fits comfortably. Wall-mounted options are great for tight spaces, while freestanding holders work well in garages or basements. - Ceiling Height: If you are considering a vertical or hoist-style holder, ensure your ceiling height accommodates the bike's dimensions when lifted. 2. Determine Your Bike Type and Weight Different bike holders are designed to support various types of bikes, such as road bikes, mountain bikes, or e-bikes: - Weight Capacity: Check the weight rating of the holder to ensure it can support your bike. For example, e-bikes are generally heavier and may require a sturdier holder. - Frame Compatibility: Some holders are designed specifically for certain frame shapes. Ensure the holder is compatible with your bike’s frame design. 3. Prioritize Adjustability and Flexibility An adjustable bike holder offers versatility, allowing you to customize the storage solution to your specific needs: - Height and Angle Adjustments: Look for holders that allow you to adjust the height and angle to accommodate different bike sizes and storage preferences. - Multiple Bikes:If you have more than one bike, a holder that allows for storing multiple bikes can save space and keep your collection organized. 4. Evaluate Durability and Build Quality Investing in a high-quality bike holder ensures longevity and reliability: - Materials: Opt for holders made from robust materials such as steel or high-grade aluminum. Trifox Bike emphasizes durability in their product offerings, ensuring their holders withstand regular use. - Finish and Coating: A protective coating can prevent rust and wear, especially if the holder will be used in humid areas like basements or garages. 5. Consider Ease of Installation and Use A bike holder should be easy to install and use, allowing for quick access to your bike: - Installation Requirements: Some holders require tools for installation, while others might be mounted with simple hardware. Choose one that fits your comfort level with DIY projects. - Ease of Use: Features like quick-release mechanisms or cleverly designed clamps can make it easier to secure and remove your bike. 6. Explore Trifox Bike’s Offerings When looking for high-quality and durable bike holders, consider Trifox Bike's range of products. Known for their commitment to quality, they provide solutions that are both functional and aesthetically pleasing. Although their current focus is on carbon components like water bottle cages, the same attention to detail can be expected in any storage solutions they offer. Selecting the best adjustable bike holder involves considering space, bike type, adjustability, durability, and ease of use. By taking these factors into account, you can ensure your bike is stored safely and conveniently, ready for your next ride. Investing in a quality bike holder not only protects your bike but also enhances the organization of your space. With the right holder, storing your bike becomes a simple and efficient task, allowing you to focus more on enjoying the ride.
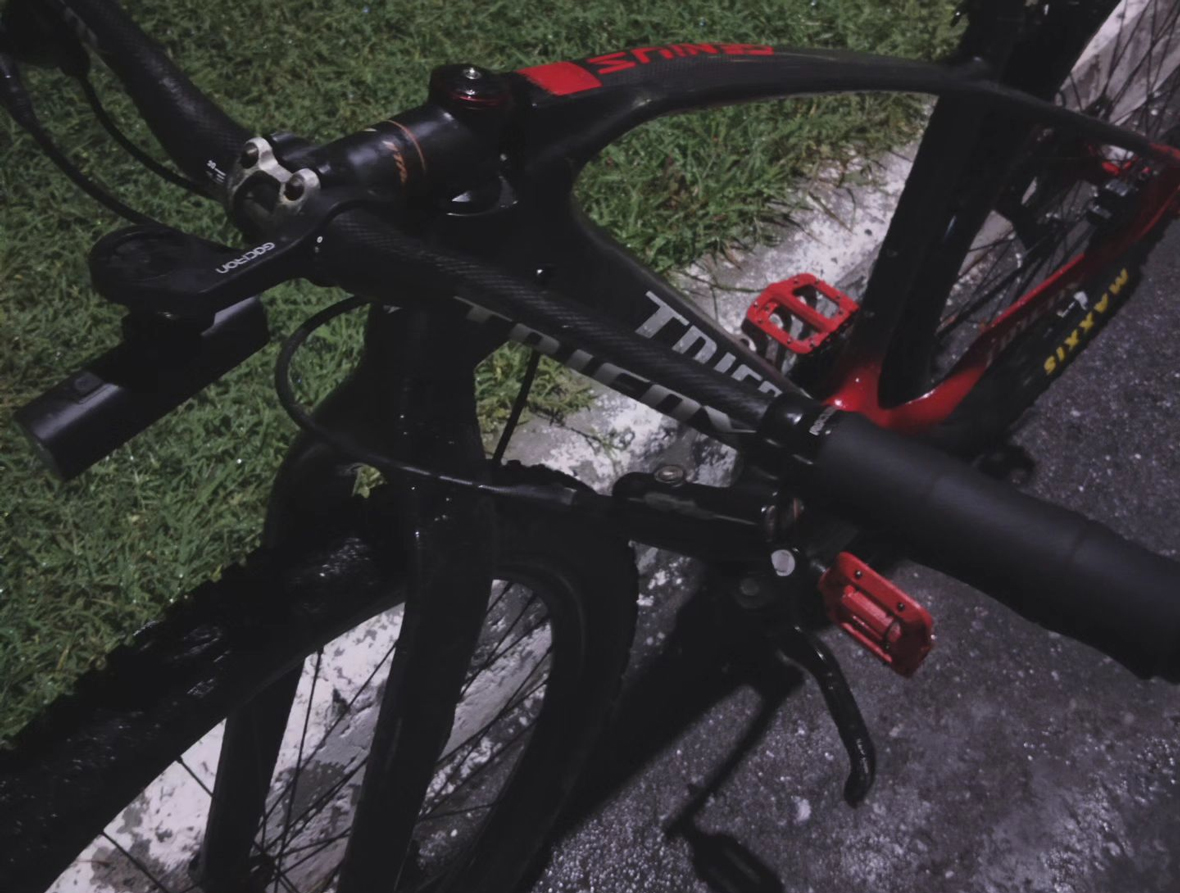
Selecting the right rigid carbon fork can significantly enhance your mountain biking experience, providing a balance of weight, durability, and performance. Trifox Bike offers a range of high-quality carbon MTB forks that cater to various biking needs. 1. Understand the Benefits of Rigid Carbon Forks Rigid carbon forks are ideal for riders seeking a lightweight and maintenance-free option. Unlike suspension forks, they provide direct feedback from the trail, improving pedaling efficiency and offering a more controlled ride on smooth surfaces. Trifox's carbon forks are known for their robust build and lightweight design, making them perfect for speed enthusiasts and those riding primarily on cross-country or urban trails. 2. Weight Considerations One of the primary advantages of rigid carbon forks is their reduced weight compared to suspension forks. Lighter forks enhance your bike's agility and handling, especially crucial for competitive cyclists. Trifox's models, such as the Carbon MTB Fork QMK100 and TMK100, are designed to minimize weight without compromising strength, offering a significant performance benefit for racers and casual riders alike. 3. Durability and Material Quality When choosing a carbon fork, durability is key. Look for high-quality carbon construction that offers resilience against the stresses of mountain biking. Trifox ensures their forks undergo rigorous testing, providing a product that withstands the rigors of trail riding. Their carbon forks also boast a sleek finish, adding aesthetic appeal to your bike. 4. Compatibility with Bike Frames Before purchasing a fork, ensure compatibility with your bike's frame. Consider the steerer tube diameter and axle type. Trifox's forks are designed to accommodate various frame sizes and styles, ensuring a seamless integration with most MTB setups. It’s crucial to verify these specifications to avoid any installation issues. 5. Performance Benefits Rigid carbon forks from Trifox offer enhanced power transfer, as they do not absorb pedal energy like suspension forks. This allows for more efficient climbing and acceleration. These forks are particularly beneficial for riders who prioritize speed and efficiency over cushioning on bumpy trails. 6. Price and Value While carbon forks can be more expensive than their aluminum counterparts, they are an investment in performance and quality. Trifox offers competitive pricing, often with significant discounts and free shipping on orders over $50, making their carbon forks accessible without compromising on quality. Conclusion Choosing the perfect rigid carbon fork involves balancing weight, durability, and compatibility with your biking needs. With Trifox's range of carbon MTB forks, you can enhance your bike's performance and enjoy a more responsive ride. Whether you're a seasoned rider or a beginner, investing in a quality carbon fork can elevate your mountain biking adventures. Remember to assess your riding style and terrain preferences to select the fork that best suits your needs. Happy riding!


