


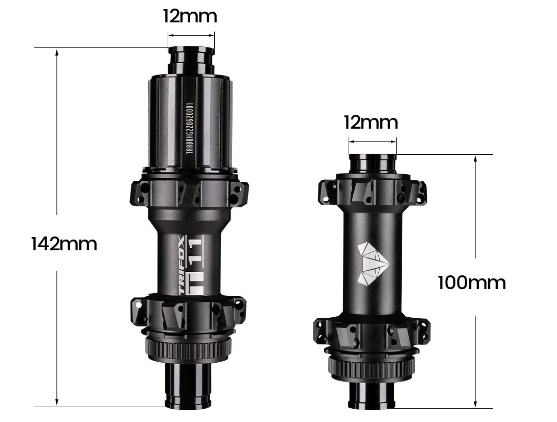
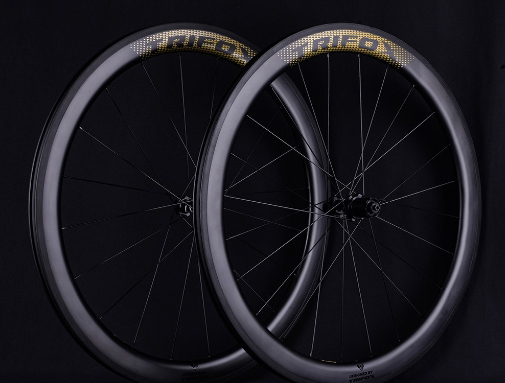
Choosing the right road hub for your bicycle is crucial for achieving optimal performance and enhancing your riding experience. A well-selected and maintained hub can significantly impact your bike's efficiency, speed, and reliability. Here’s a comprehensive guide on how to select and maintain the perfect road hub. 1. Understanding Road Hubs A road hub is the central part of a bicycle wheel that connects the wheel to the bike frame and allows it to rotate freely. It consists of several components, including bearings, axle, and hub shell. When selecting a road hub, you’ll want to consider factors like material, weight, and type of bearings. 2. Selecting the Right Road Hub Material Road hubs are typically made from aluminum or carbon fiber. Carbon fiber hubs, like those offered by Trifox, are lightweight yet strong, providing excellent stiffness and reduced weight. Bearings Hubs can come with either sealed cartridge bearings or loose ball bearings. Sealed bearings are low maintenance and offer better protection against dirt and moisture, making them ideal for road cycling. Compatibility Ensure the hub is compatible with your bike’s wheel size and cassette type. The Trifox hubs are designed to fit various wheel sizes and are compatible with multiple drivetrain systems, ensuring a versatile fit for most road bikes. Weight For competitive cycling, every gram counts. Choose a lightweight hub to reduce the overall weight of your bike, improving acceleration and climbing efficiency. 3. Maintaining Your Road Hub Regular Cleaning Keep your hub clean by wiping it down after rides, especially in muddy or wet conditions. Use a soft cloth and mild detergent to remove dirt and grime. Lubrication Regularly lubricate the bearings to keep them running smoothly. Avoid over-lubrication as it can attract dirt and cause wear. High-quality hubs like those from Trifox come pre-lubricated, but periodic maintenance will extend their lifespan. Inspection Periodically inspect your hub for signs of wear or damage. Check for any play in the bearings, unusual noises, or rough rotation. If you notice any issues, address them promptly to prevent further damage. Bearing Replacement Over time, bearings may wear out and need replacement. Follow the manufacturer’s guidelines for replacing bearings. Trifox hubs are designed for easy servicing, making bearing replacement straightforward. Torque Settings Ensure bolts and axle nuts are torqued to the manufacturer’s specifications. Over-tightening can damage components, while under-tightening can lead to instability. In conclusion, selecting and maintaining the right road hub involves understanding key components, considering compatibility, and performing regular maintenance. By choosing high-quality hubs like those from Trifox and following these maintenance tips, you’ll enjoy optimal performance and a smoother, more reliable ride. Invest in the right road hub today and experience the difference it makes in your cycling journey.
Installing an alloy seat clamp on your bicycle might seem like a small task, but it’s one that plays a crucial role in ensuring a secure and comfortable ride. A properly installed seat clamp keeps your seat post stable, preventing slippage and enhancing your overall cycling experience. Here’s a step-by-step guide to help you install your new alloy seat clamp correctly. 1. Gather Your Tools Before starting, make sure you have the necessary tools: an Allen wrench (typically 4mm or 5mm), grease, and a torque wrench if possible. You’ll also need your new alloy seat clamp, like the Trifox SC35, which is designed for durability and ease of use. 2. Remove the Old Seat Clamp If you already have a seat clamp installed, start by loosening the bolt using the Allen wrench. Unscrew it completely and carefully remove the old clamp from the frame. Keep the bolt and any washers in a safe place as you may need them later. 3. Clean the Seat Tube With the old clamp removed, clean the top of the seat tube where the new clamp will sit. Use a cloth to wipe away any dirt, grease, or debris. A clean surface ensures better grip and performance of the new clamp. 4. Apply Grease Apply a small amount of grease around the inside of the new alloy seat clamp. This helps in smooth adjustment and prevents corrosion. Avoid over-greasing as it can attract dirt. 5. Install the New Clamp Place the new Trifox SC35 seat clamp over the seat tube. Align it properly so that the bolt hole is positioned correctly. Insert the bolt through the clamp and begin to tighten it by hand. Make sure it's fitted evenly around the tube. 6. Adjust the Seat Post Insert your seat post into the seat tube. Adjust it to your desired height. Ensure the saddle is level and the height aligns with your comfort and riding style. 7. Tighten the Clamp Using the Allen wrench, tighten the bolt on the seat clamp. Use a torque wrench to achieve the recommended torque setting, usually marked on the clamp or provided by the manufacturer. Over-tightening can damage the clamp or frame, while under-tightening can cause slippage. 8. Check for Stability Once the clamp is tightened, check the stability of the seat post. Try to move the seat side to side and up and down. If there’s no movement, your installation is successful. 9. Final Adjustments Take a short test ride to ensure everything feels right. Make any minor adjustments to the seat height or angle as needed, and re-tighten the clamp if necessary. Installing an alloy seat clamp, such as the Trifox SC35, is a straightforward process that can greatly enhance your bike’s performance and comfort. With proper installation, you'll ensure a stable and enjoyable ride every time you hit the road.
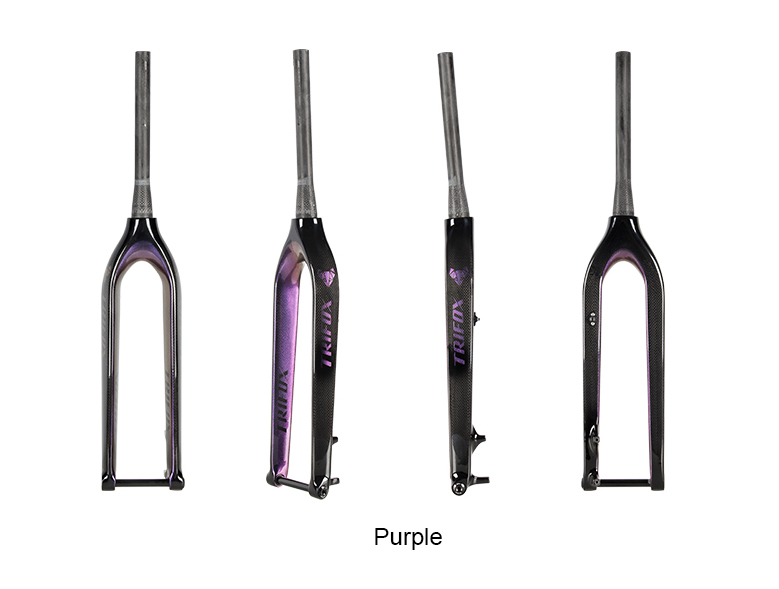
Choosing the right rigid MTB fork can make a significant difference in your mountain biking experience. Whether you're an avid off-road adventurer or a casual trail rider, selecting a fork that complements your riding style and bike setup is crucial. Here's a guide to help you make the perfect choice. 1. Understand Your Riding Style Before diving into specifications, consider how and where you ride. If you enjoy technical trails with lots of obstacles, you'll need a fork that offers excellent strength and durability. For smoother paths and long-distance rides, a lightweight fork with good responsiveness might be more suitable. 2. Material Matters One of the primary factors to consider is the fork's material. Carbon fiber forks, like the Trifox TMK100, offer an excellent balance of strength and weight. The TMK100 provides exceptional durability while keeping the weight low, enhancing both performance and handling. 3. Compatibility and Fit Ensure that the fork is compatible with your bike frame and wheel size. The Trifox TMK100 is designed specifically for 29-inch wheels and features a tapered design from 1-1/8 to 1-1/2 inches, which ensures a snug fit and optimal handling1. Additionally, it is suitable for straight headtubes, making it a versatile option for various mountain bike frames. 4. Brake Compatibility Having reliable stopping power is essential for mountain biking. The TMK100 is compatible with disc brakes, which provide consistent performance in all weather conditions1. This feature is particularly important for off-road cycling, where you may encounter varying terrains and weather scenarios. 5. Axle Type and Tire Clearance Check the axle type and tire clearance of the fork. The TMK100 utilizes a thru-axle style, offering increased stiffness and better alignment. It can handle tires up to 2.1 inches, giving you the flexibility to choose wider tires for better traction on rugged trails. 6. Aesthetics and Design Last but not least, consider the aesthetics and design of the fork. A sleek and modern fork can enhance the overall look of your bike. Reviews have praised the TMK100 for its stylish appearance, which adds an attractive touch to any mountain bike. In conclusion, choosing the perfect rigid MTB fork involves considering your riding style, ensuring compatibility, and paying attention to key features like material, brake compatibility, axle type, and design. The Trifox TMK100 stands out as an excellent option, combining lightweight carbon construction with robust performance features. For more details, check it out here.
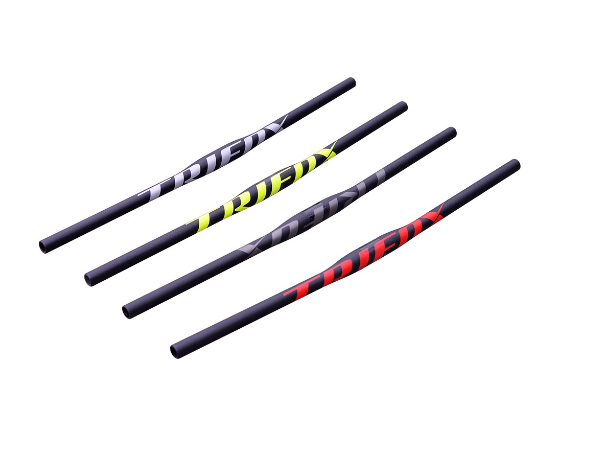
When it comes to enhancing your cycling experience, handlebars play a crucial role. If you're contemplating whether to switch to a flat bar, here are some compelling reasons why it might be the right choice for you. 1. Enhanced Control Flat bars offer superior control, especially in technical terrains. The wider grip allows for better leverage, making it easier to navigate sharp turns, rough trails, and obstacles. This increased control is particularly beneficial for mountain bikers and commuters who face varying conditions daily. 2. Improved Comfort A flat bar promotes a more upright riding posture, which can significantly reduce strain on your back, neck, and wrists. This ergonomic advantage makes long rides more comfortable, allowing you to enjoy your journey without discomfort. 3. Versatility Flat bars are versatile and suitable for various types of riding, from urban commuting to cross-country adventures. Their straightforward design makes mounting accessories like lights, GPS units, and phone holders easier, enhancing your overall riding experience. 4. Durability and Safety Flat bars are typically more robust than their drop-bar counterparts, providing increased durability. Their design also offers better stability and control, contributing to a safer ride, especially when navigating uneven or unpredictable surfaces. Top Pick: Trifox Carbon Flat Bar If you're looking for a high-quality flat bar, check out the Trifox Carbon Flat Bar FHB100. Known for its lightweight yet sturdy construction, this flat bar enhances both control and comfort, making it a great upgrade for your bike. Conclusion Switching to a flat bar can provide better control, improved comfort, and greater versatility, making it a worthwhile consideration for various types of cyclists. Whether you're tackling off-road trails or navigating city streets, the benefits of a flat bar are clear. Upgrade to a flat bar and experience the difference it can make in your riding experience.
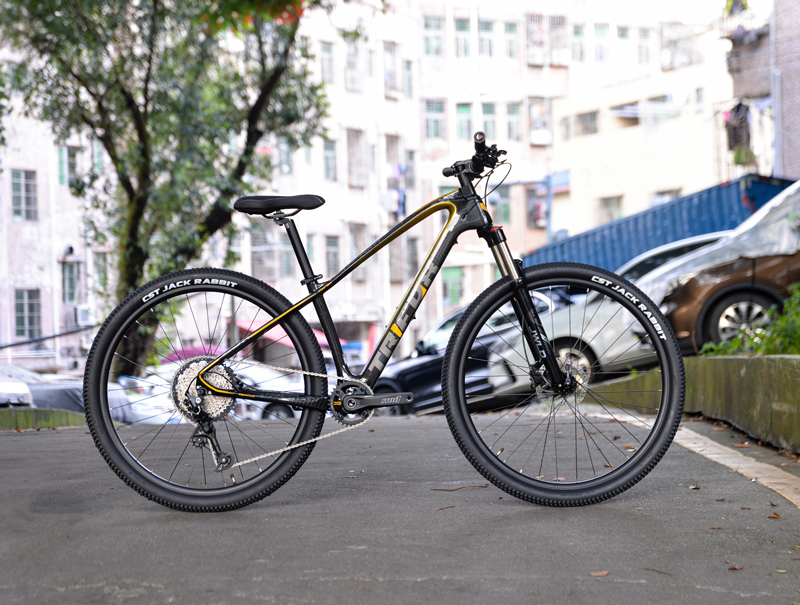
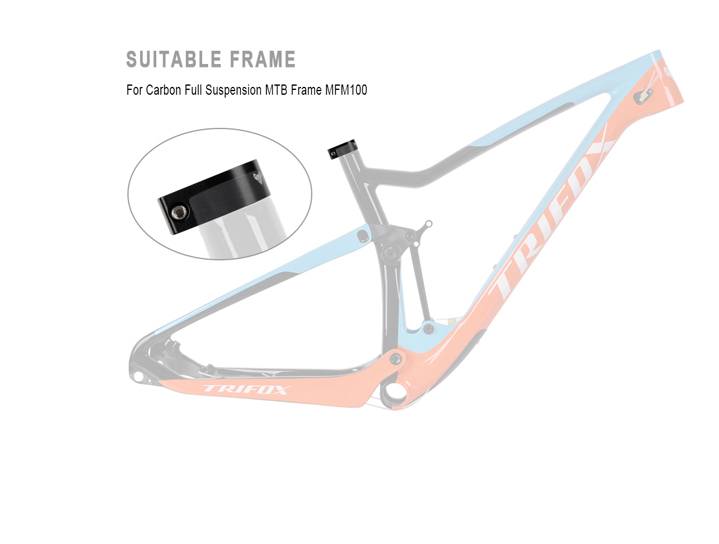
Building a bike with a high-quality hardtail frame can be an incredibly rewarding project, offering customization and performance tailored to your specific needs. Here's a step-by-step guide to help you get started. 1. Choose the Right Frame Start with a reliable and high-quality frame like the Trifox Carbon MTB Hardtail Frame MFM200. Known for its lightweight construction and durability, this frame provides an excellent foundation for your build. 2. Gather Essential Components Next, you'll need to gather all essential components: Fork: Choose a suspension fork that matches your riding style. Groupset: A high-quality groupset ensures smooth shifting and efficient power transfer. Wheels and Tires: Select wheels that are strong yet light, along with tires suited for your terrain. Brakes: Reliable disc brakes offer superior stopping power. 3. Assemble the Drivetrain Install the bottom bracket and crankset first, followed by the chain and derailleur. Ensure everything is aligned correctly for optimal performance. 4. Install the Fork and Handlebars Slide the fork into the head tube and secure it with the stem. Attach the handlebars, making sure they are at a comfortable height and angle. 5. Add the Wheels and Brakes Mount the wheels onto the frame and install the disc brakes. Make sure the brakes are properly aligned to avoid any rubbing against the rotors. 6. Final Adjustments Adjust the saddle height, handlebar position, and brake lever reach to fit your body perfectly. Tighten all bolts securely and check for any loose parts. 7. Test Ride Before hitting the trails, take your new bike for a test ride. Ensure everything functions smoothly and make any necessary tweaks. Conclusion Building a bike with a high-quality hardtail frame like the Trifox Carbon MTB Hardtail Frame MFM200 is a fulfilling endeavor that results in a personalized, high-performance ride. Follow these steps for a successful build and enjoy the unmatched satisfaction of riding a bike you've built yourself. Happy trails!
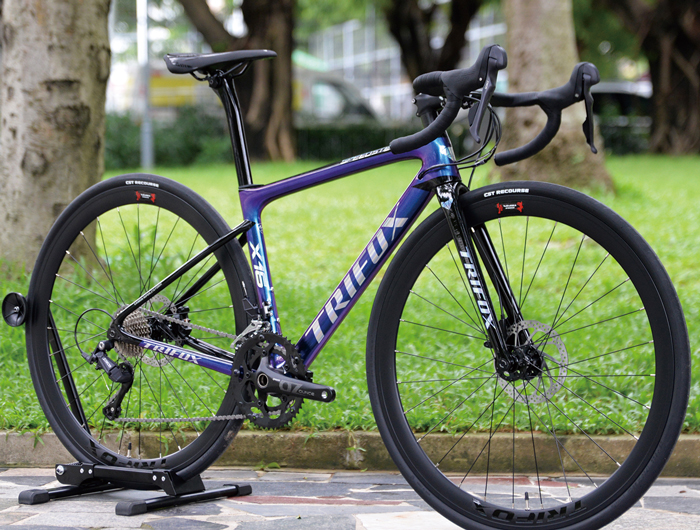
Investing in an ultra-light road bicycle can be a game-changer for any cyclist, whether you're a seasoned racer or a weekend warrior. But what exactly makes these bikes worth the investment? Let's break it down. 1. Speed and Performance The primary advantage of an ultra-light road bicycle is its enhanced speed and performance. Lighter bikes require less energy to accelerate and maintain high speeds, making them ideal for competitive racing and long-distance events. The reduced weight not only aids in quicker sprints but also improves climbing efficiency, allowing you to tackle hills with greater ease. 2. Maneuverability and Control An ultra-light frame significantly boosts maneuverability, giving you more precise control over your bike. This is particularly beneficial in tight corners, descents, and technical sections of your ride. Enhanced control leads to improved safety and confidence, letting you focus on pushing your limits. 3. Reduced Fatigue Carrying less weight means exerting less effort, which translates to reduced rider fatigue. Over long rides, this can make a substantial difference in your endurance and overall enjoyment. By conserving energy, you can ride longer and recover faster. 4. Aesthetic and Technological Innovation Ultra-light road bicycles often feature cutting-edge technology and sleek designs. Materials like carbon fiber offer not just a reduction in weight, but also superior strength and vibration dampening properties. These bikes are a blend of form and function, catering to cyclists who appreciate both aesthetics and performance. Top Pick: Trifox Ultra Light Road Bicycle For those serious about upgrading their ride, consider the Trifox Ultra Light Road Bicycle. Known for its exceptional build quality and innovative design, this bike offers all the benefits of ultra-light cycling while maintaining durability and style. Conclusion An ultra-light road bicycle is more than just an upgrade; it's an investment in speed, control, and riding pleasure. Whether you're aiming to shave seconds off your race time or simply enjoy a more effortless ride, the benefits are undeniable. Make the leap to an ultra-light road bike and experience the difference it can make on every ridd.

When it comes to optimizing your mountain bike, selecting the right components can make a significant difference in your riding experience. Among the many upgrades available, a carbon riser handlebar stands out for its numerous benefits. Let's delve into why choosing a carbon riser handlebar could be the perfect enhancement for your mountain biking adventures. Lightweight and Strong One of the most compelling reasons to opt for a carbon riser handlebar is its lightweight nature. Carbon fiber is known for its outstanding strength-to-weight ratio, making it an ideal material for handlebars. By reducing the weight of your bike's front end, you can achieve better maneuverability and control, especially on technical trails. This weight reduction is not just about performance; it also means less fatigue during long rides, allowing you to push your limits with greater ease. Enhanced Vibration Dampening Mountain biking often involves navigating rough terrains that can transmit a lot of vibration to your hands and arms. A carbon riser handlebar excels in damping these vibrations, offering a smoother and more comfortable ride. This feature is particularly beneficial during extended rides or on trails with constant bumps and jolts. Improved Riding Position Riser handlebars are designed to elevate the rider’s position, providing a more upright stance. This posture not only enhances comfort but also improves visibility and control over the bike. For riders who prefer a laid-back yet confident riding style, a riser handlebar is indispensable. The increased height also facilitates easier handling during descents and sharp turns. Aesthetic Appeal Let’s not overlook the aesthetic advantage. Carbon riser handlebars have a sleek, modern look that can instantly upgrade the appearance of your bike. With clean lines and a premium finish, they add a touch of sophistication to your setup. Durability Carbon fiber is incredibly durable and resistant to fatigue, making it a reliable choice for demanding off-road conditions. Unlike aluminum handlebars, which can bend or corrode over time, carbon handlebars maintain their integrity and performance for the long haul. Top Pick: Trifox Carbon Riser Handlebar If you're considering upgrading to a carbon riser handlebar, check out the Trifox Carbon Riser Handlebar RHB300. Known for its exceptional quality and engineering, this handlebar offers all the benefits mentioned above. Designed with precision, it promises to enhance your mountain biking experience by combining strength, flexibility, and style. Conclusion Choosing a carbon riser handlebar for your mountain bike is more than just a performance upgrade; it’s an investment in comfort, durability, and overall riding enjoyment. Whether you're a seasoned rider or a beginner looking to improve your setup, the advantages of a carbon riser handlebar are clear. From reduced weight and enhanced vibration dampening to improved riding position and aesthetic appeal, a carbon riser handlebar is a versatile component that can significantly elevate your mountain biking experience. Make the switch today and feel the difference on your next ride!
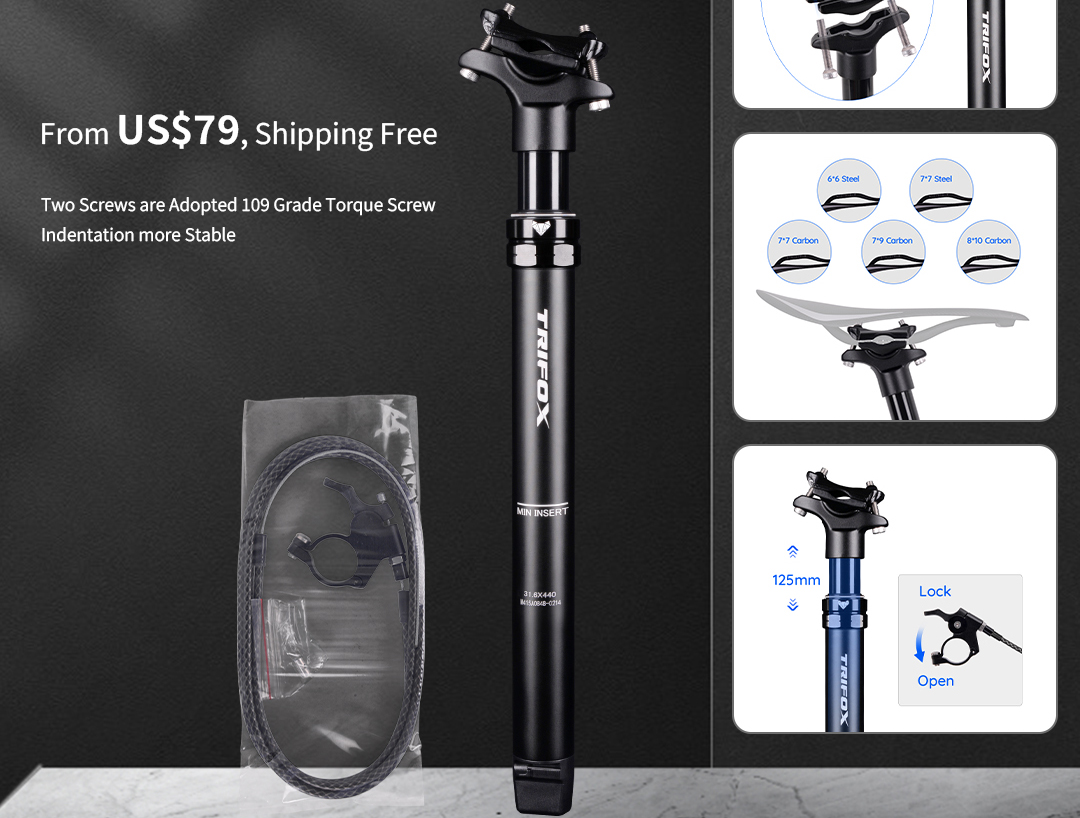
When it comes to enhancing your biking experience, investing in new components can make a world of difference. One upgrade that has gained immense popularity among mountain bikers is the dropper seatpost. But is it the upgrade your bike needs? Let’s explore the benefits and considerations to help you decide. What is a Dropper Seatpost? A dropper seatpost is a type of adjustable seatpost that allows the rider to change the height of the saddle on the fly, typically using a remote lever mounted on the handlebars. This feature is invaluable for mountain bikers who navigate varying terrains and need to adjust their saddle height frequently for optimal performance and safety. Key Benefits of a Dropper Seatpost Improved Control and Safety:Lowering the saddle while descending steep or technical trails lowers your center of gravity, providing better balance and control. This leads to increased confidence and safety on challenging descents. Enhanced Climbing Efficiency:At full height, a dropper seatpost allows you to maintain an efficient pedaling position while climbing. This dual functionality ensures that you’re always in the best position for the section of the trail you're tackling. Versatility:Whether you’re hitting jumps, navigating rocky terrain, or cruising down smooth paths, a dropper seatpost adapts to your needs. This adaptability makes it an essential component for avid mountain bikers who face diverse trail conditions. Reduced Fatigue:Constantly stopping to manually adjust your saddle can be tiring and interrupt your flow. With a dropper seatpost, adjustments are seamless and quick, allowing you to focus more on riding and less on fiddling with your bike. Considerations Before Upgrading Compatibility:Ensure your bike frame is compatible with a dropper seatpost. Some older frames might not have the required routing for internal cables or the correct diameter for the seatpost. Cost:Dropper seatposts can be a significant investment. However, considering the improvement in performance and enjoyment, many riders find it a worthy upgrade. Maintenance:Dropper seatposts have moving parts and hydraulic systems that may require maintenance over time. Consider the additional upkeep when deciding on this upgrade. Top Pick: Trifox Dropper Seatposts If you're convinced that a dropper seatpost is the upgrade your bike needs, check out the Trifox Dropper Bike Seatposts. Trifox offers high-quality dropper posts known for their reliability and smooth operation. With options catering to different budgets and requirements, you’re sure to find a model that fits your biking style and enhances your overall ride. Conclusion A dropper seatpost is more than just a luxury; it's a practical upgrade that can significantly improve your mountain biking experience. By offering better control, efficiency, and versatility, it can transform your rides and boost your confidence on the trails. Evaluate your needs and consider making this valuable addition to your bike setup.
Matching your bike frame with the right rim brakes is essential for achieving better control and a safer ride. Rim brakes are a popular choice for road bikes due to their lightweight design and effective braking performance. Here’s how to ensure your bike frame and rim brakes work seamlessly together for optimal control. First, consider the compatibility of your bike frame with rim brakes. Not all frames are designed to accommodate rim brakes, especially modern models that may favor disc brakes. Check the manufacturer’s specifications to ensure your frame has the necessary mounts and clearances for rim brakes. This includes confirming the placement and type of brake bosses on the frame and fork. Next, evaluate the brake calipers. Rim brakes typically come in two main types: caliper brakes and cantilever brakes. Caliper brakes are common on road bikes, offering direct pull and consistent braking power. Ensure the reach of the caliper brakes matches the distance from the brake mounts to the rim. Cantilever brakes, often found on cyclocross and touring bikes, provide more clearance for wider tires and are ideal for mixed terrain. The wheel size and tire width are also crucial factors. Rim brakes need to align perfectly with the braking surface on the rim. For instance, 700c wheels are standard on road bikes, and the brake pads should make full contact with the rim for maximum braking efficiency. Wider tires might require longer-reach brakes to fit properly within the frame and fork. Consider the material of your rims as well. Alloy rims are commonly used with rim brakes because they offer a solid braking surface and good heat dissipation. Carbon rims can also be used but often require specific brake pads to avoid overheating and ensure reliable performance. Matching the brake pads to the rim material is critical for consistent braking power and longevity. Pay attention to the brake levers and cables. High-quality brake levers and well-maintained cables ensure smooth operation and responsive braking. Make sure the brake levers are compatible with your brake calipers. Regularly check and replace worn cables to maintain optimal performance. Lastly, fine-tuning and regular maintenance are key. Properly adjusting the brake pads to sit parallel to the rim and ensuring even pad wear can significantly improve control. Regularly inspect and replace brake pads as needed to maintain effective braking. In conclusion, matching your bike frame with the right rim brakes involves considering frame compatibility, brake type, wheel size, rim material, and brake components. By paying attention to these details, you can achieve better control and a safer ride. For high-quality rim brakes and bike frames, explore trusted brands and components.


