


How to train for climbing short slopes 1.do some repetitive hill climbing Find a hill that’s not too steep, and divide it into three distinct sections. Ideally, the first section has a suitable slope, of about 8-10%, then the middle section is slightly flatter, and the last section is the steepest, with a slope of about 10-12%. The length is preferably 2-3 minutes. Start to climb the hill repeatedly 8 times, start timing at the bottom of the mountain, and stop at the top of the mountain. You can sprint at the starting point, then sit down and step on a slightly flat section of the road, leave the seat for the last section, and sprint to the top with all your strength. Effectively recover until your breathing becomes normal, then start the next climb. Try to use the same amount of time for all 8 reps, and if you get too slow, stop the workout, cool down, and try again next week. Record the time of each climb, and also pay attention to the weather and wind direction, and you can compare seasons. 2.change your pace On moderately steep long slopes, try changing pace exercises, start at a moderate pace, then mark 250 meters ahead of you and start sprinting off the saddle, doing your best (this is similar to running a farrek run ). Reach the marked point, return to a moderate pace, and repeat this many times until you reach the top of the hill. 3.practice brow sprint You often see riders climb to the top of the hill, stop pedaling and go coasting before switching to the big ring, which is a complete waste of time. Try practicing brow sprints. When you reach the top, you immediately cut to the big plate and start sprinting, so that you can reach full speed on the downhill. (brow refers to eyebrows, like a curve from uphill to downhill) It’s a very good attacking position in a race because you’ll notice most of the drivers are coasting and you can open up the gap quickly and you’ll be far out when the others are hesitating. Even in the TT, we can see riders coasting in the brow position, which loses precious seconds, don’t hesitate to cut to the market and start charging.
Some people say to “ride more”, but I think the reply “ride more” is the same as when someone asks how to lose weight and you say “exercise more”, although it is correct, it is nonsense. The first: To explain, warm up for 20 minutes, then keep riding for 20 minutes in FTP. FTP means the maximum power you can sustain for an hour. Or you can keep it at FTHR, which is the maximum heart rate that can be maintained within an hour. Rest for 5 minutes, ride at leisure, then do another set, then ride at leisure for 15 minutes, and go home. Before doing it, you’d better find a road with no traffic lights, then ride for 20 minutes, try your best, feel your own threshold, and then ride at a slightly slower speed than this every time you train. The advantage of this training is that the intensity is not very high and the time requirement is not long. Very practical for ladies. The disadvantage is that the progress is relatively slow, and it takes at least two times a week to see the effect. After slowly improving, you can speed up the speed in two sets of 20 minutes, exceeding your own FTP. The second type: Warm up for about 20 minutes and then do 3 sets of 8 minutes each. You must exceed your FTP. The best result is that you feel that you are about to die at the end of the third set, but the training is over when you are about to collapse. Last 15 minutes of leisure riding, head home. The intensity is higher than that of the previous training, and the time requirement is not too high. You can try again after you have made some progress. Be careful not to go too fast in the first group, or you will go crazy in the end. The above two pieces of training are what I recommend to girls. I am particularly curious about the mentality of a certain respondent when he said “150 kilometers to explode”. Everyone’s physical fitness is different. Not everyone has the physical strength, energy, and time to ride 150 kilometers. It’s like when someone asks you how to improve your 5-kilometer performance, you answer him and say you should run a marathon and run hard. The above two training times I recommend are about 1 hour, you definitely have time, and the effect is absolutely guaranteed. Finally, a little technical question: Riding with a high cadence and the low gear ratio is the most effective way. Don’t worry about whether your legs are strong enough. The landlord is a girl, so she should understand where her strengths lie. Women’s muscle growth is much slower than men’s, but there is no difference in the ability to improve cardiorespiratory capacity. A certain amount of muscle is indeed very important, but if you ride a lot, you will find that road bikes do not necessarily require how much muscle, but to see whether your cardiopulmonary capacity is strong or not, and whether your body is thin or not. The leg muscles of the top sprinters in the Tour de France burst out, but they were still pulled by the seemingly weak climbers when they climbed the hill. So don’t think that you have to build muscles with a large plate, it is better to use a small plate with a high gear ratio and high cadence. What does it matter as long as the speed is the same. Generally speaking, it is better to keep the cadence around 90-100 when riding at FTP, and it is not good if it is too high or too low. Breathing skills are very important but often overlooked. The importance of inhalation is self-evident, but the host should also pay attention to exhalation, and blow out the exhaust gas in the body with his mouth, just like blowing a trumpet. sitting posture. Under normal circumstances, the hands are placed on the shifting handle, but when you want to go all out, you might as well try to put your hands on the handlebars. This aerodynamic posture helps to further increase your speed. You can practice attacking each other with others so that your improvement will be faster.
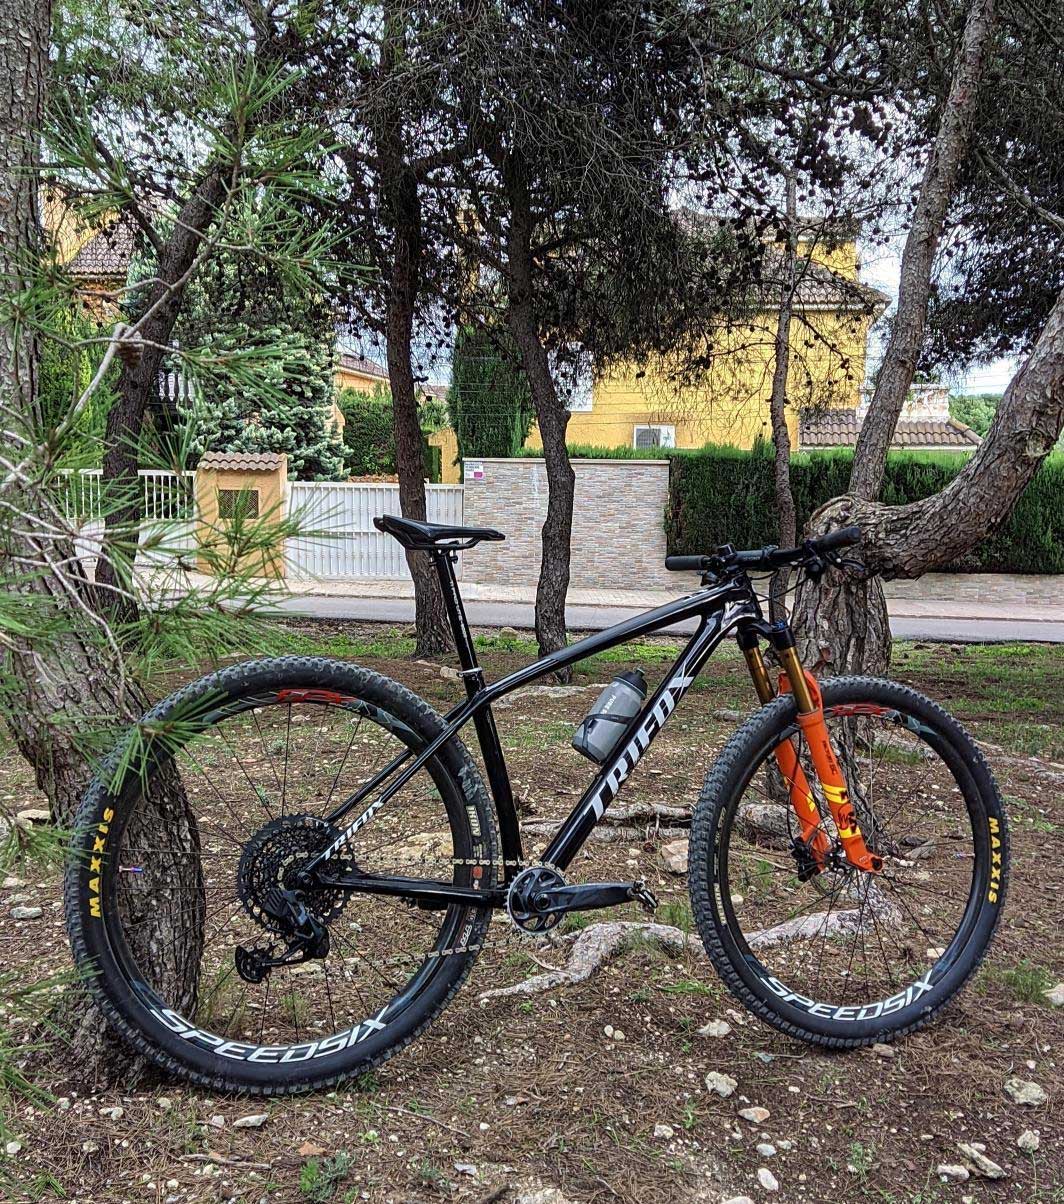
Carbon fiber has long been hailed as the ultimate material for cycling frames, known for its lightweight and strength. But what if you could take that technology to the next level? That's precisely what Trifox Bike has done, introducing a revolutionary new design that takes carbon fiber frames to a whole new level.Trifox Bike is a bike manufacturer that specializes in creating whole bikes, carbon bike frames, carbon bike wheels, etc. entirely made from carbon fiber. Unlike traditional bike frames that use carbon fiber in certain parts of the frame, Trifox Bike's design incorporates carbon fiber into every component of the bike. This results in a bike that is not only lighter but also stronger and more responsive than traditional bikes.The use of carbon fiber in cycling has been a game-changer since its introduction, as it significantly reduces the weight of the bike while also increasing its strength. Trifox Bike takes this technology to the next level by creating a whole bike, bike frame, bike wheel, etc. out of carbon fiber. This innovative design allows for a much greater degree of customization, as every aspect of the bike can be tailored to the rider's needs.One of the most significant advantages of the Carbon Bike Frame SDY20 is its weight. The bike's lightweight construction makes it much easier to handle, accelerating faster and climbing hills with less effort. The carbon fiber also provides an incredibly responsive ride, allowing for maximum power transfer and precise handling.Another benefit of the Carbon Bike Frame SDY20 is its durability. Carbon fiber is known for its strength, and SDY20's design ensures that every component of the bike frame is built to last. This means that the bike can withstand even the toughest terrain, giving riders the confidence to push themselves to new limits.In addition to its technical advantages, SDY20's design is also aesthetically stunning. The carbon fiber gives the bike a sleek and modern look, which is sure to turn heads on any ride.Overall, Carbon MTB Frame SDY20 is a groundbreaking advancement in cycling technology. Its innovative design sets a new standard for lightweight, strong, and responsive bikes, providing a whole new level of customization and performance for riders. If you're looking for the ultimate cycling experience, then Ultra Light 29er Carbon Hardtail MTB Frame SDY20 is the way to go.
Carbon fiber bikes have become increasingly popular in recent years due to their lightweight, stiffness, and performance. However, buying a carbon bike can be a daunting task, especially for those who are new to cycling or unfamiliar with the technology. In this article, we’ll provide a comprehensive guide to help you choose a satisfactory carbon bike that meets your needs and budget.Step 1: Define Your Riding GoalsThe first step in buying a carbon bike is to define your riding goals. Consider factors such as the type of riding you plan to do, your fitness level, and your budget. Are you looking for a racing machine, an endurance bike, or a versatile all-rounder? Knowing your goals and budget will help you narrow down your options and focus on the features that are most important to you.Step 2: Choose the Right FrameThe frame is the heart of any bike, and it’s no different for carbon bikes. When choosing a carbon frame, consider factors such as weight, stiffness, and comfort. Also, consider the geometry of the frame, which can significantly impact the bike’s handling and performance. Finally, consider the manufacturer's reputation and warranty.Step 3: Select the Right ComponentsOnce you’ve chosen your frame, it’s time to select the right components. This includes the drivetrain, brakes, wheels, handlebars, stem, and seat post. Consider factors such as weight, performance, and compatibility with your frame. Remember, the right components can significantly impact the bike’s performance and feel.Step 4: Choose the Right SizeChoosing the right size is critical to ensure comfort, efficiency, and performance. Carbon bikes come in a range of sizes, and it’s important to choose the right one for your body type and riding style. Consider factors such as the length of the top tube, the height of the seat post, and the length of the stem.Step 5: Test Ride and AdjustBefore making a final decision, it’s essential to test ride the bike and make adjustments to ensure a perfect fit. Pay attention to factors such as saddle height, handlebar reach, and cleat position. A good bike shop will help you make these adjustments and ensure that your new carbon bike fits you perfectly.In conclusion, buying a carbon bike can be a daunting task, but by following these steps and taking your time, you can choose a satisfactory carbon bike that meets your needs and budget. Remember, it’s essential to define your riding goals, choose the right frame and components, choose the right size, and test ride and adjust the bike to ensure a perfect fit. With the right bike, you’ll be able to enjoy the benefits of carbon fiber technology and take your cycling performance to the next level.
Building a new carbon fiber road bike is an exciting process that requires a significant investment of time and money. However, the end result is a high-performance machine that is tailored to your individual needs and preferences. In this article, we’ll take a closer look at the process of building a new carbon fiber road bike.Step 1: Define Your Goals and BudgetThe first step in building a new carbon fiber road bike is to define your goals and budget. Are you looking for a racing machine, a comfortable endurance bike, or a versatile all-rounder? Once you have a clear idea of what you’re looking for, you can start researching the available options and setting a budget.Step 2: Choose Your FrameThe next step is to choose your frame. Carbon fiber frames are popular for their lightweight and stiff construction, which offers excellent power transfer and responsiveness. When choosing a frame, consider factors such as weight, stiffness, comfort, and aerodynamics. Also, consider the compatibility with your desired components such as brakes, bottom brackets, and wheelsets.Step 3: Select Your ComponentsAfter choosing your frame, it’s time to select your components. The choice of components can significantly impact the performance and feel of your bike. Consider factors such as the type of drivetrain, brakes, wheels, handlebars, stem, and seat post. Each of these components has a variety of options to fit your preferences and budget.Step 4: Assemble Your BikeOnce you have your frame and components, it’s time to assemble your bike. Depending on your level of experience, you may choose to do this yourself or have it done by a professional bike mechanic. Assembling a bike involves installing components such as the headset, bottom bracket, seat post, and wheels. It’s important to take your time and follow the manufacturer's instructions closely to ensure a safe and reliable build.Step 5: Test and AdjustThe final step is to test and adjust your bike. This involves ensuring that everything is properly tightened and adjusted, and taking the time to properly fit the bike to your body. Consider factors such as saddle height, handlebar reach, and cleat position. After this is done, take your bike for a test ride to ensure everything is working as expected.In conclusion, building a new carbon fiber road bike is a rewarding process that allows you to create a high-performance machine tailored to your individual needs and preferences. By following these steps and taking your time, you can create a bike that will provide you with years of enjoyment on the road.
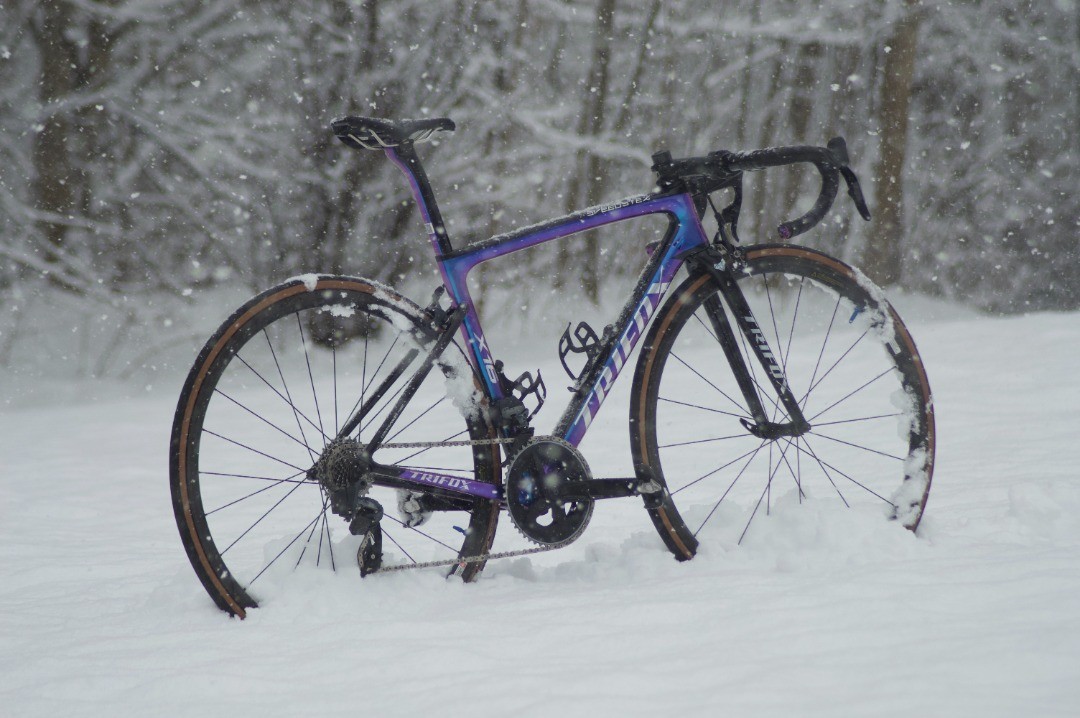
Day 1:The snow has fallen heavily overnight and the streets are slick with ice. I bundle up in my warmest clothes, pack a thermos of hot chocolate, and set out on my winter cycling adventure. It’s a bit nerve-wracking at first, but as I navigate the icy terrain, I find myself enjoying the challenge. The crisp winter air fills my lungs and I feel invigorated as I pedal through the quiet, snow-covered streets.Day 5:The snow has been steadily falling all week, and I’m starting to get used to the routine of bundling up and braving the elements. The hardest part is keeping my glasses from fogging up, but I’ve found a solution in the form of ski goggles. Today, I venture out to a nearby park that I’ve never explored before. The snow-covered trees and frozen lake are breathtaking, and I feel grateful to be able to experience this serene winter wonderland on my bike.Day 10:I’m starting to feel like a true winter cyclist now. My gear is dialed in, and I’m getting used to the chill in the air. Today, I take a longer ride out of the city and into the countryside. The snow-covered fields and rolling hills are a stark contrast to the urban landscape I’m used to, and I relish the feeling of freedom as I pedal along the quiet roads.Day 15:It’s been a tough week, with bitter cold temperatures making it difficult to motivate myself to go outside. But I remind myself of how alive I feel when I’m cycling through the winter landscape, and I force myself to bundle up and get out there. As always, the feeling of accomplishment is worth it once I’ve completed my ride.Day 20:Today, I decide to try something new and join a group of winter cyclists for a group ride. It’s a different experience riding with others, and I find myself enjoying the camaraderie of a shared experience. We take a challenging route through the city, with steep hills and winding roads, but I feel a sense of pride as I pedal alongside my new winter cycling companions.Day 25:As the end of February approaches, I’m starting to feel a bit melancholic about the end of winter. It’s been a tough year, but winter cycling has given me a sense of purpose and joy that I didn’t know I was missing. I vow to keep cycling through the rest of the winter, and to continue exploring the beauty of the season on two wheels.Day 30:The last day of February has arrived, and with it, the end of my winter cycling diary. As I pedal through the snowy streets one last time, I reflect on the past month and how much I’ve grown as a cyclist and as a person. Winter cycling has taught me resilience, perseverance, and the importance of embracing new experiences. As I reach my final destination, I take a moment to savor the stillness of the winter landscape and the satisfaction of completing my goal. Although my winter cycling diary may be ending, I know that the lessons and memories I’ve gained will stay with me for a lifetime.
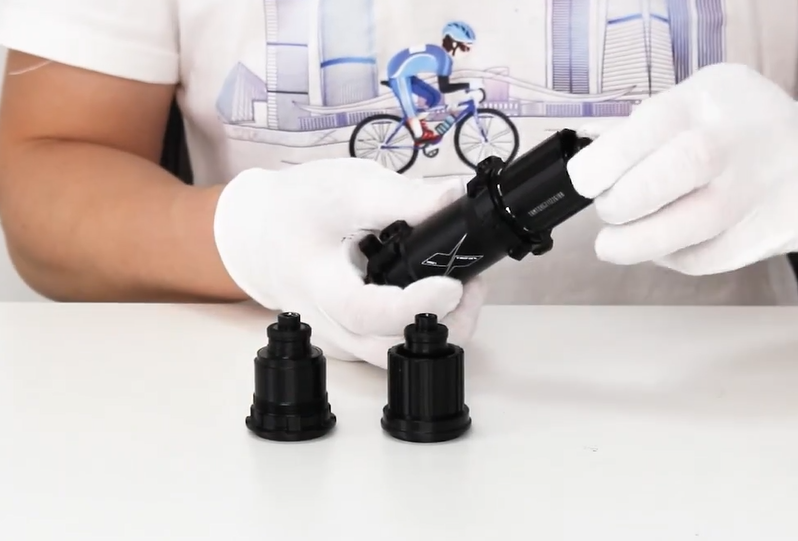
A bicycle hub is a vital component of any bicycle that is responsible for supporting the wheel and reducing friction. It is an essential part that allows the wheel to rotate smoothly and efficiently, making it possible for the rider to travel long distances with ease. In this article, we will explore the various types of bicycle hubs and their functions.Types of Bicycle HubsThere are two main types of bicycle hubs, front and rear hubs. The front hub is located at the front wheel of the bicycle, while the rear hub is located at the back wheel.Front HubThe front hub typically consists of a central spindle that is attached to the wheel rim and two bearings that allow the wheel to rotate smoothly. The front hub also contains an axle that is attached to the fork of the bicycle. The fork is the part of the bicycle that holds the front wheel in place.Rear HubThe rear hub is more complex than the front hub and has additional components that are designed to accommodate the bicycle's gears. The rear hub also contains a freewheel mechanism, which allows the rider to pedal backward without engaging the chain and the rear wheel. This feature is particularly useful when the rider needs to coast or brake.Function of Bicycle HubsBicycle hubs serve several essential functions, including:Support the Wheel: Bicycle hubs support the weight of the rider and the bicycle, making it possible for the wheel to rotate smoothly.Minimize Friction: Bicycle hubs are designed to reduce friction and improve the bike's efficiency. The bearings within the hub are lubricated with grease or oil to reduce friction and ensure smooth rotation.Transfer Power: Bicycle hubs transfer power from the rider's legs to the wheel, allowing the bike to move forward.Accommodate Gears: Rear hubs are designed to accommodate the bicycle's gears, making it possible for the rider to climb hills or ride faster on flat surfaces.In conclusion, bicycle hubs are a crucial component of any bicycle, and they play a significant role in ensuring a smooth and efficient ride. Whether you are a professional cyclist or a casual rider, it is essential to have a high-quality bicycle hub that is designed to support your weight and reduce friction. If you are looking to purchase a new bicycle or upgrade your existing one, make sure to invest in a high-quality hub that meets your needs and budget.

I believe that in recent years, many cyclists have tried and experienced the excellence and convenience of the tubeless system in the development of bicycles. The tubeless system not only can quickly repair the tires, but also improves the efficiency, comfort, handling, and stability, combined with the appropriate specifications. The wheelset, rim, and tire can be perfectly compatible, achieving high air tightness, more stable performance, and a trans-epochal design that can prevent tires from breaking.The tubeless system is characterized by no need for air compressors, which makes cycling easier for cyclists!There are 5 steps to replace tubeless tires. The parts to be prepared are tubeless tires, rims with the same specifications, needle-nose pliers, measuring needles, leak-filling fluids, and pumps. When you are ready, let us do it for cyclists. Detailed DIY teaching!1. First of all, disassemble all the accessories on the air nozzle. The air heart is sometimes tightly locked. It is recommended to prepare removal tools, such as needle-nose pliers.2. Find the corresponding position of the air nozzle of the rim, first, insert the air core into the tube body, and then close the tire and the rim.3. Fully squeeze the bead into the joint of the wheelset, check repeatedly to confirm that the two are completely tight, and then lock the nut of the valve after completion.4. Take out the measuring syringe again, and use the scale in the cylinder to accurately measure the amount of leak-filling fluid used. The volume of the leak-filling fluid required by the tires is not the same. Check the required volume of the leak-filling fluid before installing it.5. Finally, use a general pump to inflate the installed tubeless tire.If you don't like tubeless tires, it's okay. You can click here to buy a clincher wheelset. There are multiple specifications for you to choose from Trifox brand, trustworthy.
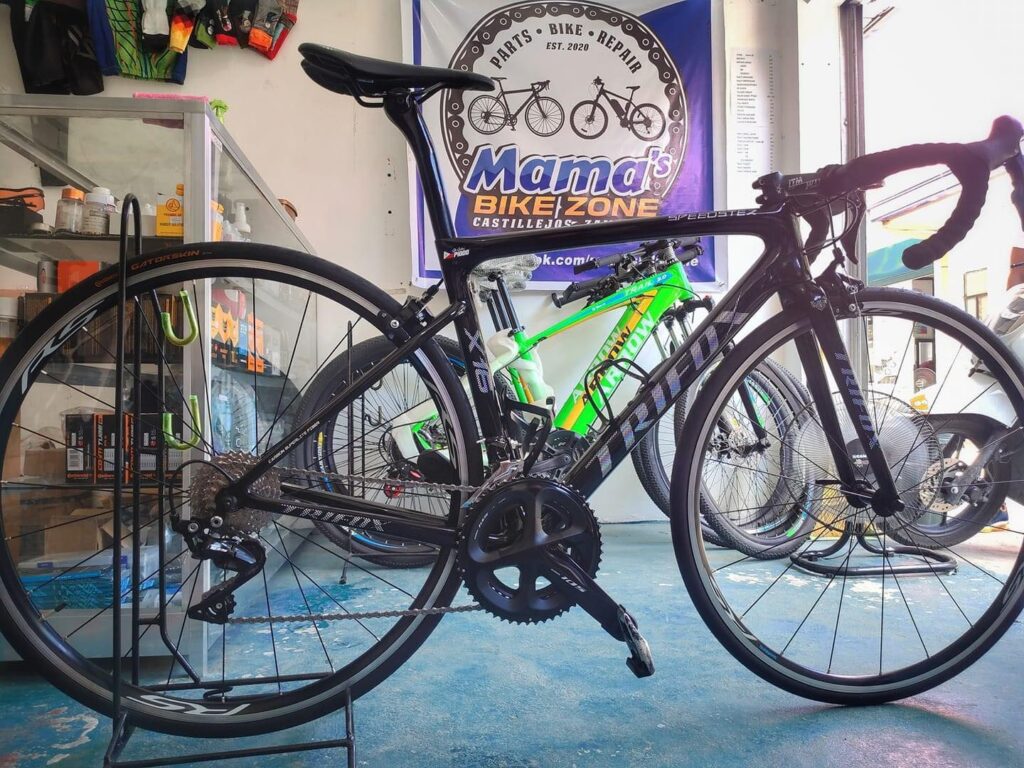
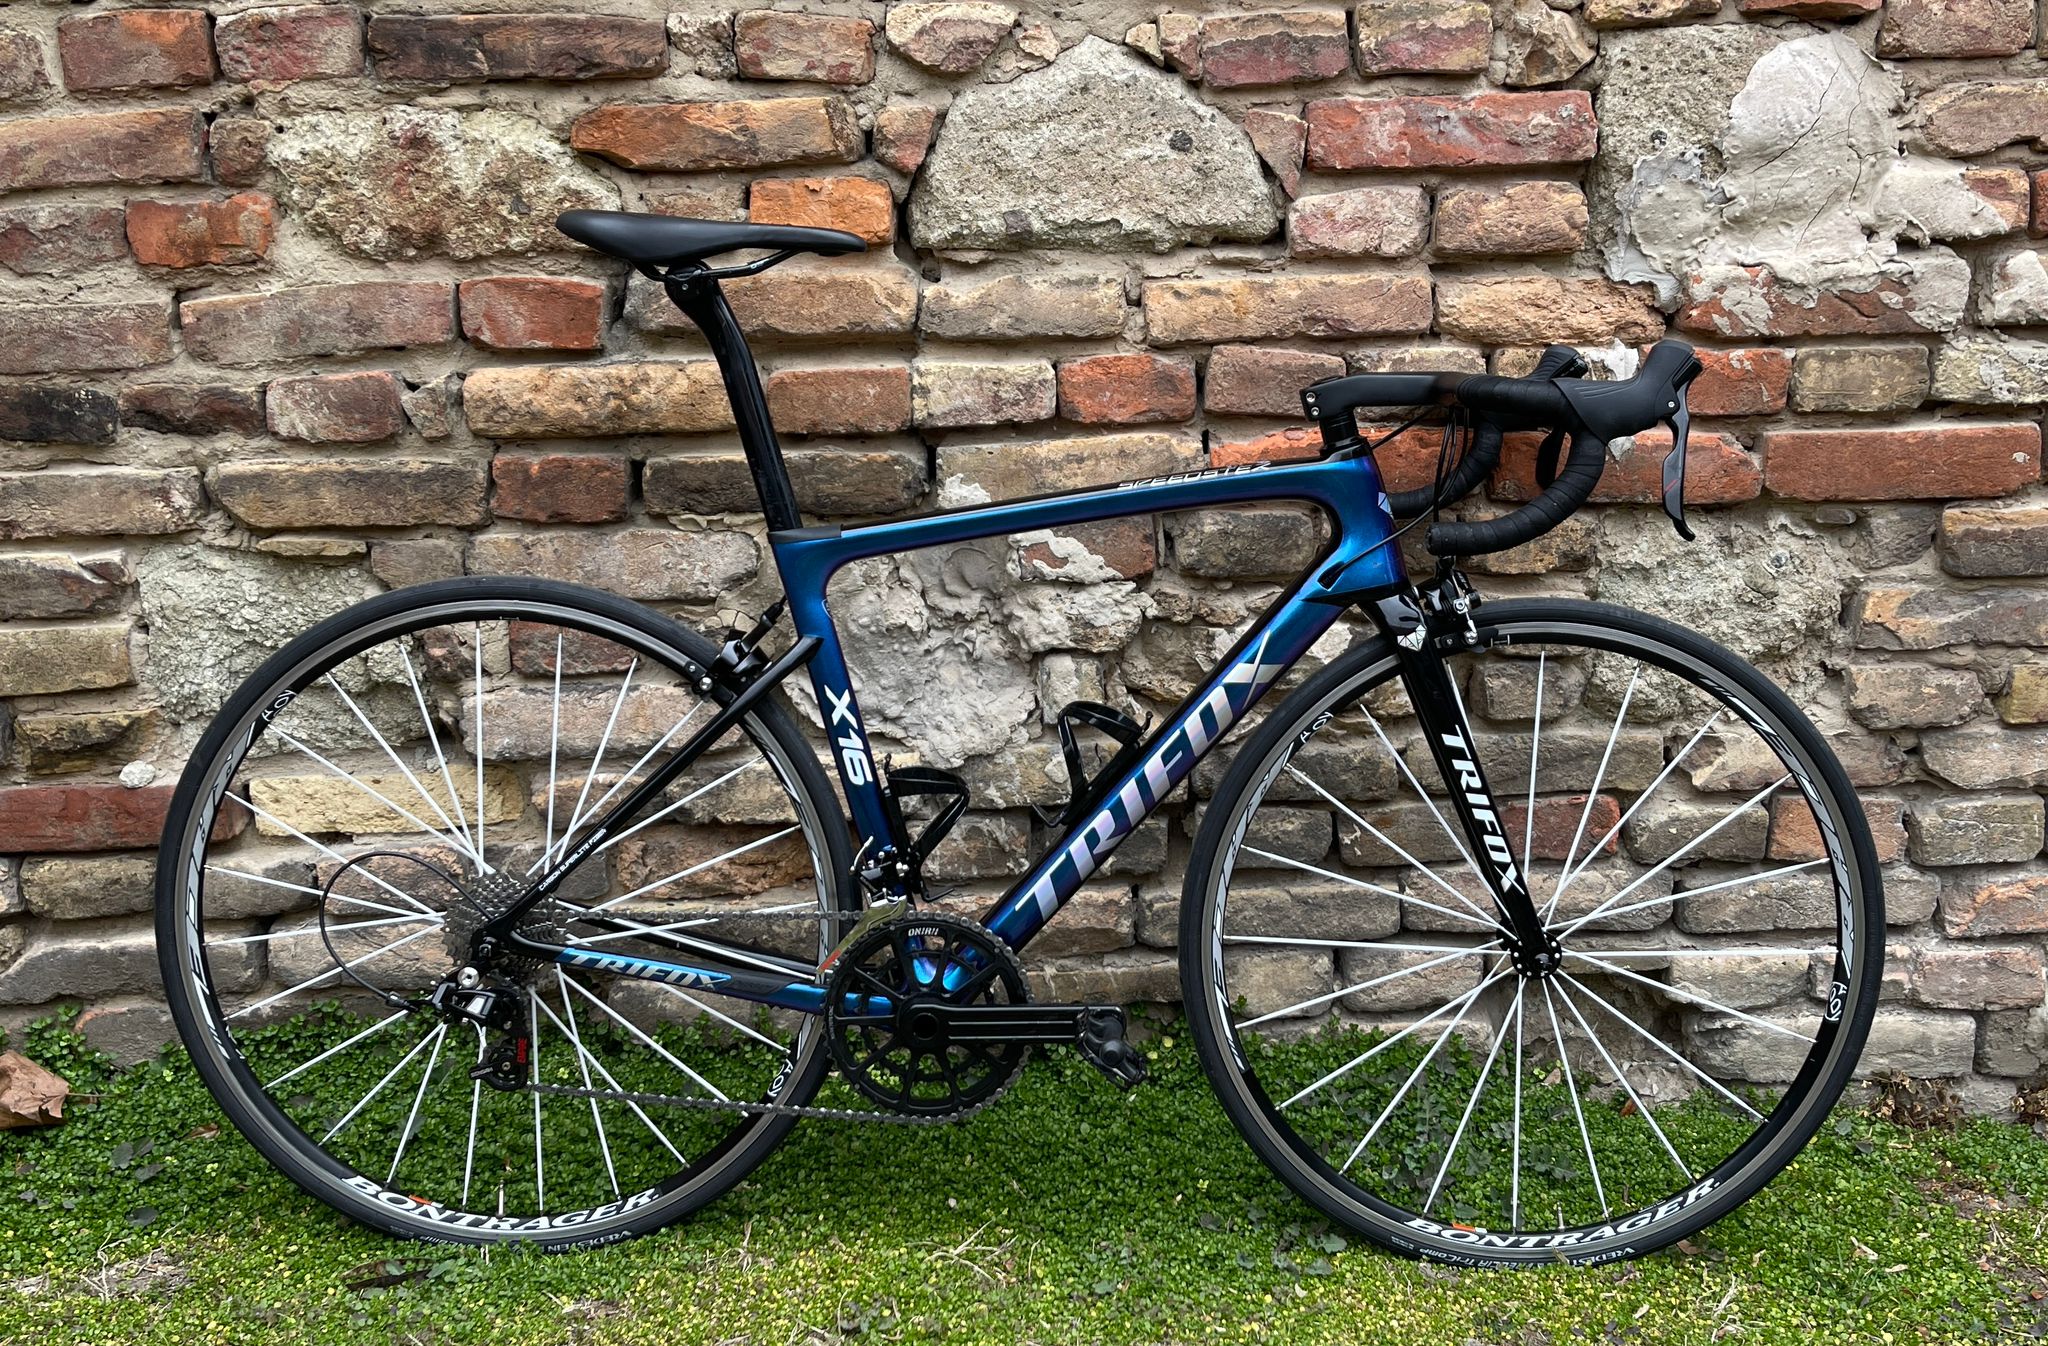
Frame: Carbon Fibre Road Bike Frameset X16Groupset-shimano 105 R7000 – 23k pesosWheelset-shimano RS100 – 5500 pesosTires- continental Gator skin – 3800 pesosSaddle- selle san marco- 650 pesosStem- ITM 7xx – 1200Bartape- pro -850 pesosPedal-shimano 1800 pesos


