


Replacing a freehub might seem daunting, but with the right tools and a bit of guidance, it’s a task any cyclist can handle. A well-functioning freehub ensures smooth shifting and efficient power transfer, making your rides more enjoyable.
1. Gather Your Tools
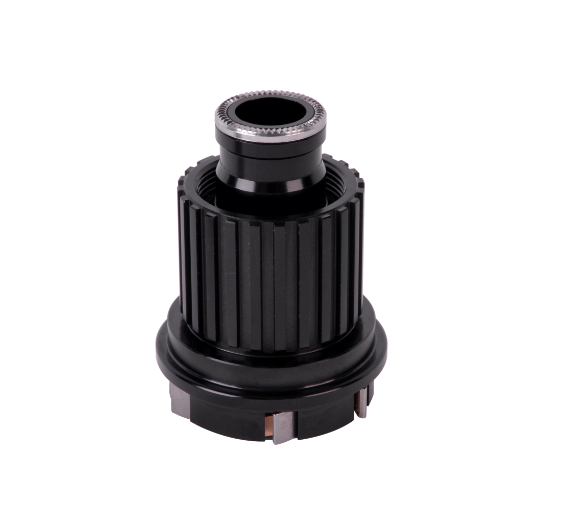
Before you start, ensure you have the necessary tools: a cassette removal tool, chain whip, hex keys (typically 10mm), a rubber mallet, and grease. Additionally, you'll need your new freehub, like the Trifox Freehub Body.
2. Remove the Rear Wheel
First, shift your chain onto the smallest cog to ease wheel removal. Release the quick-release lever or loosen the axle nuts, then carefully remove the rear wheel from the bike frame.
3. Remove the Cassette
Secure the cassette using the chain whip to prevent it from rotating. Insert the cassette removal tool into the lockring and turn it counterclockwise to loosen and remove the lockring. Carefully slide off the cassette cogs and spacers, keeping them in order for reassembly.
4. Remove the Old Freehub
With the cassette removed, locate the bolt that secures the freehub to the hub shell, typically accessible through the center of the hub. Insert the hex key or appropriate tool and turn counterclockwise to unscrew the bolt. Once loosened, gently tap the freehub with a rubber mallet if needed and slide it off the hub shell.
5. Prepare the Hub Shell
Clean the hub shell thoroughly to remove any dirt or debris. Apply a thin layer of grease to the interface where the new freehub will sit. This prevents corrosion and ensures a smooth installation.
6. Install the New Freehub
Align the new Trifox freehub with the hub shell and slide it into place. Secure it by tightening the fixing bolt clockwise using the hex key. Ensure it's snug, but avoid over-tightening as it can damage the freehub or hub shell.
7. Reinstall the Cassette
Slide the cassette cogs and spacers back onto the freehub body in the correct order. Tighten the lockring clockwise using the cassette removal tool until secure.
8. Reinstall the Rear Wheel
Place the rear wheel back into the bike frame. Tighten the quick-release lever or axle nuts securely. Check that the wheel is properly aligned and spins freely without rubbing against the brake pads or frame.
9. Final Check
Shift through all the gears to ensure smooth operation. Listen for any unusual noises and check that the freehub engages and disengages properly. If everything feels smooth, your replacement is successful.
Replacing a freehub, such as the Trifox Freehub Body, is a straightforward process that can significantly enhance your bike's performance. With a few tools and some careful steps, you can ensure your bike is running smoothly and efficiently, ready for your next adventure. Happy riding!


Maintaining and upgrading your Trifox freehub is essential for ensuring smooth, reliable performance on the trails and roads. Proper maintenance can extend the life of your components, while timely upgrades can enhance your riding experience.
Importance of Regular Maintenance
Regular maintenance of your freehub is crucial for several reasons:
Performance: A well-maintained freehub ensures smooth and efficient power transfer from your pedals to the wheels;Durability: Routine care prevents premature wear and tear, extending the lifespan of your freehub;Safety: Properly functioning components reduce the risk of accidents caused by sudden mechanical failures.
Steps to Clean and Lubricate Your Freehub
Remove the Freehub: Start by removing the rear wheel from your bike. Use a wrench to carefully unscrew the freehub from the hub body;Clean Thoroughly: Wipe down the freehub with a clean cloth to remove dirt and grime. Use a degreaser to clean the internal parts, ensuring all old lubricant and debris are eliminated;Inspect for Wear: Check the pawls and ratchets for signs of wear or damage. Look for any cracks or chips in the freehub body;Lubricate: Apply a light layer of freehub-specific lubricant to the pawls and ratchets. Avoid over-lubricating, as excess grease can attract dirt and cause buildup;Reassemble: Carefully reassemble the freehub and reinstall it onto the rear wheel. Ensure all parts are securely tightened.
Signs of Wear and When to Upgrade
Even with regular maintenance, freehubs can wear out over time. Here are some signs that it might be time to upgrade:
Noise: Unusual clicking or grinding noises indicate worn out or damaged pawls and springs;Slippage: If your pedals slip under pressure, the freehub's engagement mechanism may be failing;Difficulty Shifting: Hard-to-shift gears can signal internal issues within the freehub body.
Benefits of Upgrading
Upgrading to a higher-quality Trifox freehub offers several benefits:
Improved Performance: Enhanced engagement mechanisms provide quicker and more precise power transfer;Increased Durability: High-quality materials and construction mean longer-lasting components;Better Riding Experience: Smoother operation and reduced noise contribute to a more enjoyable ride.

Conclusion
Maintaining and upgrading your Trifox freehub is a vital part of bike upkeep. By regularly cleaning and lubricating your freehub, inspecting for signs of wear, and upgrading when necessary, you ensure optimal performance and longevity. For a wide range of high-quality bike components, including freehubs, visit TrifoxBike. Keep your bike running smoothly and enjoy every ride to the fullest!
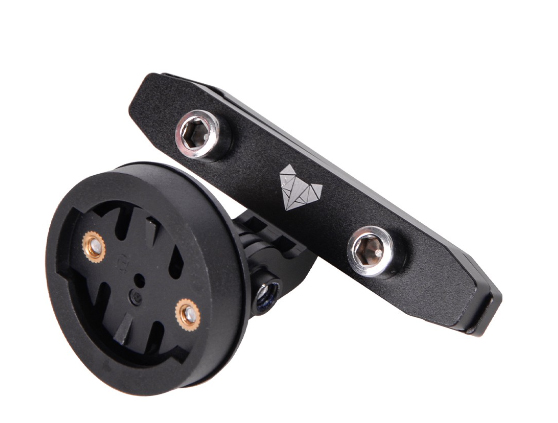
A bike board, often referred to as a bikepacking or adventure board, is essentially a platform that allows cyclists to attach gear, supplies, or even additional seating to their bikes. This versatile accessory makes it possible to transform your regular bike into a cargo-carrying beast, perfect for those who love to explore the great outdoors.
Choosing the Right Bike Board
1. Consider Your Bike Type and Size
The first step in selecting a bike board is to consider the type of bike you have. Different boards are designed to fit various types of bikes such as mountain bikes, road bikes, and touring bikes. Additionally, ensure that the board is compatible with the size of your bike frame to avoid any fitting issues.
2. Evaluate the Board's Weight Capacity
Before making a purchase, check the weight capacity of the bike board. It's crucial to choose a board that can handle the load you plan to carry. Overloading a bike board can lead to handling difficulties and potentially damage your bike.
3. Material Matters
Bike boards are typically made from materials like aluminum, plastic, or carbon fiber. Aluminum boards are durable and relatively lightweight, making them a popular choice for many cyclists. Plastic boards may be lighter but less durable, whereas carbon fiber offers the best strength-to-weight ratio but at a higher price point.
4. Ease of Installation
Look for a bike board that offers easy installation and removal. Some boards come with quick-release systems, allowing you to attach or detach the board without tools, which is especially handy if you're frequently switching between cargo-carrying and standard biking modes.

Using Your Bike Board for Outdoor Adventures
1. Packing Smart
When loading up your bike board, distribute the weight evenly to maintain balance. Heavier items should be placed closer to the bike frame, while lighter items can be positioned further out. This helps in keeping the bike stable and manageable, even on rough terrains.
2. Securing Your Load
Use bungee cords, straps, or cargo nets to secure your gear to the bike board. Ensure everything is tightly fastened to prevent items from shifting or falling off during your ride. It's also a good idea to check the security of your load periodically, especially after riding through bumpy sections.
3. Protecting Your Gear
Consider using waterproof bags or covers to protect your gear from the elements. Sudden rain showers or muddy trails can quickly soak or dirty your belongings, so it's best to be prepared.
4. Planning Your Route
With additional weight on your bike, it's important to plan your route accordingly. Opt for paths that are suitable for the added load, avoiding overly technical trails that could pose a challenge. Remember, the goal is to enjoy the journey as much as the destination.
5. Practice Makes Perfect
Before embarking on a long adventure, take a few short trips with your loaded bike board to get used to the handling differences. Practice maneuvering, braking, and turning with the extra weight. This will help you feel more confident and safe during your outdoor excursion.
6. Respect the Environment
While exploring the great outdoors, always follow Leave No Trace principles. Pack out what you pack in, minimize your impact on the environment, and respect wildlife and other trail users.
7. Be Prepared for Emergencies
Carry a basic repair kit, including tools for fixing flat tires, adjusting the bike board, and tightening bolts. Also, bring a first aid kit, extra water, and snacks. Being prepared can make all the difference in handling unexpected situations.
Choosing and using a bike board for your next outdoor adventure opens up a world of possibilities for exploration and fun. By carefully selecting the right board for your needs and following these tips for effective use, you'll be well-equipped to embark on memorable journeys across diverse landscapes.
Whether you're planning a multi-day bikepacking trip or a day-long excursion, a bike board can enhance your adventure, allowing you to carry everything you need to explore the great outdoors to its fullest.
In the realm of mountain biking, the choice of each component on your bike plays a significant role in defining your ride's quality, performance, and durability. One such critical component that often goes underappreciated is the hub of a mountain bike. The hub sits at the core of your bike's wheels, influencing not only the wheel's performance but also affecting overall bike handling, acceleration, and efficiency.
Understanding the Role of MTB Hubs
At its essence, the hub is the central part of a bike's wheel, connecting the wheel to the bike's frame or fork via the axle. It allows the wheel to spin freely on two sets of bearings. For mountain bikes, hubs are designed to withstand the rough and tumble of off-road trails, providing a smooth ride over rocky paths, through mud, and across various terrains encountered on the trail. Thus, selecting a high-quality hub is paramount for any serious mountain biker.
Performance: The Key Considerations
When it comes to performance, several factors come into play. Firstly, the hub's engagement system is crucial. A hub with a higher number of engagement points can offer quicker response times when you start pedaling after coasting. This feature is particularly beneficial on technical trails where precise control over the bike is needed.
Secondly, the weight of the hub influences the overall weight of the bike. While lighter hubs contribute to a more nimble and responsive ride, it's essential to balance weight with the strength and durability required for mountain biking.
Lastly, the type of bearings used in the hub affects performance. Sealed cartridge bearings are commonly found in high-quality hubs due to their durability and resistance to elements like dust and water, ensuring a smoother ride and longer lifespan.
Durability: Built to Last
Mountain biking by its very nature subjects bikes to harsh conditions, making durability a non-negotiable aspect when selecting components. The material of the hub plays a significant role in its durability. High-quality materials such as aluminum and carbon fiber are favored for their combination of strength and lightweight properties. Furthermore, the construction of the hub, including how well it seals against dirt and moisture, directly impacts its longevity and maintenance requirements.
Making the Right Choice
Given the diverse offerings in the market, how does one choose the right MTB hub? Here are a few guidelines:
- Engagement: Look for hubs with a high number of engagement points if you prioritize responsiveness and control.- Material and Construction: Opt for hubs made from durable materials like aluminum or carbon fiber, and pay attention to the quality of construction, especially the sealing systems.- Bearings: Prefer sealed cartridge bearings for their durability and ease of maintenance.- Compatibility: Ensure the hub is compatible with your bike's wheel size, brake type (disc or rim), and drivetrain specifications.

Conclusion
The hub may be a small component of a mountain bike, but its impact on the bike's performance and durability is substantial. By carefully considering factors such as engagement, weight, materials, and bearing types, you can select a hub that enhances your mountain biking experience.
Whether you're upgrading an existing bike or building a new one from scratch, investing in a high-quality hub is a step towards achieving the perfect balance of performance and durability on the trails. Remember, the right hub not only improves your ride today but also ensures countless adventures for years to come.
When it comes to cycling, the devil is in the details. Every component of your bike plays a critical role in its performance, and hubs are no exception. Hubs are the central part of your wheels, and choosing the right one can significantly enhance your cycling experience.
Understanding Bike Hubs
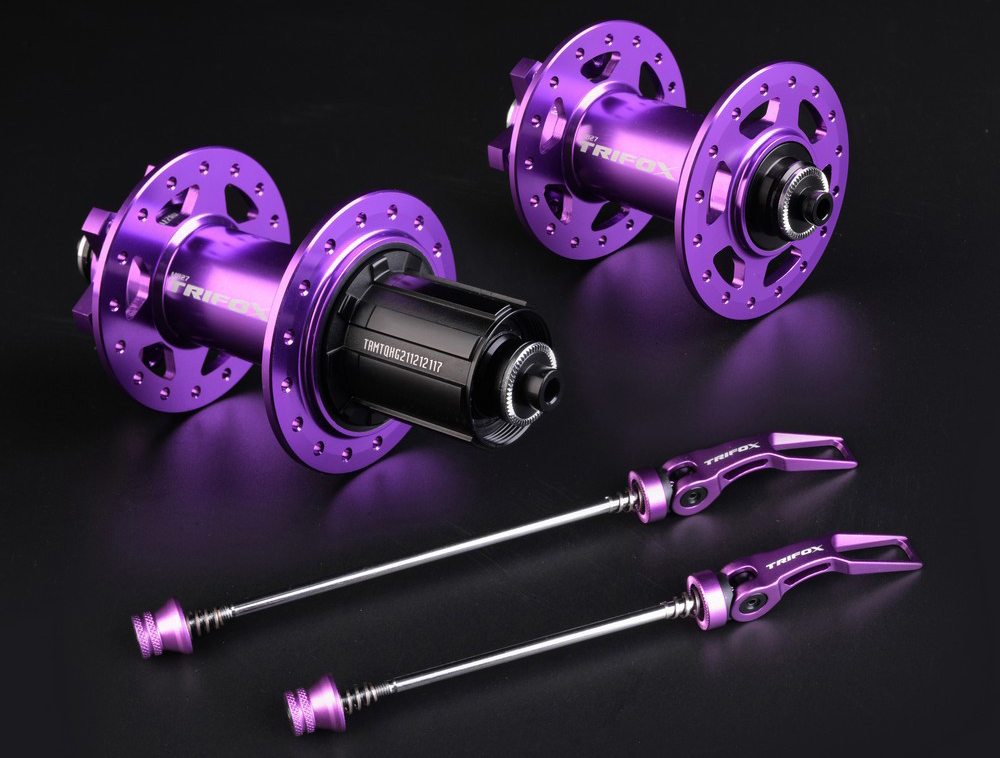
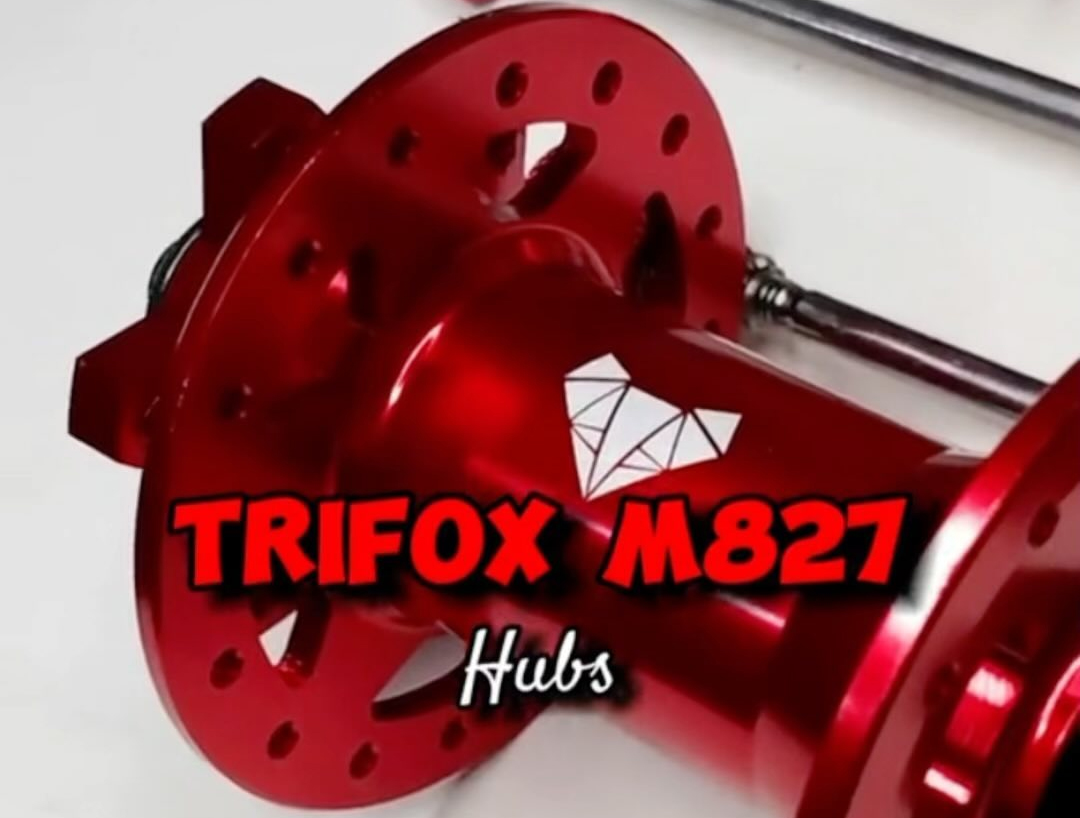
Bike hubs are the core of your wheels where the axle and bearings are located. They connect the wheel with the bike frame and allow the wheel to spin freely. The number of holes in a hub (like the 32H in Trifox Bike Hub M827) refers to the number of spokes a wheel has. Generally, more spokes mean a stronger but slightly heavier wheel, making a 32H hub a balanced choice for many riders.
Factors to Consider when Choosing a Bike Hub
1. Riding Style
Your riding style and discipline are crucial in determining the right hub. For example, mountain biking often requires durable hubs that can withstand rough terrains. In this regard, the Trifox Bike Hub M827, designed specifically for mountain bikes, is a solid choice.
2. Compatibility
Ensure the hub you choose is compatible with your bike's drivetrain and brake system. The Trifox Bike Hub M827 is compatible with Shimano 10/11 speed and SRAM XD Driver, offering versatility for different setups.
3. Material and Construction
The material and quality of construction significantly affect the durability and performance of the hub. The Trifox Bike Hub M827 is made from AL7075 Aluminum, known for its strength and lightness, which ensures durability without adding significant weight.
4. Bearing Type
Hubs typically come with either sealed cartridge bearings or loose ball bearings. Cartridge bearings, like the ones in the Trifox Bike Hub M827, are generally more durable and require less maintenance.

The Benefits of Choosing the Right Hub: Trifox Bike Hub M827
Choosing the right hub, like the Trifox Bike Hub M827, can offer several benefits:
- Improved Bike Performance: A well-made bike hub ensures smooth wheel rotation, reducing friction and enhancing your bike's overall performance.
- Durability: Quality hubs like the Trifox Bike Hub M827 are built to last, ensuring you can tackle even the toughest terrains with confidence.
- Better Control and Stability: The right hub improves wheel strength and stability, giving you better control over your bike.
In conclusion, choosing the right 32H bike hub involves considering your riding style, the hub's compatibility, material, construction, and bearing type. The Trifox Bike Hub M827 excels in all these areas, making it a fantastic choice for enhancing your cycling experience.
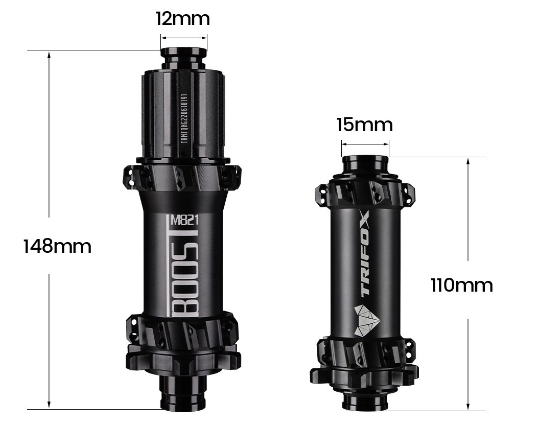
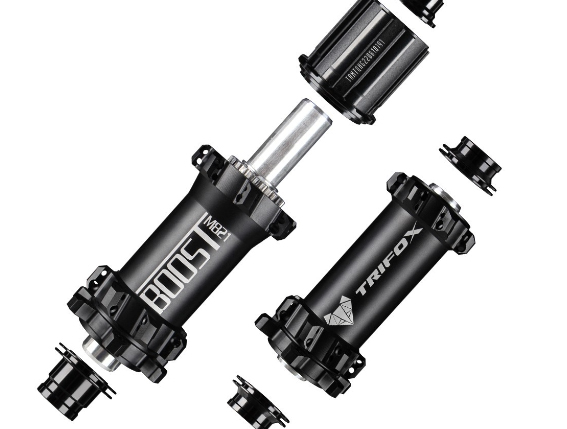
Mountain biking is an exhilarating sport that demands not only physical strength but also reliable equipment. One such piece of equipment that can significantly enhance your biking experience is a bike hub boost, such as the Trifox Bike Hub M821 Boost for MTB.
Installing the Trifox Bike Hub M821 Boost for MTB
Before you begin, it's important to note that installing a bike hub boost requires precision and some technical knowledge. If you're unsure, consider seeking assistance from a professional.
1. Remove the Old Bike Hub
Start with removing your wheel from the bike frame. Once done, use a cone wrench to remove the nuts holding the old hub in place. Carefully slide out the old hub, making sure not to lose any small parts like bearings or spacers.
2. Install the Trifox Bike Hub M821 Boost
Slide the Trifox Bike Hub M821 Boost onto the axle. Make sure the hub is centered on the axle before securing it with the provided nuts. Use a torque wrench to ensure the nuts are tightened correctly.
3. Reinstall the Wheel
Once the new hub is securely installed, reattach the wheel to your bike frame. Ensure it's properly aligned and that the quick-release or thru-axle is tightened securely.
The Benefits of a Bike Hub Boost
Installing a bike hub boost, like the Trifox Bike Hub M821 Boost, offers several benefits:
1. Improved Wheel Stiffness
A bike hub boost increases the distance between the flanges on the hub, which results in a wider bracing angle for the spokes. This improves wheel stiffness, offering better handling and control over rough terrains.
2. Enhanced Frame Design
The wider hub spacing allows for wider frame and fork designs, which can accommodate larger tires and offer improved suspension designs. This results in better traction and a smoother ride on rough trails.
3. Better Wheel Durability
The increased wheel stiffness from a bike hub boost also improves the wheel's durability. The wheels are less likely to go out of true or get damaged when riding over rough terrain.
4. Increased Bike Performance
Overall, installing a bike hub boost can significantly enhance your biking performance. It offers better control, stability, and durability, making your rides more enjoyable and efficient.

Installing a bike hub boost may require some effort, but the benefits it offers make it a worthwhile upgrade. The Trifox Bike Hub M821 Boost for MTB is a fantastic option that promises to enhance your mountain biking experience.
Whether you're a seasoned cyclist or someone who's just taken a leap into the world of wheels, the importance of the bicycle hub cannot be overstated. It’s the core of your bike's wheel assembly, and everything from rolling resistance to handling can be influenced by its quality. This guide will take you through the meticulous process of choosing and installing an aluminum alloy hub, elevating your cycling experience to enjoy a smooth ride every time.
The Heart of Your Bike: An Introduction to Hubs
Before you even hit the road, the hub is whispering promises—of seamless motion, of endurance, and of the open road. But, what is a hub, exactly? The bicycle hub is a simple yet crucial component. It’s the center of the wheel, the part around which the wheel and tire rotate when in motion. The design and construction of the hub impact the functionality and performance of the entire wheel. And when it comes to material, nothing beats aluminum alloy for its blend of strength, lightness, and corrosion resistanc
Why Choose Aluminum Alloy?
Aluminum alloy hubs are preferred in many disciplines of cycling for their lightweight construction and efficient heat dissipation, which is particularly important for high-stress areas of the wheel where components may be more prone to heat damage. They are also less susceptible to rust and are often lighter, providing better acceleration and handling.
Picking the Perfect Hub:
Selecting the right hub is akin to choosing the heart for your bike's soul. It's not a decision to be taken lightly. Here's what you need to consider:
Hub Type and Use Case
Start with the basics—what type of cycling do you do? Road, mountain, or hybrid? Different types of cycling require different hubs.
Road Bikes: Consider lightweight, low-friction sealed cartridge bearing hubs with a high-quality, fast-engaging freehub design.
Mountain Bikes: Opt for rugged, durable, and easily serviceable cup-and-cone type hubs with strong, reliable axle systems.
Hybrid Bikes: A middle ground of reliability and a blend of road and light off-road trail capabilities may warrant a mix of road and mountain bike hub features.
Hub Width and Axle Standards
The width of the hub will be dictated by your bike's frame and fork. Standard road bikes usually come with 130mm or 135mm rear spacing, while mountain and fat bikes will have wider spacing to accommodate broader tires and more robust wheels. Axle standards, such as quick-release (QR) or thru-axle, will also vary based on your bike's needs and age.
Spoke Hole Count and Lacing Patterns
The number of spoke holes in the hub flanges will directly influence the strength and design of your wheel. Ensure the hub you choose aligns with your wheelset's spoke count and lacing pattern for optimal performance.
Freehub and Cassette Compatibility
If you’re installing a rear hub on a geared bike, ensure that the freehub is compatible with the cassette. For example, modern road bikes typically use a standard Shimano or SRAM cassette spline. Mountain bikes could vary, with some requiring different interfaces for their cassettes.
Sealed Bearings
If regular maintenance isn't your forte, sealed bearings are a no-brainer. They protect against contamination and reduce the need for frequent overhauls, but they're typically non-adjustable compared to cup-and-cone systems.

Your relationship with your bike is personal. Each ride is a story of adventure, progress, and joy. Your hub is the silent companion, ensuring you sail smoothly through all terrains. Aluminum alloy hubs, when chosen and set up correctly, can enhance every aspect of your cycling experience. From the initial selection to the final spin, your diligence will be well-rewarded. Now equipped with this comprehensive guide, may your wheels turn soundly, with the assurance of a well-fitted aluminum alloy hub at their core.
When it comes to bicycles, even the smallest components play a huge role in determining performance. One such component that often goes unnoticed but has a significant impact on both stability and efficiency is the bicycle hub.
1. Enhancing Strength and Durability:
Hubs with different spoke numbers offer varying degrees of strength and durability. By increasing the spoke count, the hub becomes sturdier and can distribute the load more effectively, especially in challenging terrains or during intensive rides. This means fewer chances of wheel failure or spoke breakage, providing riders with a reliable and long-lasting cycling experience.
2. Improving Power Transfer:
A higher spoke count in a hub enables better power transfer from the cyclist to the road. With a larger number of spokes evenly distributing the force applied during pedaling, there is minimal energy loss, resulting in more efficient pedaling and enhanced acceleration. Hubs with higher spoke numbers make uphill climbs feel less strenuous and flat roads more rewarding.
3. Boosting Stability and Control:
Hubs with different spoke numbers contribute to increased stability and control on various surfaces. A hub with a higher spoke count enhances stiffness, reducing flex under heavy loads or high-speed maneuvers. This improved stiffness translates to better handling, responsiveness, and cornering abilities, giving cyclists the confidence to push their limits without compromising safety.
4. Enhancing Aerodynamics:
For those cyclists seeking every possible advantage in aerodynamics, hubs with lower spoke numbers are a game-changer. Fewer spokes mean reduced wind resistance, allowing for smoother airflow around the wheels. The decreased drag enables higher speeds and improved performance, especially in time trials, sprints, or races. So if speed is your game, opt for a hub with a lower spoke count.
5. Customization and Personalization:
With hubs available in various spoke numbers, cyclists have the freedom to customize their wheels based on their preferences and riding style. Whether you prioritize strength, speed, or a balance of both, selecting the ideal spoke number allows you to fine-tune your cycling experience. This personalization helps you achieve optimal performance and ensures an enjoyable ride every time.

Conclusion:
Hubs with different spoke numbers bring a plethora of benefits to the world of cycling. From increasing strength and durability to enhancing power transfer, stability, and aerodynamics, they cater to the diverse needs of cyclists. So, whether you're a recreational rider or a competitive cyclist, it's time to embrace the magic of hubs with different spoke numbers and elevate your cycling game to new heights. Explore the possibilities and witness the positive impact they can have on your cycling experience.
Remember, investing in a high-quality hub with the right spoke number that suits your riding style and goals is crucial. Upgrade your bicycle hub today and embark on unforgettable cycling adventures. Happy cycling!

Si eres un amante del ciclismo, sabes que la elección del conjunto de ruedas es clave en tu experiencia en carretera. Además de ser un factor importante en cuanto al rendimiento, también puede influir en el nivel de comodidad y seguridad en tus viajes.
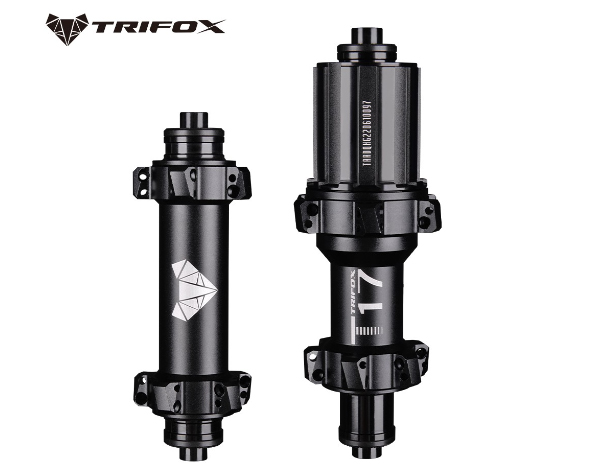
Una de las principales ventajas de las ruedas Trifox WT17 es su material de construcción: fibra de carbono ultraligera. Este material de alta calidad y resistencia no solo hará que tu bicicleta sea más liviana y maniobrable, sino que también aumentará su capacidad de absorción de impactos y vibraciones, contribuyendo a una experiencia de conducción más agradable. La terminación mate UD le da a las ruedas un aspecto elegante y sofisticado.
Las medidas de las Trifox WT17 son compatibles con neumáticos clíncher de 700 x 25C, y cuentan con una anchura externa de 25 mm y una anchura interna de 18 mm. El número de agujeros en el radio delantero es de 20, mientras que en el posterior hay 24, ambos con radios y pezones de tipo Pillar.
Además, sus bujes de aleación de aluminio Trifox T17 disponen de sistema de desmontaje rápido, con una separación delantera de QR x 100mm y trasera de QR x 130mm. El conjunto de ruedas está adaptado para frenos de llanta y es compatible con transmisiones Shimano 8/9/10/11S o SRAM XDR 12S.
Otra ventaja importante de las Trifox WT17 son sus rodamientos de alta calidad. Los bujes disponen de dos rodamientos en el buje delantero y cuatro en el trasero, los cuales proporcionan una alta hermeticidad. Además, la liberación rápida del cierre permite un fácil desmontaje y mantenimiento sin necesidad de herramientas especiales.Las Trifox WT17 están disponibles en tres opciones de profundidad de 45 mm, 50 mm y 60 mm, lo que las hace adecuadas para diferentes preferencias de conducción y condiciones.
Elegir el conjunto de ruedas adecuado para tu bicicleta es una elección importante en términos de rendimiento, comodidad y seguridad. En ese sentido, las Trifox WT17 se destacan como una excelente opción de alta calidad y resistencia, adaptadas a las necesidades de los ciclistas de ruta.
Si buscas una experiencia de conducción cómoda, segura y con un rendimiento superior, deberías considerar seriamente estas ruedas para tu bicicleta. Te garantizamos que no te decepcionará la inversión. ¡A disfrutar del camino!


