


If you’re an avid mountain biker, you will know that the grips on your bike are as important as any other component. They are designed to keep you in control and provide you with a comfortable grip as you ride through rugged terrains. With various types of grips in the market, it can be overwhelming to decide on the perfect one for you. In this article, we take you through the ultimate guide to choosing the most comfortable mountain bike grips.
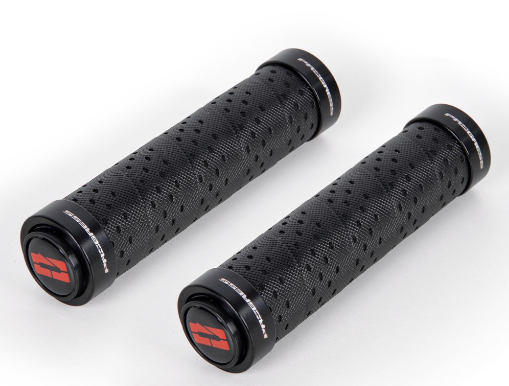
1. Consider the Material of the Grip
Choosing the right material for your mountain bike grip will significantly affect the level of comfort you get during your rides. Grips can either be made out of rubber or silicone. Rubber grips are the most common among bikers, but they tend to wear down quickly and are prone to slip during wet weather conditions. If you want a longer-lasting grip that can handle all weather conditions, opt for silicone grips.
2. Check the Style of the Grip
The style of the grip refers to how the grip is designed to suit different types of riders. Some riders prefer thicker grips, while others like thinner ones that give them more control over the bike. Additionally, other grips have specific features like gel padding, which is excellent for shock absorption, and ergonomic design that reduces hand fatigue and strain.
3. Consider the Grip Pattern of the Grip
The grip pattern on a mountain bike grip can have a significant impact on how comfortable your ride will be. Grip patterns have varying levels of aggression ranging from smooth to the aggressive diamond pattern. The diamond pattern provides excellent traction, especially when riding in wet and muddy conditions. On the other hand, smooth grips offer a more leisurely ride but are less suitable for challenging terrains.
4. Test the Length of the Grip
The length of the grip is another crucial factor to consider when choosing a comfortable mountain bike grip. A grip that is too short will not provide enough leverage, making it difficult to hold the bike when riding through rugged terrain. On the other hand, a grip that’s too long will cause unnecessary added weight and create a bulkier feel. The perfect grip should allow your hands to fit comfortably without leaving any extra length or gaps.
5. Check for Compatibility
Before settling on a specific grip, you need to ensure that it’s compatible with your bike’s handlebar. Most grips will fit common bar sizes, but it's essential to double-check before making a purchase. Additionally, read up on how the grips attach to the handlebar. Some grips use a single-sided clamp, while others use locking rings or bolts.
In conclusion, choosing the most comfortable mountain bike grip is as much about personal preference as it is about functional requirements. With the various types of grips on the market, it's essential to know what you're looking for in a grip. Always consider the material, style, grip pattern, length, and compatibility before making any purchase. Remember, a comfortable grip translates to better control, longer rides, and less hand fatigue.
And if you’re looking for a great option, be sure to check out the Trifox Bicycle Grips. They offer excellent shock absorption, ergonomic design, and a diamond-shaped non-slip pattern, making them a fantastic choice for avid mountain bikers.


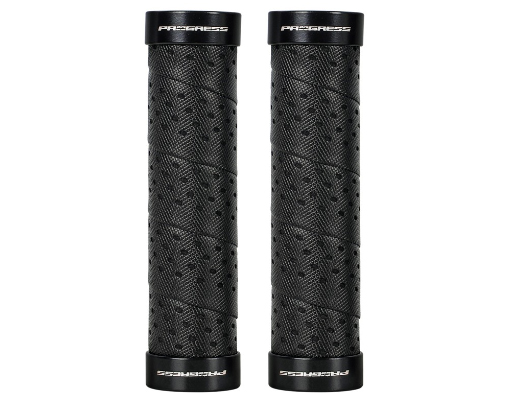
Mountain biking is an exciting and challenging activity that requires you to have a solid grip on your bike's handlebars. It's crucial to have a good set of mountain bike grips that can provide comfort and control in different terrain types. When shopping for the best mountain bike grips, you will encounter various options with different materials, textures, and shapes. However, what separates the top mountain bike grips apart from the rest?
1. Material
One of the most significant factors that determine the quality of mountain bike grips is the material used to create them. The best mountain bike grips are usually made of soft and durable materials like silicone or rubber. It would help if you opted for grips that are comfortable to the touch, yet robust enough to resist wear and tear. Some premium mountain bike grips feature reinforced areas that come in handy when performing technical maneuvers that require a lot of pressure on the brake levers.
2. Texture
Mountain bike grips with the right texture offer improved traction and control, especially when the trails are wet or muddy. When purchasing mountain bike grips, consider getting ones with a grippy texture that feels secure in your hands. Soft rubber or silicone grips with a diamond pattern, knurling, or waffle pattern offer excellent grip, even when your hands are sweaty. A good grip texture ensures your hands stay in place and prevents slips when navigating challenging trails.
3. Shape
Mountain bike grips come in many shapes and sizes, from ergonomic grips to thin grips. Ergonomic grips have a contoured shape that conforms to the palm's natural shape and offers more excellent comfort. On the other hand, grips like the Trifox offer direct feedback from the handlebar. Thin grip may not be the best for long hauls but offer enhanced tactile feedback on technical descents or quick turns through tight corners. Of course, the ideal shape for your mountain bike grip largely depends on your personal preferences.
4. Durability
The best mountain bike grips are ones that can take a beating. Mountain bike grips that wear out quickly or tear apart after a few rides can be frustrating and costly in the long run. Your mountain bike grips should withstand the daily wear and tear that comes with riding challenging trails. Go for mountain bike grips made of high-quality materials that can survive harsh weather conditions and expose to the sun or water.
5. Customizability
Mountain bike grips come in a wide variety of colors, patterns, and designs. Choosing a customizable and cool looking grip can take your bike's appeal to the next level. With so many options available, you can express your personality through your bike's grips. Some premium brands enable you to add logos or customize the colorway to maximize your ride's aesthetics.
The right pair of mountain bike grips can make a significant difference in your biking performance. A good grip should offer comfort, durability, texture, and customizability. When choosing the right mountain bike grip for your needs, balance between all the above factors is essential. Invest in a solid pair of mountain bike grips, and you’ll be amazed by how much more control you’ll have while out shredding on your bike.

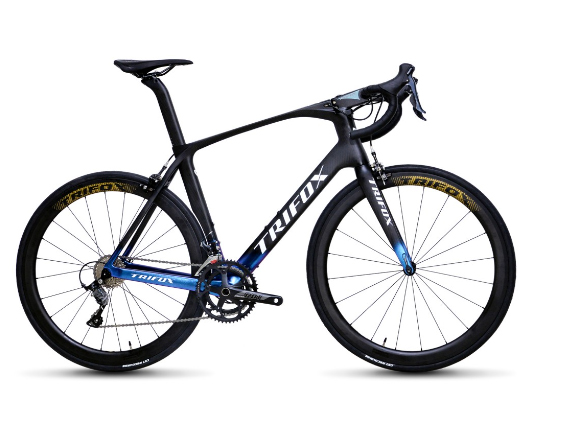
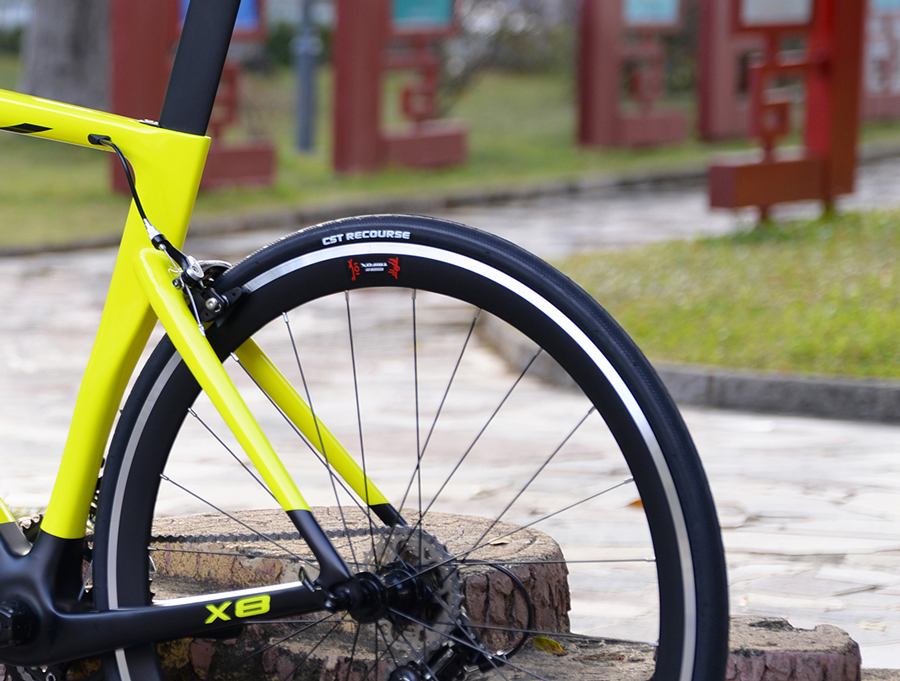
Aero road bikes have extremely crucial features that allow for a faster ride through air resistance reduction. Carbon fibre technology and the incorporation of aerodynamics have greatly improved the performance of the modern road bike in comparison to the traditional one. Here is what you need to know about aero road bikes that will help you make an informed decision.
1) AERO ROAD BIKE FRAME
An aero bike frame is designed to reduce air resistance which makes it more aerodynamic. The frame plays a crucial role in the aerodynamics of the bike because it is the first point of contact with the wind. Aero road bike frames are designed to be thin, dynamic, and sleek because this reduces the surface area which makes a lot less for the wind to push against. It is, therefore, important to choose a frame that is both aerodynamic and structurally sound for a safe and fast ride.
2) WHEELS
The wheels of an aero bike add to its aerodynamic properties. Different wheel designs typically have different levels of drag and lift coefficients, which determine their aerodynamic performance. Aero road bikes usually have deep dish rims, which provide the bike with a more stable ride in crosswinds and aid in reducing drag coefficient. The wheels should be wider than traditional road bikes and made of high-grade carbon fiber materials to enhance the stiffness and reduce weight.
3) HANDLEBARS
Handlebars of an aero road bike are designed to steer the bike when cycling and should be leaned on when racing. The unique handlebars can come in a variety of shapes ranging from oval, square, or teardrop, but they all play a significant role in reducing drag while the cyclist is in an aggressive riding position. The ideal handlebars should provide comfort to the rider and promote a low, aerodynamic riding position.
4) FIT
An essential aspect of aero road bikes is the rider's fit to the bike. It is crucial to ensure that the bike fits the rider correctly. A bike that is too small or too large causes discomfort for the cyclist. A good fit is necessary for effective power transfer from the rider to the bike; this makes the experience more enjoyable, with less energy waste. Before purchasing an aero road bike, it is advisable to conduct bike fitting to ensure compatibility with your body size and riding style.
5) COST
Aero road bikes are in high demand due to their high-quality features, which translates to cost. They are generally more expensive compared to traditional road bikes. You get what you pay for, but this does not mean that you must break the bank to own one. Choose an aero road bike that is within your budget range and still has the necessary features for your desired purpose.
Buying an aero road bike requires some thought and research. Please make sure you take your time to evaluate the different options in the market carefully. Consider the frame structure, wheels, handlebars, fit, and cost. An aero road bike with the right specifications will provide an excellent cycling experience and ride much faster. Remember, the right bike is the one tailored to suit your specific riding needs and will help you achieve your goals.

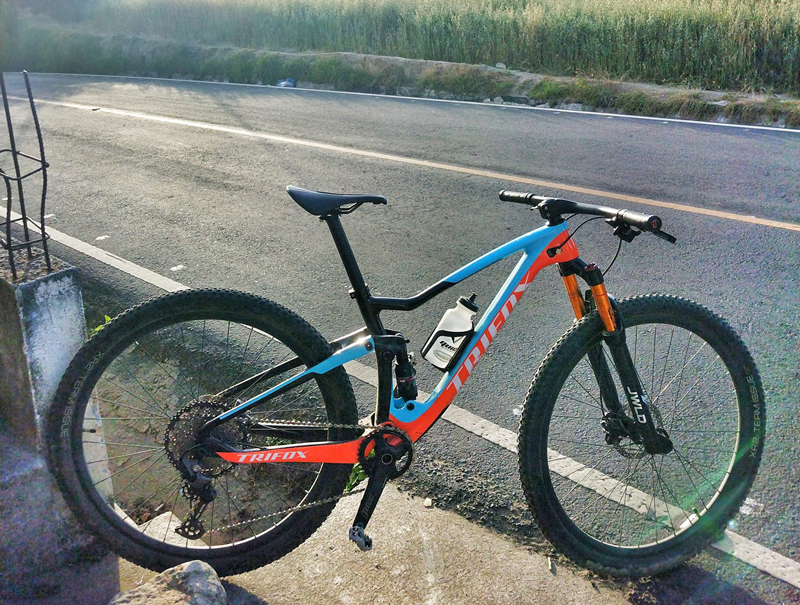
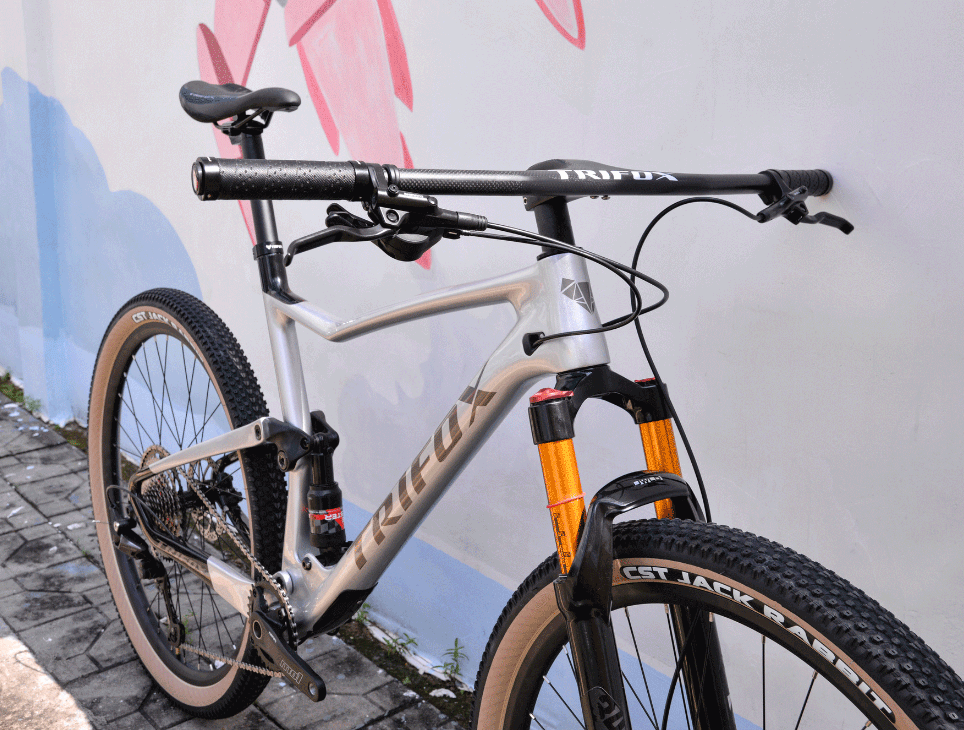
Mountain biking offers a unique experience for those who enjoy the thrill of the outdoors, the rush of speed, and the satisfaction of exploring new terrain. But for 1.70m tall riders, getting the perfect mountain bike can be a daunting task. That's why we've done the research for you and recommend Trifox mountain bike frames as the ultimate choice for all levels of mountain biking enthusiasts who are of average height.
1. Trifox Mountain Bike Frames: The Perfect Match for 1.70m Tall Riders
Trifox Mountain Bike Frames are a great choice for 1.70m height as they are made with high-quality carbon fiber material and designed with a unique geometry that offers a comfortable, efficient, and responsive ride. The frames have various features that are perfect for riders of this height - including their lightweight construction, efficient power transfer, and precise handling.
2. Why Trifox Mountain Bike Frames Stand Out
Trifox understands the different needs of mountain bikers, and they design their frames to deliver exceptional performance. The frames are built with an emphasis on speed, durability, and stability, all while being featherlight. The frames have a slightly suspended design with an upward curve, allowing for plenty of clearance for 1.70m riders while still providing ample control and precision.
3. Which Trifox Mountain Bike Frame Is Best for 1.70m Tall Riders?
Trifox offers a range of mountain bike frames to choose from, and each is designed with distinct specifications to meet the unique needs of different riders. We recommend the Trifox Carbon MTB Frame, which is not only affordable but perfect for 1.70m riders. The frame is made of high-quality carbon fiber, making it ultra-lightweight without sacrificing strength and durability. The frame is also designed with a tapered head tube, which enhances handling and control.
4. Additional Features of the Trifox Carbon MTB Frame
Apart from its lightweight carbon fiber construction and tapered head tube, the Trifox Carbon MTB Frame has an advanced suspension system that maximizes performance and reduces fatigue. With a compact and ergonomic design, it provides ample clearance and stability for 1.70m tall riders while still allowing for free and comfortable movement. The frame's aesthetic appeal is also worth mentioning as it's sleek, modern, and visually appealing.
5. Why Trifox Is the Best Choice for 1.70m Tall Riders
Trifox is an exceptional brand that has established a solid reputation in the cycling industry for designing quality mountain bike frames. The brand's commitment to producing high-quality products that provide an excellent riding experience is evident in the Trifox Carbon MTB Frame. For 1.70m tall riders, this frame makes the perfect balance of weight, durability, and agility, ultimately enhancing your overall riding experience.
If you're a 1.70m tall rider looking for a mountain bike frame that's efficient, lightweight, and comfortable to ride, the Trifox Carbon MTB Frame should be top of your list. With its advanced suspension system, aesthetic appeal, and high-quality carbon fiber material, it offers the best performance for riders of this height.
Whether you're an experienced or novice rider, Trifox delivers the best in terms of durability, agility, speed, and overall riding experience. Get your Trifox frame, take your biking experience to the next level, and explore the great outdoors with ease.

Tubeless rims on your road bike can provide excellent performance and comfort advantages over traditional tubed tires. But, setting up tubeless rims requires proper preparation and installation. One of the critical components of the entire setup is taping. Applying the tape correctly to the rim is crucial to prevent air loss and accommodate the tubeless tire.
Step 1: Remove Your Old Tape.
The first step in replacing your tubeless rim tape is removing the old tape from your rim. You can use a flat tool or a screwdriver to pry up and remove the old tape carefully. Be sure to clean the rim sidewalls and spoke holes thoroughly before installing the new tape.
Step 2: Measure Your Rim.
Measuring the rim diameter is key to choosing the right size tape for your rim. Check your rim specification or measure the rim diameter with a tape measure. Choose a tape that fits the rim diameter precisely, leaving a bit of an overlap for the seam or valve opening.
Step 3: Start Taping.
Start your taping by fixing the end of the tape inside the rim bed. Press down the tape firmly to stick it to the bed. Then, slowly and evenly wrap the tape around your rim bed. Take care to avoid wrinkling and overlapping the tape edges. Stretch the tape to get it into the rim's edges, but don't overstretch to prevent tearing or wrinkling.
Step 4: Seal The Edges.
Sealing the edges of the tape is crucial to prevent air or moisture from leaking through. You can use a small piece of tape or a thin strip of rubber material to seal the edges of the tape. Secure the seal by pressing on it firmly, above the valve opening, and around the rim's edges.
Step 5: Trim The Excess.
After finishing taping and sealing, trim off excess tape around the rim's edges to achieve a clean and smooth finish. Use a sharp scissors or a razor blade to cut off the excess. Take care not to cut the sealing material you've just applied. Your tubeless rim is now ready to go.
Taping tubeless rims on your road bike is an essential part of the entire tubeless tire installation process. With the right tools, careful preparation, and attention to detail, you can tape your tubeless rims correctly and avoid flat tires or air loss. Always remember to remove the old tape, measure the rim diameter, start the taping accurately, seal the edges correctly, and trim the excess to achieve a clean and smooth finish. Happy cycling on your newly tubeless road bike rims!

When it comes to bicycles, even the smallest components play a huge role in determining performance. One such component that often goes unnoticed but has a significant impact on both stability and efficiency is the bicycle hub.
1. Enhancing Strength and Durability:
Hubs with different spoke numbers offer varying degrees of strength and durability. By increasing the spoke count, the hub becomes sturdier and can distribute the load more effectively, especially in challenging terrains or during intensive rides. This means fewer chances of wheel failure or spoke breakage, providing riders with a reliable and long-lasting cycling experience.
2. Improving Power Transfer:
A higher spoke count in a hub enables better power transfer from the cyclist to the road. With a larger number of spokes evenly distributing the force applied during pedaling, there is minimal energy loss, resulting in more efficient pedaling and enhanced acceleration. Hubs with higher spoke numbers make uphill climbs feel less strenuous and flat roads more rewarding.
3. Boosting Stability and Control:
Hubs with different spoke numbers contribute to increased stability and control on various surfaces. A hub with a higher spoke count enhances stiffness, reducing flex under heavy loads or high-speed maneuvers. This improved stiffness translates to better handling, responsiveness, and cornering abilities, giving cyclists the confidence to push their limits without compromising safety.
4. Enhancing Aerodynamics:
For those cyclists seeking every possible advantage in aerodynamics, hubs with lower spoke numbers are a game-changer. Fewer spokes mean reduced wind resistance, allowing for smoother airflow around the wheels. The decreased drag enables higher speeds and improved performance, especially in time trials, sprints, or races. So if speed is your game, opt for a hub with a lower spoke count.
5. Customization and Personalization:
With hubs available in various spoke numbers, cyclists have the freedom to customize their wheels based on their preferences and riding style. Whether you prioritize strength, speed, or a balance of both, selecting the ideal spoke number allows you to fine-tune your cycling experience. This personalization helps you achieve optimal performance and ensures an enjoyable ride every time.

Conclusion:
Hubs with different spoke numbers bring a plethora of benefits to the world of cycling. From increasing strength and durability to enhancing power transfer, stability, and aerodynamics, they cater to the diverse needs of cyclists. So, whether you're a recreational rider or a competitive cyclist, it's time to embrace the magic of hubs with different spoke numbers and elevate your cycling game to new heights. Explore the possibilities and witness the positive impact they can have on your cycling experience.
Remember, investing in a high-quality hub with the right spoke number that suits your riding style and goals is crucial. Upgrade your bicycle hub today and embark on unforgettable cycling adventures. Happy cycling!
When it comes to maintaining your bicycle's performance, a regular tune-up is essential. A bike tune-up is a comprehensive service that ensures that your bike is safe, efficient, and ready for the road. But What does a bike tune up include?
1. Inspection and Assessment:
The first step of a bike tune-up is a thorough inspection and assessment process. This involves checking every part of your bike, including the frame, tires, wheels, brakes, gears, and bearings. A professional mechanic will carefully examine each component to identify any issues that may affect the bike's performance or safety.
2. Cleaning and Lubrication:
A clean and well-lubricated bike is crucial for optimal performance. During a tune-up, the bike will be thoroughly cleaned to remove dirt, debris, and any residual grease or oil. After cleaning, appropriate lubrication will be applied to the chain, gears, cables, and other moving parts to ensure smooth and efficient operation.
3. Brake Adjustments:
The braking system is one of the most critical safety components on your bike. A tune-up will involve inspecting and adjusting the brakes to ensure proper alignment, pad wear, and cable tension. This process will optimize brake performance, ensuring reliable stopping power and control.
4. Gear Adjustments:
Smooth shifting between gears is essential for a comfortable ride. In a bike tune-up, the gear system will be evaluated and adjusted to ensure precise shifting and eliminate any skipping or chain slippage issues. This adjustment may include cable tension, limit screw adjustments, and derailleur alignment.
5. Wheel and Tire Inspection:
Wheels and tires play a significant role in your bike's performance and safety. During a tune-up, the mechanic will check for any damage, wear, or misalignment. They will inspect the spokes, true the wheels if necessary, and ensure proper tire inflation. This inspection and maintenance will improve ride quality and reduce the risk of punctures and accidents.
6. Bearing Service:
Your bike's bearings enable smooth rotation of various parts, such as the headset, bottom bracket, and hubs. A comprehensive tune-up involves inspecting these bearings for wear, cleaning and regreasing them if needed, and adjusting any loose or tight bearings. This process ensures optimal performance and longevity of your bike's components.

Conclusion:
A bike tune-up is a necessary maintenance service that keeps your bicycle in top shape. By understanding what a bike tune-up includes, you can ensure that your bike performs at its best while promoting safety and longevity. Remember, regular tune-ups and preventative care are key to a smooth, efficient, and enjoyable ride. So, if your bike is due for a tune-up, don't hesitate to schedule an appointment with a professional bike mechanic today.
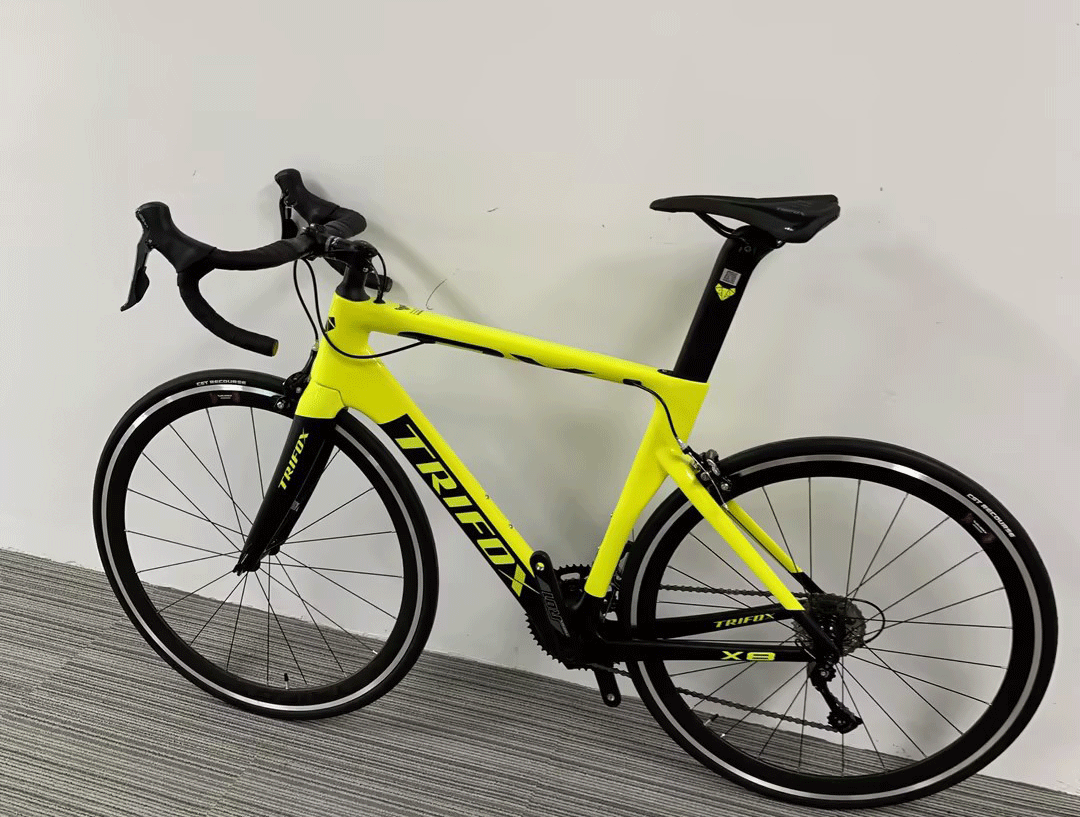
1. Lightweight and Agility:
One of the key factors in determining a road bike's performance is its weight. Carbon fiber excels in this aspect, as it is exceptionally lightweight while maintaining remarkable strength. Trifox carbon fiber road bikes, for instance, are designed with precision and optimized aerodynamics, resulting in a bike that is agile, responsive, and efficient.
2. Superior Strength and Sturdiness:
Although carbon fiber is incredibly lightweight, it does not compromise on strength. Carbon fiber road bikes, such as those offered by Trifox, are known for their remarkable durability even under intense riding conditions. This material's strength ensures that riders can confidently conquer rugged terrains, steep ascents, and speedy descents without fearing structural failures.
3. Excellent Vibration Damping:
Road vibrations can negatively impact a rider's comfort and endurance. Carbon fiber possesses inherent vibration-damping capabilities, offering riders a smoother and more comfortable ride by reducing road shocks and vibrations. Trifox carbon fiber road bikes incorporate advanced carbon layup techniques to amplify this characteristic, guaranteeing a plush and pleasant riding experience even during long-distance journeys.
4. Customizability and Flexibility:
Carbon fiber allows for versatile customization options, catering to individual preferences and riding styles. Trifox offers a variety of carbon fiber road bike frames with different geometries, allowing riders to choose the frame that suits their body dimensions, riding preferences, and performance goals. This flexibility ensures an optimal fit, enhancing overall efficiency and comfort.
5. Enhanced Efficiency and Speed:
The exceptional stiffness-to-weight ratio of carbon fiber road bikes directly contributes to their superior efficiency and speed. Trifox's carbon fiber frames excel in power transfer, enabling riders to convert more energy into forward motion. By minimizing energy loss, these bikes provide an unparalleled riding experience and a competitive edge on the road.

In the world of road biking, carbon fiber has firmly established itself as a prime material choice, exemplified by Trifox carbon fiber road bikes. Its combination of lightweight, strength, vibration damping, customization options, and performance-driven characteristics makes carbon fiber the ideal material for road bikes. When searching for a road bike that maximizes performance and comfort, carbon fiber frames should be at the top of the list. Explore the exceptional Trifox carbon fiber road bikes to experience the pinnacle of road biking technology and craftsmanship.

Many people mistakenly believe that bicycles are equipped with transmissions to speed up riding. Even when buying bicycle, they judge the speed of the bicycle based on 24-speed, 30-speed, etc. In fact, the maximum power a person can produce is only 0.4 horsepower. The transmission is just a tool to help people bring out the maximum horsepower easily.
Generally, bicycles are used in cities, and there are actually many slopes in cities. For example, sometimes when you are riding a bicycle, you will feel that your pedals suddenly become heavier, and there are often many slopes that cannot be judged with your eyes. At this time, the role of the transmission can be fully reflected. If there is a transmission, you can ride easily as long as you can change to a lighter gear. Of course, this method can also be used when there is a headwind.
The advantage of the transmission is that it can help you effectively reduce your physical exertion when your physical strength is not good. For example, when you have a cold, your physical exertion should not be too great. If you choose lighter gears when riding, you will feel more relaxed. There are also women who are in poor health, students who are tired from exams, older people, etc., who can all use bicycle derailleurs flexibly, so the benefits of derailleurs are indeed too many.
Operate shifting gears correctly and efficiently
If the gear is too light, the rider's pedaling force will be uneven. If the leg force is too heavy, the rider's buttocks will not be able to sit stably on the seat cushion, causing the so-called "hip jump". In addition, due to excessive leg force, the pedaling posture changes, affecting the smoothness of the pedaling action. There are also many beginners who lack training at the beginning and lack sufficient muscle endurance in their legs. Although they use too heavy a gear, It can move forward with greater power, but because the muscles cannot withstand the pressure, sports injuries such as knee joint or muscle strains may occur. Beginners should measure their own physical condition and not forcefully ride in heavy gears in pursuit of speed. Traveling over long distances.
"Match appropriate gear ratios for different road conditions"
When some beginners choose a vehicle, they often like to adjust the gear ratio of the front and rear chainrings according to their own riding habits and preferences, but we should choose the one that suits our own preferences and achieve the most efficient pedaling output.
Novices often change gears immediately when they see a big slope and use a smaller transmission ratio. This directly leads to a sudden increase in frequency. When the muscles have not adapted, they will immediately feel muscle fatigue, and because the gear ratio is too light. , will cause an immediate decrease in speed. When other riders overtake, it will also cause the frequency of the legs that have suddenly become tired to increase again. In this way, as long as one or two slopes are passed, the relatively small transmission will immediately show weakness, so the correct When changing gears when climbing a hill, you should start to feel the pressure on your feet as the car reaches the middle of the slope, and then start shifting. The adjustment range is generally 2 or 3 gears at a time, depending on the specific slope increase. This requires not only physical strength but also It requires experience. Standing pedaling can also provide greater speed in the early stages of climbing, and can delay the reduction of the gear ratio, giving your feet sufficient time to adapt to the frequency.
"Detailed analysis of specific road conditions"
level road
On a flat road, the front chainring is usually a small chainring, and the rear chainring is mainly matched with a 17 to 21 chainring. If riding with a tailwind, the rider can adjust the front chainring to a large chainring, and the rear chainring can be Freely match to achieve the effect of high-speed cruising.
sharp uphill
When riding on flat sections, if there are sharp short slopes ahead, such as bridges, hilly terrain, etc. The rider can rely on the inertia of the riding surface to rush up. The front chainring can be maintained in the position of the larger chainring, while the rear chainring should change gears according to the road conditions.
uphill
Because on uphill sections, it will increase the burden on the rider's legs when pedaling, resulting in excessive leg resistance. At this time, you should adjust the gear of the rear disc. Use the adjustment method one tooth at a time to gradually find the most suitable gear. With subsequent riding experience, you can easily find the gear that suits you.
When riding continuous uphill sections, the rider should change gears according to the terrain. Usually the front chainring is adjusted to a small gear, while the rear chainring is constantly changing gears to match the rapidly changing terrain conditions.
downhill
When riding continuous downhill sections, the first principle for beginners should be to maintain average pedaling efficiency and avoid affecting the vehicles behind. The front chainring can be adjusted to a large chainring, and the rear chainring can gradually lower the gear. Don't fail to adjust because of greed. If there is an unexpected situation or sharp bend and the brake is not enough, it may lead to serious accidents.
In fact, there is no so-called correct time to change gears during riding. After all, everyone's physical condition is different. Riders should listen and feel the level of their own riding before changing gears. Simply put, if you feel resistance while riding, you should shift gears. If the pedaling is too heavy, you should adjust the gear to a lighter level, and vice versa.
A well-fitting bike coupled with the correct riding posture will ensure you have a happy ride.


