


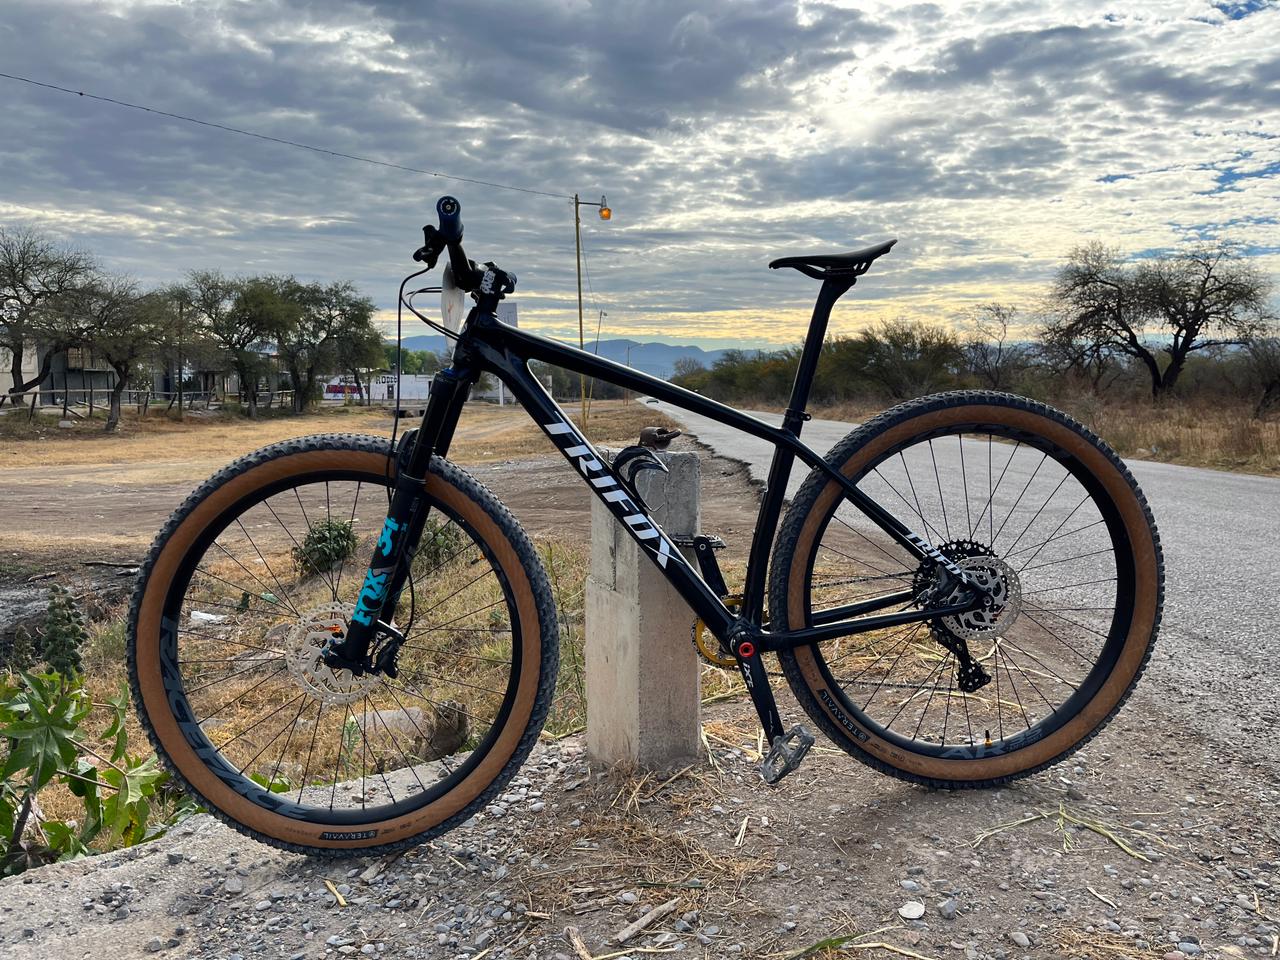
Carbon fiber bikes have become increasingly popular in recent years due to their lightweight, stiffness, and performance. However, buying a carbon bike can be a daunting task, especially for those who are new to cycling or unfamiliar with the technology. In this article, we’ll provide a comprehensive guide to help you choose a satisfactory carbon bike that meets your needs and budget.Step 1: Define Your Riding GoalsThe first step in buying a carbon bike is to define your riding goals. Consider factors such as the type of riding you plan to do, your fitness level, and your budget. Are you looking for a racing machine, an endurance bike, or a versatile all-rounder? Knowing your goals and budget will help you narrow down your options and focus on the features that are most important to you.Step 2: Choose the Right FrameThe frame is the heart of any bike, and it’s no different for carbon bikes. When choosing a carbon frame, consider factors such as weight, stiffness, and comfort. Also, consider the geometry of the frame, which can significantly impact the bike’s handling and performance. Finally, consider the manufacturer's reputation and warranty.Step 3: Select the Right ComponentsOnce you’ve chosen your frame, it’s time to select the right components. This includes the drivetrain, brakes, wheels, handlebars, stem, and seat post. Consider factors such as weight, performance, and compatibility with your frame. Remember, the right components can significantly impact the bike’s performance and feel.Step 4: Choose the Right SizeChoosing the right size is critical to ensure comfort, efficiency, and performance. Carbon bikes come in a range of sizes, and it’s important to choose the right one for your body type and riding style. Consider factors such as the length of the top tube, the height of the seat post, and the length of the stem.Step 5: Test Ride and AdjustBefore making a final decision, it’s essential to test ride the bike and make adjustments to ensure a perfect fit. Pay attention to factors such as saddle height, handlebar reach, and cleat position. A good bike shop will help you make these adjustments and ensure that your new carbon bike fits you perfectly.In conclusion, buying a carbon bike can be a daunting task, but by following these steps and taking your time, you can choose a satisfactory carbon bike that meets your needs and budget. Remember, it’s essential to define your riding goals, choose the right frame and components, choose the right size, and test ride and adjust the bike to ensure a perfect fit. With the right bike, you’ll be able to enjoy the benefits of carbon fiber technology and take your cycling performance to the next level.
Building a new carbon fiber road bike is an exciting process that requires a significant investment of time and money. However, the end result is a high-performance machine that is tailored to your individual needs and preferences. In this article, we’ll take a closer look at the process of building a new carbon fiber road bike.Step 1: Define Your Goals and BudgetThe first step in building a new carbon fiber road bike is to define your goals and budget. Are you looking for a racing machine, a comfortable endurance bike, or a versatile all-rounder? Once you have a clear idea of what you’re looking for, you can start researching the available options and setting a budget.Step 2: Choose Your FrameThe next step is to choose your frame. Carbon fiber frames are popular for their lightweight and stiff construction, which offers excellent power transfer and responsiveness. When choosing a frame, consider factors such as weight, stiffness, comfort, and aerodynamics. Also, consider the compatibility with your desired components such as brakes, bottom brackets, and wheelsets.Step 3: Select Your ComponentsAfter choosing your frame, it’s time to select your components. The choice of components can significantly impact the performance and feel of your bike. Consider factors such as the type of drivetrain, brakes, wheels, handlebars, stem, and seat post. Each of these components has a variety of options to fit your preferences and budget.Step 4: Assemble Your BikeOnce you have your frame and components, it’s time to assemble your bike. Depending on your level of experience, you may choose to do this yourself or have it done by a professional bike mechanic. Assembling a bike involves installing components such as the headset, bottom bracket, seat post, and wheels. It’s important to take your time and follow the manufacturer's instructions closely to ensure a safe and reliable build.Step 5: Test and AdjustThe final step is to test and adjust your bike. This involves ensuring that everything is properly tightened and adjusted, and taking the time to properly fit the bike to your body. Consider factors such as saddle height, handlebar reach, and cleat position. After this is done, take your bike for a test ride to ensure everything is working as expected.In conclusion, building a new carbon fiber road bike is a rewarding process that allows you to create a high-performance machine tailored to your individual needs and preferences. By following these steps and taking your time, you can create a bike that will provide you with years of enjoyment on the road.
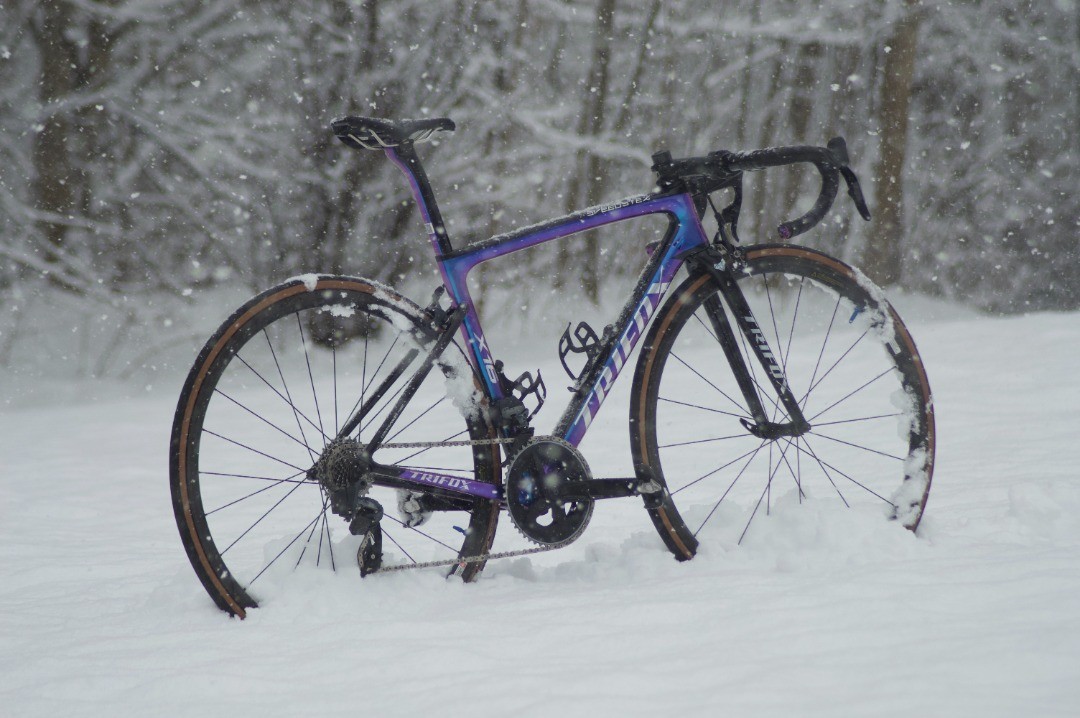
Day 1:The snow has fallen heavily overnight and the streets are slick with ice. I bundle up in my warmest clothes, pack a thermos of hot chocolate, and set out on my winter cycling adventure. It’s a bit nerve-wracking at first, but as I navigate the icy terrain, I find myself enjoying the challenge. The crisp winter air fills my lungs and I feel invigorated as I pedal through the quiet, snow-covered streets.Day 5:The snow has been steadily falling all week, and I’m starting to get used to the routine of bundling up and braving the elements. The hardest part is keeping my glasses from fogging up, but I’ve found a solution in the form of ski goggles. Today, I venture out to a nearby park that I’ve never explored before. The snow-covered trees and frozen lake are breathtaking, and I feel grateful to be able to experience this serene winter wonderland on my bike.Day 10:I’m starting to feel like a true winter cyclist now. My gear is dialed in, and I’m getting used to the chill in the air. Today, I take a longer ride out of the city and into the countryside. The snow-covered fields and rolling hills are a stark contrast to the urban landscape I’m used to, and I relish the feeling of freedom as I pedal along the quiet roads.Day 15:It’s been a tough week, with bitter cold temperatures making it difficult to motivate myself to go outside. But I remind myself of how alive I feel when I’m cycling through the winter landscape, and I force myself to bundle up and get out there. As always, the feeling of accomplishment is worth it once I’ve completed my ride.Day 20:Today, I decide to try something new and join a group of winter cyclists for a group ride. It’s a different experience riding with others, and I find myself enjoying the camaraderie of a shared experience. We take a challenging route through the city, with steep hills and winding roads, but I feel a sense of pride as I pedal alongside my new winter cycling companions.Day 25:As the end of February approaches, I’m starting to feel a bit melancholic about the end of winter. It’s been a tough year, but winter cycling has given me a sense of purpose and joy that I didn’t know I was missing. I vow to keep cycling through the rest of the winter, and to continue exploring the beauty of the season on two wheels.Day 30:The last day of February has arrived, and with it, the end of my winter cycling diary. As I pedal through the snowy streets one last time, I reflect on the past month and how much I’ve grown as a cyclist and as a person. Winter cycling has taught me resilience, perseverance, and the importance of embracing new experiences. As I reach my final destination, I take a moment to savor the stillness of the winter landscape and the satisfaction of completing my goal. Although my winter cycling diary may be ending, I know that the lessons and memories I’ve gained will stay with me for a lifetime.
A bicycle hub is a vital component of any bicycle that is responsible for supporting the wheel and reducing friction. It is an essential part that allows the wheel to rotate smoothly and efficiently, making it possible for the rider to travel long distances with ease. In this article, we will explore the various types of bicycle hubs and their functions.Types of Bicycle HubsThere are two main types of bicycle hubs, front and rear hubs. The front hub is located at the front wheel of the bicycle, while the rear hub is located at the back wheel.Front HubThe front hub typically consists of a central spindle that is attached to the wheel rim and two bearings that allow the wheel to rotate smoothly. The front hub also contains an axle that is attached to the fork of the bicycle. The fork is the part of the bicycle that holds the front wheel in place.Rear HubThe rear hub is more complex than the front hub and has additional components that are designed to accommodate the bicycle's gears. The rear hub also contains a freewheel mechanism, which allows the rider to pedal backward without engaging the chain and the rear wheel. This feature is particularly useful when the rider needs to coast or brake.Function of Bicycle HubsBicycle hubs serve several essential functions, including:Support the Wheel: Bicycle hubs support the weight of the rider and the bicycle, making it possible for the wheel to rotate smoothly.Minimize Friction: Bicycle hubs are designed to reduce friction and improve the bike's efficiency. The bearings within the hub are lubricated with grease or oil to reduce friction and ensure smooth rotation.Transfer Power: Bicycle hubs transfer power from the rider's legs to the wheel, allowing the bike to move forward.Accommodate Gears: Rear hubs are designed to accommodate the bicycle's gears, making it possible for the rider to climb hills or ride faster on flat surfaces.In conclusion, bicycle hubs are a crucial component of any bicycle, and they play a significant role in ensuring a smooth and efficient ride. Whether you are a professional cyclist or a casual rider, it is essential to have a high-quality bicycle hub that is designed to support your weight and reduce friction. If you are looking to purchase a new bicycle or upgrade your existing one, make sure to invest in a high-quality hub that meets your needs and budget.

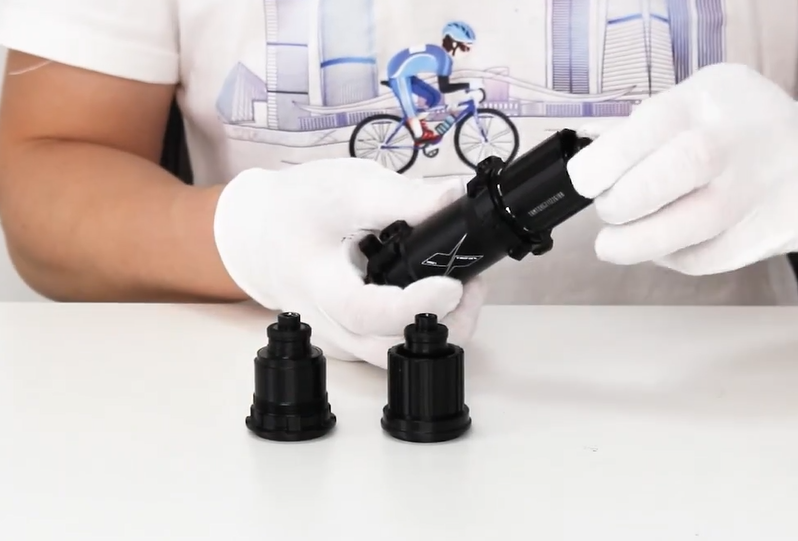
I believe that in recent years, many cyclists have tried and experienced the excellence and convenience of the tubeless system in the development of bicycles. The tubeless system not only can quickly repair the tires, but also improves the efficiency, comfort, handling, and stability, combined with the appropriate specifications. The wheelset, rim, and tire can be perfectly compatible, achieving high air tightness, more stable performance, and a trans-epochal design that can prevent tires from breaking.The tubeless system is characterized by no need for air compressors, which makes cycling easier for cyclists!There are 5 steps to replace tubeless tires. The parts to be prepared are tubeless tires, rims with the same specifications, needle-nose pliers, measuring needles, leak-filling fluids, and pumps. When you are ready, let us do it for cyclists. Detailed DIY teaching!1. First of all, disassemble all the accessories on the air nozzle. The air heart is sometimes tightly locked. It is recommended to prepare removal tools, such as needle-nose pliers.2. Find the corresponding position of the air nozzle of the rim, first, insert the air core into the tube body, and then close the tire and the rim.3. Fully squeeze the bead into the joint of the wheelset, check repeatedly to confirm that the two are completely tight, and then lock the nut of the valve after completion.4. Take out the measuring syringe again, and use the scale in the cylinder to accurately measure the amount of leak-filling fluid used. The volume of the leak-filling fluid required by the tires is not the same. Check the required volume of the leak-filling fluid before installing it.5. Finally, use a general pump to inflate the installed tubeless tire.If you don't like tubeless tires, it's okay. You can click here to buy a clincher wheelset. There are multiple specifications for you to choose from Trifox brand, trustworthy.
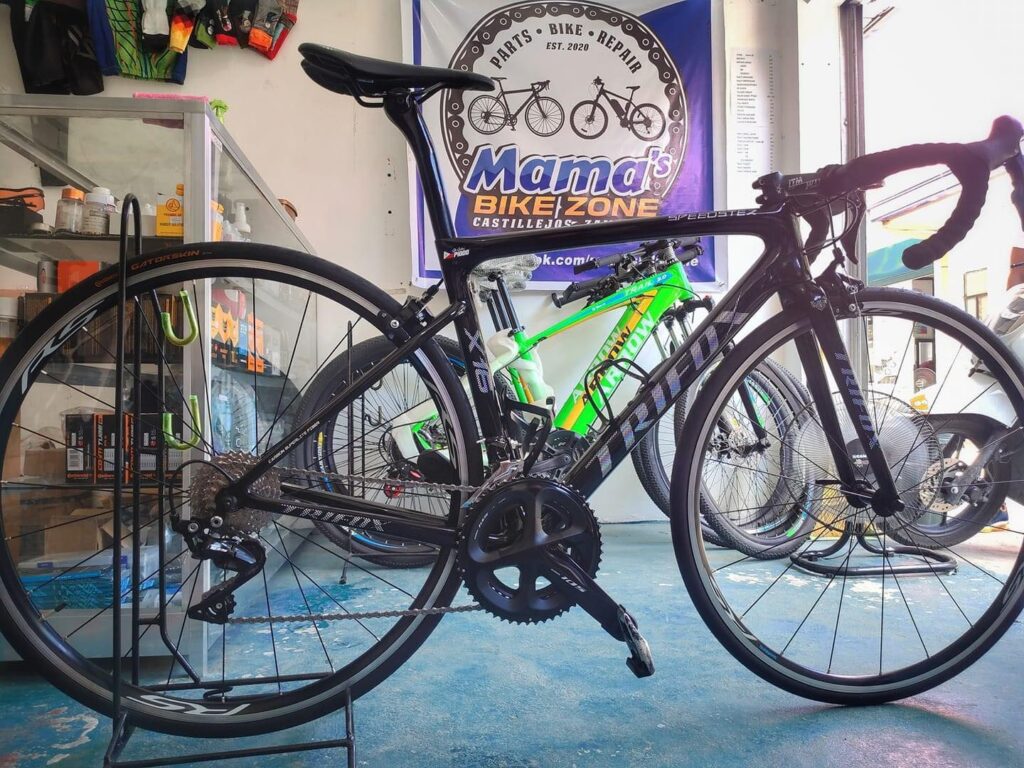
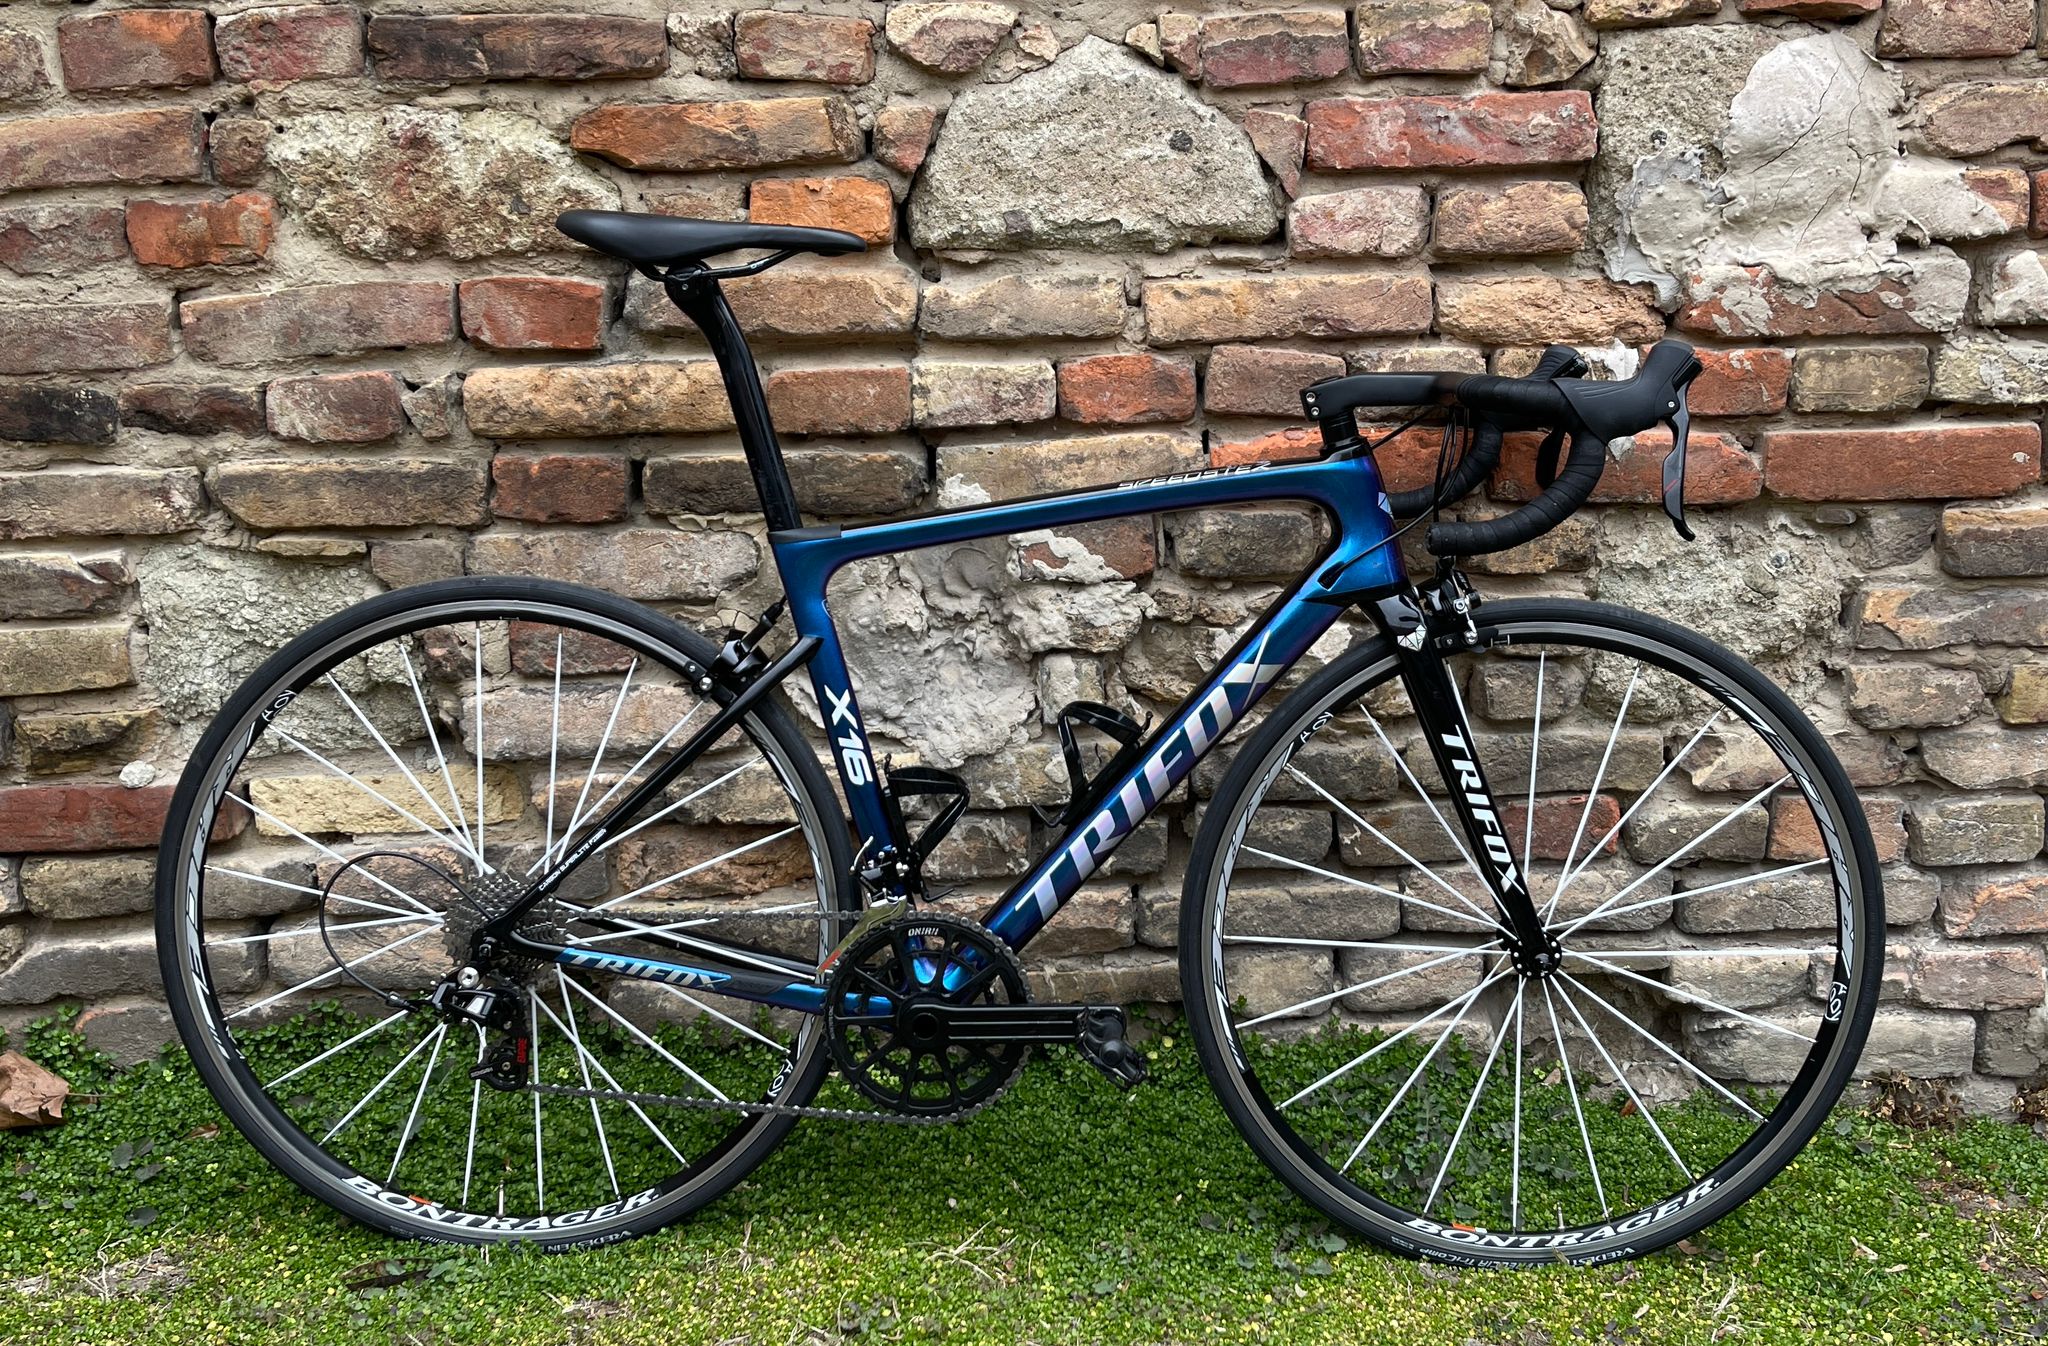
Frame: Carbon Fibre Road Bike Frameset X16Groupset-shimano 105 R7000 – 23k pesosWheelset-shimano RS100 – 5500 pesosTires- continental Gator skin – 3800 pesosSaddle- selle san marco- 650 pesosStem- ITM 7xx – 1200Bartape- pro -850 pesosPedal-shimano 1800 pesos
1. Cycling skillsFor those who are not very proficient in riding mountain bikes, what is the normal posture?The upper body is low, looking down a bit, looking down 10 meters on the road ahead, with the head slightly inclined forward;The two hands should be bent naturally, not too straight. If the two hands are too straight, the hands will be numb and tired, and the hands will bend, which is convenient for bowing at the waist, lowering the body's center of gravity, and preventing the impact caused by the bumps of the car from being transmitted to the whole body; Both hands held the handlebar lightly and forcefully and seated the saddle firmly.2. Pedal skillsThere are three pedaling methods for bicycles: toe down, Freestyle pedaling, and heel down.2.1. Toes down:The characteristic of this kind of pedal is that the toes are always downward during the entire riding process. This method has a smaller ankle joint range of motion, which is more conducive to increasing the frequency and easy to master, but the leg muscles are always in a state of tension, which is not conducive to Naturally passing through smaller places.2.2. Freestyle pedaling:At present, some elite riders mostly adopt the freestyle pedaling method. This kind of pedaling method means that the angle of the ankle joint changes according to different parts of the foot during a full rotation.Free pedaling conforms to the principle of mechanics. The direction of force is consistent with the circular tangent formed when the pedal is rotated. This reduces the motion range of the knee joint and thigh, which is beneficial to increase the pedaling frequency, pass the critical zone naturally, and reduce the dead point. . The thigh muscles can also be relatively relaxed. But this pedaling method is more difficult to master.2.3. Heel down:The heel-down pedaling method is slightly upward with the toes and the heel down by 8~15 degrees. This method is rarely used in normal cycling, but only a few people use the heel-facing method when they make excessive adjustments during cycling. Down pedal method.Its characteristic is that the muscles change their exertion state in a short time, get a short rest, and achieve the purpose of restoring muscle fatigue.3. Turning skills3.1 Tilt method:The bike body is a line, leaning into the curve. The body's center of gravity is based on the tilting of the bike into the corner and maintaining the rider's body and the bike at the same tilt angle.Straighten the outer knee and subconsciously increase the strength, as if you are going to step on the foot (but if you actually step on it, be careful not to slip and avoid falling).Press your inner knee against the beam. This is a good way to adjust your trajectory. Reduce the pressure to reduce the curvature. The outer hand slightly pulled up the handlebar.Two good times to use tilt:Can use not too-sharp corners (less than 45 degrees) to accelerate, can clearly see the unfamiliar corners aheadTwo defects of inclination on wet asphalt roads:On rainy days, although this turning technique can give you good traction, its angle and weight distribution, and arrangement are not conducive to slippery roads; the tilt technique is not as sensitive as the corresponding twist.3.2. Grasp the directionKeep the bicycle upright and lean into the bend. Move forward until the nose and brake lever is in line. Keep the bicycle upright, tilt your body into the bend (enough to straighten the outer arm), and tilt the handlebar to the inner side of the bend. Bend the elbow of the inner arm to pull the handlebar back while the outer arm pushes out the handlebar to turn the handlebar direction. Keep both knees buckled inward and continue pedaling.4. Uphill and downhill skillsUphill and downhill riding skills are important basic technology for mountain biking.4.1: Cycling uphill skillCycling Uphill should maintain a normal pedaling action and not use sudden force. Under normal circumstances, it is not advisable to use standing cycling or lifting cycling methods, otherwise, it will consume too much energy.When encountering short-distance slopes, you should make full use of the inertial principle of object motion, pedal easily, and stand up riding when approaching the top of the slope, increase the speed as much as possible, and create favorable conditions for acceleration downhill.When encountering a long uphill slope, you should adjust the transmission ratio in time according to your physical strength. Don't wait until you can't ride and the speed has completely dropped before changing the transmission ratio. Resolutely avoid the phenomenon of restarting. For long slopes or steep slopes, stand-up cycling methods can be used alternately to adjust the harder parts and let some muscles rest.Do not follow the car too close when going uphill. Due to the force of the uphill, the driving often swings from side to side, and a collision may occur if you follow the bicycle too close. Furthermore, the speed drops significantly when going uphill, and following the car will restrict one's cycling method.4.2: Downhill biking skillTo achieve the desired effect of downhill biking, one must be brave and witty, bold and careful, and concentrated, keep a close eye on the road ahead, and be ready to deal with any situation on the road decisively; Dare to pedal actively and increase speed.When turning, keep the body and the bicycle in line, lean inward, and keep the upper body and the bicycle in a straight line to overcome centrifugal force. The angle of inclination depends on the speed and the size of the curve, but generally, it should not exceed 28 degrees, otherwise, there is a risk of slipping.Control the speed before turning. Use the method of tapping the brakes to gradually slow down. When braking, use the front and rear brakes as much as possible. The front brakes can be slightly advanced. When using the front brakes, the direction of the front wheel must be consistent with the forward direction of the bike. Otherwise, it will be due to the weight of the rider. The bike's inertia was restricted and caused a fall. Release the brakes after entering the curve to avoid unnecessary deceleration. Do not use the back brake too hard on the curve. Otherwise, the bike may turn around or slip.5. Braking skillsThe front brake can provide you with very good braking force, but it can also turn you into a trapeze. Below we show you how to break. Move the center of gravity back when using the front brake.When you use the front brake, your center of gravity will naturally move forward due to inertia. You must practice when you start to break, consciously move your center of gravity back (lower your body and move your butt back). The more you move the center of gravity back, the more braking power you can use.You can practice on sandy or a bit slippery flat ground, speed up and use different forces to press your front and rear brakes, and learn how to control your brakes. Or ask the master how he uses the brakes while cycling.Reduce the power of the front brake when turningAs with driving a car, you have to slow down when turning. If you press your brakes hard while turning, you will slip and lose control. Use your front and rear brakes at the same time to reduce your speed when turning. When you brake, your front wheel's reaction will decrease, so reducing the front brake force will make your turn more perfect.If you are in a sharp turn downhill and need to use the brakes, try to use the power of the rear brake. For example, on flat ground, when braking at the last moment, lower the center of gravity and use 30% of the front and 70% of the braking force behind to make a braking action.Don't press the front brake excessively"Inertia is your friend", you need speed to pass rocks and obstacles. Otherwise, the wheels will stop turning and throw you over the handle. Depressing the front brake excessively will move your center of gravity forward, causing the front of the bike to tilt down.If you use the front brake in a steep downhill turn, you must control your front and rear brakes at the same time, and don't press them with excessive force. At this time, you can put the brakes on and off to prevent braking. The lock-up phenomenon occurs.Buy High quality Carbon Fiber Mountain Bike Frame From Trifox
1. The bicycle helmet is too heavy!TRIFOX: It seems you haven't worn a helmet before. Now the helmet is very light.2. If I don't cycle fast, I don't need a helmetTRIFOX: The current "road killer" (refers to people who don't have cycling skills but ride on the road and endanger the safety of others.) So many, so you know…3. They are too expensive for bicycle helmetsTRIFOX: It's much cheaper than going to the emergency department to suture your scalp and receive the medicine, and it doesn't hurt.4. The helmet messes up my hairTRIFOX: Yes, this is a fact. However, if you don't have a bicycle helmet in a crash, it may really mess up your head. You can consider options: a day of messy hair or a lifetime of a bad head.5. Looks uglyTRIFOX: Come on! Only when you wear a helmet can you look professional, the riders will respect you, and give you more cycling space, and you can be handsome. Moreover, according to the visualobservation of the rider, the turning head rate of wearing a helmet is many percentage points higher than that of not wearing a helmet.6. Wearing a bicycle helmet is too hotTRIFOX: There are a lot of heat dissipation holes on the helmet, there are super many ventilation holes, and it will not be hot.7. If I don't ride on a busy road, I don't need a helmetTRIFOX: This is a big mistake. Only 10% of bicycle injuries are related to bikes. Because overwhelming rocks, rolling into pits and other falls are more likely to happen, these accidents may occur on any road.8. I never fall from a bicycleTRIFOX: Maybe it just doesn't exist temporarily. Everyone has a crash, and some serious injuries are caused by a crash. Don't have a fluke.9. Wearing a helmet looks so funnyTRIFOX: There are many colors and designs of cycling helmets. You can definitely find a helmet that makes you look handsome.10. None of my friends wear helmetsTRIFOX: Maybe your friends don't know the importance of helmets. If you are the first person among your friends to recognize this problem, and you are the first to lead the helmet on, think about the day your friend crashed because Learn to wear a helmet from you and save a life, how much he will appreciate you. right?Have you been Shot, Follow Trifox and escort your cycling!
The main reason why cycling is favored by the public is that many of its advantages are unmatched by other sports. For example, cycling is a systemic aerobic exercise, which can effectively exercise the functions of human organs such as the brain and heart. High level of exercise Most of the human muscles are concentrated in the legs, and cycling is to make the legs move continuously. In addition, we use our hands, wrists, and back muscles when cycling, which is equivalent to a whole-body exercise that can increase calorie consumption. For example, in the world’s most famous cycling event – Tour de France, an average player consumes 5000~8000 kcal of calories every day. Free riding, more scenery It also takes an hour, and the distance covered by cycling is 5 times that of walking and 2 to 3 times that of jogging. That is to say, you can see more outdoor scenery by cycling. As long as the weather is fine, we can decide the destination of cycling according to our mood, unlike other sports such as swimming, basketball, etc., which are limited by the venue and time. So, cycling is a fairly free sport. exercise that activates the brain Riding a bicycle requires high skill: keep the bike balanced pedal Pay attention to the road conditions, choose a safe route, and twist the handlebar at any time Flexible control of the transmission when going up and down slopes Aerobic exercise that works wonders When riding bicycles on ordinary roads, we also need to pay attention to other road signs, observe the state of surrounding motor vehicles and pedestrians, and have sharp eyes to be able to notice dangerous causes such as empty bottles and potholes ahead of the road. In short, when riding a bicycle, you need to see six directions and listen to all directions and be able to instantly identify various information received by the eyes, ears, and nose and act accordingly. Therefore, cycling is also a sport that can activate the brain and make people smarter. Aerobic exercise can take in a sufficient amount of oxygen, and it is an effective exercise for burning and hoarding fat. Our body is made up of more than 200 bones, and the muscles covering the bones are skeletal muscles, which are composed of aerobic muscles called slow-twitch fibers and anaerobic muscles called fast-twitch fibers. Among them, the main heat source of aerobic muscle is sugar and fat, while the heat source of anaerobic muscle is sugar. The amount of glycogen stored in muscles is limited, and all glycogen will be consumed during intense exercise. In this way, aerobic muscles will continue to consume accumulated fat in order to continue exercising. However, we can use aerobic exercise to burn body fat only if we continue to exercise for more than 20 minutes. Advantages of cycling cardio The general standard of exercise intensity is the number of times the heart sends blood within 1 minute, that is, the number of heartbeats. Cycling is a very effective means of maintaining a heart rate that meets aerobic exercise standards. When maintaining a certain exercise intensity, the active muscles of the human body will generate heat energy, which will increase the body temperature. At this time, the human body will automatically sweat to lower the body temperature. The main component of sweat is water. For every 1L of water lost by a person weighing 60kg, the body temperature will drop by 12°C. Of course, sweating is not the only way to lower body temperature, and the water and heat emitted by people during breathing cannot be underestimated. The speed of bicycle movement is relatively fast, and the cyclist is often blown by the oncoming wind, so the sweat discharged is easy to evaporate. Therefore, although our body temperature may rise sharply when we ride a bicycle, the evaporation of sweat can ensure that the human body maintains a comfortable body temperature, and the advantages of aerobic exercise are reflected here.


