


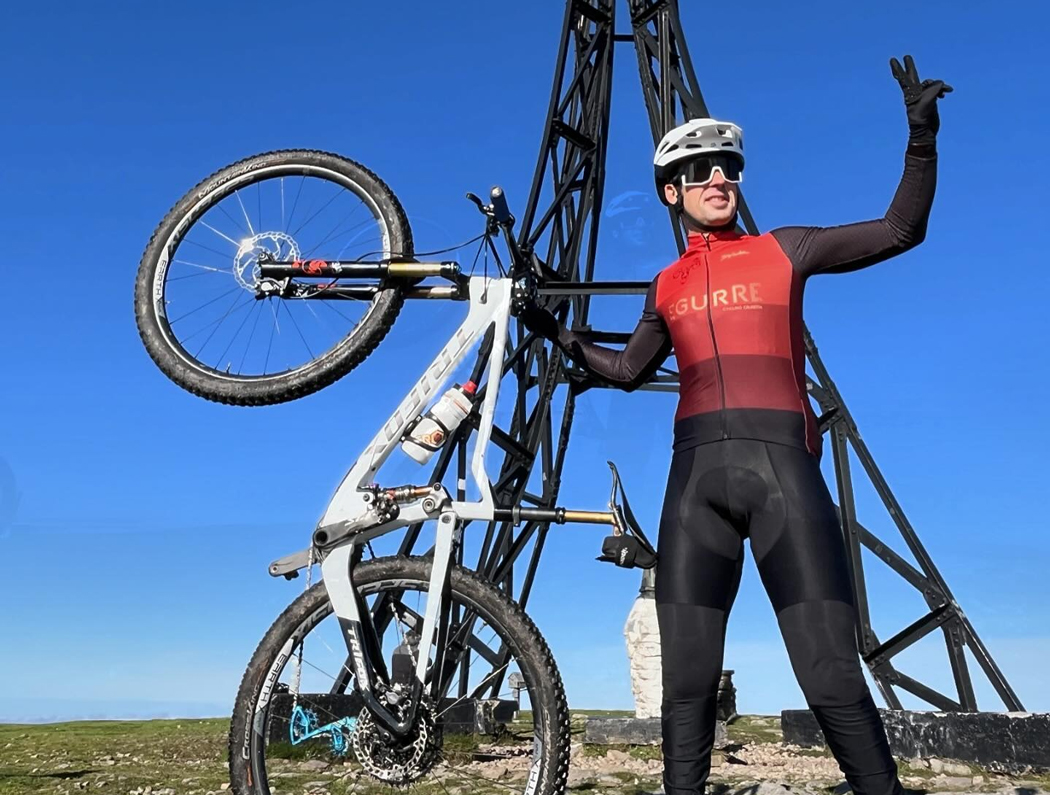
When it comes to mountain biking, especially for trail riders, choosing the right bike can make a world of difference. One of the most debated decisions among cyclists is whether to opt for a dual suspension bike or stick with a hardtail. Dual suspension bikes, which feature both front and rear shocks, are known for their ability to absorb impacts and provide a smoother ride on rough terrain. However, they come with a higher price tag and more maintenance. So, are dual suspension bikes really worth the investment for trail riders? Let’s break it down.
1. Superior Comfort on Rough Terrain
One of the most obvious advantages of dual suspension bikes is the comfort they provide. Trail riding often involves navigating rocky paths, bumpy trails, and obstacles that can create significant jolts and impacts. Hardtail bikes, which only have a suspension fork at the front, can transfer a lot of that shock directly to the rider, leading to discomfort, fatigue, and a less enjoyable ride.
Dual suspension bikes, like the Trifox Pioneer Bike, are equipped with both front and rear shocks that work together to absorb impact. This creates a much smoother ride, allowing you to handle rough terrain with greater ease. The rear suspension helps to absorb shocks from bumps and drops, making the ride more comfortable and reducing the risk of injury from jarring impacts. For trail riders who often encounter technical terrain or prefer longer rides, the added comfort of dual suspension can be a game-changer.
2. Better Control and Handling
Dual suspension bikes also offer superior control and handling compared to hardtails, especially on downhill and technical sections of the trail. The rear suspension helps to keep the rear wheel planted on the ground, improving traction and stability. This is particularly important when navigating loose gravel, wet conditions, or steep descents, where maintaining control is crucial.
The Trifox Pioneer Bike is designed with a robust dual suspension system that enhances handling, even in challenging conditions. The bike’s front and rear shocks work in unison to maintain tire contact with the ground, providing more consistent traction and allowing you to tackle technical sections with confidence. Whether you’re navigating tight switchbacks or blasting down a rocky descent, the improved stability and control that come with dual suspension can make a noticeable difference in your performance.
3. Reduced Fatigue on Long Rides
Riding on rough terrain can be exhausting, particularly on long rides. The constant jarring and bouncing of a hardtail bike can take a toll on your body, leading to fatigue and discomfort. On the other hand, dual suspension bikes reduce the impact forces that travel through your body, making the ride less taxing. This is especially beneficial for trail riders who enjoy longer rides or multi-day adventures.
The Trifox Pioneer Bike offers excellent suspension performance that helps reduce the strain on your arms, legs, and back. With the rear suspension absorbing much of the shock, riders can focus on the ride itself rather than worrying about fatigue or discomfort. If you’re planning on tackling challenging trails or going for long-distance rides, the added comfort and reduced fatigue provided by dual suspension will allow you to ride longer and harder without burning out.
4. Increased Safety and Confidence
A well-designed dual suspension system can also increase your safety on the trails. By providing better traction, stability, and control, these bikes help riders stay in control during high-speed descents, technical maneuvers, and challenging terrain. When you’re riding on a bike that feels stable and secure, you’re more likely to take on challenging obstacles with confidence.
The Trifox Pioneer Bike is equipped with advanced suspension technology that enhances both safety and performance. Whether you’re descending a steep hill or negotiating an uneven rock garden, the bike’s suspension keeps you in control and minimizes the risk of losing traction or control. This makes dual suspension bikes an excellent choice for riders who enjoy pushing their limits and tackling more advanced trail features.
5. The Cost vs. Benefits Debate
Of course, dual suspension bikes come with a higher price tag compared to hardtails. The additional cost is typically due to the more complex suspension systems, higher-quality components, and additional maintenance required. For some riders, especially those just starting out or those who primarily ride smooth trails, a hardtail might offer all the performance they need at a more affordable price.
However, for serious trail riders who often ride on rough, technical trails, the benefits of a dual suspension bike are hard to ignore. The increased comfort, better control, and reduced fatigue make the higher investment well worth it for riders who want to maximize their performance and enjoy a smoother, more enjoyable ride.
So, are dual suspension bikes really worth the investment for trail riders? The answer largely depends on the type of riding you do and your priorities as a cyclist. If you regularly ride on rough, technical terrain or enjoy long-distance trail rides, a dual suspension bike like the Trifox Pioneer Bike can significantly improve your ride quality, comfort, and performance. While they do come with a higher price tag, the added benefits of better control, reduced fatigue, and increased safety make them an excellent choice for serious trail riders who want to take their biking experience to the next level.


If you're new to mountain biking or just exploring the different types of bikes available, you may have come across the term “suspension bike.” But what exactly does that mean, and how does it affect your riding experience? Whether you're hitting rugged trails, tackling rocky descents, or simply exploring the outdoors, suspension bikes are designed to provide better comfort, control, and performance on rough terrain. In this post, we’ll break down what suspension bikes are, how they work, and why they might be the right choice for you.
What Is a Suspension Bike?
A suspension bike is a type of bicycle that is equipped with a suspension system to absorb shock and reduce the impact of rough terrain. Unlike traditional rigid bikes, which have a solid frame and fork, suspension bikes feature shock-absorbing components in the front (the fork) and/or the rear (the frame or rear shock). This suspension system helps smooth out bumps, rocks, and other obstacles on the trail, giving riders a more comfortable and controlled experience.
There are two main types of suspension bikes: front suspension (also known as hardtail) and full suspension. Let’s explore each type in more detail.
Front Suspension (Hardtail)
A front suspension bike, or hardtail, has a shock-absorbing fork at the front of the bike but does not have suspension in the rear. The fork is designed to absorb shocks from obstacles like rocks, roots, and bumps, helping to keep your hands and arms from getting jarred. Hardtail bikes are generally lighter, more efficient, and require less maintenance than full-suspension bikes, making them an excellent choice for cross-country riders or those who primarily ride on less technical terrain.
Advantages of Front Suspension Bikes:
- Lighter weight
- More efficient pedaling (especially on smooth trails)
- Lower maintenance costs
- Ideal for cross-country and less technical riding
Disadvantages:
- Less control and comfort on very rough or technical terrain compared to full-suspension bikes
Full Suspension
Full suspension bikes, as the name suggests, have both front and rear suspension systems. The front fork absorbs impacts from the terrain, while the rear shock (or shock absorber) does the same for the rear of the bike. This system is ideal for riders tackling more technical trails, downhill tracks, or rugged mountain routes, as it significantly enhances comfort and control. The rear suspension helps maintain traction, preventing the rear wheel from bouncing off the ground and giving you better control over the bike’s handling.
The rear shock in full suspension bikes can be adjusted for different types of terrain, allowing riders to fine-tune the bike’s performance based on their specific needs.
Advantages of Full Suspension Bikes:
- Better comfort and control on rough terrain
- Increased traction and stability, especially on downhill or technical trails
- More forgiving ride for beginners or those new to mountain biking
Disadvantages:
- Heavier than hardtail bikes
- Requires more maintenance due to additional components
- More expensive compared to front suspension bikes
How Does a Suspension Bike Work?
Suspension systems use a combination of springs and dampers to absorb and control shock. When the bike encounters a bump, rock, or other obstacles, the suspension compresses to absorb the impact, and then it returns to its original position, thanks to the spring and damper combination. The damper controls the speed of the spring’s return, ensuring a smooth and controlled recovery. This reduces the jarring feeling you would otherwise experience on a rigid bike, improving overall comfort and stability.
Key Components of a Suspension System:
1. Fork (Front Suspension): The fork absorbs the shock at the front of the bike and helps keep your hands and arms steady when riding over rough terrain.
2. Rear Shock (Full Suspension): The rear shock absorbs impacts in the rear of the bike, providing additional comfort and traction.
3. Shock Absorbers (Springs and Dampers): These are the core components that control the compression and rebound of the suspension, ensuring that the ride is smooth and stable.
Why Choose a Suspension Bike?
If you're planning on riding in rough or rocky terrain, or if you want to tackle more technical trails, a suspension bike will make a significant difference in your experience. Suspension bikes are designed to enhance control and comfort, especially on uneven or bumpy surfaces. Here are a few reasons why you might opt for a suspension bike:
- Improved Comfort: Suspension systems help reduce the impact of bumps and vibrations, leading to a more comfortable ride. This is especially important for long rides or trails with lots of obstacles.
- Better Control: With both front and rear suspension, you get more traction and stability, helping you maintain control when going over rough terrain, steep descents, or obstacles.
- Increased Confidence: A suspension bike makes it easier to navigate technical trails without worrying about losing control or hurting yourself from the impact of bumps and drops.
- Versatility: Suspension bikes, particularly full-suspension models, are great for a wide range of terrains, from cross-country routes to downhill trails.
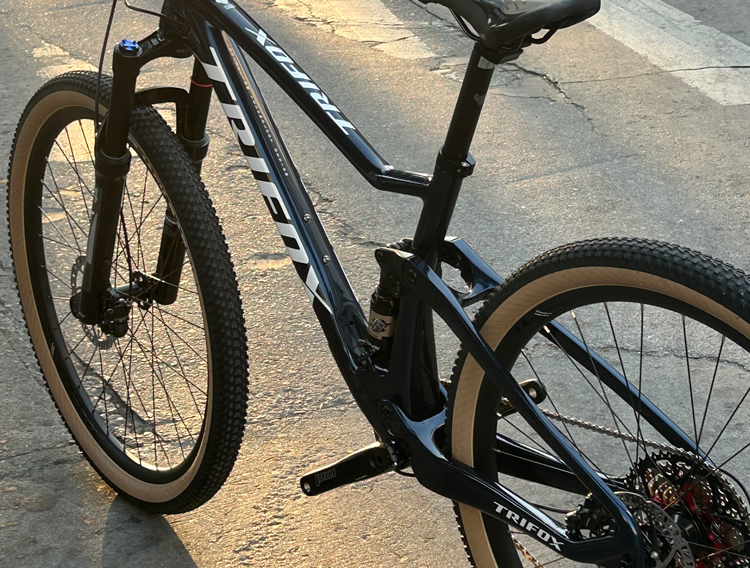
The Trifox MFM100 Full Suspension Carbon MTB Frame
For those looking to invest in a high-performance mountain bike, the [Trifox MFM100 Full Suspension Carbon MTB Frame] is an excellent option. Featuring a lightweight, durable carbon fiber frame and advanced suspension technology, this bike offers enhanced shock absorption, traction, and overall control, making it perfect for mountain biking enthusiasts looking to take on challenging terrains. With its stiff and responsive frame design, the Trifox MFM100 is an ideal choice for riders who want the perfect balance of comfort, performance, and durability.
Final Thoughts
Whether you opt for a front suspension (hardtail) or full suspension bike, suspension systems are a key feature for riders who want to improve comfort and performance on rough terrain. By absorbing shocks and maintaining traction, suspension bikes make riding on challenging trails smoother and more enjoyable. With options ranging from lightweight hardtails to full-suspension models like the Trifox MFM100, there’s a bike to suit every type of rider and riding style.

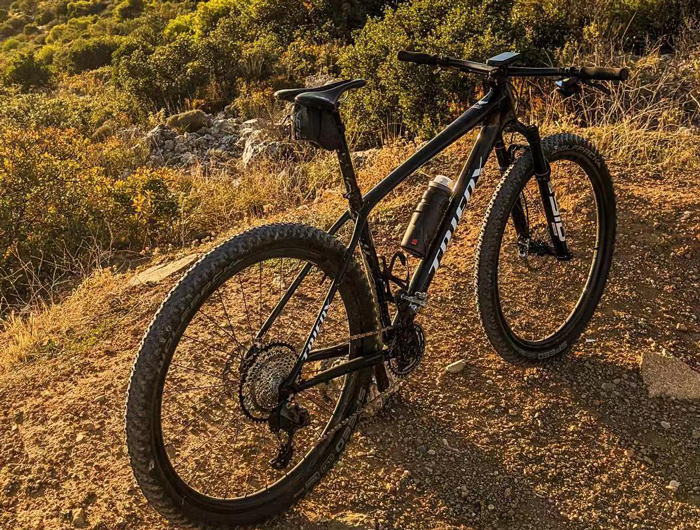
When it comes to mountain biking, having the right bike for the terrain is essential for both performance and enjoyment. Among the many choices available, the PeakTrail Xtreme MK7 Aluminum Mountain Bike stands out as a top contender for trail enthusiasts. This bike, designed for rugged terrain and built to withstand the toughest trails, offers a combination of lightweight durability, smooth handling, and advanced features that set it apart from other trail bikes.
1. Lightweight Yet Durable Aluminum Frame
One of the standout features of the PeakTrail Xtreme is its aluminum frame, which strikes the perfect balance between strength and weight. While many high-performance mountain bikes use heavier steel or more expensive carbon fiber frames, the aluminum frame of the PeakTrail Xtreme MK7 offers exceptional durability without adding unnecessary weight.
This makes it easier to tackle steep climbs and challenging terrains without being weighed down. The aluminum construction also means the bike is highly resistant to corrosion, ensuring that it can handle the elements and continue to perform season after season, whether you’re riding through muddy trails, wet conditions, or rocky surfaces.
For riders looking for a bike that delivers both power and agility, the PeakTrail Xtreme’s lightweight design allows for faster acceleration and greater maneuverability, giving you a competitive edge on technical sections and tight corners.
2. Advanced Suspension for Smooth Rides
Mountain biking often involves tackling rough, uneven trails, and the PeakTrail Xtreme is equipped with an advanced suspension system that absorbs shocks and provides a smoother, more comfortable ride. With a front suspension fork designed to cushion impacts from bumps, rocks, and roots, the bike is optimized for trail riding. This suspension system is particularly beneficial when you encounter rocky or root-heavy trails, as it absorbs the vibrations and helps you maintain control.
While many trail bikes may only have basic suspension systems, the PeakTrail Xtreme ensures that every ride, whether uphill or downhill, remains comfortable and controlled, even on challenging terrain. This is essential for maintaining stability and confidence while riding through technical sections, making it easier to focus on your performance rather than worrying about discomfort or lack of control.
3. Superior Handling and Control
Control is paramount for mountain bikers, and the PeakTrail Xtreme MK7 excels in this area. The geometry of the bike is specifically designed to offer superior handling, allowing riders to navigate tight turns, rough descents, and uneven terrain with ease. The bike’s geometry provides a stable and responsive ride, enabling better control during technical descents and tight corners.
The wide tires on the PeakTrail Xtreme further enhance grip, improving traction on slippery or rocky trails. This allows for better control when navigating steep slopes or loose gravel, so you can confidently take on obstacles without worrying about losing grip or stability.
Whether you’re riding through switchbacks or descending from a mountain trail, the PeakTrail Xtreme provides the level of control that ensures you’re always in charge, regardless of the conditions.
4. Versatile Components for a Range of Terrains
The PeakTrail Xtreme is designed to handle a wide range of terrains, from smooth, fast-flowing trails to rugged, technical tracks. The bike is equipped with high-quality components that improve performance across different terrains. This includes an efficient gear system that allows for smooth shifting, helping you power through climbs and keep up speed on flat sections.
Additionally, the strong, reliable brakes give riders confidence on downhill runs, ensuring you can stop quickly and safely when navigating tricky sections. The combination of components ensures that the PeakTrail Xtreme is versatile enough for different riders, from beginners to more experienced bikers, and can be trusted in various riding conditions.
5. Durability for Long-Term Use
Mountain biking can be demanding on both the rider and the bike, but the PeakTrail Xtreme MK7 is built to endure. Thanks to its durable aluminum frame and rugged components, this bike can handle frequent use, from aggressive trail riding to weekend adventures. The reinforced parts are designed to stand up to the harsh conditions of off-road cycling, including mud, dirt, water, and rocks.
For serious mountain bikers, durability is key—no one wants to invest in a bike that will break down after a few rides. The PeakTrail Xtreme provides long-term performance, allowing riders to take on challenging trails without worrying abohigh-performance trail bikes come with a steep price tag, the PeakTrail Xtreme MK7 offers exceptional value for money. By using aluminum for the frame and combining it with reliable suspension and components, this bike delivers solid performance without breaking the bank. For riders who want a durable, high-performing bike without paying for top-tier carbon frames or overly expensive designs, the PeakTrail Xtreme offers an excellent balance of quality and affordability
The PeakTrail Xtreme MK7 Aluminum Mountain Bike is a standout choice for anyone looking to take their trail riding to the next level. Its lightweight yet durable aluminum frame, advanced suspension system, superior handling, and reliable components make it a top contender in the mountain biking world.
Whether you’re a beginner looking for a versatile bike to tackle different trails or an experienced rider who demands control and performance, the PeakTrail Xtreme offers the perfect combination of durability, speed, and comfort to make every ride an adventure.
文字

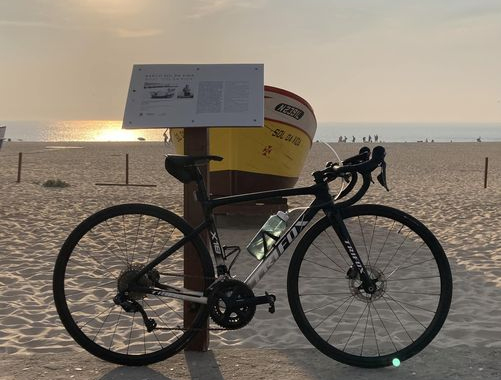
For cycling enthusiasts and competitive riders, the quest for speed is an ongoing challenge. Every part of the bike contributes to the overall performance, from the frame material to the gearing system. Among the most popular choices for speed-focused cyclists is the 11-speed aero road bike. These bikes promise improved aerodynamics, faster shifting, and a more efficient ride, but the question remains: is an 11-speed aero road bike worth the investment for those who are serious about speed?
1. Precision Shifting and Gear Range
One of the most significant upgrades you get with an 11-speed system is the increased gear range and smoother, faster shifting. Compared to a 10-speed bike, an 11-speed drivetrain allows for more closely spaced gears. This means you can make finer adjustments in your cadence, ensuring that you always find the perfect gear to optimize your pedaling efficiency—whether you're powering through flat stretches or tackling a challenging climb.
The added gears also give you a broader range, helping to maintain speed on varying terrains. For speed enthusiasts, having the ability to fine-tune your gear selection in response to changes in gradient or wind conditions is a huge advantage. In races or time trials where every second counts, this level of precision can make the difference between a podium finish and an also-ran result.
2. Aerodynamics and Speed
An aero road bike is designed with one goal in mind: speed. The frame geometry is optimized to reduce drag, and the bike’s overall design helps the rider achieve a more aerodynamic position. Combined with the 11-speed drivetrain, which allows for more efficient power transfer, an aero road bike helps cyclists maintain higher speeds with less energy.
The Trifox 2024 R241, for example, features a carbon fork and aluminum frame, a combination that delivers both aerodynamics and durability without sacrificing weight. The lighter frame, combined with the aerodynamic design, reduces wind resistance, allowing cyclists to achieve faster speeds with less effort. For speed enthusiasts, this means that you can ride faster, use less energy, and maintain high speeds over longer distances.
3. Better Control with Disc Brakes
In addition to the performance benefits of the 11-speed system, modern aero road bikes like the Trifox R241 come equipped with disc brakes. Disc brakes provide superior stopping power, especially in wet or variable conditions, allowing for better control at high speeds. For speed enthusiasts, having the confidence to brake effectively—without compromising safety or control—is crucial when navigating downhill stretches or tight corners during competitive events.
When you're pushing your bike to its limits, knowing that your braking system can handle the demands of high-speed riding offers peace of mind, ensuring you can focus on performance without worrying about safety concerns.
4. Enhanced Durability and Performance Over Long Distances
While the initial investment in an 11-speed aero road bike may seem steep, these bikes are built for durability. The quality of materials, such as the aluminum frame and carbon fork found in the Trifox R241, is designed to withstand the demands of long-distance rides, high-speed sprints, and tough training sessions. Aero bikes are engineered for riders who are pushing their limits, and these frames can handle the stress of aggressive riding.
Moreover, the S-Ride 2x11-speed groupset offers smooth, responsive performance over time, even as it experiences wear and tear. The added durability ensures that you're not just buying a bike for today but investing in a machine that will serve you well through many seasons of racing and training.
5. The Cost-to-Performance Ratio
One of the key considerations when purchasing any high-performance bike is the cost-to-performance ratio. While an 11-speed aero road bike like the Trifox R241 may come at a premium price compared to entry-level models, the performance gains in terms of speed, efficiency, and aerodynamics make it a worthwhile investment for serious cyclists. If speed is your top priority, the precision and control offered by an 11-speed system can significantly enhance your overall riding experience.
For speed enthusiasts, the ability to gain an edge in both training and competition can justify the investment. When you factor in the long-term durability and the advanced features like disc brakes and aerodynamic frame design, an 11-speed aero road bike offers both performance and value.
Conclusion
If you’re a speed enthusiast looking to elevate your riding experience, the 11-speed aero road bike is definitely worth the investment. With benefits like precision shifting, superior aerodynamics, better braking performance, and long-term durability, this bike type is built to optimize every ride. Whether you’re a competitive cyclist or a recreational rider aiming for higher speeds, a well-designed aero road bike like the Trifox R241 can help you achieve your goals while providing a thrilling and efficient ride.
Choosing the right full suspension bike can transform your off-road biking experience, offering enhanced comfort, control, and performance. Full suspension bikes are designed to handle rough terrains by absorbing shocks from both the front and rear, making them ideal for trail and mountain biking. Here’s a comprehensive guide to help you choose the perfect full suspension bike, using insights from Trifox Bike's MFM100 full suspension carbon MTB frame.
Understanding the Benefits of Full Suspension Bikes
Full suspension bikes provide the advantage of dual shock absorption, which significantly reduces rider fatigue and enhances traction on uneven terrains. This dual suspension system allows for better handling and control, especially on descents and technical trails. The added comfort and control make full suspension bikes a popular choice for both competitive riders and casual adventurers.
Key Features of the MFM100 Frame
The Trifox MFM100 frame exemplifies what to look for in a high-performance full suspension bike:
1. Material and Weight: Made from T800 carbon fiber, the MFM100 frame is ultra-lightweight while maintaining strength and durability. Weighing just over 2kg, it provides a great balance for speed and endurance.
2. Boost Design: With a 148 x 12mm spacing, it enhances the rear wheel's strength and stiffness, accommodating up to 2.35" tires for better traction and stability.
3. Geometry and Suspension: The frame features a 68.5° head tube angle and a customizable rear shock mount, allowing riders to fine-tune their setup for optimal performance and comfort.
4. Internal Cable Routing: This feature offers a sleek, uncluttered look while protecting cables from the elements, contributing to the bike's overall aesthetic and aerodynamics.
Steps to Choose the Right Full Suspension Bike
1. Determine Your Riding Style: Consider the type of terrain you plan to tackle. Trail bikes are versatile and suitable for various conditions, while downhill bikes are optimized for steep descents.
2. Choose the Right Frame Material: Carbon fiber frames like the MFM100 are preferred for their lightweight and strong construction, which enhances handling and speed.
3. Consider Suspension Type and Travel: Look for bikes with adjustable suspension to tailor your ride based on the trail conditions. The MFM100 offers travel options of 100mm to 115mm, providing flexibility for different terrains.
4. Evaluate Bike Geometry: Geometry affects handling and comfort. A longer wheelbase and slack head angle offer stability on descents, while a steeper seat tube angle improves climbing efficiency.
5. Assess Component Quality: Pay attention to the quality of components, such as the drivetrain, brakes, and wheels. High-quality components like those offered by Trifox ensure reliability and performance.
6. Test Ride If Possible: If you have the opportunity, test ride different models to feel the differences in handling and comfort. This can provide invaluable insight into what fits your style and preferences.
Tips for Making the Right Choice
- Budget Considerations: Determine your budget beforehand and focus on finding the best quality within that range. Trifox offers competitive pricing on high-performance frames like the MFM100.
- Future Upgrade Potential: Consider a bike that allows for easy component upgrades. This flexibility can help you improve performance as your skills advance.

In conclusion, selecting the right full suspension bike involves understanding your needs, evaluating technical specifications, and making informed decisions based on your riding style and goals. The Trifox MFM100 frame is an excellent example of a high-quality option that caters to various biking needs, making it a strong contender for anyone looking to enhance their off-road adventures. By following these steps, you can find a bike that delivers both excitement and comfort on every ride.

In the world of competitive cycling, the choice of bicycle can be as critical as the training regimen itself. Top riders often select bikes that enhance their performance through a combination of advanced technology, superior materials, and innovative designs.
The Allure of Carbon Frames
One of the most sought-after features in professional-grade bicycles is the carbon frame. Carbon fiber is favored for its remarkable combination of lightweight and strength, allowing riders to achieve higher speeds with less effort while maintaining durability. Trifox Bike, known for its high-quality carbon products, offers frames that are not only light but also robust, providing a solid foundation for competitive racers.
Performance and Durability
The demands of professional cycling require bikes that not only perform well but also withstand rigorous use. Trifox's carbon frames and components ensure that durability does not come at the cost of performance. Models like the Pioneer and the Ultra Light SF-QR 2.0 exemplify this balance, providing riders with the agility needed for swift maneuvers and the toughness required for endurance.
Technological Advancements
Top riders also gravitate towards bicycles that incorporate the latest technological advancements. Features such as aerodynamic designs, integrated components, and enhanced suspension systems can make a significant difference in a race. Trifox's commitment to innovation is evident in their bike designs, which often include cutting-edge technology that optimizes speed and efficiency.
Benefits of High-Quality Materials
The use of high-quality materials extends beyond just the frames. From carbon wheels to handlebars, every component can impact the overall performance of a bike. Trifox ensures that each part contributes to a cohesive, high-performing machine, allowing cyclists to focus on their ride without worrying about equipment failure or inefficiencies.
Specific Models for Different Needs
Professional cyclists often choose bikes tailored to their specific disciplines or racing conditions. Trifox offers a variety of models to cater to these diverse needs. The Pioneer, for example, is an excellent choice for those prioritizing stability and power transfer, making it ideal for road races. Meanwhile, the Ultra Light SF-QR 2.0, true to its name, is designed for those who need a feather-light ride that doesn't compromise on speed or control.
Influence on Professional Choices
Ultimately, the choice of bicycle among top riders comes down to how well the bike can enhance their natural abilities and complement their training. The precision engineering and thoughtful design of Trifox bikes offer these athletes the tools they need to excel. With features that maximize performance and provide a competitive edge, it's no wonder that such bicycles are the go-to choice for many professionals.
In conclusion, the preferences of top riders reflect a blend of innovation, material excellence, and performance-focused design. As cycling technology continues to evolve, brands like Trifox are at the forefront, providing bicycles that meet the high standards of elite cyclists, ensuring every ride is not just a journey, but a testament to the power of modern bike engineering.

Finding a high-quality bicycle frame without spending a fortune is a top priority for many cycling enthusiasts. Whether you're building a bike from scratch or upgrading an old one, the frame is the foundation of your ride, influencing its performance and durability. Fortunately, there are strategies to find affordable yet quality frames that meet your needs. Here’s how you can get started without stretching your budget.
1. Know What You Need
Start by understanding your cycling needs. Are you a road cyclist, mountain biker, or someone who enjoys leisurely rides? Knowing the primary use will help you focus on the right type of frame. For instance, road bike frames are designed for speed and efficiency, while mountain bike frames are built for durability and control on rough terrains.
2. Focus on Frame Material
Frame material significantly impacts both performance and price. Common materials include aluminum, steel, titanium, and carbon fiber. Each has its pros and cons:
- Aluminum: Lightweight and affordable, suitable for beginners and casual riders.
- Steel: Known for its durability and smooth ride quality, though heavier.
- Titanium: Offers strength and lightness but is typically more expensive.
- Carbon Fiber: Lightweight and strong, ideal for performance-focused cyclists.
Trifox Bike offers carbon road bike frames at a fraction of the usual cost, providing an excellent option for those seeking lightweight and durable frames without the premium price tag.
3. Look for Discounts and Deals
One way to save money is by shopping during sales or looking for discounts on last season's models. Trifox Bike, for example, often offers significant discounts on their carbon road bike frames, such as the X8QR and X12 models, which are available at over 50% off with free shipping on orders over $50.
4. Compatibility with Components
Ensure the frame is compatible with your existing or intended components. Check the frame’s specifications, such as wheel size, brake type (disc or rim), and bottom bracket type. Trifox provides detailed information on their frames, making it easier for you to verify compatibility.
5. Read Reviews and Get Recommendations
Before finalizing your purchase, read customer reviews and seek recommendations from fellow cyclists. This can provide insights into the frame's performance and durability. Trifox Bike's website features reviews for each frame, helping you make an informed decision.
6. Consider Buying Direct
Buying directly from manufacturers like Trifox can often result in better deals, as it eliminates retailer markups. This approach can offer better value for your money while still providing a high-quality product.
7. Don't Sacrifice Quality for Price
While it's essential to stay within your budget, compromising too much on quality can lead to higher costs down the line due to maintenance or replacement needs. Look for frames that balance affordability with durability and performance.
Conclusion
Finding a quality bicycle frame without breaking the bank is achievable with the right approach and resources. By focusing on your needs, understanding frame materials, and seeking out deals, you can secure a frame that offers both performance and value. Trifox Bike stands out as a great option, providing high-quality carbon frames at competitive prices. With the right frame, you'll be well on your way to enjoying countless hours of cycling, confident that you've made a smart investment.
Mountain biking is an exhilarating sport that combines adventure, fitness, and a deep connection with nature. For newcomers eager to hit the trails, getting started might seem daunting, but with the right guidance, you can dive into the world of MTB (mountain biking) with confidence.
1. Choosing the Right Bike
Your mountain bike is the core of your experience, and selecting the right one is crucial. For beginners, an all-around MTB is ideal. Consider factors like the bike's frame material, suspension type, and wheel size. Trifox Bike offers high-quality carbon frames, which are lightweight and durable, making them an excellent choice for those new to the sport. Their range includes options like the Pioneer and PeakTrail Xtreme, catering to different biking needs and budgets.
2. Essential Gear
Beyond the bike, there are several pieces of gear that will enhance your ride:
- Helmet: This is non-negotiable. A helmet protects you from serious injuries and is a must-have for every ride.
- Gloves: They offer better grip and protect your hands during falls.
-Protective Eyewear: Shields your eyes from dust, debris, and UV rays.
- Hydration Pack: Staying hydrated is crucial, especially on longer trails.
- Appropriate Clothing: Opt for moisture-wicking fabrics that keep you comfortable, and consider padded shorts for added comfort.
3. Basic Maintenance Tips
To ensure your bike remains in top condition, regular maintenance is key:
- Tire Pressure: Check your tire pressure before each ride. Properly inflated tires provide better control and reduce the risk of flats.
- Chain Lubrication: Keeping your chain well-lubricated ensures smooth shifting and prolongs the life of your drivetrain.
- Brake Check: Test your brakes before every ride to ensure they're responsive.
- Regular Cleaning: Dirt and grime can affect performance. Regularly clean your bike, especially after muddy rides.
4. Safety Precautions
Safety should always be a priority:
- Trail Etiquette: Respect other trail users. Yield to uphill climbers and be mindful of hikers.
- Ride Within Your Limits: Start with trails that match your skill level and gradually progress to more challenging ones.
- Stay Aware: Always be aware of your surroundings, including other riders and potential hazards on the trail.
5. Getting Involved in the Community
Mountain biking is not just a sport; it's a community. Joining local MTB groups can provide support and camaraderie. These groups often organize rides and offer valuable tips and encouragement.
6. Upgrading as You Progress
As you become more comfortable, you might consider upgrading your components. Trifox Bike offers a range of components, from carbon wheels to forks, that can enhance your bike's performance. These upgrades can make a significant difference as you tackle more challenging trails.

Starting your mountain biking journey is an exciting step towards endless adventures. By investing in quality gear and understanding the basics, you'll be well on your way to enjoying the thrill of the trails. Remember, every expert was once a beginner, and with each ride, you'll gain confidence and experience. Embrace the journey, stay safe, and enjoy every moment on your bike.

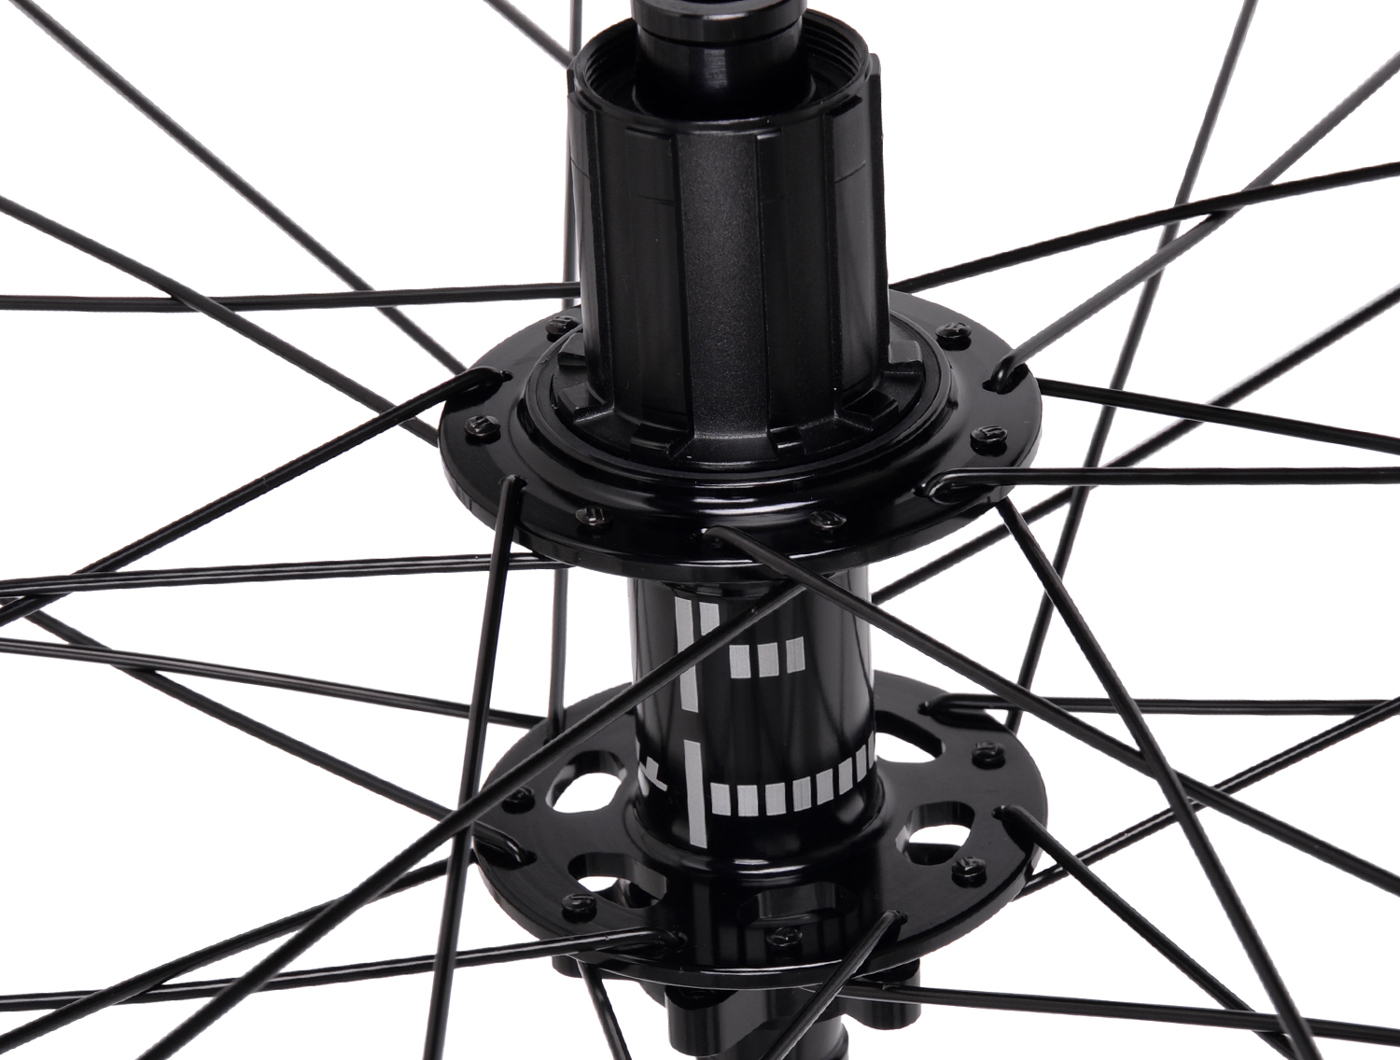
Choosing the right alloy 700c bicycle wheels can make a substantial difference in your cycling performance and experience. Whether you're a daily commuter, a weekend warrior, or a competitive cyclist, selecting the right wheels involves considering several key factors, including weight, durability, and cost.
Choosing Alloy 700c Bicycle Wheels
1. Consider Your Cycling Needs
- Commuting: If you're using your bike primarily for commuting, consider wheels that are durable and can withstand rougher terrains. Alloy wheels are a great choice as they offer a balance between strength and weight, making them ideal for everyday use.
- Racing: For competitive cycling, weight becomes a critical factor. Lighter wheels contribute to faster acceleration and improved climbing ability. Alloy wheels like the AWT7 from Trifox, which offer a blend of lightness and performance at a reduced cost, could be an ideal option.
- Touring: For long-distance touring, durability and comfort take precedence. Look for wheels that offer a comfortable ride and can endure long periods of cycling without wear. Alloy wheels with a robust build and good shock absorption properties will serve you well.
2. Evaluate Weight and Durability
- Weight: Alloy wheels are generally lighter than their steel counterparts but heavier than carbon wheels. However, they provide an excellent middle ground, offering the advantages of lightweight construction while maintaining a lower price point compared to carbon wheels.
- Durability: Alloy is known for its resilience. When choosing wheels, ensure they can handle the types of roads and conditions you usually encounter. Products like Trifox's Alloy Road Bike Wheels AWT18 are designed to offer a good balance between weight and durability, making them a reliable choice for various cycling activities.
3. Assess Cost and Value
- Budget: Alloy wheels are available at various price points, making them accessible for different budgets. Trifox offers competitive pricing on their wheels, with significant discounts and free shipping for orders over $50, enhancing value without compromising quality.
- Value: Look for wheels that provide excellent value through features like enhanced aerodynamics, quality materials, and good customer service. Trifox, for example, offers 24/7 live chat support, ensuring that you have assistance whenever needed.
Maintaining Your Alloy 700c Bicycle Wheels
Proper maintenance is crucial to ensure the longevity and performance of your alloy wheels. Here are some essential tips:
1. Regular Cleaning
- Clean your wheels regularly to remove dirt, grime, and brake dust that can wear down the rims. Use mild soap and water, and avoid harsh chemicals that can damage the alloy.
2. Inspect for Damage
- Regularly inspect your wheels for signs of damage such as cracks or dents, which can compromise safety. Pay special attention to the rims and spokes, especially after long rides or rough terrain.
3. Check Spoke Tension
- Ensure that the spokes are evenly tensioned to maintain wheel integrity. Uneven tension can lead to wheel wobble and reduce performance. If you're unsure, consulting a professional for spoke adjustments can be beneficial.
4. Monitor Tire Pressure
- Keeping your tires at the recommended pressure reduces stress on the wheels and enhances performance. Under-inflation can lead to pinch flats, while over-inflation can cause the tire to blow off the rim.
5. Store Properly
- When not in use, store your bike in a dry place away from extreme temperature changes, which can affect the integrity of alloy materials.
By carefully choosing and diligently maintaining your alloy 700c bicycle wheels, you'll enjoy a smoother, more efficient ride. Brands like Trifox offer quality options that cater to different needs, ensuring you find the perfect fit for your cycling adventures. With the right approach, your wheels can provide reliable performance for many miles to come.


