


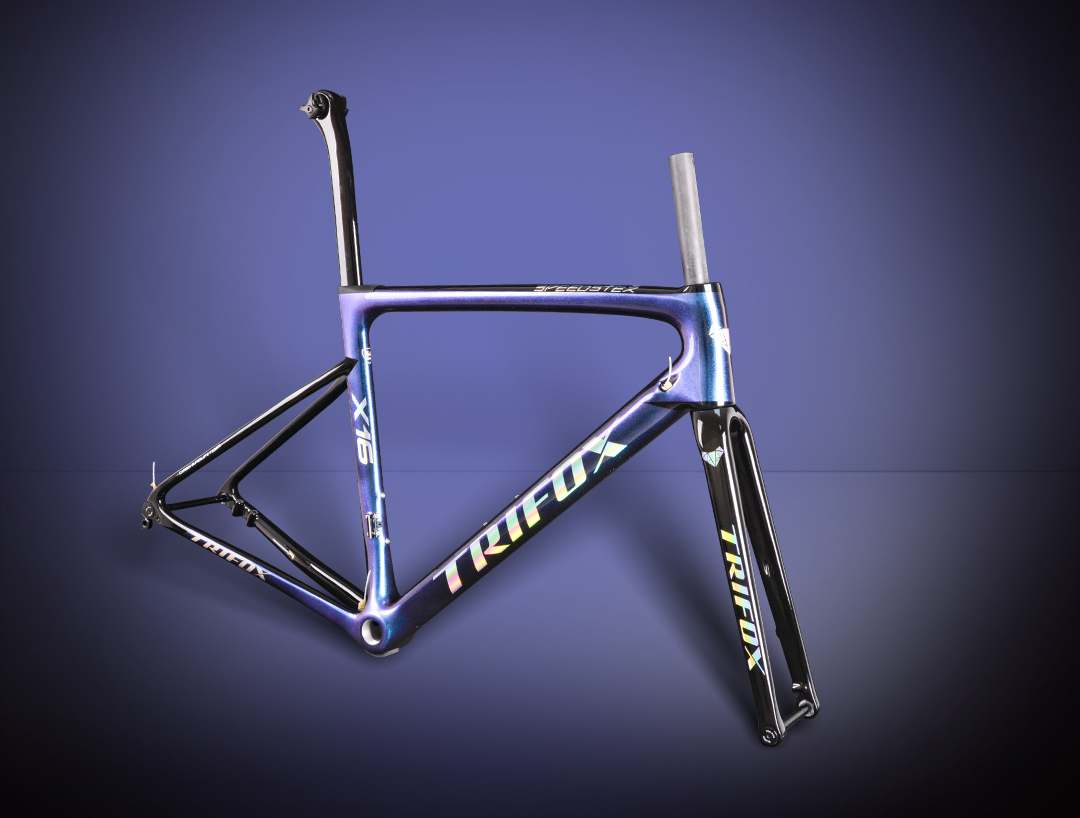
What makes a road bike frame truly popular? It's not just hype – it's the perfect blend of performance, value, and real-world usability. Trifox's X16 Disc Brake Carbon Frame consistently tops their charts, and for good reason. Let's dive into what makes this frame a standout choice for discerning riders:
Uncompromising Lightweight Performance: Crafted from high-modulus T800 carbon fiber, the X16 boasts an impressive frame weight hovering around 900g (size dependent). This translates directly to snappier acceleration, effortless climbing, and a lively, responsive ride that feels eager under power. It's pure road buzz without the penalty.
Disc Brake Dominance: Embracing the modern standard, the X16 features flat-mount disc brake compatibility. This means superior stopping power in all conditions – wet descents, tight corners, or emergency stops – offering consistent modulation and control that rim brakes simply can't match. Confidence is key to speed.
Stiffness Meets Comfort: Trifox engineers didn't just chase grams. The X16 features a stiff front triangle (head tube, down tube, bottom bracket) for razor-sharp handling and efficient power transfer when you stomp on the pedals. Yet, the carefully shaped thin seatstays and fork provide crucial vertical compliance, absorbing road buzz and reducing fatigue on longer rides. You get race-ready feedback without the harshness.
Modern, Versatile Geometry: The X16 strikes a brilliant balance. Its geometry leans towards aggressive (think shorter headtubes, longer reaches) for efficient power output and aerodynamic potential, yet remains accessible enough for spirited club rides and gran fondos. It’s a frame built for speed that doesn’t demand a pro-level contortion.
Smart, Rider-Focused Design:
Threaded Bottom Bracket (BB86): A massive win for reliability and home mechanics. No press-fit creaks here! Easy installation and long-term peace of mind.
Full Internal Cable Routing: Creates a sleek, aerodynamic profile while protecting cables and hoses from the elements. Looks pro, functions flawlessly.
Wide Compatibility: Accommodates electronic and mechanical groupsets, 28c+ tires (great for comfort/rough roads), and standard 27.2mm seatposts for tuning ride feel.
Why the X16 Resonates:
It delivers pro-level pedigree (lightweight carbon, advanced shaping, disc performance) at a direct-to-consumer price that makes high-performance cycling genuinely accessible. You're not paying for flashy marketing or dealer markups – just exceptional engineering focused on the ride.

The Trifox X16 isn't just popular; it's popular for a reason. It masterfully combines the essential ingredients modern road riders crave: lightweight carbon efficiency, the confidence of disc brakes, a balanced blend of stiffness and comfort, and practical, reliable design – all wrapped up in a package offering outstanding value. If you're seeking a frame that punches far above its weight class and forms the foundation of a truly exciting road machine, the X16 is Trifox's testament to smart performance.

Remember when carbon fiber was reserved for pro pelotons and deep-pocketed racers? Not anymore. Mountain biking is witnessing the unstoppable rise of carbon, transforming trails from XC loops to gnarly enduro descents. Brands like Trifox are making this once-exotic material accessible, proving carbon MTBs aren't just lighter – they're better riding machines. Here's why the shift is seismic:
Featherweight Flight: This is the headline. Carbon frames slash pounds off alloy counterparts. Less weight means easier climbing, quicker acceleration, and less fatigue over long days. You carry the bike less; the bike carries you more. Trifox's carbon hardtails and full-suspension rigs exemplify this advantage, turning arduous ascents into achievable efforts.
Stiffness Meets Sensation: Carbon isn't just light; it's incredibly tuneable. Engineers craft frames with targeted stiffness where it matters most: the bottom bracket for efficient pedaling, the head tube for precise steering. Yet, carbon's magic lies in its ability to also offer vertical compliance. It absorbs smaller trail chatter better than alloy, reducing arm and leg fatigue, letting you ride harder, longer.
Strength You Can Trust: Forget the "fragile" myth. Modern carbon layups create structures incredibly resistant to impacts and fatigue. When designed correctly (like Trifox's robust mountain frames), carbon handles rock strikes, drops, and rough terrain with impressive resilience. It won't dent like aluminum and shrugs off corrosion.
Ride Refined: The combination of lightness, stiffness, and subtle flex translates to a more connected, responsive, and lively feel. You feel the trail without being beaten by it. Carbon bikes track better through corners, feel more nimble in the air, and offer a directness that boosts confidence when pushing limits.

Trifox: Bringing Carbon to the Trail
Brands like Trifox are crucial to this rise. By leveraging efficient manufacturing and direct-to-consumer models, they deliver high-performance carbon mountain bikes at astonishingly competitive prices. Whether it's their agile carbon hardtails perfect for XC and trail blasting, or their capable full-suspension platforms, Trifox proves you don't need a pro contract to experience the carbon revolution.
The Verdict: Not Just a Trend, The Future
The rise of carbon fiber in mountain biking isn't just hype; it's a fundamental shift driven by tangible performance benefits. It offers a superior blend of weight, strength, stiffness, and ride quality that alloy struggles to match. As manufacturing advances and brands like Trifox make it more accessible, carbon is becoming the material of choice for riders seeking every advantage on the trail. It’s not about replacing alloy entirely, but about offering a compelling, high-performance option that’s redefining what’s possible on two wheels. Ready to feel the difference? Explore the carbon evolution: Discover Trifox Mountain Bikes.

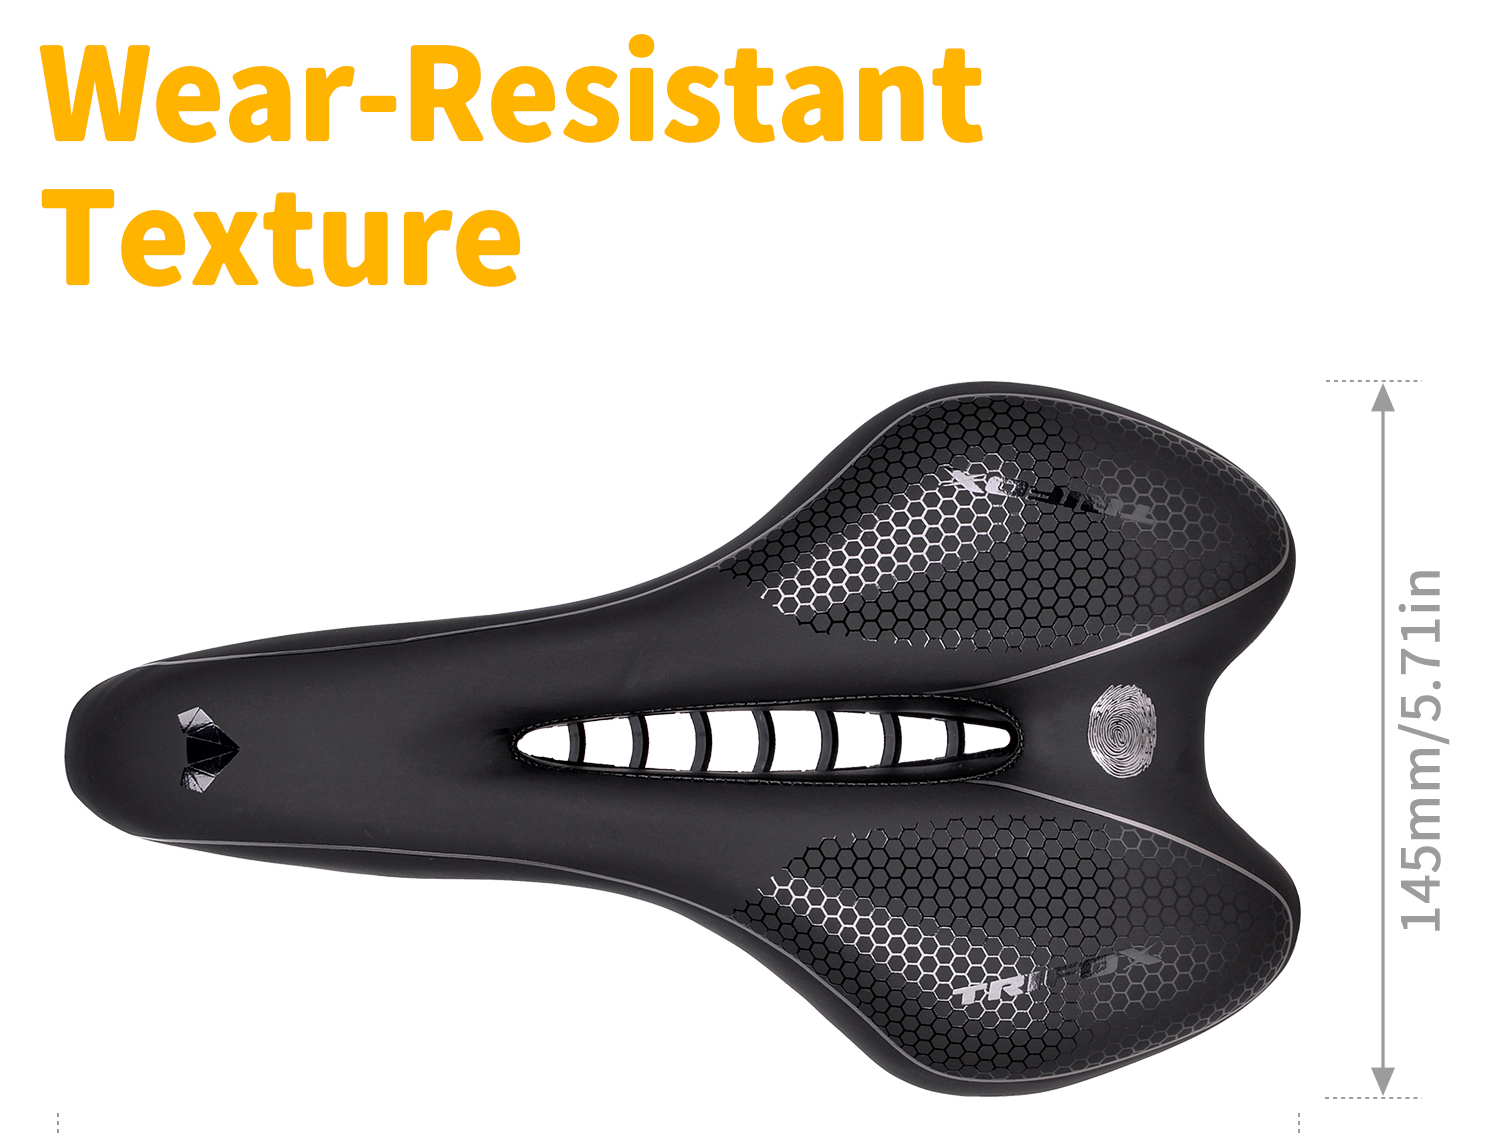
That stock saddle on your road bike? It served its purpose getting you started. But if you're chasing performance, comfort, or simply a more refined ride, upgrading to a full-carbon saddle like the Trifox CS200 is a game-changer. Forget the misconception that carbon is harsh – modern designs blend featherweight efficiency with surprising comfort. Here's why the switch is worth it:
1. The Weight Weenie Wins: This is the obvious one. At a claimed 120 grams, the Trifox CS200 utterly demolishes typical alloy-railed saddles (often 250g+). Shedding 100+ grams directly off your bike, especially high up and at the contact points, makes a tangible difference. It's pure acceleration, easier climbing, and the satisfaction of marginal gains realized. Every watt feels more efficient.
2. Stiffness = Power Transfer: Carbon fiber's inherent stiffness isn't just for weight savings. It means virtually zero flex under power. When you stomp on the pedals, every ounce of energy goes into propelling you forward, not lost compressing padding or flexing the shell. You'll feel a more direct, connected drive, especially during sprints and out-of-the-saddle efforts.
3. Engineered Comfort (Yes, Really!): "Carbon must be hard!" is the biggest myth. Saddles like the CS200 use carefully sculpted shapes, strategic flex zones in the carbon base, and minimal high-density padding precisely where needed. This provides targeted support to your sit bones, reducing pressure on soft tissue. Less padding can actually mean less numbness on long rides, as your weight is correctly distributed. The shape is key, and many find carbon shells conform better over time.
4. Breathability Matters: Ever finished a long ride feeling swampy? Full-carbon bases are inherently perforated or designed with significant cutouts/channels (like the CS200). This promotes airflow, drastically reducing heat and moisture buildup. Enhanced ventilation equals greater comfort and reduced friction, ride after ride.
5. Durability & Low Maintenance: Carbon fiber is incredibly resilient to fatigue and corrosion. Unlike leather or synthetic covers that can degrade, or rails that can rust, a quality carbon saddle shrugs off sweat, weather, and miles. It requires minimal upkeep beyond wiping clean.
The Trifox CS200: A Prime Example
The Trifox CS200 exemplifies these benefits perfectly:
- Ultralight 120g: Significant weight savings.
- Full Carbon Shell & Rails: Maximizes stiffness and durability while minimizing weight.
- Strategic Padding: Minimal, high-rebound foam for targeted comfort without bulk.
- Central Cutout: Enhances breathability and relieves perineal pressure.
- Aerodynamic Shape: Sleek design complements a performance road bike.
Is it for Everyone?
Like any saddle, fit is paramount. A carbon saddle's shape needs to match your anatomy. If the stock shape works for you, upgrading to carbon refines it. If not, focus on finding the right shape first, then consider carbon for the performance benefits. The Trifox CS200 offers a popular, performance-oriented profile.
The Upgrade Verdict:
Upgrading to a carbon saddle isn't just about shaving grams; it's about enhancing the fundamental connection between you and your bike. The blend of dramatic weight reduction, efficient power transfer, surprising comfort through intelligent design, and superior breathability creates a noticeably better riding experience. If you're ready to feel more connected, efficient, and comfortable, especially on demanding rides, a saddle like the Trifox CS200 is a worthy investment. It transforms a crucial contact point from a necessary component into a performance asset. Make the switch and feel the difference!
Forget "just" improved stopping power – switching to a dedicated disc brake wheelset unlocks a cascade of performance benefits that fundamentally elevate your road riding. It's not an incremental upgrade; it's a transformation in control, confidence, and capability.
Why Disc Wheelsets Rule the Road:
1. Unshakeable Confidence, Anywhere, Anytime: Rim brakes falter in wet grit or on long, steep descents. Discs deliver consistent, powerful, and modulated braking performance regardless of weather, road grime, or gradient. This translates directly to riding faster with more control when it matters most.
2. Aerodynamic & Structural Advantages: Free from the need for a braking surface, disc wheelsets allow for wider, deeper, and more aerodynamically optimized rim profiles. This reduces drag for free speed. The rim itself is also stronger without the wear surface, enabling lighter constructions and improved impact resistance.
3. Tubeless Paradise: Disc wheelsets are the perfect partners for tubeless tires. Wider rims create a better tire profile for lower rolling resistance, enhanced grip, and the holy grail: fewer flats at lower pressures. No more worrying about brake track wear from heat during hard descents either.
4. Future-Proof Performance: The industry standard is clear. Disc brakes dominate new road bikes. Investing in a quality disc wheelset ensures compatibility with the latest frames and groupsets, protecting your upgrade path.
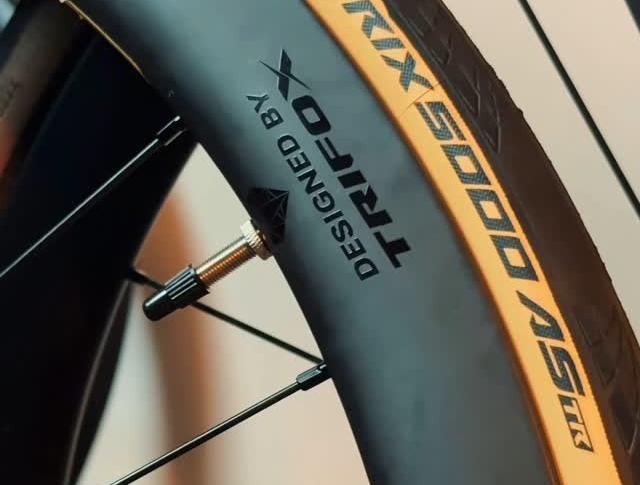
The Trifox WT11: Performance Engineered for Disc:
The WT11 Disc Brake Centerlock Clincher Carbon Wheelset embodies these advantages:
- Lightweight Carbon Construction: Prioritizes acceleration and climbing response.
- Optimized Aero Depth: Balances speed and crosswind stability.
- Wider Rim Profile: Enhances tire performance and supports tubeless setups seamlessly (valves included!).
- Reliable Centerlock Interface: Ensures secure rotor mounting and easier maintenance.
- Stiffness & Durability: Engineered for powerful sprints and demanding riding.
Who Wins with Disc Wheels?
- All-Weather Warriors: Ride confidently rain or shine.
- Descenders & Climbers: Brake later, descend faster, climb without rim heat worries.
- Speed Seekers: Leverage superior aero and tubeless efficiency.
- Tech Adopters: Invest in the modern standard.
Ready for Uncompromised Control & Speed?
Upgrade your stopping power, unlock aerodynamic gains, embrace tubeless simplicity, and future-proof your ride. Disc wheelsets aren't just better brakes; they're the foundation for a faster, safer, and more enjoyable road experience.

Imagine slicing through headwinds, floating up climbs, and feeling every pedal stroke ignite instant acceleration. This isn’t fantasy—it’s the reality of riding an ultra-light road bike. When your entire machine weighs less than a weekend grocery haul, every aspect of cycling transforms from effort to exhilaration.
Why Ultra-Light Matters:
1. Climbs Become Conquests: Shedding weight is the ultimate climbing hack. A lighter frame demands less energy to defy gravity, turning grueling ascents into rhythmic, rewarding efforts. You’ll crest hills faster—and smile wider.
2. Explosive Acceleration: Stop-and-go traffic? Sprint segments? Ultra-light bikes leap forward with minimal input. The reduced mass means near-instant response to power, making surges feel effortless and races decisive.
3. Agile Handling: Cornering tight descents or navigating technical routes becomes intuitive. A featherweight frame dances beneath you, offering surgical precision and confidence at high speeds.
4. Endurance Boost: Less weight = less fatigue. Ride longer, push harder, and finish strong without the dead-legged feeling of hauling excess mass.
The Trifox Difference:
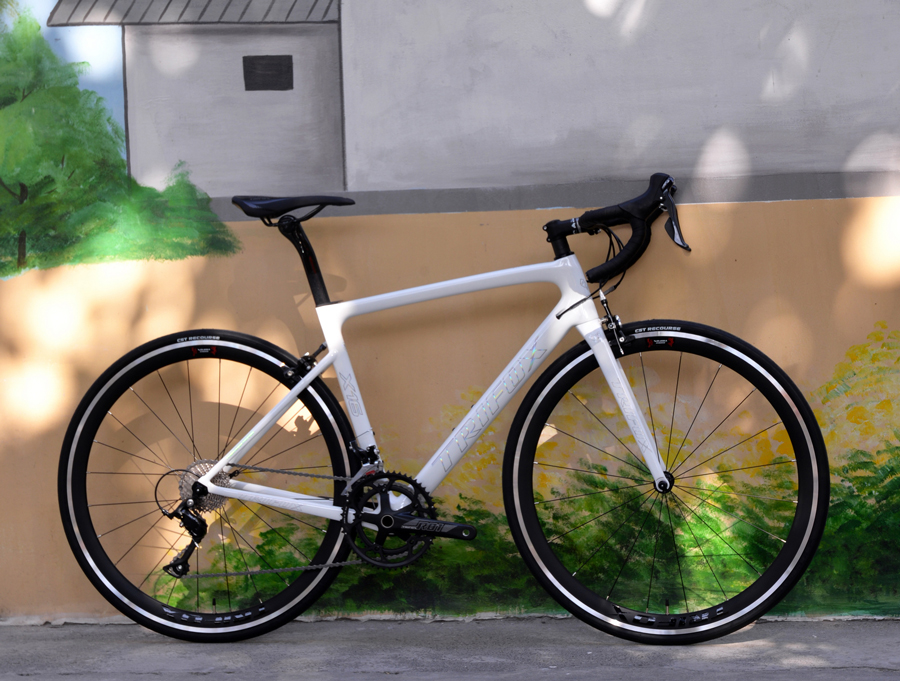
The 700c Carbon Fiber Ultra-Light Road Bicycle isn't just light—it's intelligently engineered. Its monocoque carbon frame blends minimal weight with optimized stiffness, ensuring zero power loss on sprints or climbs. Paired with aerodynamic tube shaping and compatibility with high-end components, it delivers pro-level performance without the pro-level price.
Who It's For:
Climbers: Conquer grades you once walked.
Racers: Gain seconds where they matter most.
Endurance Riders: Cover miles with leftover energy.
Upgraders: Feel your first true "race bike" epiphany.
Ready to Redefine Your Limits?
An ultra-light bike isn't an upgrade—it's a revelation. The Trifox 700C rewrites your relationship with the road, turning struggle into flow and effort into euphoria.

In an era of complex full-suspension rigs, the aluminium hardtail mountain bike holds a special, enduring appeal. It’s not about nostalgia; it’s about a distinct, exhilarating riding experience defined by purity, efficiency, and a direct connection to the trail that modern aluminium frames elevate perfectly.
Why Choose the Aluminium Hardtail?
- Unbeatable Efficiency: Every watt of your pedal power translates directly into forward motion. Aluminium frames offer fantastic stiffness, ensuring minimal energy loss. You feel faster, especially on climbs and flowing singletrack where acceleration is key.
- Trail Telepathy: Without rear suspension, you feel every root, rock, and contour. This direct feedback sharpens your skills, improves your line choice, and creates an incredibly immersive, connected ride. You learn to flow with the trail, not just float over it.
- Lively & Playful: Modern aluminium frames are surprisingly compliant, offering a lively, responsive feel. The hardtail design encourages popping off features, manualing, and flicking the bike around with agility – pure, unadulterated fun.
- Robust & Reliable: Aluminium is tough. It shrugs off rock strikes and minor crashes. Combine that with the inherent simplicity of a hardtail (fewer pivots, less maintenance), and you have a bike built for relentless trail duty and adventure, season after season.
- Incredible Value: You get serious performance and durability without the high cost and maintenance of rear suspension. This frees up budget for higher-quality components elsewhere.
The Modern Aluminium Hardtail: Evolved & Capable
The Trifox PeakTrail Xtreme MK7 exemplifies this allure. It’s not your grandad's rigid bike. Featuring:
- A lightweight, hydroformed aluminium frame with optimized tubing for strength and ride quality.
- Aggressive, modern geometry for confident descending and stability at speed.
- Premium suspension fork (like the Suntour Raidon) to smooth out the front end.
- High-performance drivetrain (Shimano SLX/XT) and powerful disc brakes for precise control.
Who Thrives on a Hardtail?
- Skill Builders: Learn proper technique and become a better rider.
- XC & Trail Racers: Maximize speed and efficiency.
- Value Seekers: Get top-tier performance without breaking the bank.
- Adventure Riders: Dependable, low-maintenance exploration machines.
- Riders Craving Connection: Those who want to truly feel the trail beneath them.
Ready to Embrace the Purity?
Experience the direct thrill and undeniable efficiency of a modern aluminium hardtail. The Trifox PeakTrail Xtreme MK7 delivers the perfect blend of performance, durability, and pure trail feedback. Rediscover why the hardtail remains a cornerstone of mountain biking.
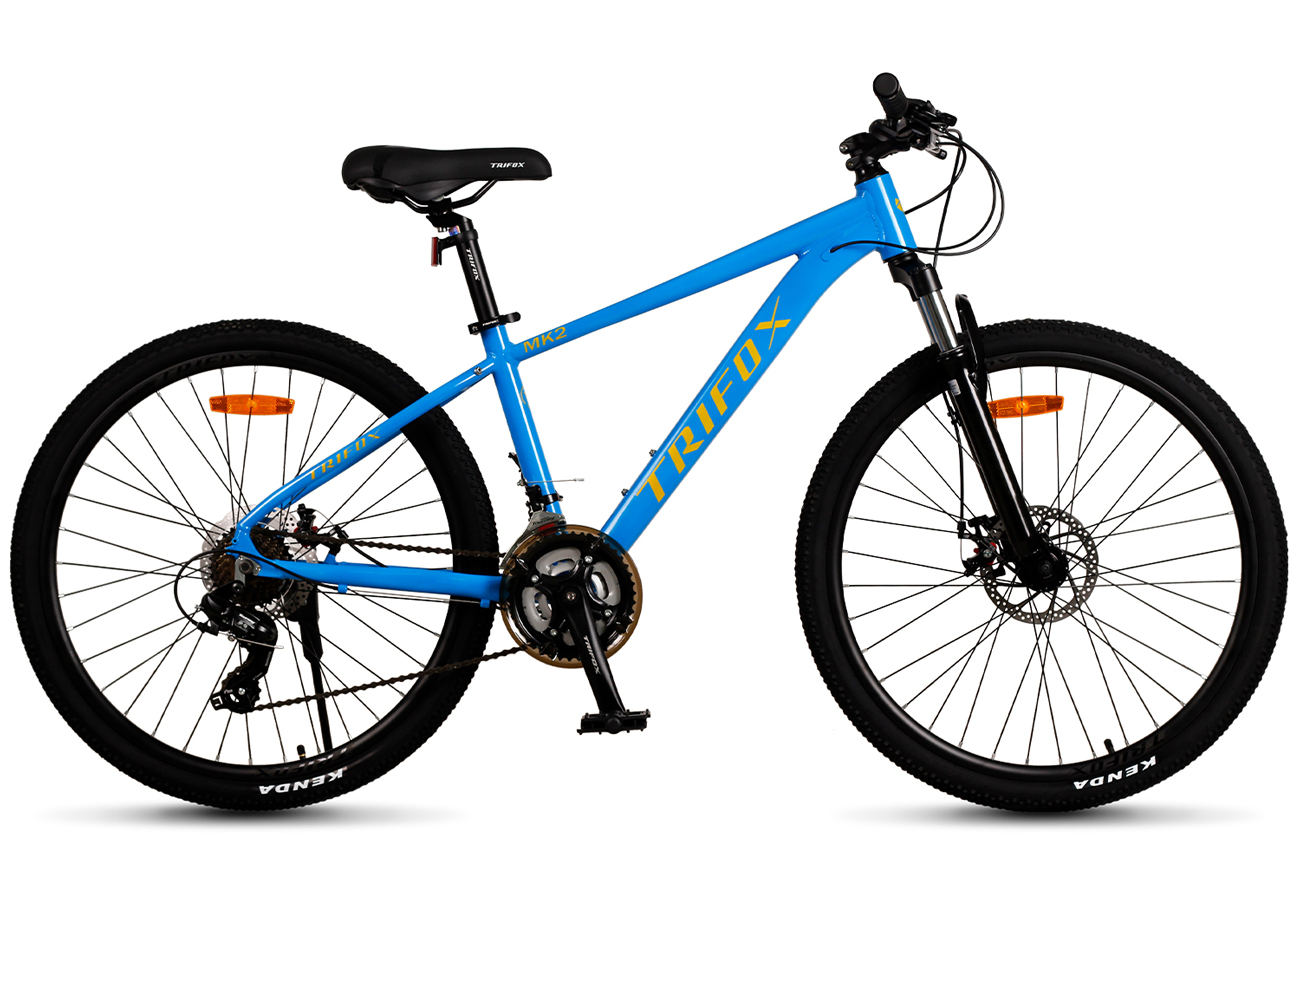
Remember when mountain biking felt pure, agile, and incredibly fun? Before plus-sized tires and complex suspensions dominated, the 26-inch aluminium hardtail reigned supreme. And guess what? It still delivers an unbeatable blend of performance and accessibility!
Why Rediscover the 26er?
Unmatched Agility: Smaller wheels mean quicker steering, tighter cornering, and a more playful, flickable ride through technical singletrack. It feels like an extension of you.
Aluminium Advantage: Modern aluminium frames offer fantastic strength, durability, and a lively ride quality at a fraction of the cost of carbon. It’s tough enough for real trails.
Simplified Fun: Less complexity often equals more smiles. Hardtails are easier to maintain and let you feel the trail directly, improving skills.
Incredible Value: You get serious trail capability without the premium price tag of larger-wheeled or full-suspension bikes. Perfect for beginners or riders seeking a nimble, reliable second bike.
Modern Touches on a Classic:
The Trifox MK2 isn't stuck in the past! It features essential modern upgrades:
Disc Brakes: Reliable stopping power in all conditions, far surpassing old rim brakes.
21-Speed Shimano Tourney: Smooth, dependable shifting for tackling varied terrain.
Updated Geometry: Ensures confident handling on today's trails.
Who Wins with a 26-Inch Aluminium MTB?
New Riders: An affordable, manageable entry point into real mountain biking.
Trail Purists: Riders who love feeling connected to the trail and honing their skills.
Commuting & Adventure: A robust, versatile bike for mixed surfaces and urban exploration.
Anyone Seeking Value: Serious fun without serious debt.
Ready to Experience Classic Trail Thrills?
Don't underestimate the enduring appeal of a well-built 26-inch aluminium mountain bike. The Trifox MK2 26-inch Aluminium Mountain Bike perfectly captures this spirit – blending timeless agility, modern disc brakes, and incredible value. Rediscover the pure joy of nimble trail riding.


Forget marginal gains – shedding significant weight from your bike's core fundamentally revolutionizes your experience. A super light frame isn't just a number; it's the key to unlocking a new dimension of riding.
The most dramatic transformation? Climbing. Less mass means defying gravity requires drastically less effort. Every pedal stroke feels more efficient, translating directly to faster ascents and reduced fatigue. Hills become challenges to relish, not dread. You accelerate quicker, maintaining momentum with newfound ease.
But the magic extends beyond going up. A lightweight frame enhances handling profoundly. It's more responsive to steering inputs, making cornering sharper and more intuitive. The bike feels like an extension of your body, dancing beneath you with agility. This flickability boosts confidence on descents and technical sections.
Acceleration is where a super light frame truly shines. Whether launching from a stop sign or surging out of a corner, the reduced inertia means the bike leaps forward with minimal effort. It feels eager, alive, translating your power into speed instantaneously. You spend less energy overcoming inertia and more maintaining exhilarating velocity.
The overall ride feel becomes exhilaratingly direct. Road buzz and minor imperfections are communicated, but the frame's stiffness (often inherent in lightweight designs like carbon) ensures power transfer is immediate and precise. You feel connected, efficient, and incredibly fast.

Experience this transformation: Ready to feel the climb vanish and the road come alive? The Trifox X16TA Disc Brake Lightweight Carbon Road Bike Frame embodies this revolution. Engineered for minimal weight and maximum performance, it's the foundation for your fastest, most responsive ride yet. Discover how a super light frame changes everything: Less weight, more ride.
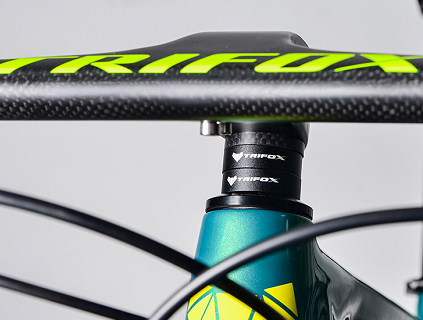
Don't underestimate those humble rings stacked on your steerer tube! Stem spacers are silent heroes in dialing your bike's feel. Positioned above or below your stem, they fine-tune your cockpit’s height – impacting comfort, control, and speed. Here's how:
1. Fit & Comfort:
Spacers directly influence your stack height – the vertical distance from the bottom bracket to the stem. More spacers (or spacers below the stem) create a taller, more upright riding position. This:
Reduces strain on your back, neck, and wrists.
Improves comfort on long climbs or endurance rides.
Opens your chest for better breathing.
Fewer spacers (or spacers moved above the stem) lowers your front end for a more aggressive, aerodynamic posture – ideal for racing or maximizing power transfer.
2. Handling & Stability:
Raising your stem with spacers shifts your weight slightly rearward. This:
Makes steering feel slightly slower and more stable, especially at high speeds or on steep descents.
Increases front-wheel traction for confident cornering.
Lowering the stem shifts weight forward:
Quickens steering response for technical, twisty trails.
3. The Sweet Spot:
Finding your ideal spacer setup balances comfort and control:
XC/Endurance Riders: Often prefer more spacers for comfort during long efforts.
Trail/Downhill Riders: May run fewer spacers (or a slammed stem) for aggressive handling and weight distribution on descents.
Experiment Wisely: Adjust in 5-10mm increments. Never exceed your fork's steerer tube limit! Always leave a 3-5mm spacer above the stem for proper headset preload.
Pro Tip: Use durable, lightweight alloy spacers like Trifox's Precision Spacers. They maintain secure clamping force, resist corrosion, and keep your cockpit clean during adjustments.

The Takeaway:
Stem spacers are free performance tuning! Dialing your stack height optimizes your body's interaction with the bike. A minor tweak can reduce fatigue, boost confidence, and transform your ride. Don't just set it and forget it – experiment safely to find your perfect balance.


