


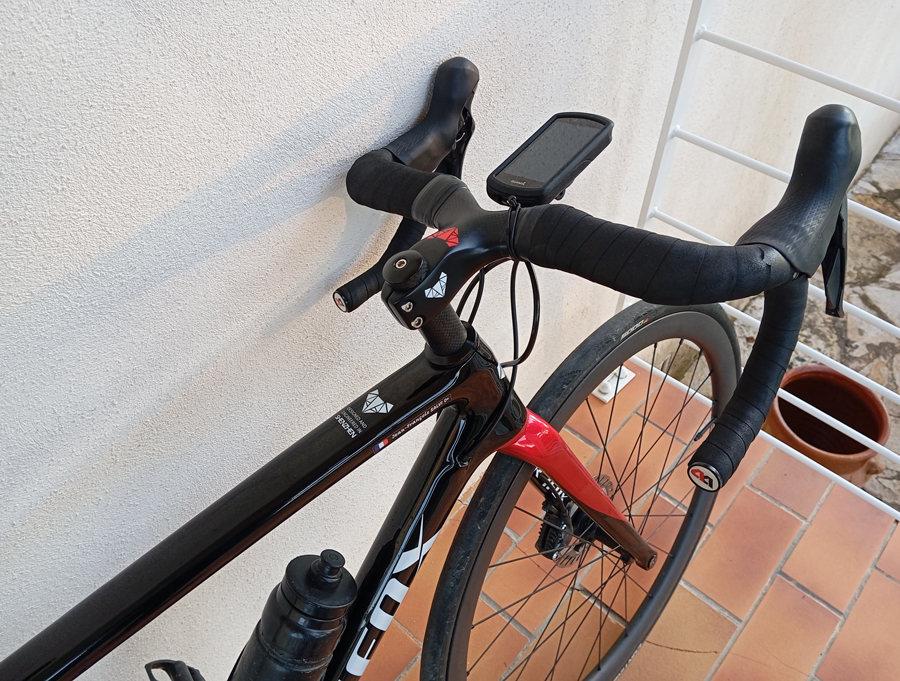
When it comes to cycling, comfort is key. Whether you’re a commuter, a weekend warrior, or a competitive rider, the quality of your ride often depends on the gear you’re using. Among the many upgrades available to cyclists, shock absorption handlebars have gained popularity for their ability to enhance the overall riding experience. These handlebars are designed to reduce the impact of road vibrations and bumps, providing a smoother and more comfortable ride. In this blog post, we’ll explore how shock absorption handlebars, like the integrated carbon drop handlebar with stem DHB500 from Trifox, can improve your cycling experience.
1. Reduced Fatigue from Vibration
One of the most noticeable benefits of shock absorption handlebars is their ability to reduce the amount of vibration transmitted from the road to your hands, arms, and shoulders. Traditional handlebars, especially on rigid frames or road bikes, can transfer a lot of shock from rough roads or gravel surfaces directly to the rider. Over time, this can lead to hand numbness, arm fatigue, and overall discomfort.
Shock absorption handlebars, such as the DHB500, are engineered with materials like carbon fiber that help dampen these vibrations. Carbon fiber’s natural flexibility allows it to absorb much of the harsh impacts, significantly reducing the stress on your body. This results in less fatigue during long rides and a more pleasant experience, even on bumpy terrain.
2. Increased Comfort and Control
In addition to absorbing vibrations, shock-absorbing handlebars can enhance your overall comfort and control on the bike. With reduced hand strain and arm fatigue, you’ll be able to maintain a firmer grip on the handlebars for longer periods. This leads to improved control over your bike, especially in technical riding conditions or while navigating tight turns.
The DHB500 handlebars, with their integrated stem design, offer a sleek, aerodynamic setup that also provides a more natural riding position. The ergonomic design supports a better body posture, allowing you to ride for hours without experiencing the discomfort that typically comes from prolonged pressure on your hands and wrists.
3. Enhanced Durability and Longevity
When it comes to cycling components, durability is essential. Shock absorption handlebars are typically constructed from high-quality materials like carbon fiber, which not only provides shock absorption but also contributes to the overall strength and longevity of the handlebars. The DHB500 handlebars, for example, feature an integrated stem that reduces the number of joints and potential weak points in the system. This results in a more robust setup that is less prone to wear and tear.
Additionally, the reduction in road vibrations can help preserve the longevity of other components on your bike, including your wheels and fork. Less shock transfer means your bike’s parts will experience less stress, leading to fewer repairs and a longer lifespan for your bike.
4. Sleek, Modern Aesthetic
Apart from their performance benefits, shock absorption handlebars like the DHB500 can also contribute to a bike’s overall aesthetic. With their sleek, integrated design, they not only offer superior functionality but also add to the modern, streamlined look of your bike. This is especially appealing for riders who appreciate both form and function.

Shock absorption handlebars like the Trifox DHB500 are a game-changer for cyclists who want to improve their ride quality, comfort, and control. By reducing vibrations, increasing comfort, and enhancing durability, these handlebars allow you to ride longer and with greater ease. Whether you're tackling rough roads or just looking for a more enjoyable commute, shock absorption handlebars can make a noticeable difference in your cycling experience.

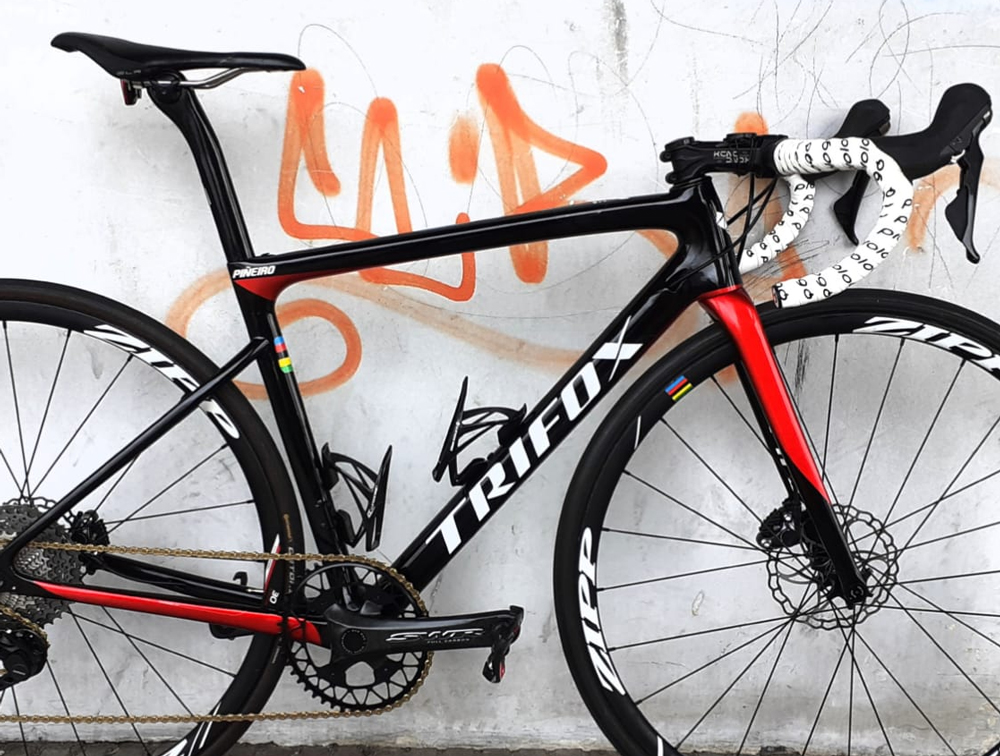
When it comes to road biking, comfort and speed are two of the most sought-after qualities. Whether you're racing through city streets or embarking on long-distance rides, the way your bike absorbs vibrations from the road can have a significant impact on both your comfort and performance. Vibration-absorbing road bikes, particularly those made from advanced materials like carbon fiber, offer a unique advantage in this area. But how exactly do they enhance your ride? Let's break it down, focusing on bikes like the Trifox Carbon Fiber Road Bicycle Ultra Light SF-QR-20.
1. Reducing Fatigue for Longer Rides
One of the most noticeable benefits of a vibration-absorbing road bike is reduced fatigue. When riding on rough or uneven surfaces, the constant vibrations travel through the bike frame and into your body. Over time, these vibrations can lead to discomfort and muscle fatigue, especially on longer rides. This is particularly true for cyclists who ride for extended hours or on roads that aren't perfectly smooth.
The Trifox Carbon Fiber Road Bicycle Ultra Light SF-QR-20 is equipped with a carbon fiber frame that naturally absorbs and dampens road vibrations. Carbon fiber has a unique ability to flex and absorb shock, which helps to reduce the impact forces transmitted to the rider. This results in less strain on your arms, legs, and back, allowing you to ride for longer periods without feeling worn out. Whether you’re training for a race or enjoying a leisurely ride, a vibration-absorbing bike keeps you comfortable, allowing you to push further without the nagging aches that can derail your ride.
2. Enhanced Comfort on Rough Roads
While many road cyclists dream of smooth, pristine pavement, the reality is that most of us will encounter rough patches, cracks, and uneven road surfaces. A traditional road bike without vibration-damping technology might transfer these bumps directly to your body, resulting in a jolting ride that can quickly become uncomfortable.
The Trifox SF-QR-20 addresses this issue with its carbon fiber construction, designed specifically to reduce vibrations without sacrificing stiffness or performance. The material’s natural ability to absorb shocks means that even when you’re riding on less-than-ideal surfaces, you’ll experience a smoother, more enjoyable ride. This level of comfort allows cyclists to focus on their technique and performance rather than being distracted by discomfort, making the bike ideal for those who ride on a variety of road conditions.
3. Improved Handling and Control
A bike that absorbs road vibrations doesn’t just provide comfort—it also improves handling and control. Vibrations from the road can cause your hands and arms to feel fatigued, which reduces your ability to hold the handlebars with a steady grip. This can be especially problematic during high-speed descents or sharp turns, where precise handling is essential.
With a vibration-absorbing road bike like the Trifox Carbon Fiber Road Bicycle, the reduced vibrations lead to better control of the bike. The smoother ride allows for a firmer grip on the handlebars, improving your ability to maintain stability, even in challenging conditions. Whether you’re maneuvering through a tight corner or descending at high speed, the bike’s ability to reduce vibrations keeps you connected to the road, giving you more confidence and control.
4. Increased Speed with Less Effort
While comfort and control are crucial, speed is the ultimate goal for many road cyclists. A smoother ride means you can exert less energy fighting the effects of road vibrations, allowing you to conserve more strength for pedaling and acceleration. The result? More efficient riding and the ability to maintain a faster pace with less effort.
Carbon fiber frames, like those on the Trifox SF-QR-20, are not only lightweight but also designed to flex in a way that maximizes energy transfer. This means that the bike absorbs shocks without wasting energy, allowing you to ride faster and with less strain. By reducing fatigue and increasing comfort, vibration-absorbing bikes make it easier to push your limits, whether you're racing or enjoying a fast-paced ride on your local roads.
5. Long-Term Health Benefits
Consistent exposure to high-impact vibrations can also lead to long-term physical issues, particularly for cyclists who ride frequently. Repeated shocks to the body can cause discomfort in the joints, wrists, and spine, potentially leading to injuries over time. Vibration-absorbing bikes, such as the Trifox Carbon Fiber Road Bicycle Ultra Light SF-QR-20, are designed to minimize these impacts, providing long-term health benefits. By reducing the strain on your body, these bikes help prevent injury and ensure that you can continue riding for years to come.
Conclusion
A vibration-absorbing road bike like the Trifox Carbon Fiber Road Bicycle Ultra Light SF-QR-20 offers significant advantages in terms of both comfort and performance. By reducing road vibrations, these bikes allow cyclists to ride longer with less fatigue, improve their control and handling, and maintain a faster pace with greater efficiency.
Whether you're a competitive racer or a casual rider, the enhanced comfort provided by a vibration-absorbing bike will help you enjoy your rides more and push your limits with greater ease. For cyclists looking to maximize both comfort and speed, investing in a bike with vibration-damping technology is a smart choice that will make every ride smoother, faster, and more enjoyable.

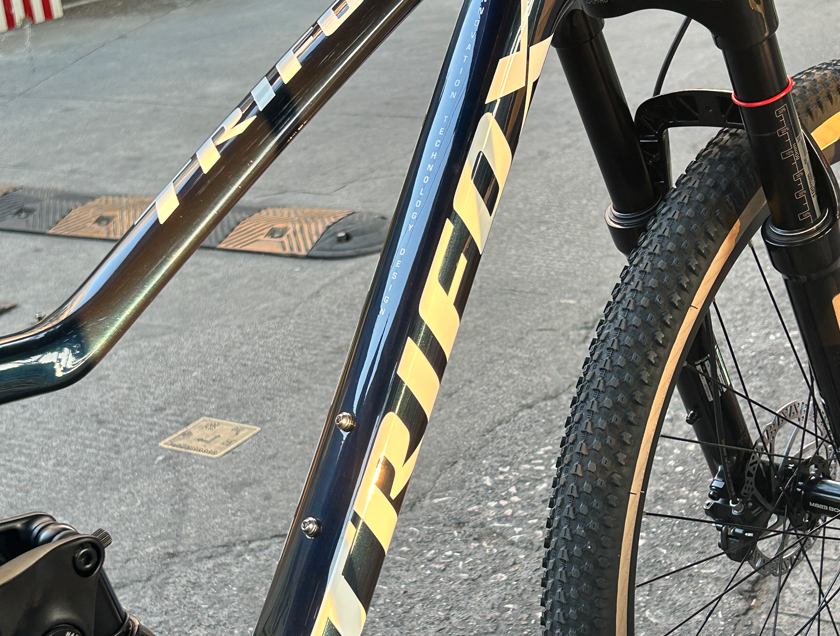
When it comes to mountain biking, especially for trail riders, choosing the right bike can make a world of difference. One of the most debated decisions among cyclists is whether to opt for a dual suspension bike or stick with a hardtail. Dual suspension bikes, which feature both front and rear shocks, are known for their ability to absorb impacts and provide a smoother ride on rough terrain. However, they come with a higher price tag and more maintenance. So, are dual suspension bikes really worth the investment for trail riders? Let’s break it down.
1. Superior Comfort on Rough Terrain
One of the most obvious advantages of dual suspension bikes is the comfort they provide. Trail riding often involves navigating rocky paths, bumpy trails, and obstacles that can create significant jolts and impacts. Hardtail bikes, which only have a suspension fork at the front, can transfer a lot of that shock directly to the rider, leading to discomfort, fatigue, and a less enjoyable ride.
Dual suspension bikes, like the Trifox Pioneer Bike, are equipped with both front and rear shocks that work together to absorb impact. This creates a much smoother ride, allowing you to handle rough terrain with greater ease. The rear suspension helps to absorb shocks from bumps and drops, making the ride more comfortable and reducing the risk of injury from jarring impacts. For trail riders who often encounter technical terrain or prefer longer rides, the added comfort of dual suspension can be a game-changer.
2. Better Control and Handling
Dual suspension bikes also offer superior control and handling compared to hardtails, especially on downhill and technical sections of the trail. The rear suspension helps to keep the rear wheel planted on the ground, improving traction and stability. This is particularly important when navigating loose gravel, wet conditions, or steep descents, where maintaining control is crucial.
The Trifox Pioneer Bike is designed with a robust dual suspension system that enhances handling, even in challenging conditions. The bike’s front and rear shocks work in unison to maintain tire contact with the ground, providing more consistent traction and allowing you to tackle technical sections with confidence. Whether you’re navigating tight switchbacks or blasting down a rocky descent, the improved stability and control that come with dual suspension can make a noticeable difference in your performance.
3. Reduced Fatigue on Long Rides
Riding on rough terrain can be exhausting, particularly on long rides. The constant jarring and bouncing of a hardtail bike can take a toll on your body, leading to fatigue and discomfort. On the other hand, dual suspension bikes reduce the impact forces that travel through your body, making the ride less taxing. This is especially beneficial for trail riders who enjoy longer rides or multi-day adventures.
The Trifox Pioneer Bike offers excellent suspension performance that helps reduce the strain on your arms, legs, and back. With the rear suspension absorbing much of the shock, riders can focus on the ride itself rather than worrying about fatigue or discomfort. If you’re planning on tackling challenging trails or going for long-distance rides, the added comfort and reduced fatigue provided by dual suspension will allow you to ride longer and harder without burning out.
4. Increased Safety and Confidence
A well-designed dual suspension system can also increase your safety on the trails. By providing better traction, stability, and control, these bikes help riders stay in control during high-speed descents, technical maneuvers, and challenging terrain. When you’re riding on a bike that feels stable and secure, you’re more likely to take on challenging obstacles with confidence.
The Trifox Pioneer Bike is equipped with advanced suspension technology that enhances both safety and performance. Whether you’re descending a steep hill or negotiating an uneven rock garden, the bike’s suspension keeps you in control and minimizes the risk of losing traction or control. This makes dual suspension bikes an excellent choice for riders who enjoy pushing their limits and tackling more advanced trail features.
5. The Cost vs. Benefits Debate
Of course, dual suspension bikes come with a higher price tag compared to hardtails. The additional cost is typically due to the more complex suspension systems, higher-quality components, and additional maintenance required. For some riders, especially those just starting out or those who primarily ride smooth trails, a hardtail might offer all the performance they need at a more affordable price.
However, for serious trail riders who often ride on rough, technical trails, the benefits of a dual suspension bike are hard to ignore. The increased comfort, better control, and reduced fatigue make the higher investment well worth it for riders who want to maximize their performance and enjoy a smoother, more enjoyable ride.
So, are dual suspension bikes really worth the investment for trail riders? The answer largely depends on the type of riding you do and your priorities as a cyclist. If you regularly ride on rough, technical terrain or enjoy long-distance trail rides, a dual suspension bike like the Trifox Pioneer Bike can significantly improve your ride quality, comfort, and performance. While they do come with a higher price tag, the added benefits of better control, reduced fatigue, and increased safety make them an excellent choice for serious trail riders who want to take their biking experience to the next level.

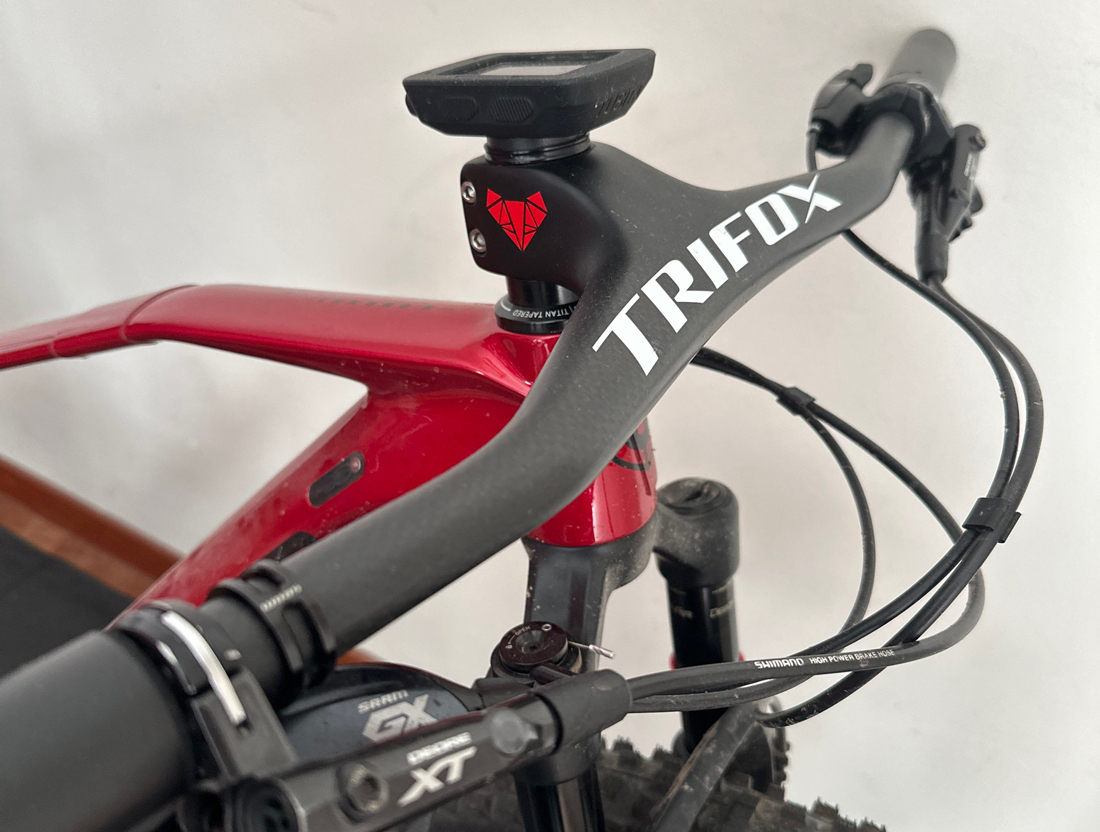
Mountain biking is all about performance, and every aspect of your bike can make a difference—whether it’s your tire choice, frame design, or the handlebars that you use. Aerodynamic handlebars, such as those found in cutting-edge MTB designs, are an often overlooked but powerful component in optimizing your ride. But how exactly can these handlebars improve your MTB performance? Let’s explore the benefits.
1. Reduced Air Resistance for Faster Rides
Aerodynamic handlebars are designed to minimize drag, the resistance caused by air friction. On the trail, especially at higher speeds, every little bit of drag counts. By reducing wind resistance, aerodynamic handlebars allow riders to conserve energy and maintain higher speeds with less effort. This is particularly beneficial on flat sections of the trail or during fast descents, where maintaining speed is crucial. A sleek, integrated design reduces the surface area exposed to wind, helping you cut through the air more efficiently.
For example, the **Trifox Carbon Integrated Handlebar RHB200**, made of high-quality carbon fiber, not only reduces drag but also integrates the stem and handlebar into a single unit. This creates a seamless design that eliminates the gaps and bulges typically found in traditional setups, further improving aerodynamics.
2. Improved Handling and Stability
Aerodynamic handlebars aren’t just about reducing air resistance—they also contribute to better handling and stability, which is vital for off-road riding. Many modern aerodynamic handlebars have a more ergonomic shape, offering a better grip and more control over the bike, especially when navigating rough terrain. The streamlined design also reduces weight, making the bike feel more responsive and agile.
The Trifox RHB200 features a compact, lightweight design that enhances control while riding through technical sections. Less weight means less inertia, allowing you to respond quicker to changes in terrain or obstacles, improving overall stability and comfort on the trail.
3. Enhanced Comfort on Long Rides
Long-distance riders know how much comfort matters. Aerodynamic handlebars like the **Trifox Carbon Integrated Handlebar RHB200** are designed to reduce the strain on your arms and shoulders, which can be especially important during longer rides. The ergonomic shape of the handlebars allows for a more natural hand position, helping to reduce fatigue over time. The lighter weight of carbon fiber also means less effort to keep the bike steady, which is crucial when spending hours in the saddle.
For mountain bikers who are tackling challenging trails or going for endurance rides, comfort is key to maintaining performance. With aerodynamic handlebars, you can ride longer without feeling the aches and pains that come with subpar handlebars.
4.Increased Durability and Strength
Many high-end aerodynamic handlebars are made from carbon fiber, known for its combination of lightweight properties and high durability. Not only does this material contribute to a better aerodynamic profile, but it also enhances the strength and longevity of the handlebars. For mountain bikers who push their bikes to the limit on rugged trails, durability is a must.
The Trifox RHB200 is a prime example of how advanced materials and engineering can create a handlebar that is both aerodynamic and highly durable. The carbon construction can withstand rough handling and impacts, ensuring that the handlebars maintain their integrity throughout countless rides.
Conclusion
Aerodynamic handlebars, such as the Trifox Carbon Integrated Handlebar RHB200, offer more than just a sleek look. They can significantly improve your MTB performance by reducing air resistance, improving handling and stability, enhancing comfort, and providing long-lasting durability. Whether you're chasing speed on flat stretches or navigating technical terrain, these handlebars offer the edge you need to enhance your riding experience. For serious mountain bikers looking to optimize their setup, switching to aerodynamic handlebars is an investment that can pay off in spades.
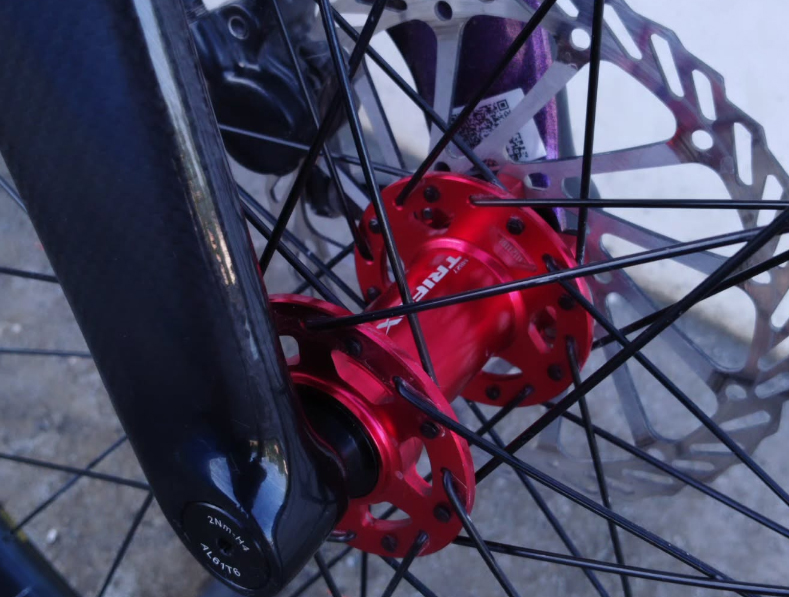
When it comes to cycling, the performance of your bike isn’t just determined by your frame or gears. The wheels play a pivotal role, and within the wheels, the wheel hubs and associated parts are often the unsung heroes of your ride. Wheel hubs are crucial to your bike’s overall performance, affecting everything from speed to handling, efficiency, and comfort.
1. Efficient Power Transfer with Quality Hubs
Wheel hubs are at the heart of your bike’s wheel system, and they play a significant role in how power is transferred from your pedals to the ground. When you pedal, the energy you generate is transmitted through the drivetrain and into the wheel hubs. A high-quality hub can efficiently transfer this energy with minimal loss, making your efforts more effective. This efficiency is essential for long rides, competitive cycling, and hilly terrain where every bit of energy counts.
For example, hubs with a higher engagement rate—meaning the number of points where the pawls inside the hub engage—provide a quicker response to your pedaling. This is particularly advantageous when you’re climbing hills or sprinting, as it allows you to accelerate faster and transfer more of your power to the road without losing momentum.
2. Smoothness and Low Friction for Better Performance
Another key factor in how hubs affect cycling performance is their smoothness and level of friction. High-quality hubs are designed to reduce friction to a minimum, ensuring that your wheels spin freely with less effort. Hubs with high-quality bearings—often ceramic or sealed ball bearings—are more efficient at reducing friction compared to low-quality bearings. This means less energy is wasted during your ride, making it easier to maintain speed, especially during long-distance rides or on flat sections of road.
Smooth-running hubs are also less prone to wear and tear, which can result in improved longevity and lower maintenance costs over time. Hubs that are built with durability in mind can handle the rigors of various terrains without compromising performance.
3. Weight Considerations for Better Handling
Wheel hubs also impact the overall weight of your bike. Lighter hubs can contribute to a faster and more responsive ride, particularly for riders who participate in competitive cycling or racing. A lightweight hub allows your bike to accelerate more quickly, especially when transitioning between gears or during a sprint. On the other hand, heavier hubs can slow you down, particularly when climbing hills or navigating tight corners.
However, it's important to balance weight with durability and strength. For instance, carbon hubs may be lighter but could be less durable on rougher terrains compared to more robust aluminum hubs. Choosing the right hub for your needs and riding conditions is essential to ensure that you don't sacrifice performance for weight savings alone.
4. Improved Braking Performance with the Right Hubs
The interaction between your hubs and brake components can significantly impact your overall braking performance. For cyclists who use rim brakes, the quality of the wheel hubs can affect how evenly and effectively your braking surfaces work. Poor-quality hubs can lead to uneven braking, while high-quality hubs ensure that the wheels are aligned correctly for smooth and consistent braking power.
For disc brake-equipped bikes, the hub's compatibility with the rotor and the ability to withstand heat buildup is equally important. A quality hub helps maintain the structural integrity of the disc brake system, reducing the risk of warping or overheating, which can compromise braking efficiency and safety.
5. Durability for Longevity
When it comes to cycling, durability is key—especially if you ride regularly or tackle rough terrain. The right hubs, built with high-quality materials and precision engineering, offer improved longevity. Hubs made from durable materials like aluminum or steel tend to be more resilient to impacts, moisture, and dirt. This is particularly crucial for off-road cyclists or mountain bikers who face harsh conditions that can wear out components faster.
Additionally, hubs with sealed bearings or internal grease systems are better at keeping out dirt and water, ensuring the hubs maintain their smoothness and performance over time. This means less maintenance and fewer repairs, allowing you to focus more on your ride and less on frequent bike tune-ups.
6. Customization for Specific Cycling Needs
One of the most attractive features of modern wheel hubs is the variety of options available for different types of cycling. Whether you're a road cyclist, mountain biker, or triathlete, there are hubs specifically designed to meet the needs of your riding style. Road cyclists may opt for lightweight hubs with quick engagement for improved acceleration, while mountain bikers might prioritize durability and the ability to handle rough terrain.
Hubs also come in different axle types and configurations, allowing you to customize your bike to fit your riding style. For instance, through-axle hubs offer increased stability and strength, particularly for off-road cycling, while quick-release hubs provide convenience for road cyclists who need to make frequent tire changes.

Wheel hubs and their associated parts are crucial to your bike’s overall performance. From improving power transfer and reducing friction to enhancing comfort and longevity, the right hubs can make a noticeable difference in your cycling experience.
Investing in quality wheel hubs ensures that your bike runs more efficiently, lasts longer, and delivers a smoother ride—whether you're on the road, trail, or competing in races. By understanding how wheel hubs influence your performance, you can make better choices when upgrading your bike, ensuring a more enjoyable and efficient ride every time.

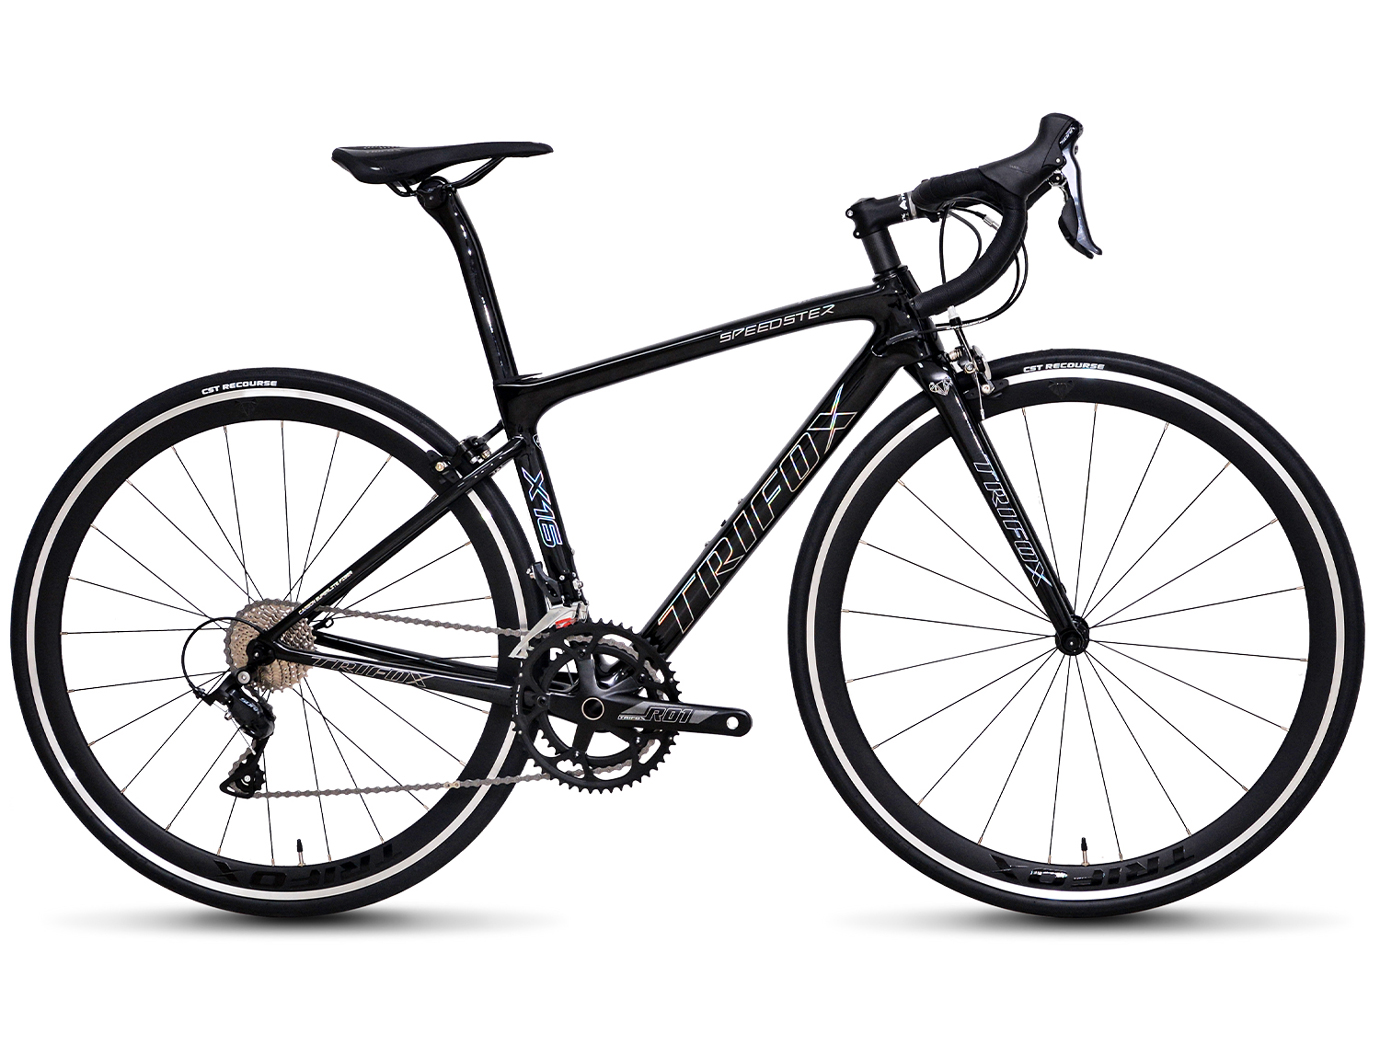
When it comes to cycling, performance is often about the combination of factors like speed, endurance, and efficiency. One of the most noticeable trends among serious cyclists is the pursuit of lighter bikes. An ultra-light road bike has become the ultimate goal for many enthusiasts and competitive riders, promising faster speeds, better climbing ability, and more responsive handling. But can a bike that’s ultra-light really make a tangible difference in your cycling performance?
Let’s dive into why a 700C ultralight carbon fiber frame road bike, like the Trifox 700C with Shimano Tiagra R4700 2x10-speed system, can enhance your cycling experience.
1. Improved Speed and Acceleration
One of the most significant benefits of an ultra-light road bike is its ability to accelerate faster. The weight of a bike has a direct impact on how much effort is required to get it moving, especially when you’re trying to reach high speeds or make quick sprints. A lightweight bike reduces the mass that the rider needs to propel forward, allowing for quicker accelerations, particularly on flat roads or during the initial takeoff from a stop.
The Trifox ultralight carbon fiber frame offers exceptional stiffness-to-weight ratio. This means that less energy is lost in flex, and more of your pedal power is transferred directly into forward motion. Whether you’re racing, sprinting, or just riding for fitness, an ultra-light road bike will help you achieve your goals faster and more efficiently.
2. Better Climbing Performance
When climbing steep hills, weight becomes one of the most critical factors in performance. A lighter bike means less mass to carry uphill, reducing the effort needed to maintain a consistent pace during a climb. For serious cyclists, every kilogram saved can have a noticeable impact on climbing times and overall endurance.
The Trifox 700C ultralight carbon fiber frame is designed with performance climbing in mind. Thanks to the carbon construction, it’s not just light but also incredibly stiff, allowing for more responsive handling as you shift gears and power through difficult terrain. The carbon material also absorbs road vibrations, ensuring that your body doesn’t wear out prematurely, which is especially useful during longer ascents or on rougher surfaces.
3. Increased Efficiency and Power Transfer
A road bike that is ultra-light typically boasts a frame made from materials that are both strong and stiff. Carbon fiber, found in the Trifox 700C, offers a superior strength-to-weight ratio, providing riders with an efficient, responsive ride. When you push on the pedals, the energy you generate is transferred directly into forward motion, rather than being absorbed by the bike’s frame.
With a lightweight and stiff frame, the Trifox 700C ensures minimal flex, which means more of your energy is utilized to propel the bike forward. This type of efficient power transfer makes a huge difference, particularly during high-intensity efforts like sprinting or time trials, where maximizing every pedal stroke counts.
4. Responsive Handling and Cornering
Another benefit of an ultra-light bike is improved handling, particularly when maneuvering through corners or tight spaces. The Trifox 700C carbon fiber frame provides a sharp and responsive feel, which is ideal for riders who push the limits of their bike’s handling capabilities. When a bike is lighter and more responsive, it requires less effort to change direction or navigate through technical sections, such as curves or obstacles in a race or trail.
For cyclists who value control and agility in their rides, an ultra-light bike ensures that your bike responds exactly how you want it to, whether you’re taking sharp corners in a race or riding on winding roads.
5. Enhanced Comfort and Reduced Fatigue
A lighter bike doesn’t just offer performance gains—it can also improve comfort, especially on long rides. The Trifox 700C ultralight carbon fiber frame features vibration-damping properties that help absorb road shocks, reducing the strain on your body during extended rides. Less weight in the bike means less strain on the rider, particularly in the arms, legs, and back.
Additionally, the frame’s ability to absorb some of the road vibrations helps reduce overall fatigue, allowing cyclists to ride longer distances without feeling as worn out. This is particularly useful for long races or endurance events where conserving energy is crucial.
6. The Cost-to-Performance Ratio
While ultra-light bikes like the Trifox 700C with its Shimano Tiagra R4700 2x10-speed system are designed for high performance, they also offer a solid cost-to-performance ratio compared to more expensive models. Carbon fiber frames, while pricier than aluminum, provide top-tier performance without the extreme price tag associated with premium carbon models. For riders who want to boost their cycling performance without emptying their wallets, the Trifox 700C ultralight road bike provides exceptional value for the price.
An ultra-light road bike like the Trifox 700C can certainly enhance your cycling performance in several meaningful ways. From better acceleration and climbing performance to improved power transfer, handling, and comfort, the benefits are clear. While weight is not the only factor that determines cycling performance, an ultra-light bike ensures that you can ride faster, longer, and more efficiently.
For cyclists who are serious about improving their performance, the Trifox 700C ultralight carbon fiber road bike offers a high-performance solution that delivers on all fronts. Whether you’re racing, training, or simply enjoying the ride, an ultra-light bike can make a noticeable difference in your cycling experience.

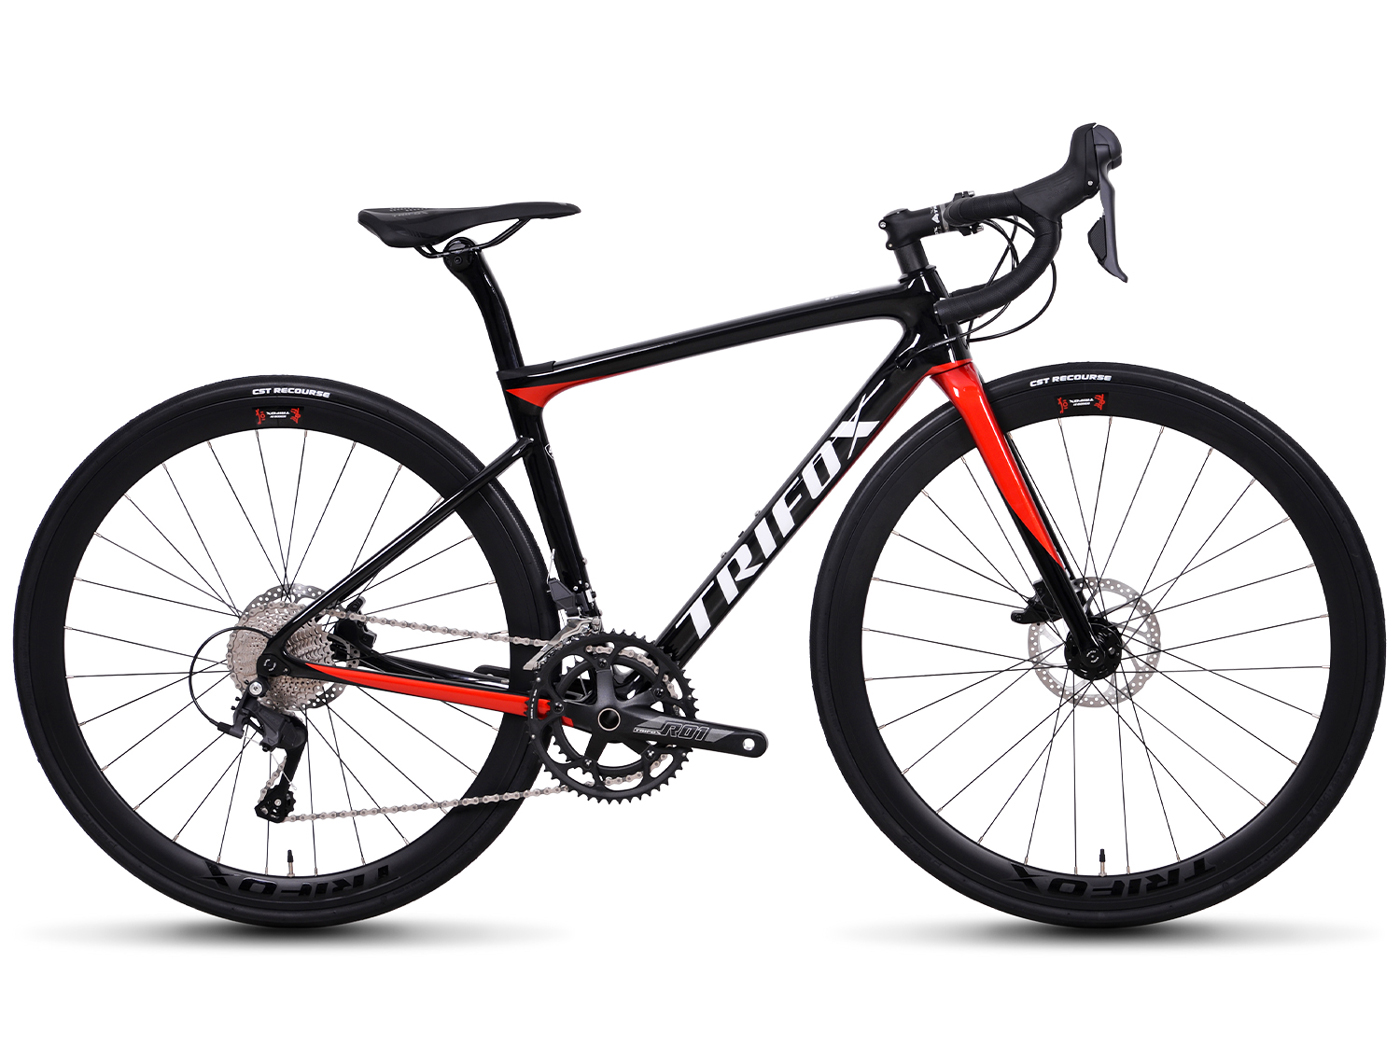
When it comes to competitive cycling, the bike you ride can make all the difference between victory and defeat. For serious racers, selecting the right bike is about more than just brand reputation—it’s about performance, weight, aerodynamics, and durability. The T800 carbon fiber racing bike, like the Trifox 700C Ultralight Carbon Fiber Road Bike, is designed with all these factors in mind, making it the ultimate choice for cyclists who demand nothing less than peak performance. In this blog post, we’ll explore why this bike, with its T800 carbon fiber frame, advanced features, and race-ready design, is a top choice for serious racers.
1. Lightweight Carbon Fiber Frame for Maximum Speed
The core advantage of the T800 carbon fiber frame is its impressive lightness without sacrificing strength. Carbon fiber is renowned for being incredibly light yet exceptionally strong and stiff, which translates to faster speeds and more efficient power transfer. In racing, every gram saved is a step closer to achieving your personal best.
Compared to traditional aluminum or steel frames, the T800 carbon fiber construction ensures that the bike remains ultra-light while still offering superior stiffness. This stiffness helps maximize pedaling efficiency by ensuring that every watt of energy put into the pedals is transferred directly to the road, rather than being absorbed by the frame. For serious racers, this means faster accelerations, better climbing, and improved overall performance.
2. Aerodynamics for Faster Rides
Aerodynamics are crucial for any racing bike, and the T800 carbon fiber racing bike is designed with this in mind. Its aerodynamic frame geometry reduces drag, helping riders maintain higher speeds with less effort. The streamlined design minimizes air resistance, allowing racers to cut through the wind more efficiently, especially during sprints and time trials.
The carbon fiber frame allows for smooth, sleek lines that reduce turbulence around the bike, giving you an edge over riders using less aerodynamically optimized machines. Whether you’re on the flat roads of a criterium or speeding down the straights in a time trial, the aerodynamic advantages of the T800 carbon frame can make a noticeable difference in your overall performance.
3. Stiffness and Power Transfer for Optimal Performance
The Trifox 700C ultralight carbon fiber road bike is built with precision and stiffness in all the right places. While the frame is designed to be lightweight, it does not compromise on rigidity. In a racing environment, where every second matters, power transfer is critical. The T800 carbon fiber frame ensures that as soon as you push down on the pedals, all of that power goes directly into forward motion, rather than being lost in the flex of the frame.
This enhanced stiffness is particularly noticeable during high-intensity efforts, such as climbing steep hills or sprinting to the finish line. When you need the bike to respond quickly and efficiently to your efforts, the T800 carbon fiber frame provides just that.
4. Advanced Disc Brake System for Superior Control
Equipped with an S-Ride 2x11-speed groupset and disc brakes, the T800 carbon fiber racing bike delivers superior control and stopping power, even in challenging conditions. Disc brakes offer several advantages over traditional rim brakes, including better performance in wet or muddy conditions, more consistent braking power, and greater control during high-speed descents.
For serious racers, the ability to brake confidently without worrying about weather conditions is invaluable. Whether you’re navigating tight corners during a race or descending at high speeds, the disc brake system provides precise control and safety, allowing you to ride with confidence and focus on the race ahead.
5. Durability for Long-Term Racing
While lightweight and performance-oriented, the T800 carbon fiber frame is also designed with durability in mind. Carbon fiber, particularly the T800 grade, is known for its ability to withstand the stresses of racing while remaining strong and resilient over time. The frame’s ability to absorb road vibrations helps reduce fatigue during long races, contributing to better comfort and performance over extended periods.
Additionally, the Trifox 700C road bike features high-quality components, such as the 2x11-speed groupset, ensuring that the bike remains reliable and smooth for many seasons of racing and training.
6. Cost-to-Performance Ratio
While the T800 carbon fiber racing bike may come with a higher price tag than entry-level models, its performance benefits make it an excellent value for serious racers. When you consider the advanced materials, superior aerodynamics, and durable components, the cost-to-performance ratio becomes more than reasonable. For competitive cyclists who want to give themselves every advantage on race day, investing in a top-tier carbon fiber bike like the Trifox 700C ultralight ensures that you’re getting the best possible tool for the job.
Conclusion
The T800 carbon fiber racing bike is designed to meet the demands of the most serious cyclists, offering unmatched performance, lightweight construction, and superior aerodynamics. Whether you’re racing in a high-stakes event or pushing yourself to improve your personal best, the T800 carbon frame provides the responsiveness, stiffness, and efficiency you need to excel. Combined with cutting-edge features like disc brakes and a precision 2x11-speed groupset, it’s clear why this bike is considered the ultimate choice for serious racers. If you’re looking to take your racing to the next level, the T800 carbon fiber bike will be your trusted companion in every race.

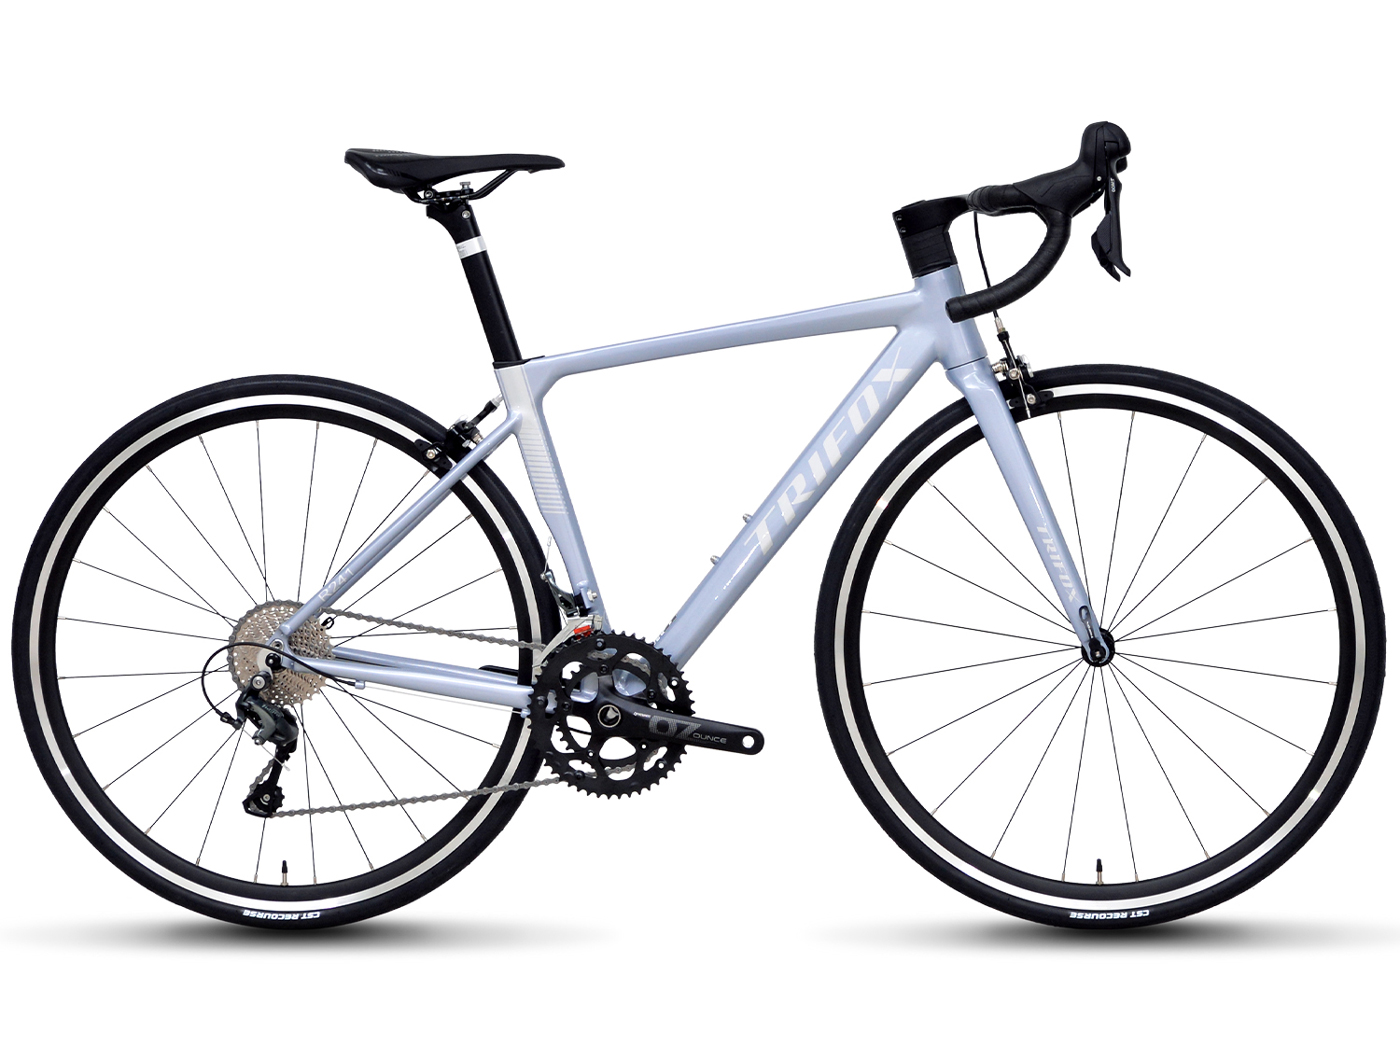
When choosing a road bike, speed enthusiasts and competitive cyclists often consider performance models that offer a balance of speed, efficiency, and comfort. Among these options, the 10-speed aero road bike stands out as a popular choice for those looking to maximize performance without breaking the bank. But how does a 10-speed aero road bike compare to other high-performance models? Let’s take a closer look at its features, advantages, and limitations to help you decide if it’s the right fit for your cycling needs.
1. The Gear Advantage: 10-Speed vs. Other Configurations
A 10-speed drivetrain, like the Shimano Tiagra R4700 found on the Trifox 2024 C-Brake Road Bike, offers a solid combination of reliability and performance. While 11- and 12-speed systems provide more gears, the 10-speed configuration strikes a balance that appeals to many riders.
The main advantage of a 10-speed setup is its simplicity. With fewer gears, the system is easier to maintain and less prone to wear and tear. This makes it an excellent choice for riders who want performance without the added complexity of higher-speed drivetrains. While it may not have the micro-adjustments of an 11-speed system, a 10-speed drivetrain still provides sufficient range for most terrains, from flat stretches to moderate climbs.
2. Aerodynamics: A Key to Speed
The defining feature of any aero road bike is its frame design, optimized to reduce drag and increase speed. The Trifox 2024 model, for instance, features an ultralight aluminum frame, which combines aerodynamic shaping with durability and lightweight performance. Compared to non-aero models, an aero bike allows riders to maintain higher speeds with less effort, particularly on flat and rolling terrains.
While other performance bikes may focus on weight reduction for climbing or versatility for all-road conditions, aero road bikes are specifically tailored for speed. This makes them ideal for riders who prioritize fast sprints, time trials, and efficient power transfer on smoother roads.
3. Weight and Materials
The Trifox 2024 10-speed road bike utilizes an aluminum frame, which strikes a balance between weight, strength, and affordability. While carbon fiber frames found in higher-end models may be lighter, aluminum remains a competitive choice for cyclists who want durability without significantly increasing the bike’s overall weight.
In comparison to heavier steel-framed bikes or more affordable entry-level options, the ultralight aluminum frame ensures that the bike feels agile and responsive, especially during accelerations and climbs.
4. Braking Systems: Caliper vs. Disc
This 10-speed aero road bike is equipped with C-brakes (caliper brakes), which offer reliable stopping power on dry roads and are lighter than disc brakes. While disc brakes are increasingly popular on higher-end models for their superior performance in wet conditions, caliper brakes remain a favorite for road cyclists seeking to minimize weight and maintain the classic road bike aesthetic.
For performance-focused riders who primarily cycle in dry conditions, the weight savings and streamlined design of C-brakes can be a significant advantage.
5. Cost-to-Performance Ratio
One of the standout features of a 10-speed aero road bike is its affordability compared to 11- or 12-speed models. While higher-end bikes may offer marginal gains in gear range and weight reduction, the cost difference is often significant. A 10-speed aero road bike like the Trifox 2024 delivers excellent performance for speed enthusiasts without the premium price tag, making it an attractive option for cyclists who want competitive features on a budget.
Conclusion
A 10-speed aero road bike strikes an impressive balance between performance, simplicity, and cost-effectiveness. While it may not have the gear range or ultralight materials of higher-end models, its aerodynamic design, lightweight aluminum frame, and reliable Shimano drivetrain make it a strong contender for speed-focused cyclists. Whether you’re looking to improve your average speed, tackle local races, or enjoy high-performance rides, the 10-speed aero road bike offers plenty of value and versatility for a wide range of riders.
When it comes to competitive cycling, every second counts, and every gram saved can make a noticeable difference in performance. This is why the lightest road bike often becomes the top choice for elite athletes. But what exactly makes these feather-light bicycles so popular among competitive cyclists?
1. Speed and Efficiency
One of the most significant advantages of a lightweight road bike is the enhanced speed and efficiency it offers. In competitive cycling, particularly in races involving steep climbs or time trials, the ability to accelerate quickly and maintain momentum is essential. Lighter bikes require less effort to propel forward, especially uphill. This means that cyclists can conserve energy during long rides and still maintain high speeds.
While aero frames and gearing systems certainly play their roles, a light bike can be the difference between winning and losing when every fraction of a second counts. A lighter frame reduces the overall weight the cyclist needs to carry, making it easier to achieve faster lap times and quicker accelerations, especially when combined with an optimal riding position.
2. Improved Handling
Handling is another critical factor in competitive cycling. Lighter bikes offer more responsive handling, especially during sharp turns or when navigating through technical courses. When the bike’s frame is lighter, it requires less force to move it in the desired direction, leading to quicker adjustments and greater precision. This responsiveness can be particularly valuable in races that include tight corners or winding paths where every maneuver counts.
Additionally, lighter bikes often have better overall balance, making it easier to maintain control in various riding conditions, from fast descents to technical ascents.
3. Climbing Performance
Climbing is one area where the weight of the bike can make the most noticeable difference. Competitive cyclists, particularly those in events like the Tour de France or the Giro d'Italia, often face long, grueling ascents. The lighter the bike, the less weight the rider needs to push uphill, which can translate into better climbing performance.
A road bike that is designed with weight-saving materials, such as carbon fiber or high-end aluminum, allows a cyclist to exert less energy during climbs, giving them a competitive edge over riders with heavier bikes. This advantage becomes even more pronounced during sustained climbs, where maintaining speed while managing energy is crucial.
4. Comfort and Fatigue Reduction
While speed and efficiency are essential, the lighter weight of a road bike can also contribute to improved comfort over long distances. Lighter bikes often use materials that are not only strong but also engineered to absorb road vibrations and shocks better than heavier counterparts. This means less fatigue over time, even on rougher terrains.
Reducing fatigue is vital for maintaining high performance throughout a race, especially in multi-stage events. With less energy wasted on dealing with discomfort, cyclists can focus on pacing themselves and conserving their strength for critical moments.
5. Technological Advancements in Materials
Today’s lightest road bikes are built using advanced materials that provide strength without the added weight. Carbon fiber, for example, is incredibly light yet extremely durable, offering the perfect balance of stiffness and flexibility. Many premium road bikes incorporate these materials in their frame, fork, and wheels, making them more aerodynamic while minimizing weight.
Bike manufacturers, such as **Trifox**, are pushing the limits of design, creating bikes that combine cutting-edge materials with performance-oriented geometry. The result is a new generation of road bikes that are not only lighter but also stronger and more responsive than ever before.

Conclusion
The lightest road bike isn’t just about shedding grams for the sake of weight—it’s about optimizing performance. Lighter bikes enhance speed, improve handling, and boost climbing capabilities, making them an essential choice for competitive cyclists. As technology advances and materials improve, these bikes are only becoming more specialized, allowing cyclists to achieve peak performance in every race. For any competitive cyclist looking to gain an edge, investing in a lightweight road bike is not just a choice, but a strategic move toward success.


