


For any cyclist, having a good set of road wheels is integral to achieving peak performance on the road. The wheels you choose can greatly affect your riding experience, from the weight, to the stiffness, to the durability. Carbon and aluminum are two popular materials used in the construction of road wheels, each with their own unique advantages and disadvantages. So, which one is truly better? In this blog post, we will discuss the pros and cons of carbon vs aluminum road wheels, and help you decide which one is the best fit for your cycling needs. Carbon Road Wheels: Carbon road wheels have significantly grown in popularity over the years due to their numerous advantages. Firstly, carbon road wheels are lightweight, making them perfect for hilly or mountainous terrain where a lighter bike can make a great difference. They are also stiffer than aluminum wheels, which means they are a more efficient source of power transfer from the cyclist to the road. Carbon is also known for its ability to dampen vibrations, allowing for a more comfortable ride. The downside of carbon wheels is that they can be costly, and more prone to damage in the event of an impact with potholes, cracks, and other obstructions on the road. Aluminum Road Wheels: Aluminum road wheels are popular for their affordability and durability, making them a great option for beginner or budget-conscious cyclists. They are heavier than carbon wheels but are still lightweight and can be relatively stiff with the right geometry. Aluminum wheels are also less likely to get damaged by potholes and rough roads, giving them a longer lifespan than carbon wheels. However, aluminum wheels can transmit more vibrations to the rider, leading to a potentially less comfortable ride than carbon wheels. Carbon vs Aluminum Road Wheels - Which one should you choose? When deciding whether to go for carbon or aluminum road wheels, it's important to consider your riding goals and needs. If you are looking for a smoother and faster ride, and don't mind spending a bit more, carbon road wheels are a great option. They are light, stiff, and can give you an edge in competitive cycling. However, if you're just starting out, or are on a budget, aluminum road wheels are a solid choice. They are durable, affordable, and can still provide an excellent cycling experience. Beyond the price and the riding goals, there are many factors that cyclists consider when selecting road wheels. Some of these factors include the wheel's weight, its durability, the stiffness, and the aerodynamics. Each material has its own characteristics that can make it more or less suitable for various types of riders, so research carefully before making a decision. In conclusion, carbon and aluminum road wheels both have their unique advantages and disadvantages. Ultimately, the choice between them should largely depend on your own individual cycling needs and goals. Identify what aspects of your wheelset are the most important to you and choose the material that best suits you. Regardless of whether you choose carbon or aluminum road wheels, selecting a high-quality set with a good reputation and proper maintenance can improve your cycling experience greatly. So, happy cycling!
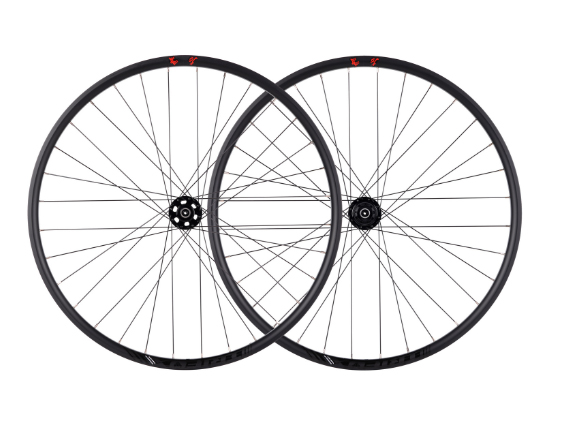
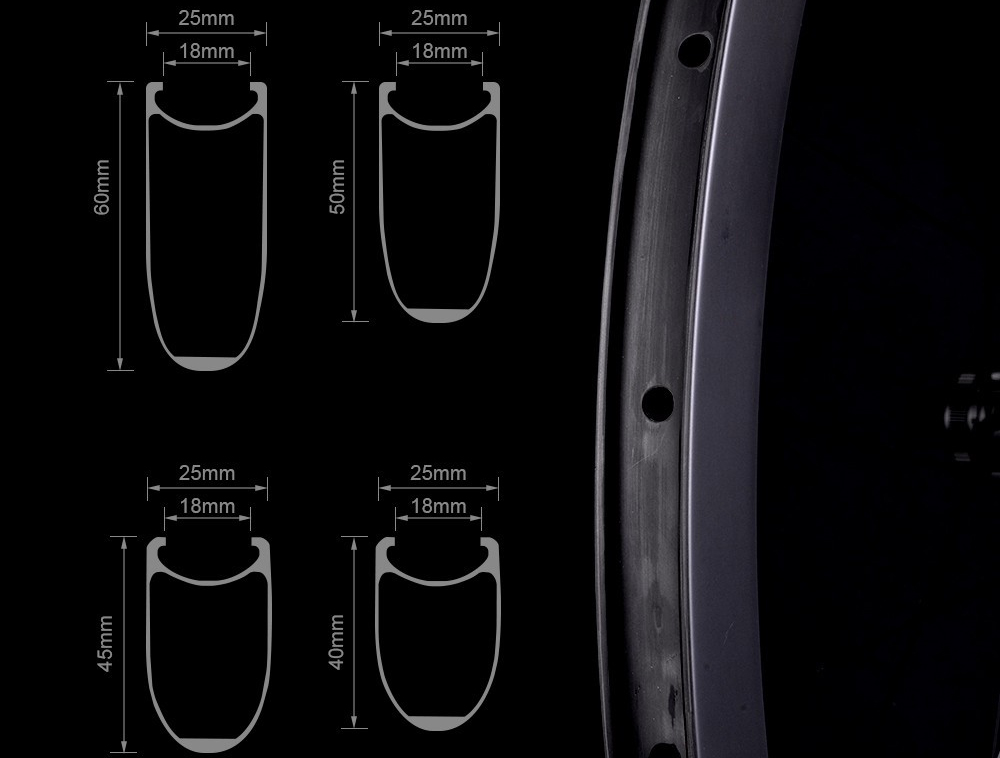
When it comes to cycling, every rider’s goal is to have a smooth and enjoyable ride. And when you decide to upgrade your bike, choosing the right wheelset can make a huge difference in your cycling experience. The latest trend in the biking industry is the 29er wheelset. It’s a bit larger than the standard wheels and comes in a lighter weight that makes it an exceptional choice for different terrains. 1. Increased Speed and Efficiency: One of the most significant advantages of a lightweight 29er wheelset is the increased speed and efficiency that comes with it. The larger wheel size allows you to roll over obstacles, including roots and dips, much more efficiently. You’ll glide over obstacles with ease and pick up speed quickly, which makes it perfect for long rides or races. Additionally, the lighter your bike is, the less energy you’ll need to pedal, which can make a significant difference on those uphill climbs. 2. Improved Handling and Control: A lightweight 29er wheelset can enhance your riding experience by providing better handling and control. With a larger wheel diameter, you’ll have a larger contact patch, which gives you better control while cornering and descents. Compared to 26-inch wheels, the 29er has a greater angle of attack that helps you ride through corners with more stability and ease. You’ll feel a noticeable difference in control when riding rough terrain thanks to the improved stability. 3. Easy Adaptability to Different Terrains: 29er wheelsets are designed for versatility. They perform well in different terrains, including off-road, gravel, and road conditions. A lightweight 29er wheelset will provide extra cushioning on rough terrains without compromising your speed, which makes it an excellent choice for long-distance rides. You’ll also find that the larger wheel size gives you a more comfortable ride than the standard size. 4. Durability and Longevity: When it comes to investing in a bike wheelset, durability is key. With a lightweight 29er wheelset, you can be sure that you’re getting long-lasting and high-quality wheels. A 29er wheelset is built to withstand different terrains and impacts, ensuring that you get the most out of your investment. The aluminum or carbon fiber construction in the wheelset is lightweight, providing high strength-to-weight ratios and durability. 5. Stylish and Eye-catching: Apart from the performance benefits, a lightweight 29er wheelset is bound to enhance the aesthetic appeal of your bike. The bigger wheels look more stylish and eye-catching than the standard size wheels. Additionally, most bike wheelsets come in different colors, allowing you to match them with your bike frame, providing a seamless and polished look for your bike. If you want to take your biking experience to the next level, upgrading to a lightweight 29er wheelset is the way to go. This wheelset provides numerous advantages such as speed, control, adaptability, durability, and style. You can find affordable lightweight wheelsets in various shops and online stores, although be sure to choose a reputable brand to avoid low-quality products. Trifoxbike 29er wheelsets, for example, are known for their strength, durability, and lightweight construction. Upgrade your riding experience today and invest in a lightweight 29er wheelset for your next bike ride!
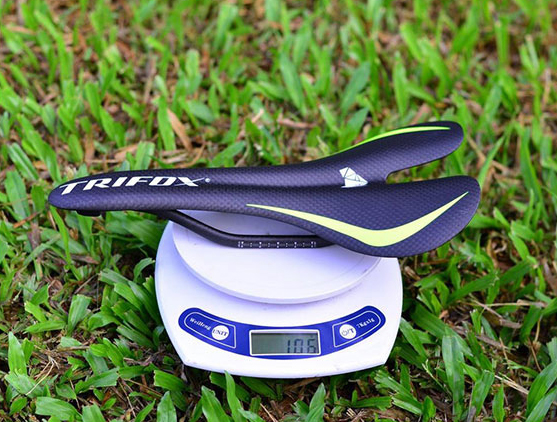
Riding your bike gives you the freedom to explore the world, get some exercise and just have fun. Whether you’re out for a leisurely ride or training for a race, having the right equipment can make all the difference. One of the most important components of your bike is the saddle. It’s the interface between you and the bike, and if it’s not comfortable, your ride can be a nightmare. Finding the right bike saddle is a personal journey, and it can take time. However, with the TriFox CS100 Carbon Bike Seat, you may just find the perfect combination of comfort and performance. Quality is the first thing you’ll notice about the TriFox CS100 Carbon Bike Seat. The carbon fiber material is incredibly lightweight and elegantly designed. Carbon is a great material for bike saddles because it is durable and moulds to your anatomy. The seat is also waterproof, which means that it’s easy to keep clean and resilient against the elements. Whether you’re cycling in the rain, or sweat on the saddle, you don’t have to worry about your saddle getting ruined. Comfort is essential when finding a new saddle, and the TriFox CS100 doesn’t disappoint. The saddle is made with an ergonomic, curved design that enhances your comfort on long rides. The curves create pressure relief points for your sit bones and prevent chafing or rubbing in sensitive areas. The saddle also includes foam padding, which provides extra cushioning and shock absorption for a smooth ride. The TriFox CS100 Carbon Bike Seat ensures you can ride further and longer without discomfort. The TriFox CS100 Carbon Bike Seat isn’t just comfortable, but it also helps with performance. The design is perfect for riders who prioritize speed. The saddle’s slim profile minimizes drag and doesn’t inhibit your movement, allowing you to get the best aerodynamics for your ride. It’s also suitable for riders who experience lower back pain, as the curves in the saddle relieve pressure from the lower back region. Ultimately, the TriFox CS100 Carbon Bike Seat helps you perform better without compromising your comfort. Installation of the TriFox CS100 Carbon Bike Seat is incredibly easy. The saddle comes with all the necessary hardware, including a saddle clamp and wrench, allowing you to attach it to your bike within five minutes. The saddle is also compatible with most bike seat posts, giving you more options for your bike. In addition, the TriFox CS100 Carbon Bike Seat is a great investment, as it’s built to last, durable, and can be easily transferred between different bicycles. In conclusion, finding the perfect bike saddle isn’t always easy. But with the TriFox CS100 Carbon Bike Seat, you get a sleek, stylish, and lightweight option that gives you both comfort and performance. Its curved ergonomic design, foam padding, and pressure relief points combine to ensure you can ride further and longer without discomfort. The installation is easy, and it’s suitable for most bikes and riders. At TriFox, they are committed to providing products that enhance the cycling experience. Give the TriFox CS100 Carbon Bike Seat a try, and you may find just what you need to ride with comfort and performance.
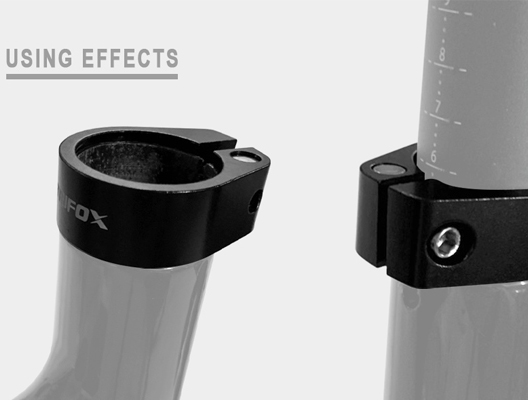
When it comes to bike components, people often focus on the bigger and more visible parts, such as the frame, wheels, and handlebars. However, it is the small and seemingly insignificant parts that can make a huge difference in your bike's performance and overall riding experience. One such component is the seatpost clamp. 1. What is a Seatpost Clamp? A seatpost clamp is a small but vital part that keeps the seatpost firmly attached to the bike frame. It is typically made up of two halves that are bolted together around the seat tube. The clamp's job is to prevent the seat from slipping down while you ride, as well as to allow you to adjust the seat height as needed. 2. Why Does Weight Matter? As with any bike component, weight is a crucial factor in seatpost clamp design. A lightweight seatpost clamp, made from high-quality materials, can help reduce the overall weight of your bike. This, in turn, can provide a significant performance boost, especially when it comes to climbing and acceleration. Additionally, less weight can make it easier to handle your bike, making it more comfortable to ride. 3. What Makes a Lightweight Seatpost Clamp? To make a lightweight seatpost clamp, manufacturers typically use materials such as aluminum, titanium, or carbon fiber. These materials are known for their strength and durability while being lightweight. The design of the clamp's shape and width can also contribute to reducing its overall weight while still maintaining its strength and performance. 4. Durability and Performance While lightweight materials are essential, it is crucial to ensure the clamp remains durable and can perform its primary function over time. Some seatpost clamps are prone to wear and damage, especially if they are repeatedly tightened and released. Therefore, it is essential to pay attention to the material quality and design when choosing a seatpost clamp. 5. Which is the Best Lightweight Seatpost Clamp? When it comes to choosing the best lightweight seatpost clamp for your bike, several factors come into play. In addition to weight and durability, you need to consider factors such as compatibility with your bike's seatpost diameter, ease of use, and price. One option to consider is the Trifox Bike Cycling Seat Post Clip SC35, made from high-quality aluminum alloy and available in a variety of sizes. This clamp is compatible with most bikes and provides excellent strength and durability while being lightweight. A lightweight seatpost clamp is an essential part of your bike setup. It can make a significant difference in your bike's performance and overall riding experience. When selecting a seatpost clamp, ensure you focus on weight, durability, and compatibility. The Trifox Bike Cycling Seat Post Clip SC35 is a highly recommended option because of its lightweight, strength, and ease of use. With this component in place, you can enjoy a smoother and more comfortable ride that enhances your bike's overall performance.
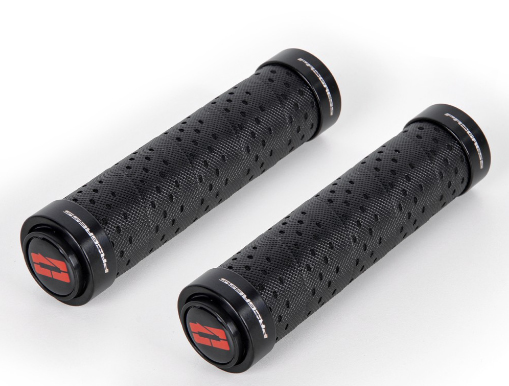
If you’re an avid mountain biker, you will know that the grips on your bike are as important as any other component. They are designed to keep you in control and provide you with a comfortable grip as you ride through rugged terrains. With various types of grips in the market, it can be overwhelming to decide on the perfect one for you. In this article, we take you through the ultimate guide to choosing the most comfortable mountain bike grips. 1. Consider the Material of the Grip Choosing the right material for your mountain bike grip will significantly affect the level of comfort you get during your rides. Grips can either be made out of rubber or silicone. Rubber grips are the most common among bikers, but they tend to wear down quickly and are prone to slip during wet weather conditions. If you want a longer-lasting grip that can handle all weather conditions, opt for silicone grips. 2. Check the Style of the Grip The style of the grip refers to how the grip is designed to suit different types of riders. Some riders prefer thicker grips, while others like thinner ones that give them more control over the bike. Additionally, other grips have specific features like gel padding, which is excellent for shock absorption, and ergonomic design that reduces hand fatigue and strain. 3. Consider the Grip Pattern of the Grip The grip pattern on a mountain bike grip can have a significant impact on how comfortable your ride will be. Grip patterns have varying levels of aggression ranging from smooth to the aggressive diamond pattern. The diamond pattern provides excellent traction, especially when riding in wet and muddy conditions. On the other hand, smooth grips offer a more leisurely ride but are less suitable for challenging terrains. 4. Test the Length of the Grip The length of the grip is another crucial factor to consider when choosing a comfortable mountain bike grip. A grip that is too short will not provide enough leverage, making it difficult to hold the bike when riding through rugged terrain. On the other hand, a grip that’s too long will cause unnecessary added weight and create a bulkier feel. The perfect grip should allow your hands to fit comfortably without leaving any extra length or gaps. 5. Check for Compatibility Before settling on a specific grip, you need to ensure that it’s compatible with your bike’s handlebar. Most grips will fit common bar sizes, but it's essential to double-check before making a purchase. Additionally, read up on how the grips attach to the handlebar. Some grips use a single-sided clamp, while others use locking rings or bolts. In conclusion, choosing the most comfortable mountain bike grip is as much about personal preference as it is about functional requirements. With the various types of grips on the market, it's essential to know what you're looking for in a grip. Always consider the material, style, grip pattern, length, and compatibility before making any purchase. Remember, a comfortable grip translates to better control, longer rides, and less hand fatigue. And if you’re looking for a great option, be sure to check out the Trifox Bicycle Grips. They offer excellent shock absorption, ergonomic design, and a diamond-shaped non-slip pattern, making them a fantastic choice for avid mountain bikers.
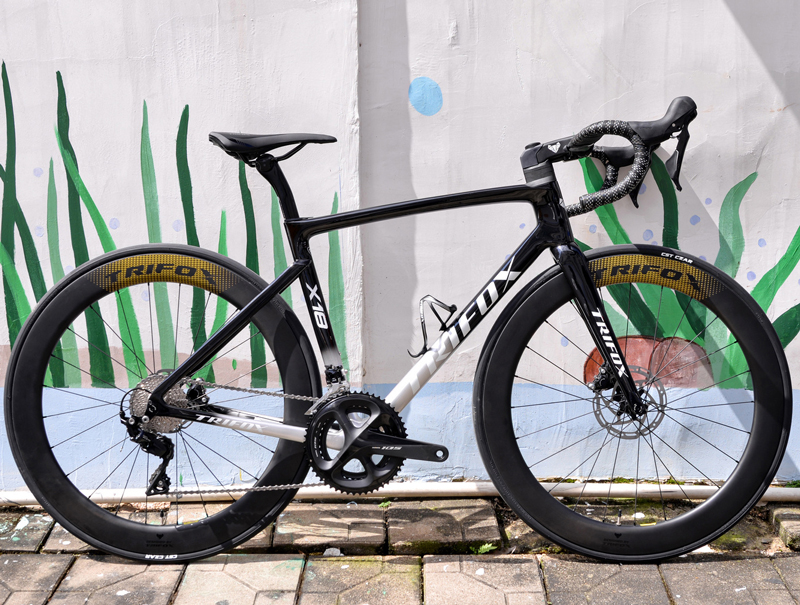
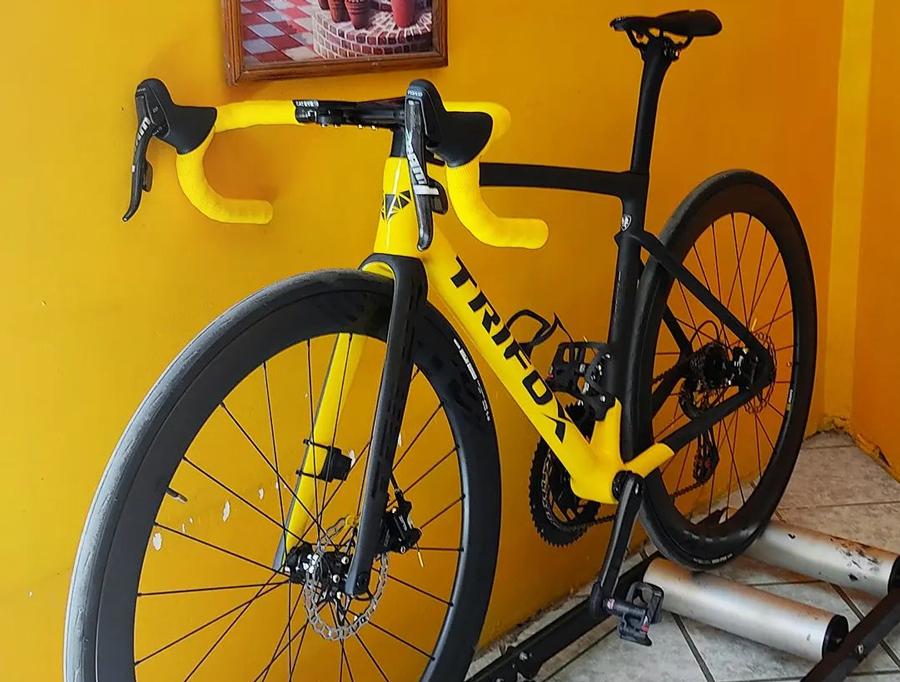
If you're a bike enthusiast, you might have heard about Chinese carbon frameset gravel bikes and the recent boom in the market. Carbon fiber has become a popular choice for bike frames over the years, thanks to its lightweight and durable properties. But the question is, are Chinese-made carbon framesets worth it? Affordability - Chinese carbon frameset gravel bikes are priced much lower than their Western counterparts. The reason being is that labor cost and production cost are much lower in China. This means you can purchase a high-quality bike frame at a fraction of the cost of a Western-made frame. Good Quality - There's a common misconception that Chinese-made carbon framesets aren't as sturdy as those made in the West. However, this is far from the truth. Some of the best components and materials used in bike manufacturing are sourced from China, and most of the Chinese-made frames are rigorously tested to ensure they meet international standards. Customization - A lot of Chinese carbon frameset gravel bike manufacturers offer customization options. You can specify your preferred size, color, and even get your name printed on the frame. This level of customization can be difficult or impossible to achieve with Western and other foreign-made brands. In conclusion, Chinese carbon frameset gravel bikes offer a lot of advantages. They're more affordable, customizable, and of good quality. However, like everything else, they have their drawbacks, such as warranty issues, lack of quality assurance, and delivery hassles. To make an informed purchase decision, do your research. Choose a reputable Chinese bike manufacturer who follows high-quality standards and can offer dependable shipping and customer support, For example, Trifox bike.
When it comes to maintaining your prized possession of a carbon bike, there's lots of conflicting information floating around about the best way to keep your frame looking clean and fresh. One of the most debated topics is whether or not it's safe to sanding carbon frame. First things first, it's essential to understand the nature and function of a carbon fiber bike frame. Carbon fiber is a composite material comprised of carbon strands that are bonded together with resin. This composite arises from a sophisticated process and innovation from high tech industries, including aerospace, military, and racing autos. Carbon is an incredibly lightweight, strong, and stiff material. It's stiffer, stronger, and lighter than aluminum and more durable than titanium. That being said, carbon is also a delicate material and should be handled with care. One of the most common reasons people will sand down their carbon bike frame is to remove a scratch or other cosmetic damage. Some suggest that sanding is necessary to remove damaged fibers. However, this is a myth. Sanding can't repair damage to your bike frame, and it may even take away essential protective fibers that keep your frame safe. In short, sanding should be avoided. Another myth about sanding is that it can be used to prevent cracks and other damage. The truth is that sanding doesn't provide any additional protections against damage, and attempting to do so can significantly harm your bike frame's integrity. In some circumstances, sanding can even disintegrate the resin particles that hold the carbon fibers together, leading to structural damage from cracks and impacts. There's also the myth that sanding is the only way to clean your bike frame. Cleaning a carbon bike frame is different from cleaning a steel or aluminum bike frame, but that doesn't mean you need to sand it down. Like any bike frame, a carbon frame can be cleaned with soap and water or a non-abrasive cleaning solution. In case of greasy parts or mud, avoid using a pressure washer; the pressure may damage the paint and cause damage to the rubber seals responsible for protecting the bearings. In summary, sanding your carbon bike frame should be avoided. Although carbon is a highly durable and lightweight material, it still requires proper cleaning and maintenance to maximize its lifespan and ride quality. Proper care involves avoiding abrasive soaps, minimizing exposure to UV rays, and using a protective bike cover during storage. Yes, sanded carbon frames may look smooth and new again, but this practice comes with undesirable and irreversible consequences. By following simple cleaning tips and making a few adjustments to your maintenance routine, you can keep your carbon frame looking great and riding solid for years to come.
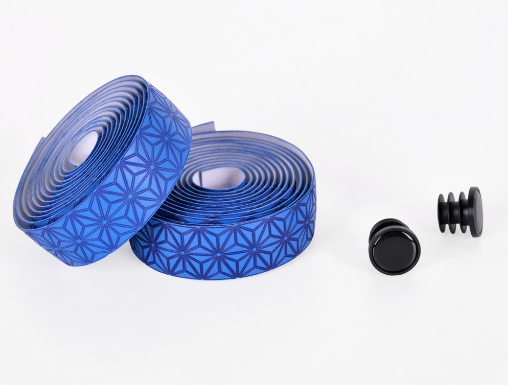
Wrapping bar tape on your road bike is not just about aesthetics; it is an essential aspect of bike maintenance. Proper bar tape wrapping not only enhances the overall look of your bike, but it also makes the handlebars more comfortable to hold, improves grip, and reduces vibrations from the road. However, many road riders struggle to wrap their bar tape without it looking messy or uneven. Step 1: Remove old bar tape Before you start, it's important to remove your old bar tape and clean your handlebars. You can use rubbing alcohol and a clean cloth to remove any dirt or adhesive residue left from your old tape. Remember to take note of how the old tape was wrapped as it will serve as a guide when you're wrapping the new tape. Step 2: Start at the Bottom When wrapping your handlebars, start from the bottom. Hold the bar tape at the bottom of the handlebars, leaving enough excess for wrapping around the bar's end. Begin the first turn by wrapping slightly diagonally upwards, making sure the tape overlaps each time. Ensure the tape is tight enough to stay in place but not so tight that it impedes the brake lever functionality. Step 3: Overlap and Secure Once you reach the handlebar's top, slide the extra bar tape under the brake levers and wrap it diagonally downwards. Overlap each turn on the previous one and ensure that the tape is tight and even along the bar. When you reach the end of your handlebar, wrap the excess tape tightly around it and secure with electrical tape or a bar plug. Step 4: Repeat on the Other Side Repeat the above steps with the other side of the handlebar. Make sure you keep equal tension on both sides to provide balance and comfort while cycling. If you want to achieve a more professional look, wrap the tape in an opposite direction on the second side. Step 5: Finishing Touches After completing the wrapping process, inspect the handlebars, ensuring there are no uneven or exposed areas. If any section needs adjustment, make the necessary corrections right away. Finish by trimming any excess bar tape with scissors or a blade, but be careful not to cut the bar tape. Perfectly wrapping bar tape on your road bike is not rocket science; it requires patience, attention to detail, and practice. With this guide, you'll be able to wrap your bike's handlebars confidently, knowing that you're doing it correctly. Always remember to remove the old tape, start at the bottom, overlap and secure, repeat on the other side, and finish with trimming. With time, you'll be able to complete the wrapping process effortlessly, and your road bike will look and feel comfortable, safe, and stylish. Happy cycling!
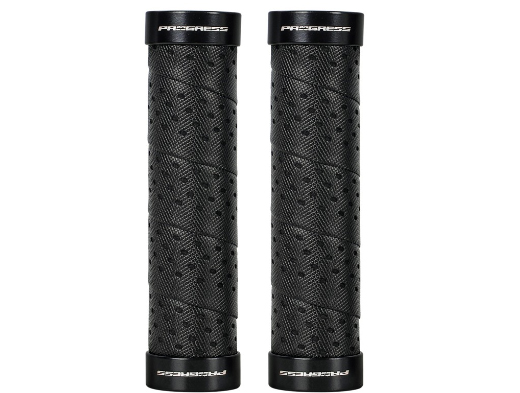
Mountain biking is an exciting and challenging activity that requires you to have a solid grip on your bike's handlebars. It's crucial to have a good set of mountain bike grips that can provide comfort and control in different terrain types. When shopping for the best mountain bike grips, you will encounter various options with different materials, textures, and shapes. However, what separates the top mountain bike grips apart from the rest? 1. Material One of the most significant factors that determine the quality of mountain bike grips is the material used to create them. The best mountain bike grips are usually made of soft and durable materials like silicone or rubber. It would help if you opted for grips that are comfortable to the touch, yet robust enough to resist wear and tear. Some premium mountain bike grips feature reinforced areas that come in handy when performing technical maneuvers that require a lot of pressure on the brake levers. 2. Texture Mountain bike grips with the right texture offer improved traction and control, especially when the trails are wet or muddy. When purchasing mountain bike grips, consider getting ones with a grippy texture that feels secure in your hands. Soft rubber or silicone grips with a diamond pattern, knurling, or waffle pattern offer excellent grip, even when your hands are sweaty. A good grip texture ensures your hands stay in place and prevents slips when navigating challenging trails. 3. Shape Mountain bike grips come in many shapes and sizes, from ergonomic grips to thin grips. Ergonomic grips have a contoured shape that conforms to the palm's natural shape and offers more excellent comfort. On the other hand, grips like the Trifox offer direct feedback from the handlebar. Thin grip may not be the best for long hauls but offer enhanced tactile feedback on technical descents or quick turns through tight corners. Of course, the ideal shape for your mountain bike grip largely depends on your personal preferences. 4. Durability The best mountain bike grips are ones that can take a beating. Mountain bike grips that wear out quickly or tear apart after a few rides can be frustrating and costly in the long run. Your mountain bike grips should withstand the daily wear and tear that comes with riding challenging trails. Go for mountain bike grips made of high-quality materials that can survive harsh weather conditions and expose to the sun or water. 5. Customizability Mountain bike grips come in a wide variety of colors, patterns, and designs. Choosing a customizable and cool looking grip can take your bike's appeal to the next level. With so many options available, you can express your personality through your bike's grips. Some premium brands enable you to add logos or customize the colorway to maximize your ride's aesthetics. The right pair of mountain bike grips can make a significant difference in your biking performance. A good grip should offer comfort, durability, texture, and customizability. When choosing the right mountain bike grip for your needs, balance between all the above factors is essential. Invest in a solid pair of mountain bike grips, and you’ll be amazed by how much more control you’ll have while out shredding on your bike.


