


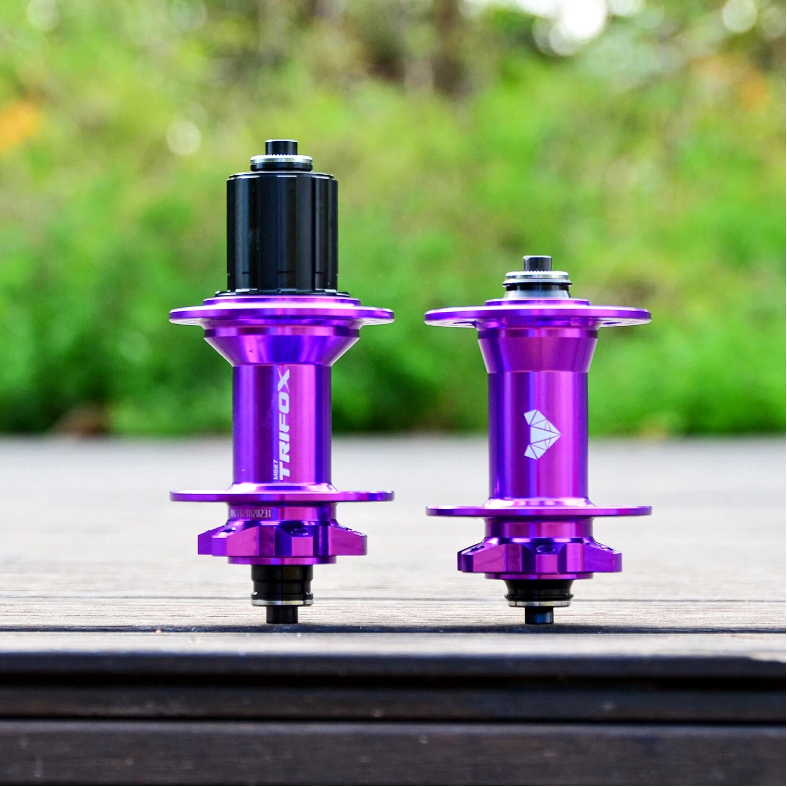
At the heart of every great wheelset lies the hub—a component often overlooked until performance falls short. The Trifox M827 mountain bike hub is designed to be noticed, not for its sleek aesthetics alone, but for the sophisticated engineering within. Its 6-pawl, 72-point engagement system promises rapid power transfer and reliable performance, but the technical story goes even deeper, offering a level of versatility that makes it a standout choice for any builder.
The Engagement System: Instant Response
The core of the M827's performance is its driver mechanism. Inside the hub shell, six precision-engineered pawls engage simultaneously with a 72-tooth ratchet ring. This configuration is key. With 72 points of engagement, the hub requires only a 5-degree rotation of the crank before the pawls lock into place. In practical terms, this means when you stomp on the pedals out of a corner or over a technical obstacle, power is delivered almost instantly. There's no lag or "dead spot" where the pedals spin freely before catching—just immediate, decisive forward momentum. This rapid engagement is a game-changer for technical climbing and aggressive trail riding where every pedal stroke counts.
Convertible Axle System: One Hub, Two Standards
Modern mountain biking is in a state of transition, with Quick Release (QR) and Thru-Axle (TA) standards both prevalent. The M827 solves this compatibility puzzle elegantly. The hub is sold with standard QR end caps (front 9x100mm, rear 10x135mm). However, its design allows you to purchase and install optional end caps to convert it to modern Thru-Axle standards (front 15x100mm TA, rear 12x142mm TA). This means you can confidently build a wheelset for your current QR frame, and if you upgrade to a newer TA frame later, you don't need new wheels—just swap the end caps on your M827 hubs. It's a future-proofing feature that adds immense long-term value.
Universal Freehub Compatibility
Versatility extends to the drivetrain as well. The M827 comes standard with a Shimano/SRAM HG-compatible freehub body, supporting 8 to 12-speed cassettes. But recognizing the diversity of modern drivetrains, Trifox offers optional freehub bodies for SRAM XD (11/12s) and Shimano Micro Spline (12s). This simple swap capability ensures the same bicycle rim hub can be adapted to virtually any high-performance groupset on the market, making it an incredibly flexible foundation for custom wheel builds.
Built to Last: Materials and Bearings
All this sophisticated engagement and adaptability is housed in a durable shell. The hub bodies are machined from 6061 aluminum alloy, while the axles and freehub bodies use stronger 7075 aluminum. The rear hub spins on four sealed cartridge bearings (two in the front) for smooth, long-lasting performance with minimal maintenance. Weighing in at a competitive 165g front and 314g rear, it offers a superb balance of strength and low weight.
In summary, the Trifox M827 is far more than a simple mtb hub. It's a meticulously engineered component that delivers instant power through its 6-pawl, 72-point system, while its convertible end caps and freehub bodies make it one of the most adaptable hubs on the market. For the discerning wheel builder seeking a hub that combines rapid engagement with genuine long-term versatility, the Trifox mtb hub M827 represents a compelling, high-performance choice.
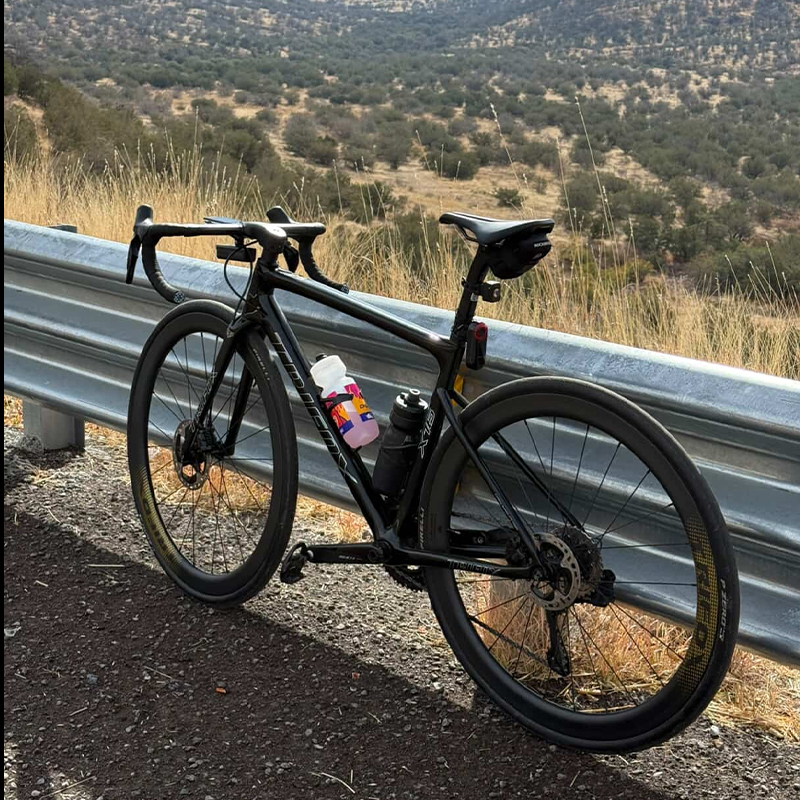
When browsing for a new road bike frame, the lines between "Linkrace" and "endurance" can sometimes blur. Marketers use the terms freely, but the true story is told by the geometry chart. Numbers don't lie. They reveal whether a frame is designed for aggressive, aerodynamic speed or for all-day comfort and stability. The Trifox X16TA carbon frameset presents an interesting case. By analyzing its key figures, we can uncover its genuine character and determine the ideal rider it's built for.
The Race Geometry Indicators
Let's look at the numbers for a size 54 inch bike frame (listed as 54cm). The head tube angle is 73°, which is firmly in the territory of a responsive race bike. This relatively steep angle provides quick, precise steering, ideal for fast cornering and rapid direction changes in a criterium or a spirited group ride. The seat tube angle is 74°, positioning the rider's hips directly over the bottom bracket for efficient power transfer—a hallmark of a climbing and racing-oriented geometry.
The Endurance Geometry Indicators
However, the X16TA also incorporates figures that suggest comfort and stability. The chainstay length is a consistent 410mm across all sizes. This is a moderate length that balances responsiveness with a planted feel, preventing the bike from feeling "twitchy." The wheelbase, at 982mm for the 54cm size, is not excessively long but provides a stable platform. Critically, the stack-to-reach ratio tells the comfort story. With a stack of 544mm and a reach of 384mm (a ratio of about 1.42), this frame offers a position that is performance-oriented yet not impossibly low. It allows for a moderately aggressive drop without requiring extreme flexibility, bridging the gap between an all-out race bike and a relaxed endurance machine.
The Verdict: A Versatile Performer
The X16TA, with its T800 carbon fiber construction, flat-mount disc brakes, and thru-axles, is engineered as a modern, versatile road bike. Its geometry charts a middle course. It offers the sharp handling and efficient pedaling position of a race bike, making it a joy to push hard on climbs and through corners. Yet, it tempers this with a wheelbase and stack height that provide real-world stability and comfort for longer days in the saddle. It's not a pure, unforgiving race bike, nor is it a slack, upright endurance tourer. It is, instead, a highly capable all-rounder that will satisfy the sportive rider, the club racer, and the enthusiast seeking one bike to do it all. For a rider looking for a medium bike frame that delivers performance without extreme discomfort, the X16TA presents a compelling and well-balanced option.
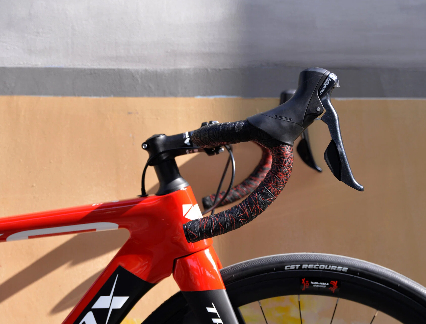
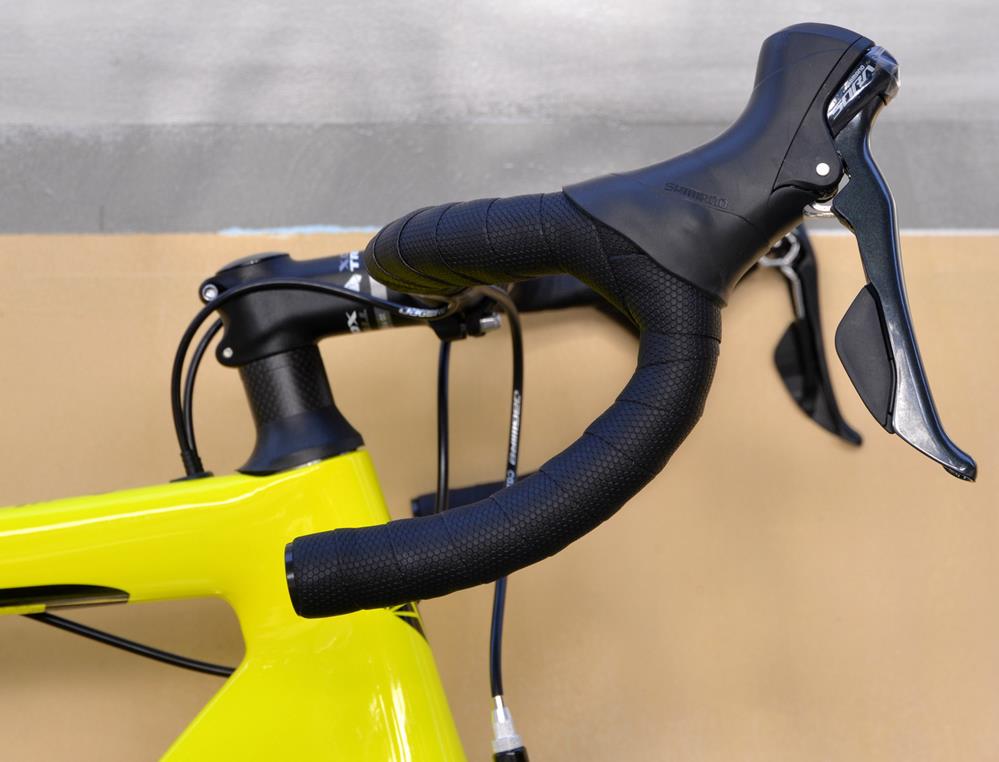
Upgrading your handlebar tape is one of the simplest ways to refresh your bike's look and feel. Quality bar tape like the Trifox BHT100 can transform your ride by providing better grip, cushioning road vibration, and giving your cockpit a clean, professional appearance. While the task might seem fiddly, with a little patience and the right technique, you can achieve a flawless wrap. Here’s our step-by-step guide to installing bicycle handlebar tape like a seasoned mechanic.
Before You Start: Preparation
Begin by removing your old tape and thoroughly cleaning the handlebar surface. Use isopropyl alcohol to remove any sticky residue. Ensure your brake levers are positioned correctly and that your handlebar end plugs are removed (new ones are included with the BHT100). Gather your new tape, scissors, and the finishing tape and end plugs provided in the kit.
Step 1: Begin at the Bar Ends
This is the foundation of a good wrap. Start by threading the new bicycle handlebar tape through the bar end, leaving about 2-3 inches protruding. This starting tab will be tucked inside later. Begin wrapping from the very end of the drop, working your way up towards the stem. Apply firm, even tension as you wrap, overlapping each new layer by about one-third to one-half of the tape's width. This overlap is crucial for preventing gaps and ensuring a comfortable, cushioned feel.
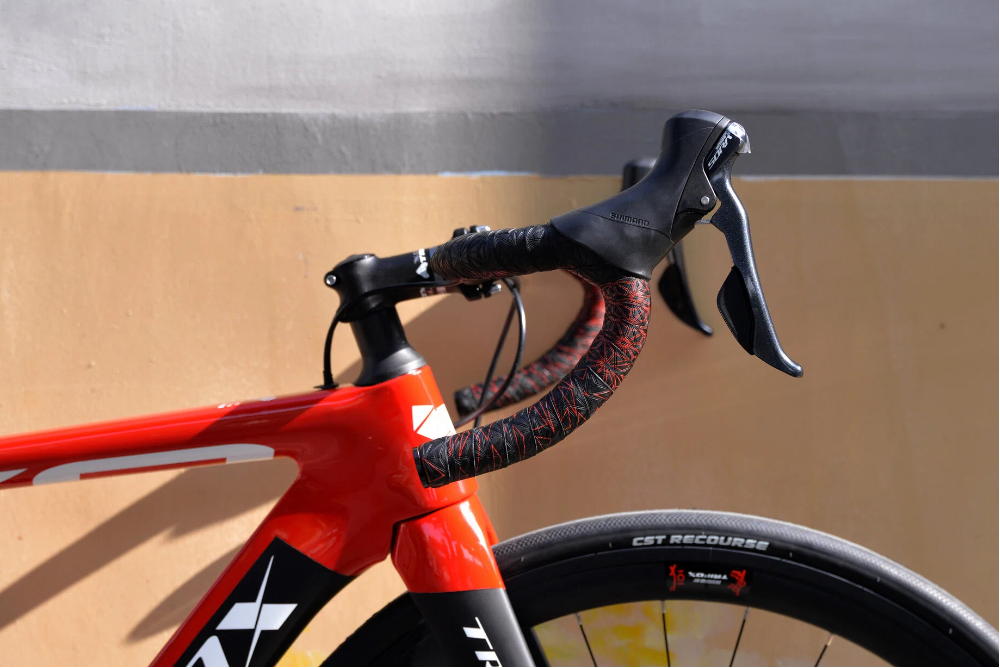
Step 2: Navigating the Brake Levers
When you reach the brake lever clamp, you'll need to create a neat transition. A common technique is to make a small "figure-eight" or "half-lap" around the lever body. Simply pull the tape tight and carefully wrap it around the front of the lever clamp, then continue wrapping up the handlebar. The key is to maintain tension so the tape lies flat without bunching. The BHT100's EVA foam core is forgiving and compresses nicely around these contours.
Step 3: Finishing at the Stem
Continue wrapping until you reach the stem. Cut the tape with sharp scissors at a slight angle for a clean, tapered edge. Use the provided finishing tape—a thin, adhesive strip—to secure the end of the bar tape neatly against the bar. Wrap it around a few times, pressing firmly for a secure hold.
Step 4: Secure the Ends
Finally, insert the new handlebar end plugs that came with your BHT100 kit. These are not just cosmetic; they are essential for safety and prevent the bar tape from unraveling. Gently push the protruding starting tab of tape into the bar end before inserting the plug for a completely clean finish.
With these simple steps, your new Trifox bar tape will be installed perfectly, ready to provide miles of comfortable, confident riding. The BHT100's combination of shock-absorbing EVA foam and durable, easy-to-clean PU leather makes it an ideal choice for this upgrade. A fresh wrap of quality bicycle handlebar tape is a small investment that pays huge dividends in comfort and control on every ride.
The question haunts every rider considering an upgrade to carbon: "Can carbon handlebars break?" It's a valid concern fueled by stories of catastrophic failure. The direct answer is yes, like any material, carbon fiber has limits and can fail if misused, damaged, or installed incorrectly. However, the more important answer lies in understanding why failures happen and how proper knowledge transforms carbon from a perceived risk into one of the strongest, most reliable components on your bike. Let's separate myth from engineering reality.
The Strength of Carbon: Stiffness, Not Brittleness
First, it's crucial to understand carbon fiber's nature. A high-quality mtb bicycle handlebar like the Trifox RHB100 is not "brittle glass." It's a composite material—thousands of ultra-strong carbon filaments embedded in a resin matrix. This construction allows it to be engineered to be exceptionally stiff and strong in specific directions (like resisting bending from your weight or steering inputs) while being remarkably lightweight. Its strength-to-weight ratio far surpasses aluminum. The perceived fragility stems from its intolerance to two specific things: impact damage and improper clamping force.
The Primary Risks: Impact and Improper Installation
Most carbon handlebar failures can be traced to a few key causes:
1. Impact Damage (The Hidden Threat): A crash or even a simple tip-over can cause a compromising impact. Unlike aluminum which might dent, carbon can suffer internal delamination—hidden cracks or separations between the carbon layers. This damage severely weakens the structure, and a bar with internal damage can fail later under normal riding loads. Always inspect your bars thoroughly after any impact.
2. Over-Torquing (The Silent Killer): This is the #1 installation error. Carbon does not yield like metal. Using the same "feel" or tools you would on an aluminum bar is dangerous. Exceeding the manufacturer's specified torque rating (typically 4-6 Nm for faceplate bolts) can crush the carbon fibers, creating stress risers that lead to cracks. A calibrated torque wrench is non-negotiable for installing carbon components.
3. Under-Torquing & Slippage: Conversely, insufficient torque can allow the bar to slip in the stem. A rider may then overtighten in a panic, leading to damage. It can also create localized stress points from movement.
4. Using the Wrong Paste: Never use grease on carbon clamp interfaces. Always use a carbon assembly paste. This specialized compound increases friction without damaging the fibers, allowing you to achieve a secure hold at the correct, lower torque.
Safe Practices for a Lifetime of Performance
Following a few golden rules ensures your mtb cycle handlebar remains safe and reliable:
* Torque, Torque, Torque: Use a quality torque wrench on every bolt. Follow the manufacturer's specs precisely (check the RHB100's documentation).
* Inspect Religiously: Before every ride, visually inspect the bar, especially around the clamp area and any potential impact points. Look for cracks, chips, or deep scratches. If in doubt, replace it.
* Handle with Care: Avoid clamping the bar in a vise or using levering tools on it during bike work. Protect it from impacts in transit or storage.
* Use Compatible Components: Ensure your stem faceplate is smooth and clean, without any sharp edges or burrs that could score the carbon surface.
Understanding the Limits and Riding with Confidence
Carbon handlebars are designed to withstand the enormous forces of riding. They are tested to standards far exceeding normal use. The Trifox RHB100, with its integrated design and monocoque carbon construction, is engineered for this purpose. The risk emerges not from the material itself, but from misuse.
By respecting the material—investing in a torque wrench, using carbon paste, and performing regular inspections—you mitigate virtually all the risk. Carbon's reward is a stiffer, more responsive, and lighter front end that improves control and reduces fatigue. The goal isn't to fear carbon, but to understand and respect its unique requirements. When treated correctly, a carbon handlebar is not a liability; it's a high-performance asset you can trust for countless miles of confident riding.
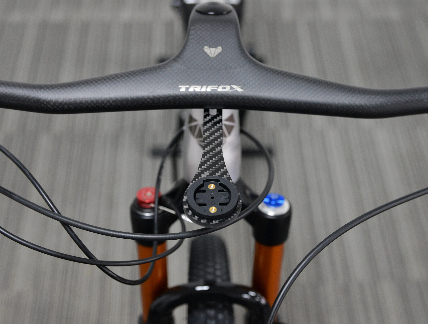
Finding the perfect bike computer mount can be frustrating. You’ve got your Garmin, Wahoo, or Hammerhead, but with countless handlebar specs and proprietary mounts, the fear of buying the wrong thing is real. This guide cuts through the confusion with a simple, two-step verification process to ensure the Trifox SBH100 is your perfect fit, turning compatibility from a gamble into a guarantee.
Step 1: The Handlebar Interface – Will It Fit My Bike?
The first check is your handlebar. The SBH100 is designed as a universal handlebar clamp, engineered to fit the most common road and mountain bike standards. It features a forged aluminum, 4-bolt clamp mechanism with a wide adjustment range, making it compatible with standard 31.8mm and oversized 35mm diameter handlebars without needing extra shims. This sleek, low-profile clamp attaches securely to your handlebar, stem, or even an integrated cockpit’s front plate, providing a clean and versatile mounting solution.
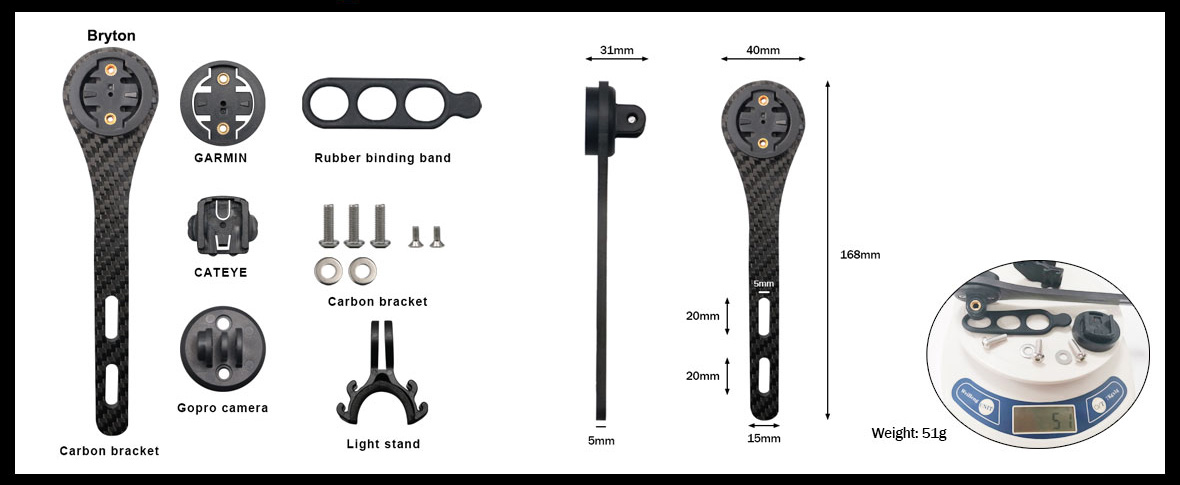
Step 2: The Computer Interface – Will It Hold My Device?
This is the core of compatibility. The SBH100 uses a universal “quarter-turn” interface, which is the industry-standard mounting system. This means it natively supports:
* Garmin: All EDGE series computers (520, 530, 830, 1030 Plus, 1040, etc.) use the quarter-turn system. Simply click your device into place.
* Wahoo ELEMNT: Models like the BOLT, ROAM, and original ELEMNT use a different, proprietary “slide-and-lock” system. For these, you would attach your Wahoo’s original mount onto the SBH100’s GoPro-style accessory threads (using the included adapter if needed).
* Hammerhead Karoo: The Karoo 2 also uses a quarter-turn mount, making it directly compatible with the SBH100.
Your Quick-Start Compatibility Checklist:
1. My handlebar/stem diameter is: 31.8mm or 35mm? ✅ SBH100 fits both.
2. My computer brand is:
* Garmin or Hammerhead: ✅ Directly compatible with the quarter-turn mount.
* Wahoo: ✅ Compatible by attaching your Wahoo mount to the SBH100’s accessory threads.
* Bryton, Cateye, iGPSPORT: ✅ These also commonly use standard quarter-turn or GoPro-style mounts, making them compatible.
Beyond the Computer: A True Multi-Mount
The SBH100's utility extends beyond your GPS. Its integrated GoPro-compatible accessory mounts (on the top and bottom) allow you to add a bicycle light mount (for lights up to 25mm in diameter) and an action camera simultaneously. This creates a clean, centralized cockpit, eliminating the need for multiple clamps and tangled zip ties.
At Trifox, our promise is a perfect fit. The SBH100 is precision-engineered from lightweight 3K carbon fiber and forged aluminum, with each interface tested for secure, vibration-free operation. We provide clear specifications and encourage you to reach out if you have any unique setup questions. Choosing the right mount isn't just about avoiding a mistake—it’s the first step to a cleaner, more focused, and more enjoyable ride where your data is always secure and in view.
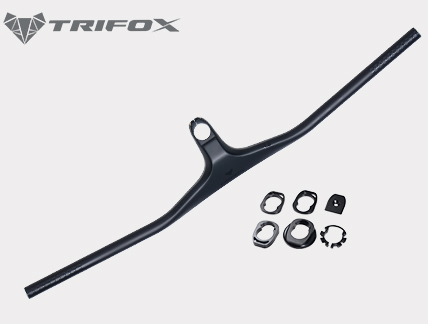
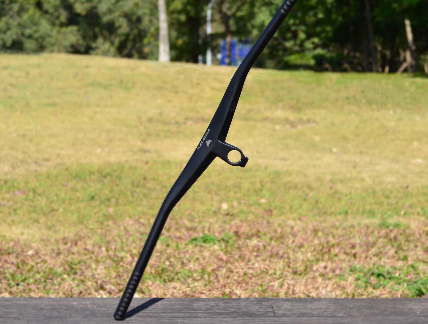
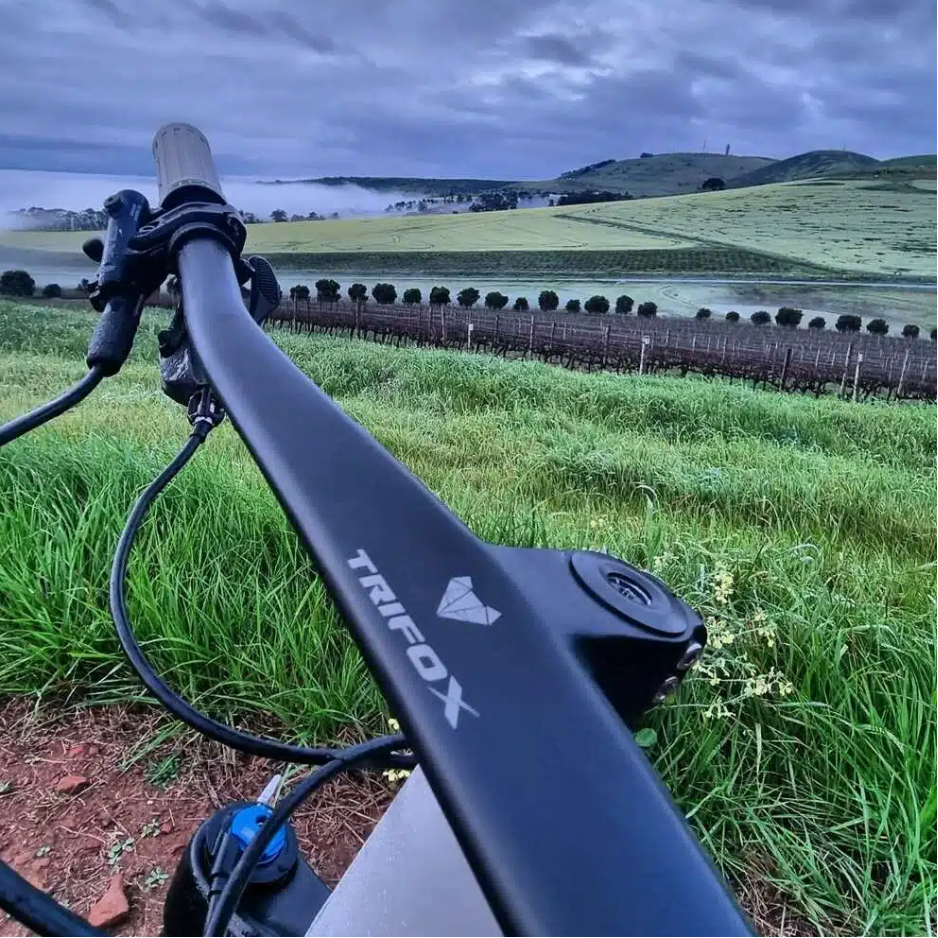
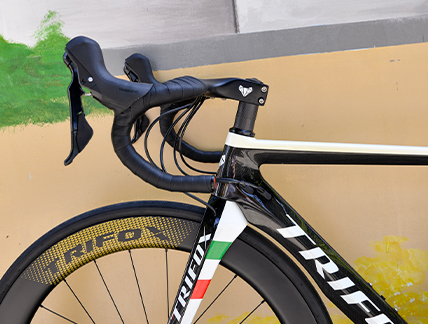
The sight of a clean, integrated cockpit is a thing of beauty—a seamless blend of form and function that promises aerodynamic gains and a clutter-free look. However, for many riders and mechanics, the thought of threading brake hoses and shift cables through a one-piece carbon mtb bicycle handlebar has been a source of dread, synonymous with hours of frustration, fishing with guide wires, and skinned knuckles. It doesn't have to be this way. The Trifox RHB600 is engineered from the ground up with a simple philosophy: performance should not come at the cost of serviceability. It proves that with thoughtful design, installing cables in a fully integrated bar can be a logical, even intuitive, process.
Engineered Pathways, Not Just Holes
The journey to an easy installation begins before you even pick up a cable. The RHB600 features dedicated, oversized internal channels that are molded directly into the carbon structure during manufacture. Unlike retrofitted holes or tight, winding paths, these channels are designed with a consistent diameter and smooth internal finish. This isn't just an empty space; it's a precisely engineered guideway that naturally directs cables and hoses from the stem entry point to their exits at the bar ends and lever clamps. The path is clear, logical, and free of sharp edges or unnecessary turns that cause snagging.
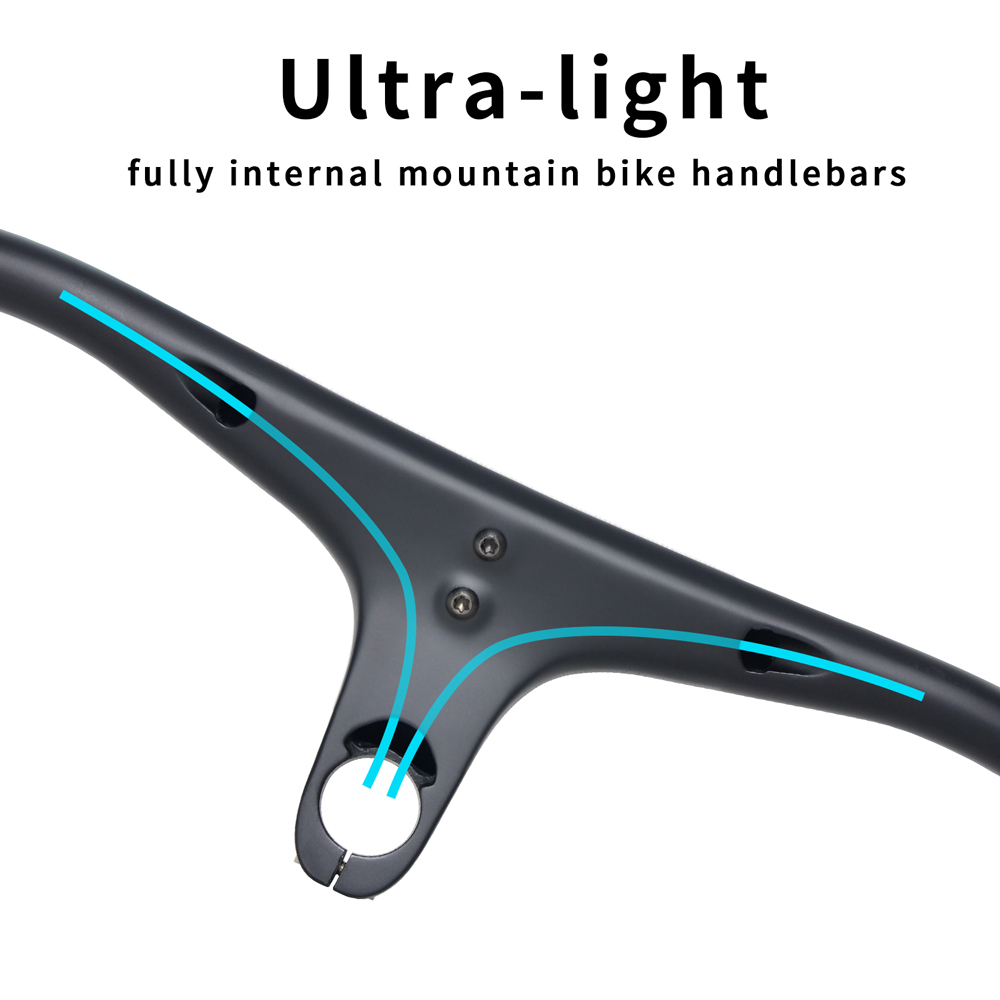
Clear Access Points
Ease of access is critical. The RHB600 is designed with large, clearly defined entry and exit ports. The port at the stem clamp area is generously sized, allowing you to easily see and feed cables into the main channel. More importantly, the exit ports at the lever mounting areas are not just small holes, but are shaped to provide a clear, open path for the housing to emerge cleanly. This thoughtful opening eliminates the frustrating "blind fishing" exercise often associated with integrated bicycle bars, where you're trying to maneuver a flexible housing through a tiny, unseen opening.
Tool-Friendly Design
A truly user-friendly design doesn't stop at guiding the cable; it also considers how you get it there. The internal channels of the RHB600 are designed to be compatible with standard installation tools and techniques. Using a simple, flexible guide wire or a mechanic's cable becomes a straightforward task. You can feed the wire through one port and confidently pull it out the other, knowing the smooth channel will guide it without catching. Once the guide is through, attaching your brake hose or shift housing and pulling it back through is a simple, one-person operation. This design respects the mechanic's time and skill, turning a complex job into a series of simple, logical steps.
Clean Finishing Details
The final touch is in the finishing details. The RHB600 includes specially designed, removable rubber port covers and grommets. Once your cables are installed, these covers snap neatly into place, creating a clean, sealed, and professional finish that looks factory-perfect. They protect the entry points from dirt and moisture without requiring messy sealants or adhesives, making future maintenance or cable replacement just as simple.
In summary, the Trifox RHB600 redefines what an integrated cockpit can be. By prioritizing intelligent features like oversized, smooth channels, large access ports, and tool-friendly design, it removes the traditional pain points of internal routing. It demonstrates that the pinnacle of carbon integrated handlebar design isn't just about achieving a sleek look or low weight—it's about creating a component that is both high-performance and genuinely practical to live with. The RHB600 doesn't just make cable installation possible; it makes it intuitive, transforming a daunting task into a satisfying part of building your dream bike.
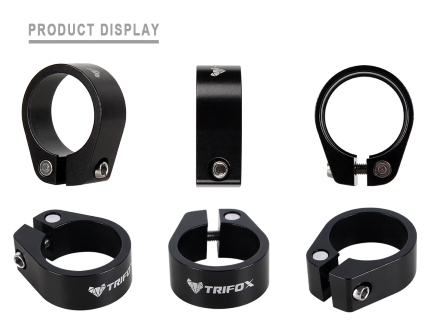
Every cyclist has experienced that sinking feeling—literally. You’ve set your saddle to the perfect height, only to find it has slowly slipped down mid-ride, disrupting your pedaling efficiency and comfort. This common frustration points directly to a small but critical component often taken for granted: the seatpost clamp. Far from being just a simple fastener, a well-engineered seatpost clamp is a cornerstone of a safe, efficient, and enjoyable ride.
The Primary Role: Security and Precision
The fundamental job of a bike seat post clamp is deceptively simple: to securely fasten the seatpost inside the frame's seat tube, preventing any movement. However, "secure" doesn't mean "crushingly tight." A quality clamp achieves a vice-like grip through intelligent design, not just brute force. It must distribute clamping pressure evenly around the circumference of the seatpost to prevent damaging carbon fiber posts or deforming thin-walled aluminum. This ensures your carefully dialed-in saddle height and angle remain exactly where you set them, mile after mile, climb after climb.
Beyond Tightening: Engineering for Performance
Modern clamps, like the Trifox SC35, are engineered with specific goals:
* Material & Weight: Made from lightweight yet strong materials like CNC-machined aluminum, they add minimal weight while offering maximum strength and corrosion resistance.
* Bolt Mechanism: A single high-quality bolt (often titanium or stainless steel) with a precise thread allows for accurate torque application. Using a torque wrench to tighten to the manufacturer's specification is crucial—it prevents under-tightening (slipping) and over-tightening (damage).
* Design & Interface: The clamp's inner diameter must perfectly match your frame's seat tube. Designs vary from classic single-bolt bands to sleek, low-profile models that integrate cleanly with the frame's aesthetics.
Choosing the Right Clamp: A Matter of Fit
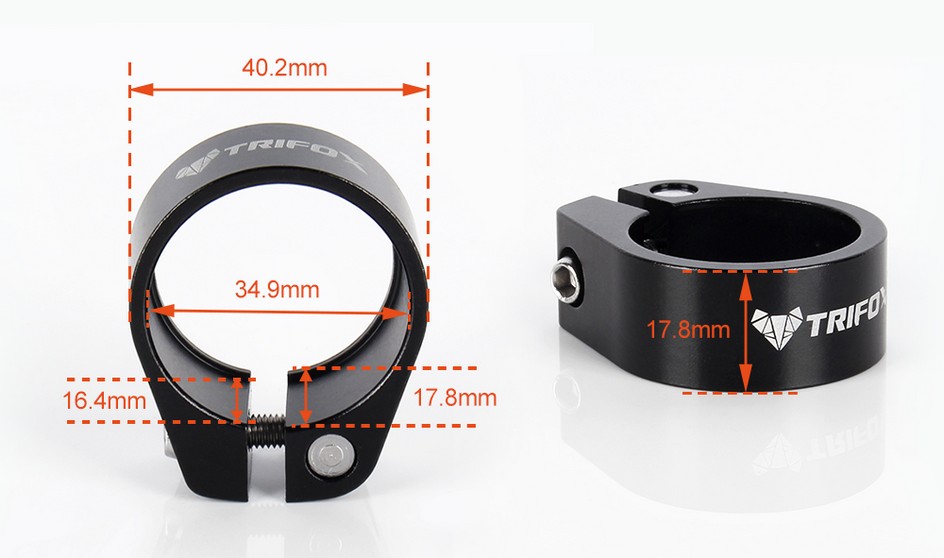
Selecting a clamp isn't one-size-fits-all. You must know two key measurements:
1. Seat Tube Diameter: The outer diameter of your frame's seat tube where the clamp sits (common sizes are 31.8mm, 34.9mm, etc.).
2. Seatpost Diameter: The outer diameter of your seatpost itself.
Mismatching these can lead to an insecure fit or damage. For carbon frames and seatposts, it's especially important to use a clamp designed to distribute pressure over a wider area to avoid stress concentrations.
A Small Upgrade, A Significant Impact
Neglecting your seatpost clamp can lead to a wobbly saddle, inconsistent riding position, and in worst cases, damage to your frame or a sudden saddle collapse. Upgrading from a basic stamped steel clamp to a precision-machined model like the Trifox SC35 enhances reliability, safety, and peace of mind. It’s a small, affordable component that plays an oversized role in holding your perfect ride together, ensuring that your connection to the bike remains solid, secure, and set exactly how you like it.
When considering performance upgrades, riders often think of wheels, groupsets, or aero bars. Rarely does a humble roll of bike handlebar tape make the list. Yet, your hands are one of only three contact points with your bike, and this thin layer of material directly influences control, comfort, and safety. It’s time to stop seeing bar tape as a cosmetic accessory and start recognizing it as a fundamental component of your cockpit.
The Core Functions: Grip, Damping, Protection
The primary functions of quality handlebar grips are immediate and tangible:
* Secure Grip: On wet days, during sprints, or on rough roads, a tacky, textured surface prevents your hands from slipping, ensuring precise steering and brake control.
* Vibration Damping: Road buzz and high-frequency vibrations travel from the tires, through the frame and fork, and into your hands. Quality tape with a padded layer (like EVA foam) acts as a crucial filter, absorbing these shocks to reduce hand numbness and arm fatigue on long rides.
* Impact Protection: In the event of a minor tip-over or crash, a well-padded tape provides a valuable layer of cushioning for both your handlebars and your palms.
Choosing the Right Tape: Key Factors
Choosing the right tape means balancing several key factors based on your riding style:
* Material & Construction: The Trifox BHT100 tape, for example, uses a smart dual-material design: a soft EVA foam base for excellent shock absorption, topped with a durable PU leather surface. This combination provides the comfort of foam with the easy-clean durability and secure grip of synthetic leather. Other common materials include natural cork (classic, eco-friendly), gel inserts (maximum comfort), and silicone (superior wet-weather grip).
* Thickness & Texture: Thicker tape generally offers more cushioning but can slightly reduce bar feel. Texture—from smooth to heavily patterned—affects grip in dry and wet conditions. The BHT100's PU leather surface offers a reliable, multi-condition grip.
* Durability & Maintenance: Sweat, sun, and frequent handling take their toll. Synthetic materials like PU leather are highly resistant to wear, UV damage, and are easy to wipe clean, making them a practical, long-lasting choice for everyday riders.
The Importance of Proper Installation
Even the best tape underperforms if installed poorly. Proper installation is key to comfort, looks, and longevity:
1. Start at the bar ends, ensuring the end plugs are securely in place first.
2. Wrap outward from the drops toward the stem, maintaining consistent, firm tension and an even overlap (usually 1/3 to 1/2 of the tape's width).
3. Finish neatly at the stem using the provided finishing tape for a professional, secure look that won't unravel.
Ultimately, investing in and properly installing a quality bike handlebar tape like the Trifox BHT100 is one of the most cost-effective upgrades you can make. It directly enhances the quality of every ride by improving your connection to the bike, fighting fatigue, and boosting confidence. Don't overlook this critical link between you and the road.
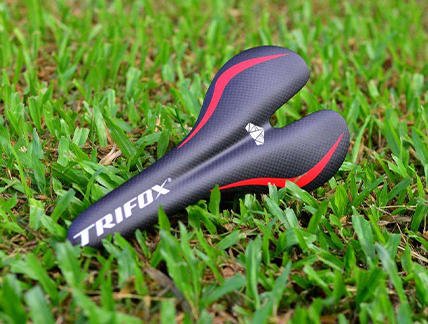
At first glance, a performance carbon saddle like the Trifox CS100 can seem intimidating. Its sleek, minimalist appearance and rigid full-carbon fiber construction stand in stark contrast to the plush, padded saddles many are used to. It's perfectly reasonable to wonder: "Will this be comfortable?" The answer lies in a fundamental shift in thinking. A performance cycling saddle is not designed to provide comfort through cushioning that you sink into. Instead, its core philosophy is support over softness. It aims to provide a stable, precise platform for your sit bones, freeing your legs to focus purely on pedaling power and efficiency. This isn't about passive comfort; it's about active, empowering performance.
Let's demystify what it really means to "require" a good position to use such a saddle effectively.
* It's About Stability, Not Core Strength: The requirement for good form isn't about needing pro-level fitness. It's about the ability to maintain a stable pelvis and avoid rocking side-to-side on the saddle. A firm, supportive platform like the CS100 actually aids this by giving your sit bones a clear, unwavering point of contact, helping you find and hold an efficient position more naturally.
* Precision Setup is a Feature, Not a Bug: Yes, achieving optimal comfort requires more precise saddle angle and fore/aft positioning. However, view this as the saddle's greatest tuning advantage. Because it provides immediate, unambiguous feedback, it acts as a precise micro-adjustment tool. Small changes yield noticeable differences, allowing you (or a bike fitter) to dial in your perfect position faster and more accurately than with a vague, forgiving saddle.
So, who is this type of bicycle saddle truly for? It’s an excellent match for the serious enthusiast whose rides regularly exceed 1.5 to 2 hours, who is chasing speed or efficiency gains, and who understands that long-distance comfort is achieved through proper support and fit—not by simply adding more padding. It’s for the rider willing to invest time in optimizing their bike setup. Conversely, it may not be the ideal choice for purely casual, upright riders or those who prefer a more relaxed, static seating position on the bike.
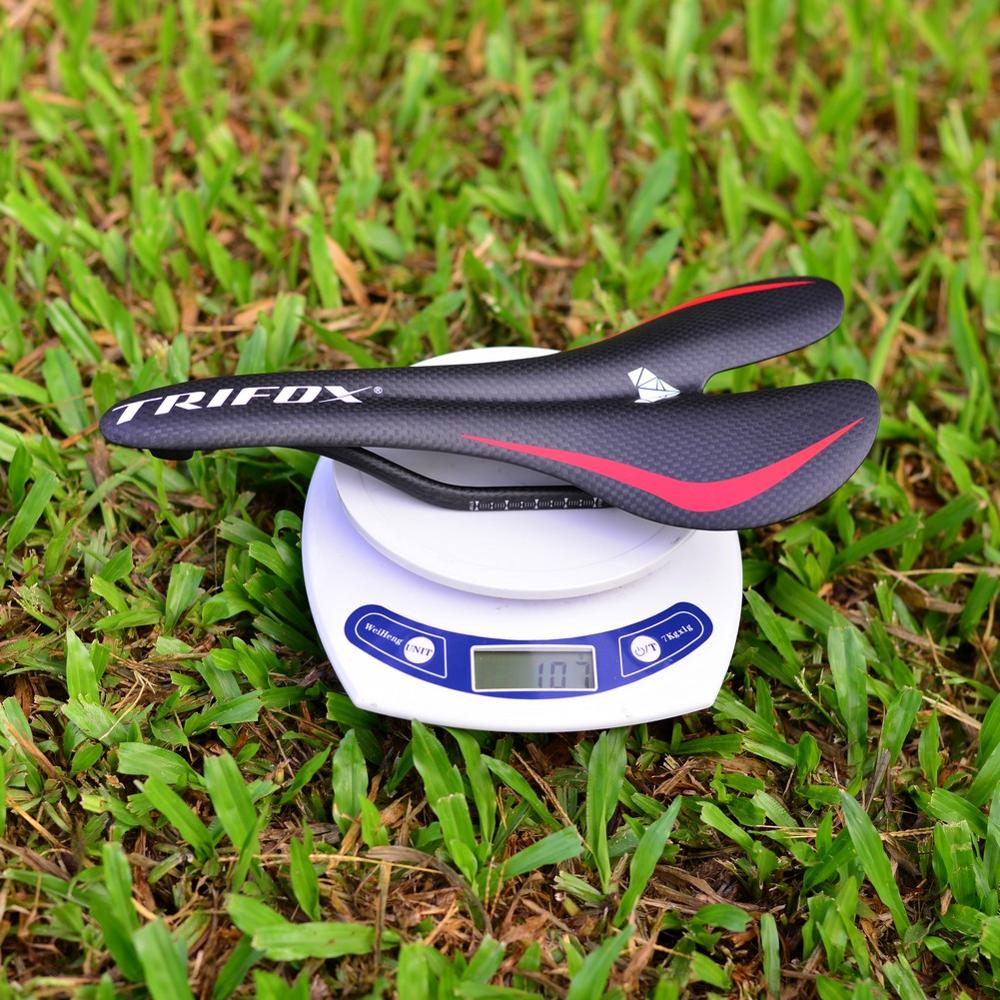
If the potential for a lighter, more efficient, and precisely supportive ride appeals to you, your logical next step is clear: prioritize a professional bike fit. A proper fit ensures your overall bike geometry and riding posture are correct. With that solid foundation established, you can then explore whether a performance carbon saddle is the right final piece of your setup puzzle. The Trifox CS100, with its sub-106g weight, ergonomic nose design to prevent numbness, and central vent for airflow, exemplifies this performance-oriented approach, offering a clear upgrade path for riders ready to make the leap.


