


Selecting the right rigid carbon fork can significantly enhance your mountain biking experience, providing a balance of weight, durability, and performance. Trifox Bike offers a range of high-quality carbon MTB forks that cater to various biking needs.
1. Understand the Benefits of Rigid Carbon Forks
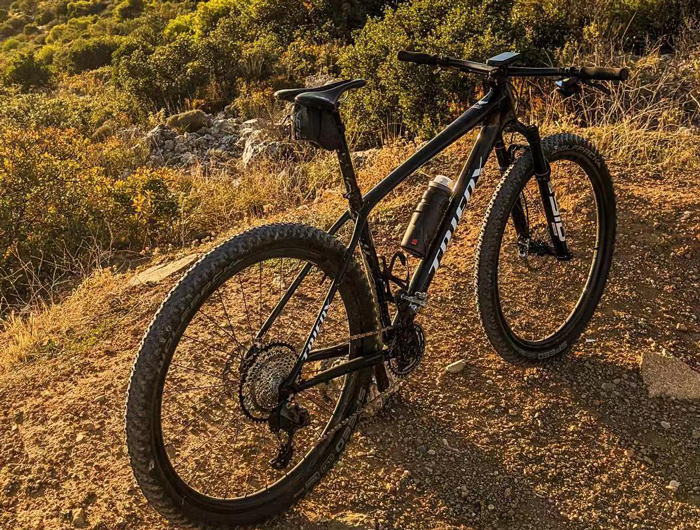
Rigid carbon forks are ideal for riders seeking a lightweight and maintenance-free option. Unlike suspension forks, they provide direct feedback from the trail, improving pedaling efficiency and offering a more controlled ride on smooth surfaces. Trifox's carbon forks are known for their robust build and lightweight design, making them perfect for speed enthusiasts and those riding primarily on cross-country or urban trails.
2. Weight Considerations
One of the primary advantages of rigid carbon forks is their reduced weight compared to suspension forks. Lighter forks enhance your bike's agility and handling, especially crucial for competitive cyclists. Trifox's models, such as the Carbon MTB Fork QMK100 and TMK100, are designed to minimize weight without compromising strength, offering a significant performance benefit for racers and casual riders alike.
3. Durability and Material Quality
When choosing a carbon fork, durability is key. Look for high-quality carbon construction that offers resilience against the stresses of mountain biking. Trifox ensures their forks undergo rigorous testing, providing a product that withstands the rigors of trail riding. Their carbon forks also boast a sleek finish, adding aesthetic appeal to your bike.
4. Compatibility with Bike Frames
Before purchasing a fork, ensure compatibility with your bike's frame. Consider the steerer tube diameter and axle type. Trifox's forks are designed to accommodate various frame sizes and styles, ensuring a seamless integration with most MTB setups. It’s crucial to verify these specifications to avoid any installation issues.
5. Performance Benefits
Rigid carbon forks from Trifox offer enhanced power transfer, as they do not absorb pedal energy like suspension forks. This allows for more efficient climbing and acceleration. These forks are particularly beneficial for riders who prioritize speed and efficiency over cushioning on bumpy trails.
6. Price and Value
While carbon forks can be more expensive than their aluminum counterparts, they are an investment in performance and quality. Trifox offers competitive pricing, often with significant discounts and free shipping on orders over $50, making their carbon forks accessible without compromising on quality.

Conclusion
Choosing the perfect rigid carbon fork involves balancing weight, durability, and compatibility with your biking needs. With Trifox's range of carbon MTB forks, you can enhance your bike's performance and enjoy a more responsive ride. Whether you're a seasoned rider or a beginner, investing in a quality carbon fork can elevate your mountain biking adventures. Remember to assess your riding style and terrain preferences to select the fork that best suits your needs. Happy riding!

Mountain biking is an exhilarating sport that combines adventure, fitness, and a deep connection with nature. For newcomers eager to hit the trails, getting started might seem daunting, but with the right guidance, you can dive into the world of MTB (mountain biking) with confidence.
1. Choosing the Right Bike
Your mountain bike is the core of your experience, and selecting the right one is crucial. For beginners, an all-around MTB is ideal. Consider factors like the bike's frame material, suspension type, and wheel size. Trifox Bike offers high-quality carbon frames, which are lightweight and durable, making them an excellent choice for those new to the sport. Their range includes options like the Pioneer and PeakTrail Xtreme, catering to different biking needs and budgets.
2. Essential Gear
Beyond the bike, there are several pieces of gear that will enhance your ride:
- Helmet: This is non-negotiable. A helmet protects you from serious injuries and is a must-have for every ride.
- Gloves: They offer better grip and protect your hands during falls.
-Protective Eyewear: Shields your eyes from dust, debris, and UV rays.
- Hydration Pack: Staying hydrated is crucial, especially on longer trails.
- Appropriate Clothing: Opt for moisture-wicking fabrics that keep you comfortable, and consider padded shorts for added comfort.
3. Basic Maintenance Tips
To ensure your bike remains in top condition, regular maintenance is key:
- Tire Pressure: Check your tire pressure before each ride. Properly inflated tires provide better control and reduce the risk of flats.
- Chain Lubrication: Keeping your chain well-lubricated ensures smooth shifting and prolongs the life of your drivetrain.
- Brake Check: Test your brakes before every ride to ensure they're responsive.
- Regular Cleaning: Dirt and grime can affect performance. Regularly clean your bike, especially after muddy rides.
4. Safety Precautions
Safety should always be a priority:
- Trail Etiquette: Respect other trail users. Yield to uphill climbers and be mindful of hikers.
- Ride Within Your Limits: Start with trails that match your skill level and gradually progress to more challenging ones.
- Stay Aware: Always be aware of your surroundings, including other riders and potential hazards on the trail.
5. Getting Involved in the Community
Mountain biking is not just a sport; it's a community. Joining local MTB groups can provide support and camaraderie. These groups often organize rides and offer valuable tips and encouragement.
6. Upgrading as You Progress
As you become more comfortable, you might consider upgrading your components. Trifox Bike offers a range of components, from carbon wheels to forks, that can enhance your bike's performance. These upgrades can make a significant difference as you tackle more challenging trails.

Starting your mountain biking journey is an exciting step towards endless adventures. By investing in quality gear and understanding the basics, you'll be well on your way to enjoying the thrill of the trails. Remember, every expert was once a beginner, and with each ride, you'll gain confidence and experience. Embrace the journey, stay safe, and enjoy every moment on your bike.
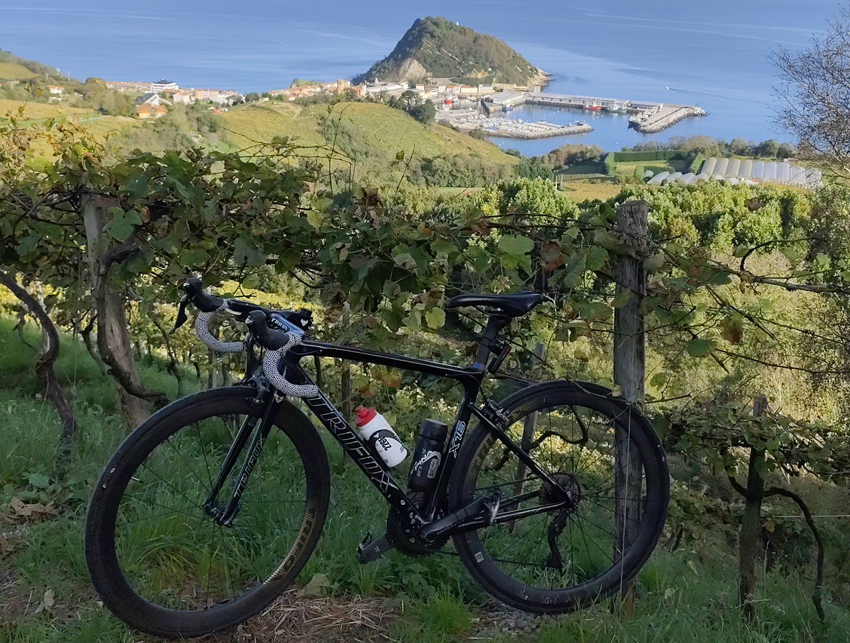
Trifox has established itself as a formidable name in the cycling world, renowned for its cutting-edge technology and innovative designs. At the pinnacle of their offerings is the Trifox X16, the brand's flagship road bike frame, which is available in two distinct versions: the X16TA and the X16QR. Both models boast remarkable features that appeal to cyclists seeking performance, durability, and aesthetic appeal.
The X16TA model features a disc brake system, providing enhanced stopping power and control, particularly beneficial in varying weather conditions. Meanwhile, the X16QR is equipped with a traditional V-brake system, catering to those who prefer the classic setup. Both frames are crafted from high-quality T800 carbon fiber, celebrated for its lightweight properties, strength, and ability to absorb road vibrations. This material ensures that each ride is not only smooth but also responsive, offering cyclists the perfect blend of comfort and speed.
One of the standout features of the X16 frames is their internal cable routing design. This thoughtful engineering choice not only contributes to a sleek and uncluttered appearance but also enhances aerodynamics, allowing for a more efficient ride. The internal routing also means less maintenance and a reduced chance of cable damage, prolonging the lifespan of the components.
Both the X16TA and X16QR are compatible with both DI2 and mechanical systems, showcasing their versatility. Cyclists can choose between electronic precision or mechanical reliability, depending on their preferences and needs. This adaptability, combined with the frame's ability to support tires up to 25mm, makes the X16 a suitable choice for a variety of cycling activities—from competitive racing to leisurely long-distance rides.
Aesthetically, the Trifox X16 frames are available in a range of color options, including matte black, chameleon blue, and red & black, allowing cyclists to personalize their rides according to their style. The visual appeal of these frames, coupled with their performance capabilities, makes them a popular choice among cycling enthusiasts.
Customer reviews further underscore the quality and performance of the X16 models. One reviewer praises the X16TA for its lightweight and stiff frame, perfect for those looking to build an affordable yet high-performing bike. Another satisfied customer highlights the seamless integration of the frame with a DI2 groupset, elevating their cycling experience with efficient and smooth gear shifts.

Overall, the Trifox X16 road bike frames embody a harmonious blend of innovative engineering, aesthetic versatility, and practical performance. Whether you opt for the disc brake X16TA or the classic V-brake X16QR, you are guaranteed a frame that not only meets but exceeds expectations, providing an unparalleled cycling experience.

For avid cyclists, every component of their bike plays a crucial role in optimizing performance and enjoyment on the road or trail. One often-overlooked accessory that can make a significant difference is the water bottle cage.
Specifically, carbon bottle cages, like those offered by Trifox, are gaining popularity for their blend of functionality and style. But can a carbon bottle cage truly enhance the cycling experience? Let’s explore the benefits and impact of this sleek accessory.
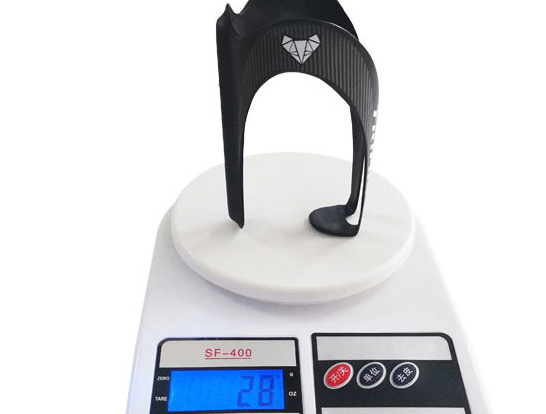
Carbon fiber has become the material of choice for many cycling components, and for good reason. Its lightweight nature is one of its most appealing attributes. When it comes to bottle cages, this means less weight for cyclists to carry, which can translate to improved speed and energy efficiency. Every gram counts in the world of competitive cycling, and a lighter bike means less effort is required during climbs and sprints. The Trifox carbon bottle cages weigh a fraction of traditional metal cages, offering a tangible performance advantage.
Durability is another key benefit of carbon bottle cages. Despite their light weight, carbon fiber structures are incredibly strong and resilient, capable of withstanding the rigors of intensive cycling. Whether you’re tackling rough mountain trails or enduring long road rides, a carbon cage ensures your water bottle stays securely in place. This robustness reduces the need for frequent replacements, making it a cost-effective choice in the long run.
From an aesthetic standpoint, carbon bottle cages offer a sleek and modern look that complements the high-tech appearance of today’s bicycles. The minimalist design and smooth finish add a touch of elegance, enhancing the overall visual appeal of your bike. This not only satisfies the eye but can also boost a cyclist’s confidence and pleasure in their ride, knowing they have a high-performance, stylish setup.
The convenience factor is another compelling reason to consider upgrading to a carbon bottle cage. These cages are designed for easy access and secure placement of water bottles, ensuring you stay hydrated without hassle. The security provided by a well-designed cage means you can focus on your ride without worrying about losing your hydration source on bumpy terrain.
Customer feedback on Trifox’s carbon bottle cages underscores their value and effectiveness. Many users have expressed satisfaction with the light weight and secure fit these cages provide, noting that they enhance the overall cycling experience. Such positive testimonials highlight the importance of investing in quality accessories. Even a seemingly small component like a bottle cage can have a significant impact on a cyclist’s performance and enjoyment.
Moreover, investing in high-quality cycling accessories like carbon bottle cages can instill a sense of pride and ownership in your cycling gear. This psychological boost can enhance your motivation and commitment to riding, whether for leisure, fitness, or competition. It also reflects a dedication to maintaining a well-equipped bicycle that can effortlessly tackle any challenge.
In conclusion, while a carbon bottle cage might seem like a minor upgrade, it can indeed be a key element in enhancing your cycling experience. By offering weight reduction, durability, aesthetic appeal, and convenience, these cages provide a comprehensive package that benefits every cyclist.
The positive experiences shared by users further emphasize their worth. For those looking to optimize their ride, a carbon bottle cage from Trifox could be a worthwhile investment, contributing to both performance and enjoyment on the bike.
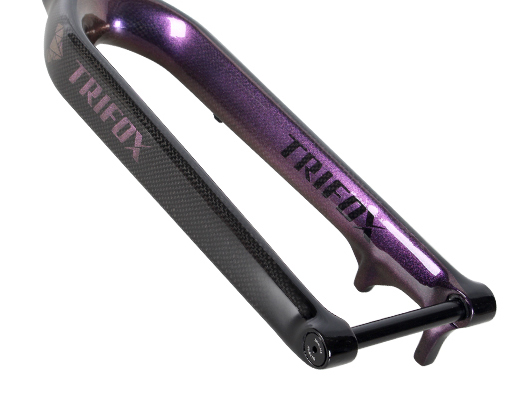
When it comes to enhancing your mountain biking experience, upgrading your bike's fork can be a game-changer. One such component that has been capturing attention is the 29er Rigid Carbon Fork, specifically the Trifox TMK100 model. But is this fork the ultimate upgrade for your mountain bike adventure? Let’s delve into its features, benefits, and what real users have to say about it.
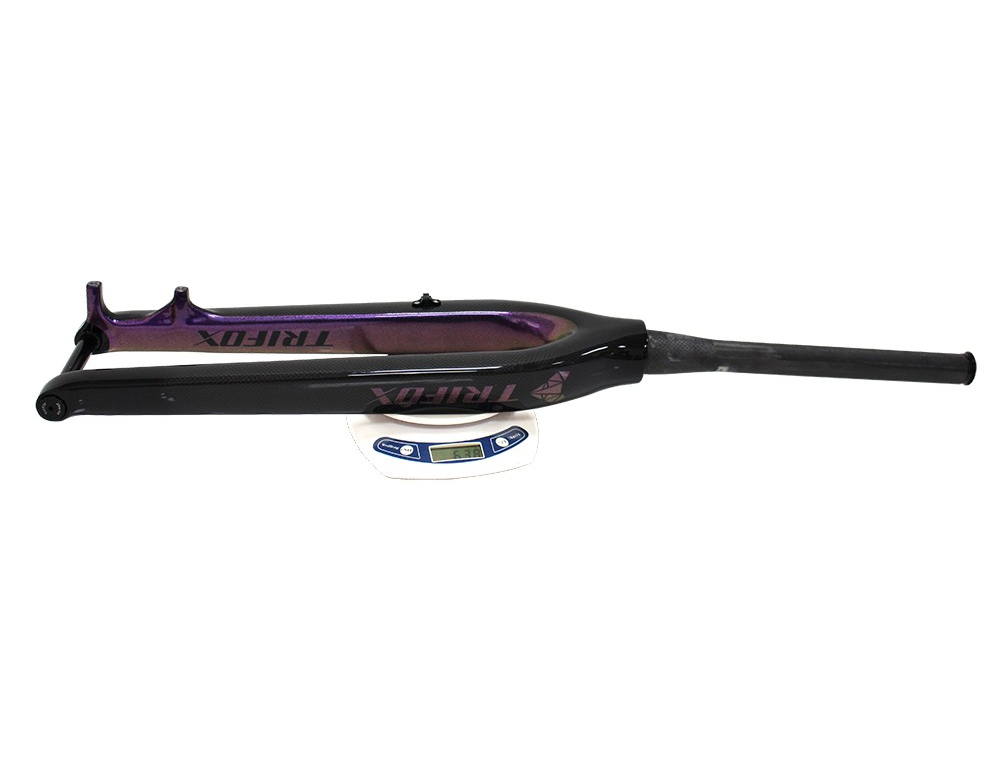
The Trifox TMK100 carbon MTB fork is engineered for performance, featuring a T800 carbon fiber construction that offers a perfect blend of strength and lightness. At approximately 600 grams, this fork significantly reduces the front-end weight of your bike, making uphill climbs easier and improving handling. The carbon fiber not only keeps the weight down but also contributes to the fork's durability, ensuring it can withstand the rugged demands of off-road cycling.
One of the standout features of the TMK100 is its compatibility with disc brakes. This integration ensures reliable stopping power, which is crucial for navigating challenging terrains.
Whether you're descending a steep trail or maneuvering through tight corners, the disc brakes provide the confidence and control needed to tackle any adventure. Moreover, the fork's tapered design, ranging from 1-1/8 to 1-1/2 inches, enhances stability and steering accuracy, allowing for precise handling even in tricky situations.
The fork is specifically designed for 29-inch wheels, making it an excellent choice for modern mountain bikes. It accommodates up to 2.1-inch tires, giving you the flexibility to choose tires that match your riding style and terrain preferences. This feature is particularly beneficial for riders who enjoy exploring various trails, from smooth paths to rocky and uneven tracks.
Customers who have opted for the Trifox TMK100 have shared overwhelmingly positive reviews. Users like Mathieu appreciate the fork's light weight and robust design, noting that it enhances their biking experience without compromising on durability. Ahlvers echoes this sentiment, highlighting the fork's strong build and appealing aesthetics. James, another satisfied customer, mentions how the fork has exceeded expectations in terms of performance and quality. With a perfect 5-star rating from all reviewers, it's clear that the TMK100 has made a strong impression on the mountain biking community.
The benefits of using a rigid carbon fork extend beyond just weight reduction and durability. By eliminating the suspension, a rigid fork like the TMK100 provides a more direct connection to the trail. This can lead to improved pedaling efficiency and a better feel for the terrain, which many seasoned riders find preferable for specific types of biking, such as cross-country and gravel riding. The direct feedback from the trail allows for a more engaged and responsive riding experience, helping you to become a more adept and skilled rider over time.

In conclusion, the 29er Rigid Carbon Fork, particularly the Trifox TMK100 model, offers a compelling upgrade for mountain bikers seeking to enhance their performance and enjoyment on the trails. Its lightweight yet durable construction, paired with its compatibility with disc brakes and 29-inch wheels, makes it a versatile and reliable choice.
The positive customer feedback further underscores its value, suggesting that for those ready to venture off the beaten path, the TMK100 could indeed be the ultimate upgrade for your mountain biking adventures. Whether you're a seasoned pro or an enthusiastic beginner, this fork promises to take your ride to new heights.

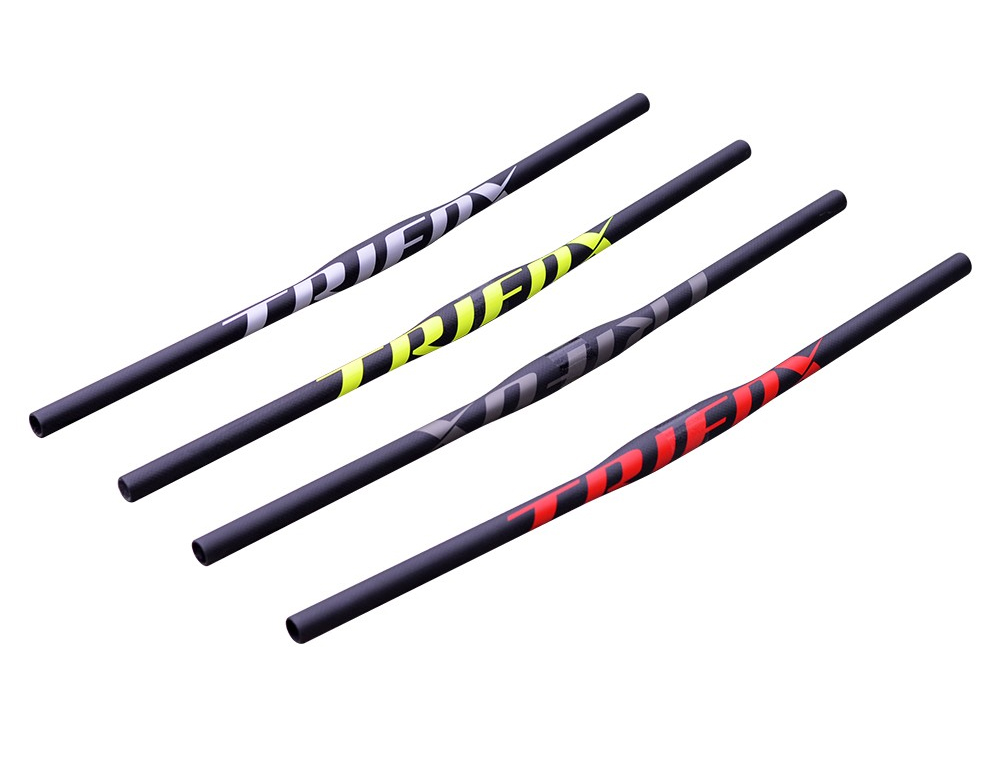
Flat handlebars have become a popular choice among cyclists, especially those navigating the rugged terrains of mountain biking. Known for their straightforward design and functional advantages, flat handlebars like the Trifox Carbon Flat Bar FHB100 can significantly enhance your biking experience.
Introduction to Flat Handlebars
Flat handlebars are characterized by their straight shape, providing a wide grip that promotes stability and control. This design is particularly advantageous for mountain bikers who require precise steering on challenging trails. Unlike drop handlebars, flat bars offer a more upright riding position, which can help reduce fatigue during long rides and improve visibility, making them ideal for both novice and seasoned riders.
Benefits of Flat Handlebars
1. Improved Control: The wide grip of flat handlebars enhances leverage and control, allowing riders to maneuver their bikes with greater ease. This is crucial when navigating steep descents or tight corners, where precise steering is necessary.
2. Comfort: By promoting an upright posture, flat handlebars help distribute weight evenly across the body, reducing strain on the back and wrists. The Trifox Carbon Flat Bar FHB100, with its ergonomic design, further alleviates discomfort by dampening vibrations, a common issue on uneven terrains.
3. Weight Reduction: Materials like carbon fiber, used in the Trifox FHB100, provide strength without the added weight. This makes climbing hills less strenuous and enhances overall bike handling. The lightweight nature of carbon fiber handlebars also contributes to improved acceleration and agility.
Choosing the Right Flat Handlebars
Selecting the right flat handlebars involves considering several factors:
- Material: Carbon fiber is a top choice due to its lightweight and durable properties. The Trifox Carbon Flat Bar FHB100, crafted from T700 carbon fiber with a 3K weave, offers a perfect blend of strength and performance.
- Back Sweep and Width: A slight back sweep, like the 3-degree angle found in the Trifox FHB100, can enhance comfort by aligning the wrists naturally. The width of the handlebar should match the rider’s shoulder width, ensuring optimal control and comfort.
- Compatibility: Ensure that the handlebars are compatible with your bike’s stem size. The Trifox Carbon Flat Bar FHB100, for instance, is designed to fit a 31.8mm stem, making it versatile for various bike models.
Flat handlebars are an excellent choice for cyclists seeking improved control, comfort, and reduced bike weight. By considering factors such as material, back sweep, and compatibility, riders can find handlebars that enhance their performance and riding enjoyment.
The Trifox Carbon Flat Bar FHB100 exemplifies these benefits, offering a reliable option for those looking to upgrade their biking experience. Whether you're tackling mountain trails or enjoying a city commute, flat handlebars can significantly amplify your cycling adventures, making them a worthwhile investment for any cyclist's toolkit.

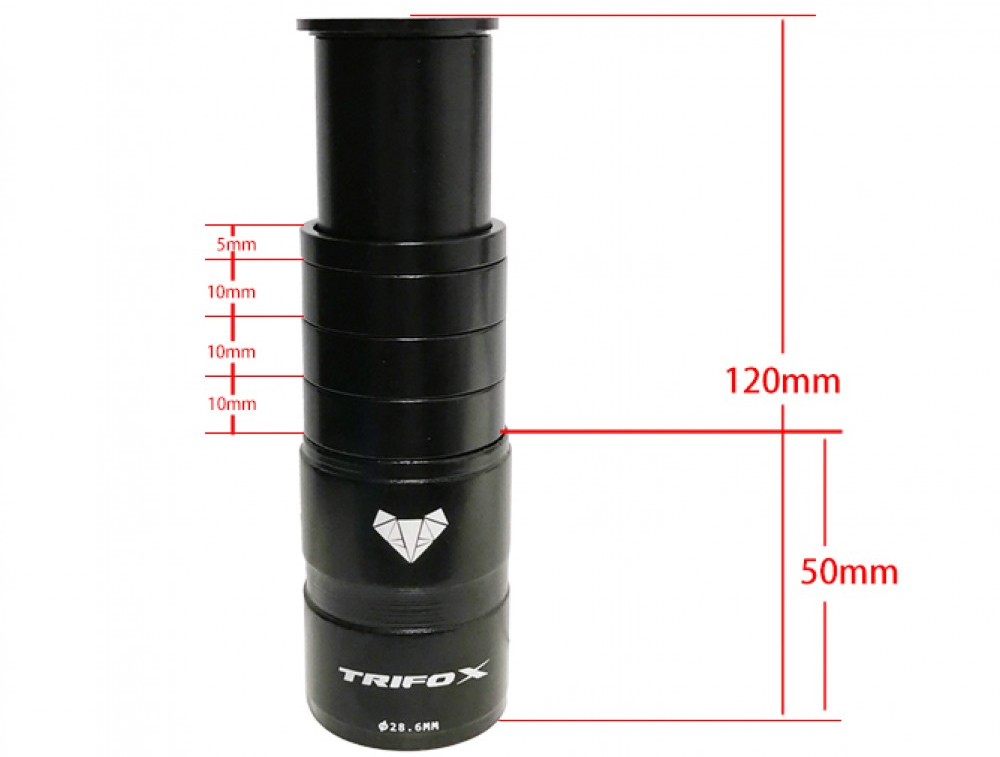
In the era of digital cycling, integrating technology into your biking routine can significantly enhance your riding experience. Whether you're a cycling enthusiast or a professional athlete, using a bike monitor stand can transform your rides by providing easy access to performance tracking and navigation tools. An adjustable bike monitor stand allows you to securely mount your digital device to your bike, ensuring you have real-time data at your fingertips while keeping your focus on the road.
Understanding the Importance of Bike Monitor Stands
Bike monitor stands are essential for cyclists who rely on digital devices such as GPS units, smartphones, or cycling computers to track performance metrics, navigate routes, and stay connected. These stands provide a secure and accessible platform for your devices, enhancing safety and efficiency by allowing you to keep your hands on the handlebars and your eyes on the path ahead.
Step-by-Step Guide to Setting Up an Adjustable Bike Monitor Stand
1. Choosing the Right Stand: Select a bike monitor stand that is compatible with your device and bike model. Consider factors such as the size and weight capacity of the stand, its adjustability, and whether it offers weather protection features. Look for stands that are robust and easy to install without requiring special tools.
2. Attaching the Stand to Your Bike: Follow the manufacturer's instructions to securely attach the stand to your bike's handlebars or stem. Ensure that the stand is fastened tightly to avoid any movement during rides. Most stands use a clamp or screw mechanism that can be tightened with basic tools.
3. Adjusting for Optimal Viewing: Position your device on the stand, adjusting the angle and height to suit your riding posture. The screen should be easily visible without requiring you to tilt your head significantly, maintaining comfort and safety. Ensure the stand holds the device securely, even on rough terrains.
Maximizing the Benefits of an Adjustable Bike Monitor Stand
- Ensure Stability: Regularly check the stand's attachment points to ensure they remain tight and secure. This practice prevents the stand from loosening over time, which can lead to device damage or distraction during rides.
- Protect Your Device from Weather: Consider using a weather-resistant cover for your device or choose a stand that offers protective features. This precaution helps safeguard your electronics from rain, dust, and debris, extending their lifespan.
- Use the Monitor Effectively: Familiarize yourself with the device’s interface and features before heading out. Set up regular updates on your performance metrics or navigation routes to make the most of your rides. Customize your display to show only essential information to minimize distractions.
Conclusion
Investing in a quality adjustable bike monitor stand is a smart choice for cyclists aiming to enhance their riding experience. By securely mounting and effectively utilizing digital devices, you can enjoy improved navigation and performance tracking, leading to more informed and enjoyable rides.
Embrace the technology-driven cycling era by equipping your bike with a reliable monitor stand, ensuring you stay connected and focused on your journey. Take the first step towards a more efficient and enjoyable biking routine today.

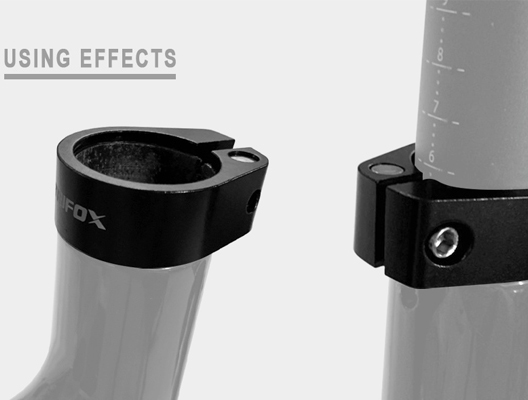
In the world of cycling, the seatpost clamp might seem like a minor component, but its role in ensuring ride comfort and stability is significant. Typically, the seatpost clamp secures the seatpost in place, maintaining the desired height and angle for optimal rider comfort. But what if you find yourself without this essential part? Here’s how to manage and ensure a smooth ride without a traditional seatpost clamp.
Importance of Seatpost Clamps
The seatpost clamp, such as the SC35 model from Trifox Bike, is designed to securely hold the seatpost in position. By doing so, it prevents the seatpost from slipping or rotating during rides, which can affect your posture and pedaling efficiency. Made from durable materials like aluminum, these clamps are built to withstand the stress and vibrations of cycling, providing long-term reliability.
Managing Without a Seatpost Clamp
While a seatpost clamp is crucial for stability, there are situations where you might need to ride without one. Whether due to a missing piece or a temporary adjustment, here are some alternative solutions:
1. Friction Paste: If you're in a pinch, applying a friction paste to the seatpost can increase grip and reduce slippage. This paste enhances the friction between the seatpost and the frame, offering temporary stability.
2. Shim Solutions: Using a shim made from sturdy material like metal or rubber can help secure the seatpost. By wrapping the shim around the seatpost, you can create a tighter fit between the post and the frame.
3. Tightening Mechanisms: If your bike frame allows, consider using a threaded bolt mechanism to secure the seatpost. This involves drilling a hole through the frame and post and inserting a bolt secured with a nut. While more permanent, this can effectively hold the seatpost in place.
Alternative Solutions
If the absence of a clamp is a longer-term issue, investing in alternative securing solutions is advisable:
- Quick-Release Mechanisms: Some bikes come with built-in quick-release mechanisms that don't rely on traditional clamps. These can be adjusted with a lever and offer easy height adjustments.
- Integrated Clamping Systems: Certain frames feature integrated clamping systems that eliminate the need for an external clamp. These systems use a tightening bolt that is part of the frame, ensuring a sleek and secure hold.
Tips for Maintaining Seatpost Stability
Without a clamp, maintaining seatpost stability requires regular checks and adjustments:
1. Regular Inspections: Periodically inspect the seatpost and frame for signs of wear or slippage. Ensure any temporary solutions, like shims or friction paste, are holding up under stress.
2. Consistent Positioning: Mark the ideal seatpost height with tape or a marker. This visual guide helps ensure you maintain the correct position, even after adjustments.
3. Secure Tools: Keep essential tools handy for on-the-go adjustments. Allen keys or wrenches can tighten bolts or adjust quick-release systems when needed.
Ensuring Rider Comfort and Safety
Ultimately, rider comfort and safety should be the priority when managing a bike without a clamp. Ensuring the seatpost is secure and at the correct height prevents discomfort and potential accidents. Always test adjustments in a safe environment before tackling challenging trails or long rides.
By understanding the role of a seatpost clamp and exploring alternative solutions, you can ensure a stable and comfortable ride, even in the absence of this small but vital component. Whether using temporary fixes or investing in integrated systems, maintaining seatpost security is essential for an enjoyable cycling experience.
When it comes to enhancing your biking experience, opting for a suspension corrected rigid fork can be a game-changer. These forks, like those offered by Trifox Bike, are designed to provide a balance between the lightweight efficiency of a rigid fork and the geometry typically associated with suspension forks.
Advantages of Carbon Rigid Forks
Weight Reduction
One of the primary benefits of using carbon rigid forks is their substantial weight reduction. Unlike traditional suspension forks, which can add significant weight to your bike, carbon rigid forks are remarkably lightweight. This reduction in weight not only aids in climbing efficiency but also enhances overall bike handling, making it easier to maneuver through technical trails.
Durability and Strength
Carbon is known for its excellent strength-to-weight ratio, offering durability that stands up to the demands of rigorous biking. Trifox's rigid forks are crafted from high-quality carbon, ensuring they can withstand the stress of off-road cycling while maintaining their structure and integrity over time.
Improved Handling
With the absence of suspension components, carbon rigid forks provide a more direct connection between the rider and the terrain. This directness results in improved handling and responsiveness, allowing for precise steering and control, which is particularly advantageous in fast, technical sections.
Steps:
1. Remove the Existing Fork: Start by loosening the bolts on the stem and removing the front wheel and brake caliper if necessary. Slide the old fork out of the head tube.
2. Prepare the New Fork: Apply a small amount of grease to the fork's steerer tube and any aluminum parts to prevent corrosion and ensure smooth installation.
3. Install the New Fork: Insert the carbon rigid fork into the head tube. Align the fork and make sure it's securely positioned.
4. Reattach Components: Secure the stem bolts and reattach the brake caliper. Ensure everything is tightened to the recommended torque settings to avoid any movement during rides.
5. Check Alignment: Finally, make sure the front wheel is properly aligned and spins freely without any interference from the brake pads.

Suitable Bikes
Rigid forks are versatile and can be used on a variety of bikes, but they are particularly well-suited for:
- Cross-Country Bikes: For riders who prioritize speed and efficiency over rugged terrain.
- Gravel Bikes: Where the combination of lightweight and durability enhances long rides on mixed surfaces.
- Commuter Bikes: Offering a reliable and maintenance-free option for daily rides.
Optimizing Performance
To get the most out of your suspension corrected rigid fork, consider the following tips:
1. Optimize Tire Pressure: Without suspension to absorb shocks, adjusting your tire pressure can significantly improve comfort and traction. Aim for a balance that suits your terrain and riding style.
2. Regular Maintenance: Keep your fork clean and periodically check for any signs of wear or damage. Regularly inspect the fork's mounting points and make sure all bolts are properly tightened.
3. Upgrade Components: Pairing your carbon rigid fork with lightweight wheels and a responsive drivetrain can further enhance your bike's performance.
Conclusion
Maximizing the benefits of a suspension corrected rigid fork entails understanding its unique advantages and ensuring proper installation and maintenance. Whether you're seeking weight reduction, improved handling, or enhanced durability, carbon rigid forks from Trifox Bike offer a reliable and efficient solution. By following these guidelines, you can optimize your bike's performance, ensuring a smooth and enjoyable ride across any terrain.


