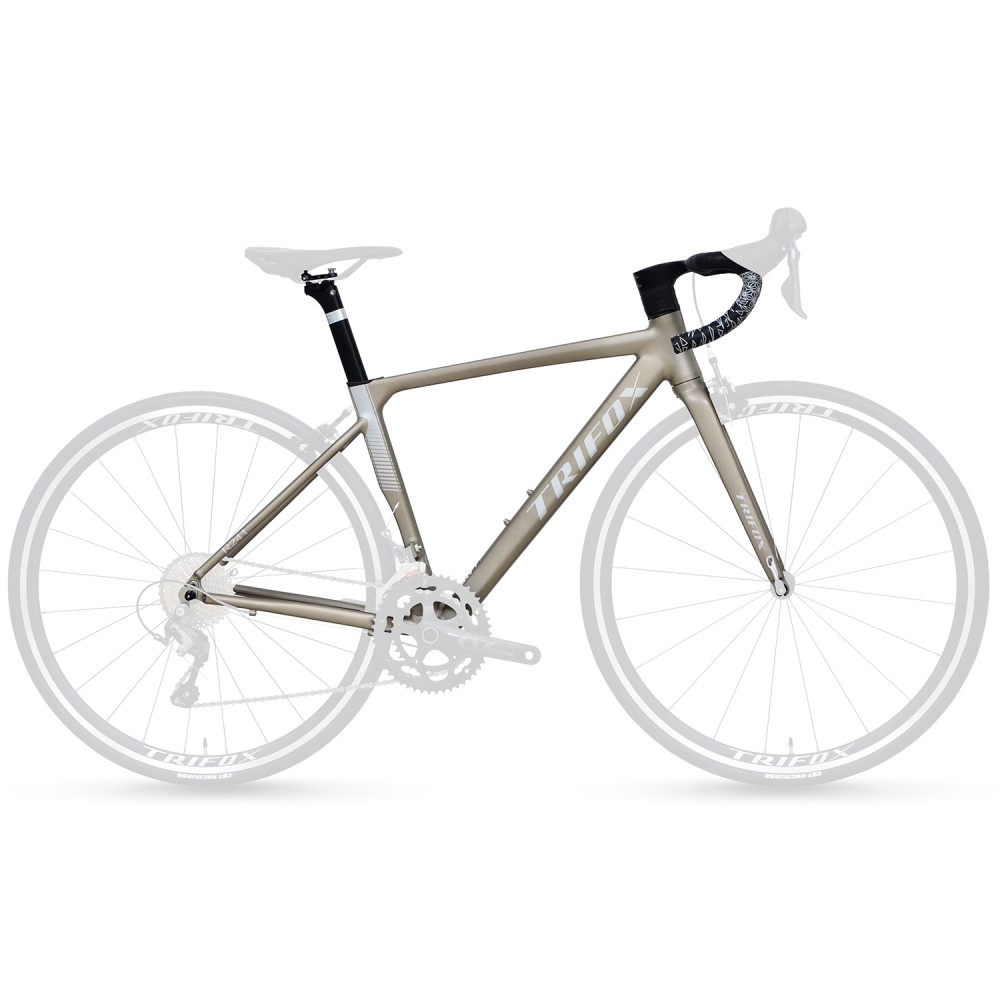
So, you're eyeing a new road bike and see terms like "aero" and "lightweight" thrown around. What's the real difference, especially when looking at frames like the Trifox X8 Aero Carbon Frame? Let's break it down
The Core Mission:
Normal (Often Called "Lightweight" or "Climbing") Bikes: Prioritize low weight and stiffness for efficient power transfer, especially uphill. Think rounder, traditional tube shapes.
Aero Bikes: Prioritize reducing aerodynamic drag to make you faster on flats and descents, where wind resistance is the biggest enemy. Think sleek, shaped tubes designed to slice through the air.
Key Differences:
1. Frame Shape & Tubing:
- Aero: Features truncated airfoil (Kammtail) shapes for tubes (down tube, seat tube, seatpost, fork blades, head tube). These mimic an airfoil's profile but with a flat back for structural integrity and UCI compliance. The Trifox X8 exemplifies this with its wind-cheating tube profiles.
- Normal: Uses more rounded, oval, or traditional diamond-shaped tubes focused on strength-to-weight ratio, not necessarily aerodynamics.
2. Integration is Key (Aero):
- Aero: Maximizes "system" integration. Cables/hoses run internally through the frame and handlebars/stem (often a one-piece bar/stem) to eliminate drag-inducing external routing. Frames may have specific brake mounts (like the X8's hidden V-brake mounts) to tuck them away from the wind. Wheels are deeper-section.
- Normal: Often features external or semi-internal cable routing. Components are less integrated for easier serviceability and lighter weight. Wheels are usually shallower.
3. Weight vs. Aero Trade-Off:
- Aero: Generally slightly heavier due to the shaped, often larger, tubing and added integration features. The focus is on saving watts from drag, not grams from the scale.
- Normal: Prioritizes minimal weight, making them feel more responsive on steep climbs. Every gram saved helps against gravity.
4. Ride Feel (Often Subtle):
- Aero: Can feel incredibly stable and planted at high speeds, especially in crosswinds (though deep wheels affect this more). Stiffness is high, often vertically stiffer than lightweight bikes.
- Normal: Often prioritize a touch more vertical compliance (comfort) over pure aero stiffness, feeling livelier on climbs and rougher roads. Generally more agile at very low speeds.
Which One is Right For You?
- Choose an Aero Bike (like the Trifox X8) if: You race, do fast group rides, time trials, or ride mostly on flat to rolling terrain where maintaining high speed is key. You want every possible aerodynamic advantage and love the integrated, futuristic look. The X8's carbon construction balances aero gains with weight savings.
- Choose a Normal/Lightweight Bike if: You tackle massive mountains regularly, prioritize the lightest possible feel, value maximum comfort on long rides, or prefer simpler maintenance. They excel where watts saved climbing outweigh watts saved from drag.
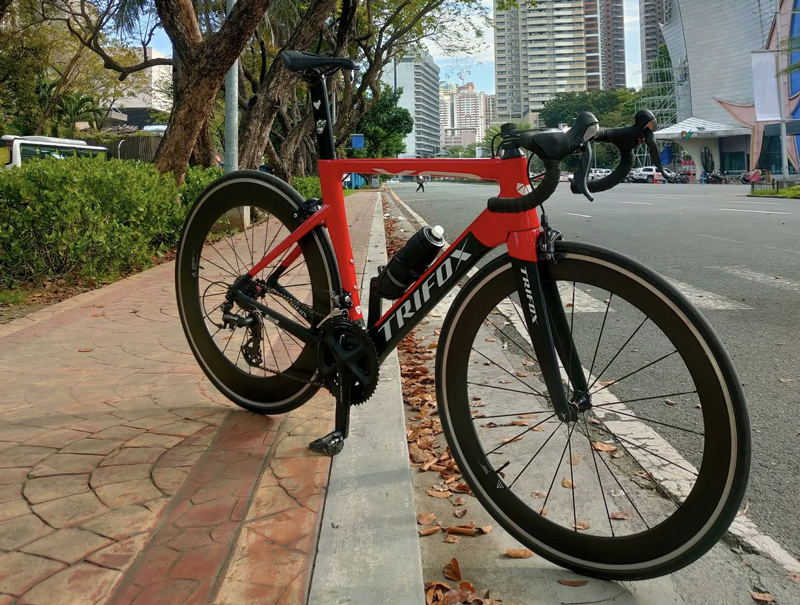
It's not about one being "better," but about optimization. An aero bike like the Trifox X8 Carbon Frame sacrifices a few grams for significant aerodynamic gains where speed matters most. A lightweight bike sacrifices aero efficiency for minimal weight where climbing reigns supreme. Many modern bikes blend these qualities, but understanding their core focus helps you pick the perfect weapon for your riding battles.
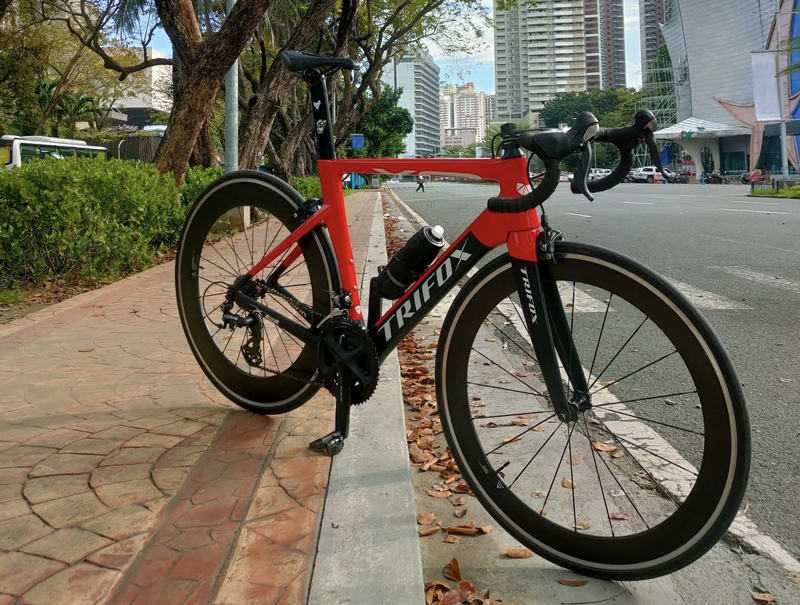
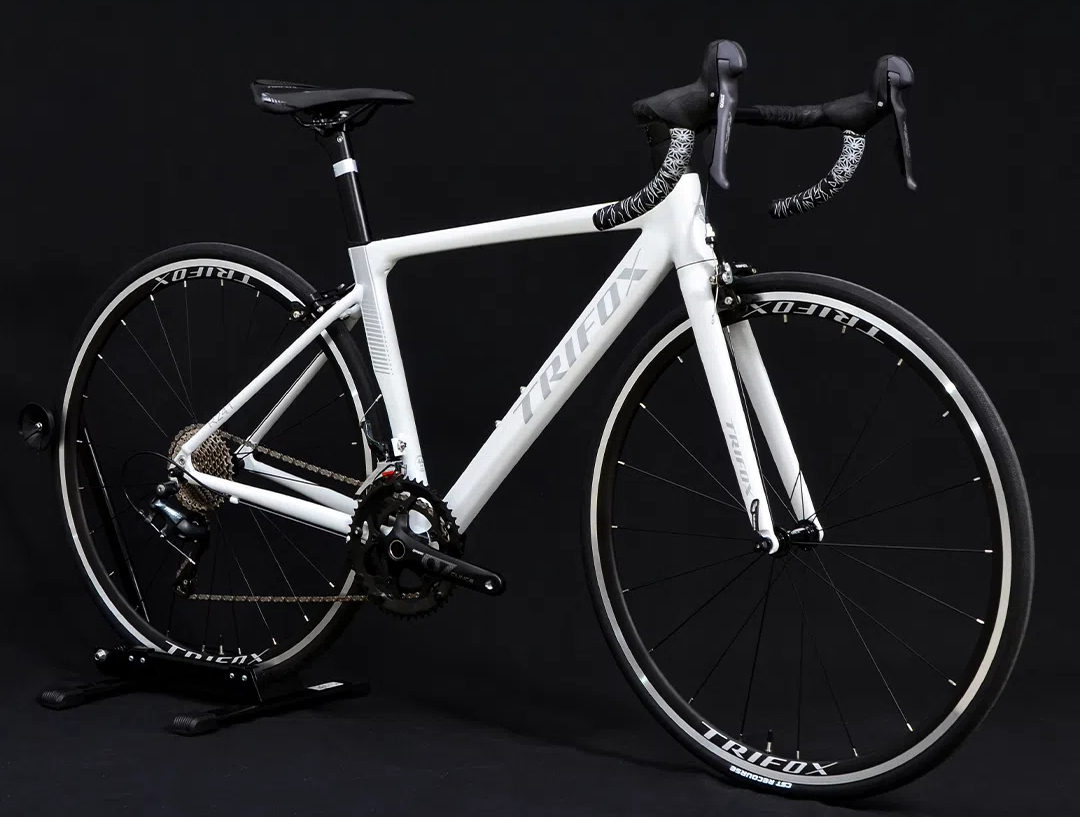
Looking for a capable, lightweight entry into road cycling without breaking the bank? The Trifox 2024 C-Brake Ultralight Aluminium Frame Road Bike, equipped with a Shimano Tiagra R4700 2x10spd groupset, presents a compelling package centered around classic rim brakes ("C-brakes"). Let's break down what this 700c aluminium machine offers.
The Core Proposition: Lightweight & Efficient
The headline act is the "ultralight" 700c aluminium frame. Trifox claims a total bike weight around 9.5kg, which is impressive for a sub-$800 bike. This low weight translates directly to easier acceleration and climbing, a major plus for new riders tackling hills or anyone seeking a responsive ride. The 700c wheels are the road standard, prioritizing rolling efficiency and speed on smooth surfaces.
Groupset: Reliable Tiagra Performance
Shimano's Tiagra R4700 groupset is the standout component here. Sitting just below the 105 tier, it offers:
- Smooth & Precise Shifting: 10-speed gearing provides ample range (likely a compact crankset like 50/34T paired with an 11-32T or 11-34T cassette) for varied terrain.
- Durability: Tiagra is known for its robust performance and longevity, perfect for regular training, commuting, or sportives.
- Modern Features: R4700 benefits from trickle-down tech from higher groupsets, offering crisp lever feel and reliable operation. The 2x10 setup gives plenty of gears for most situations.
The "C-Brake" Focus: Classic Stopping Power
This bike uses traditional rim brakes (caliper brakes). In the era of disc dominance, this is a deliberate choice impacting price and performance:
Significantly lighter weight than disc brake systems, contributing to the bike's low overall mass. Simpler maintenance – easier to adjust, pad changes are quick and cheap. Generally more aerodynamic. Keeps the price point aggressively low.
Wheelset & Finishing Kit
The included R4700 wheelset is a typical OEM offering: functional, durable, and reasonably lightweight, but not a performance highlight. They get the job done reliably. Expect basic but serviceable finishing kit (handlebar, stem, seatpost, saddle) designed for comfort and fit adjustment.
Target Rider & Verdict
This Trifox bike is squarely aimed at:
1. New Road Cyclists: Seeking a lightweight, efficient first road bike with reliable shifting.
2. Budget-Conscious Riders: Wanting maximum performance for minimal outlay.
3. Fair-Weather/Fitness Riders: Primarily riding in dry conditions where rim brakes are perfectly adequate.
4. Weight Weenies on a Budget: Prioritizing low overall weight above all else.
Is it a Good Buy?
For the right rider, absolutely. Exceptional value for a full Tiagra groupset. Very competitive lightweight frame. Efficient 700c wheelset. Classic, simple road bike feel. Easy maintenance.
The Trifox Ultralight Tiagra C-Brake bike is a smartly specced budget road rocket. It delivers the core road cycling experience – lightweight efficiency and smooth, reliable shifting via Shimano Tiagra – by embracing the simplicity and cost savings of rim brakes. If you prioritize weight and value, ride mostly in good conditions, and want proven componentry, this is a compelling contender that punches well above its price point.
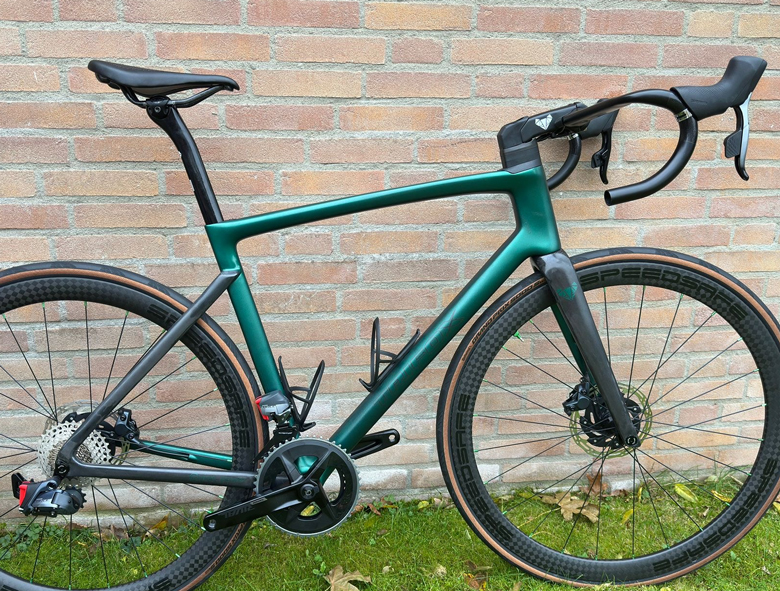
The short answer? Yes, often. Disc brakes (especially hydraulic ones) add bulk near your bike's wheel hubs, and not all bike racks handle this well. Using the wrong rack risks damaging your brakes, frame, or wheels. Here’s what to know:
The Problem: Clearance & Contact
- Frame Contact: Many traditional hanging-style racks (where the bike dangles from its top tube) use support arms that clamp near the fork crown or seatstay bridge – exactly where disc calipers sit. This can crush brake lines or bend calipers.
- Wheel Trays: Racks that hold bikes by the wheels need trays wide enough to accommodate disc rotors without bending them. Narrow trays can bend rotors if forced.
Rack Types That WORK with Disc Brakes:
1. Platform (Tray-Style) Racks (Best Option):
-Why: Bikes are secured by the wheels, not the frame. Look for:
Wide, open wheel trays that easily clear rotors.
Adjustable wheel chocks or ratcheting arms that grip tires/rims only, avoiding the brake area.
2. Hitch-Mounted Racks with Frame Grips (Carefully):
- Look for: Models specifically designed with disc brake clearance. They feature:
Frame grip arms shaped to curve around disc calipers.
Adjustable arm angles to avoid contact points.
- Always visually confirm the arms never touch the caliper or hose when clamped.
3. Roof Racks (Usually Fine):
- Why: Fork-mount trays clamp the fork dropout (far from the brake). Wheel-mount trays hold the wheel itself. Just ensure the fork mount adapter (if needed) doesn't interfere with a front disc.
Racks to AVOID (Generally):
- Basic Hanging Racks (Trunk/Roof/Hitch): These almost always clamp the frame top tube or seat tube, forcing the support arms directly into the disc calipers on the fork and rear triangle. High risk of damage.
Key Buying Tips:
1. Look for "Disc Brake Compatible": This is the easiest starting point, but still inspect.
2. Check the Support Points: Physically see (or find detailed photos/videos) showing where the rack contacts YOUR bike. Ensure calipers and hoses are untouched.
3. Prioritize Wheel Holders: Platform/tray racks are the safest, most versatile bet.
4. Measure Rotor Size (Especially for Fat Bikes/E-MTBs): Very large rotors need extra-wide trays.
The Bottom Line:
Don't risk costly brake damage! While some traditional racks might fit certain disc-brake bikes by luck, it's essential to choose a rack explicitly designed or verified for disc brake clearance. Invest in a quality platform-style rack or a frame-grip hitch rack with proven disc compatibility. Your brakes (and wallet) will thank you!
Ready for a high-performance disc brake road bike? Explore disc-compatible designs like the Trifox carbon series.
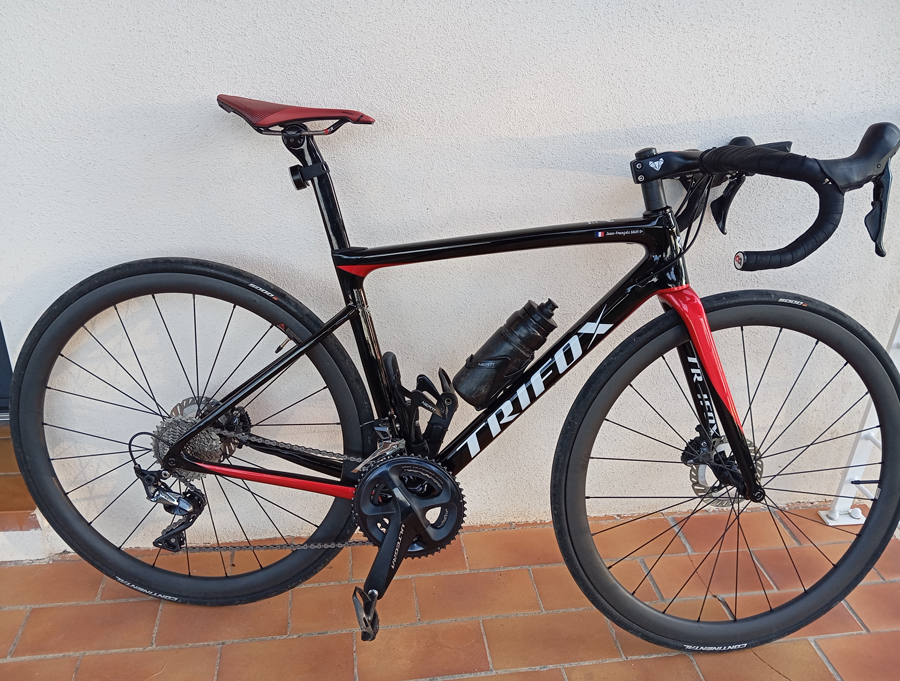
Dreaming of effortless climbs and responsive sprints? A lightweight road bike unlocks that exhilarating ride. But with countless options, choosing "the one" can feel overwhelming. Let’s break down the key factors to find your perfect featherweight steed:
1. Frame Material: The Core of Lightness
- Carbon Fiber (King of Light): The go-to for serious weight savings. Offers an exceptional strength-to-weight ratio, vibration damping, and aerodynamic shaping. High-modulus carbon delivers the ultimate lightness and stiffness (like the Trifox Carbon Fiber Ultra-Light Road Bicycle). Consider frame grade (T700, T800, T1000) – higher usually means lighter/stiffer but pricier.
- Aluminum: A great value option. Modern hydroformed alloys are surprisingly light and stiff, though often slightly heavier and harsher than carbon. Ideal for budget-conscious riders wanting performance.
- Titanium: Luxuriously smooth, corrosion-resistant, and reasonably light, but typically heavier than top carbon and significantly more expensive. A niche, durable choice.
- Steel: Beloved for its classic ride quality (smooth, compliant), but generally the heaviest option. Modern alloys are lighter, but rarely compete on pure weight.
2. Components: Where Grams Add Up
Lightweight frames need lightweight partners:
- Groupset: Higher-tier groupsets (Shimano Ultegra/Dura-Ace, SRAM Force/Red, Campagnolo Chorus/Record/Super Record) use more carbon fiber, titanium, and advanced alloys to shed grams. Focus on the drivetrain (crankset, derailleurs, cassette) and brakes.
- Wheelset: This is CRUCIAL! Lightweight carbon wheels make a massive difference in acceleration and climbing. Look for low rim weights and consider aerodynamic profiles too. Quality hubs (sealed bearings) ensure smooth rolling.
- Cockpit & Finishing Kit: Carbon handlebars, seatposts, and saddles contribute noticeable savings. Every gram counts!
3. Geometry & Fit: Light AND Right
A super-light bike is useless if it doesn’t fit! Consider:
- Riding Style: Race geometry is aggressive (low, stretched). Endurance geometry is more relaxed (taller headtube, shorter reach) for comfort on long rides. Choose what suits your goals.
- Professional Sizing: Don't guess! Get a professional bike fit or at least use sizing charts meticulously. The right size ensures efficiency, power transfer, comfort, and prevents injury.
4. Balancing Priorities: Weight vs. Everything Else
- Budget: Lightweight comes at a premium, especially carbon fiber and top components. Set a realistic budget. Sometimes, a slightly heavier frame with better wheels/components is smarter than the lightest frame with budget parts.
- Ride Quality: Ultra-stiff frames/wheels can feel harsh. Look for frames designed with compliance (like specific carbon layups) if comfort is key.
- Durability: Ensure the lightweight construction doesn't sacrifice reliability, especially for wheels and critical components.
Putting it Together: Your Checklist
1. Set Your Budget: Be realistic.
2. Prioritize Frame Material: Carbon is the lightweight benchmark.
3. Focus on Wheels: Allocate a significant part of your budget here.
4. Choose Appropriate Groupset Tier: Match performance level and weight goals.
5. Get the RIGHT SIZE & Geometry: Non-negotiable for performance and comfort.
6. Consider Finishing Kit: Carbon bars/seatpost for final tuning.
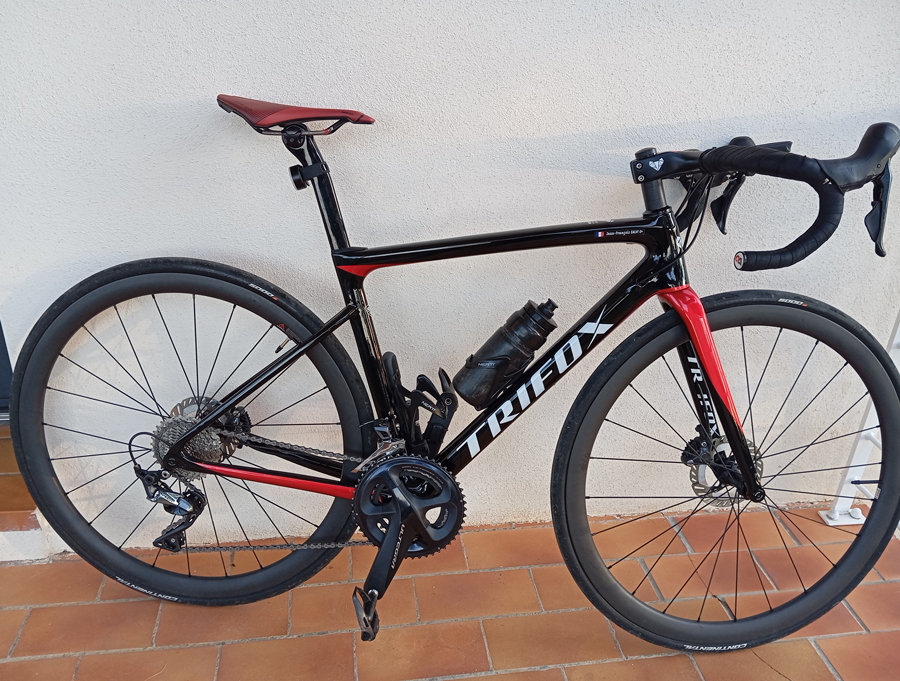
For riders seeking the pinnacle of carbon engineering focused on minimal weight without sacrificing stiffness, explore dedicated ultra-light platforms.
The Trifox 700c Carbon Fiber Ultra-Light Road Bicycle exemplifies this pursuit, showcasing how high-modulus carbon creates a responsive, agile machine built for conquering climbs and accelerating with ease. Remember, the perfect lightweight bike is the one that fits you perfectly and brings a smile to your face on every ride!
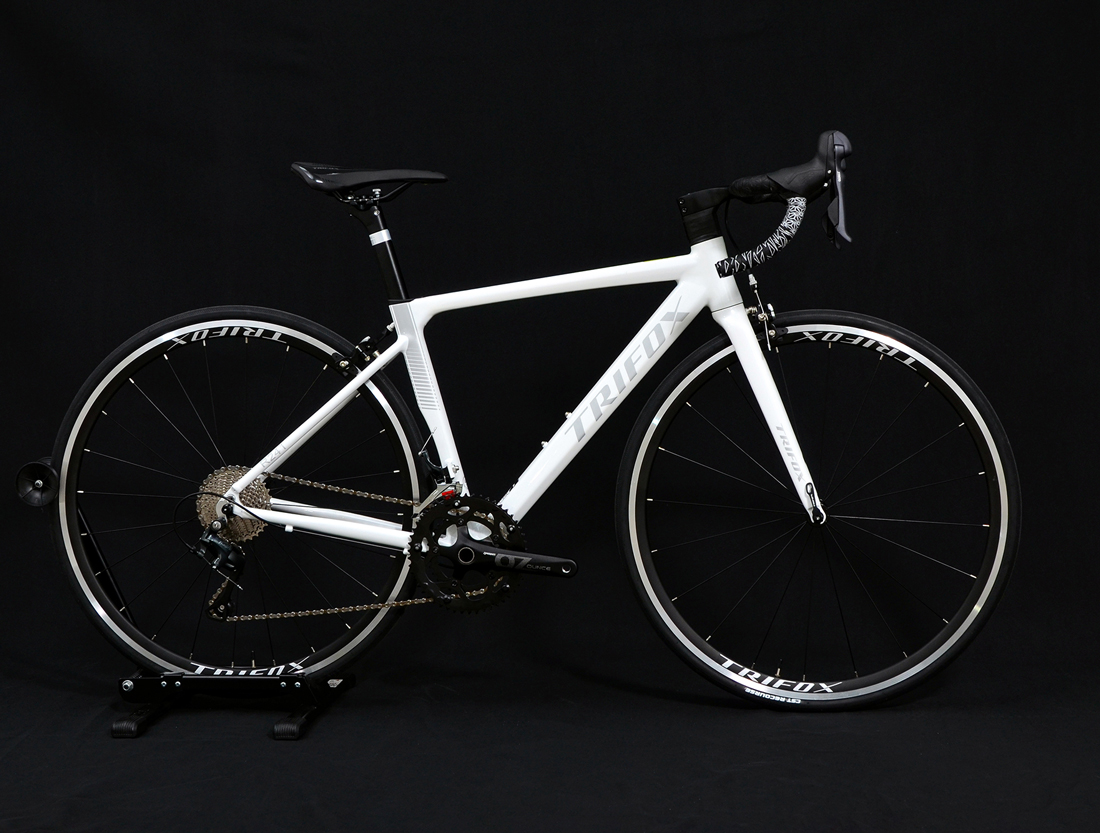
Forget squeezing rubber blocks onto your wheel rims! Modern bikes like the Trifox R241 Road Bike increasingly rely on disc brakes for superior stopping power. But how do these compact, rotor-equipped systems actually work? It's simpler physics than you might think.
The Core Components:
1. The Rotor (Disc): This is the metal (usually steel) disc bolted firmly to your wheel hub. It spins with the wheel.
2. The Caliper: Mounted near the hub on your frame (front) or fork/seatstay (rear), this housing contains the brake pads.
3. The Brake Pads: These friction material blocks sit inside the caliper, positioned on either side of the rotor.
4. The Actuator: This is your brake lever and the system it pulls – either a cable (mechanical disc) or hydraulic fluid (hydraulic disc). The Trifox R241 features mechanical disc brakes.
The Magic Happens When You Squeeze:
1. Lever Action: Pulling the brake lever initiates the stopping force.
2. Force Transmission:
- Mechanical (Cable): The lever pulls a cable. This cable runs to the caliper and directly moves a mechanism (like a piston or lever arm) inside it.
- Hydraulic: The lever pushes a piston in a master cylinder, forcing hydraulic fluid through a sealed hose to the caliper.
3. Caliper Activation: Inside the caliper, the transmitted force (cable pull or hydraulic pressure) pushes one or more pistons.
4. Pad Squeeze: These pistons press the brake pads inward from both sides, clamping them firmly onto the spinning rotor.
5. Friction = Stopping Power: The immense friction generated between the pads and the rotor creates drag. This drag acts directly on the wheel hub, rapidly slowing down the rotation of the wheel and, therefore, the bike.
Key Advantages Over Rim Brakes:
- Consistent Performance in All Conditions: Water, mud, or grime on the rim? Irrelevant! Discs shed contaminants easily, offering reliable braking in rain or on dusty trails. The Trifox R241's discs ensure confidence no matter the weather.
- Better Modulation & Power: Discs allow finer control over braking force ("modulation") and typically provide stronger overall stopping power than rim brakes, especially when wet or under heavy load.
- Reduced Rim Wear: Braking force is applied to a dedicated rotor, not your expensive wheel rims. This eliminates rim wear from braking, prolonging wheel life.
- Compatibility with Carbon Rims/Aero Wheels: Discs are essential for carbon rims (which can't handle rim brake heat) and work perfectly with deep-section aero wheels. The Trifox R241's carbon fork benefits hugely here.
- True Wheels: Since braking force isn't applied to the rim sidewalls, minor wheel wobbles (true issues) affect braking performance far less.
Mechanical vs. Hydraulic (Like the Trifox R241's S-Ride):
- Mechanical: Uses cables. Generally simpler, easier to maintain trailside, and more affordable. Can require slightly more lever effort and periodic cable tension adjustment. A solid, reliable choice like the S-Ride system on the R241.
- Hydraulic: Uses fluid. Offers self-adjusting pads, typically requires less finger effort, and provides exceptional modulation and feel. Needs less frequent maintenance but bleeding the system is more complex.
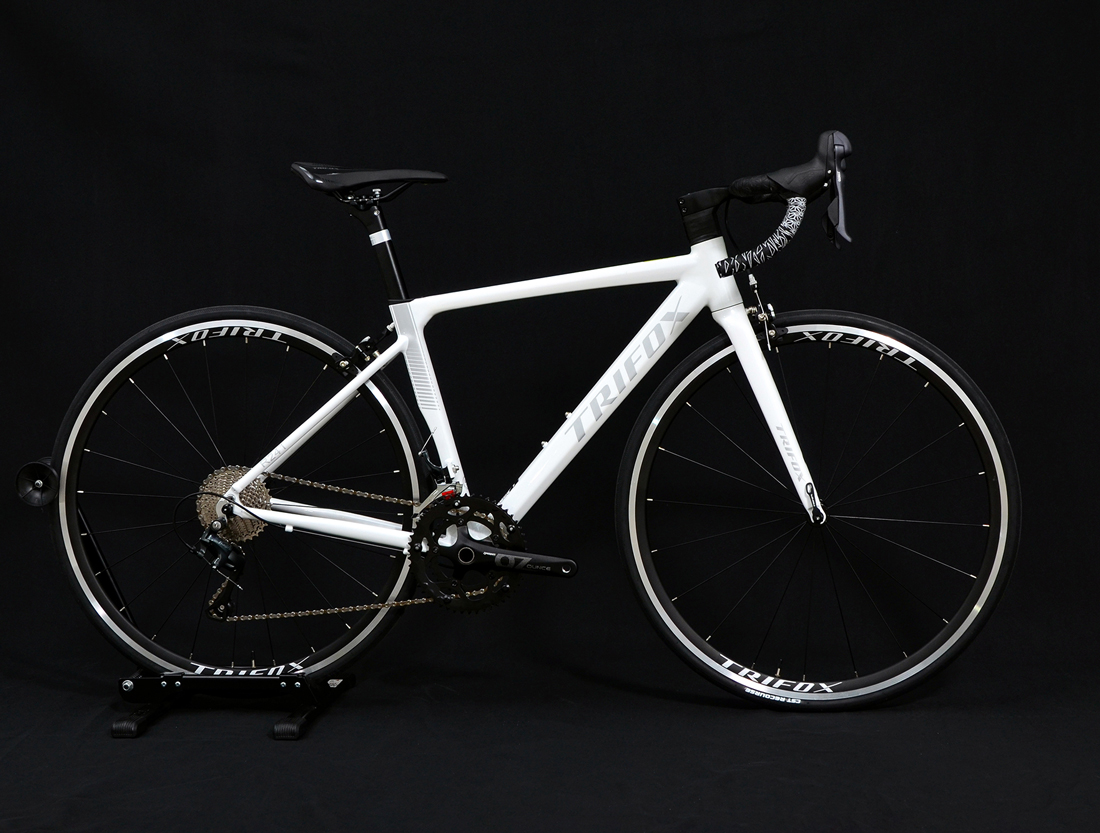
Disc brakes transform lever pull into powerful clamping friction directly at the wheel hub via a rotor. This system delivers consistent, powerful, and controllable stopping in diverse conditions, protects your rims, and unlocks modern frame and wheel designs – precisely why performance-oriented bikes like the Trifox R241 Road Bike rely on them. It's a fundamental upgrade for safety and ride quality.
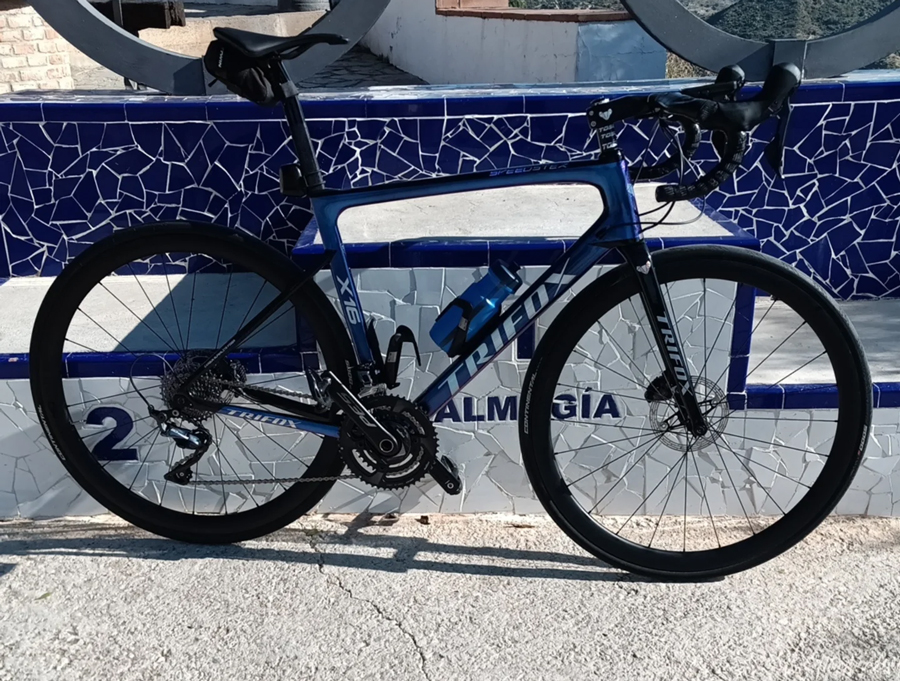
In the fast-paced world of road cycling, every gram matters. For riders chasing speed, efficiency, and climbing prowess, the quest for the lightest bike is never-ending. Enter the Trifox X16, a marvel of engineering poised to dominate 2025 as one of the world's lightest road bikes. Let’s dive into what makes this machine a game-changer.
Featherlight Frame, Uncompromised Strength
At the heart of the X16 lies its ultra-lightweight carbon fiber frame. Trifox's advanced monocoque construction uses high-modulus carbon to shed weight without sacrificing stiffness or durability. The result? A bike that accelerates like a rocket and climbs with effortless agility, yet remains robust enough for punishing races or long-distance rides.
Premium Components for Peak Performance
The X16's weight savings extend beyond the frame. It's equipped with a Shimano Dura-Ace R9200 groupset, renowned for its crisp shifting and feathery weight. Pair this with Trifox's own carbon wheelset—1,350 grams of aerodynamic efficiency—and you’ve got a bike that’s as responsive as it is swift. Even the cockpit gets the lightweight treatment, featuring an integrated carbon handlebar-stem combo that trims grams while enhancing aerodynamics.
Aero Design Meets Comfort
Lightweight doesn't mean sacrificing comfort. The X16's frame incorporates strategic tube shaping to slice through wind, while its tuned compliance absorbs road vibrations. Whether you're sprinting on smooth tarmac or tackling cobbled climbs, this bike balances speed and ride quality seamlessly.
Why the Trifox X16 Stands Out
In a market flooded with lightweight contenders, the X16 shines with its balance of affordability and elite performance. Many sub-7kg bikes come with five-figure price tags, but Trifox delivers pro-level specs at a fraction of the cost. It’s a top pick for competitive cyclists and enthusiasts alike who refuse to compromise on weight or budget.
Ready to experience the future of road biking? The Trifox X16 redefines what’s possible in 2025. Learn more or secure yours here: Trifox X16. Lighten your ride, elevate your speed—this is the ultimate machine for those who chase horizons.
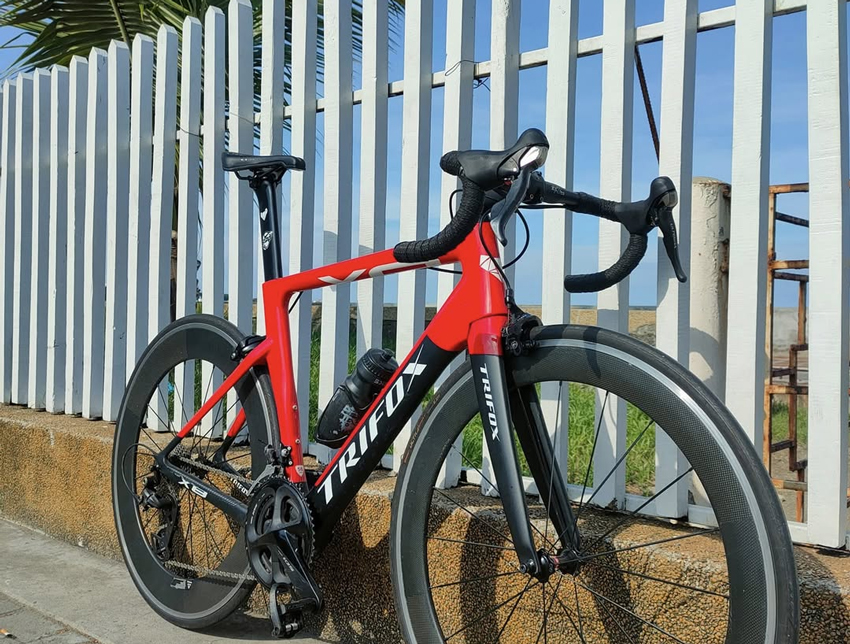
For cyclists chasing every advantage, aero road bikes are essential, blending speed, efficiency, and cutting-edge design. In 2025, the pursuit of performance no longer demands a premium budget, thanks to models like the Trifox X8, which redefines value in the aero category.
What Makes a Great Value Aero Bike?
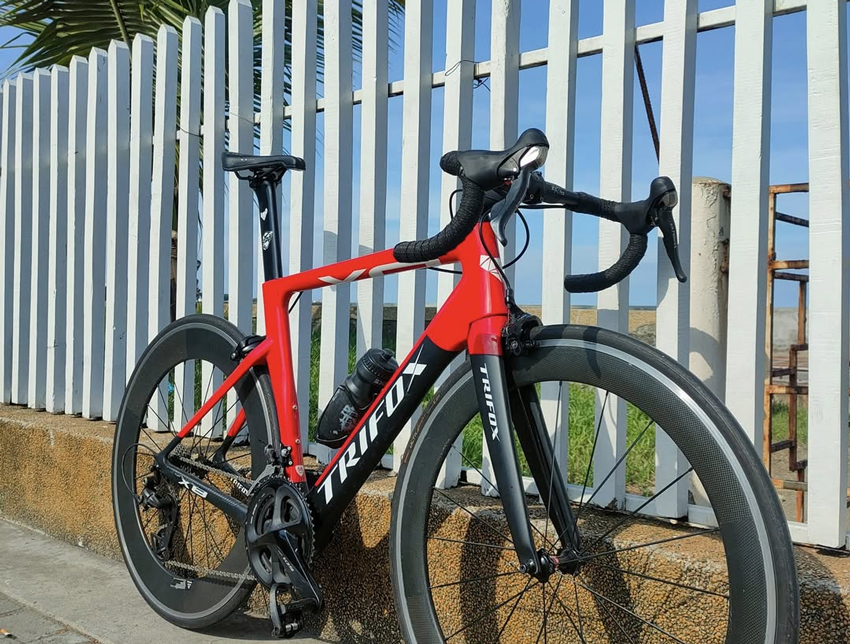
The best options balance aerodynamics, weight, components, and price. The Trifox X8 excels here, boasting a full carbon frame with wind-tunnel-optimized tubing, an integrated cockpit, and hidden cable routing to minimize drag.
At just 8.6kg (size 56cm), it's lightweight yet stiff, ensuring responsive handling. Compatibility with both mechanical and electronic groupsets (like Shimano 105 Di2 or SRAM Rival AXS) offers customization, while disc brakes and 30mm tire clearance add versatility for varied terrain.
Why the Trifox X8 Stands Out
Trifox's direct-to-consumer approach slashes costs without compromising quality. Early reviews highlight its agile handling and stability, making it a race-ready choice for crits, fondos, or spirited group rides.
Final Thoughts
In 2025, aero performance is more accessible than ever. The Trifox X8 delivers pro-level engineering at a fraction of the cost, proving speed doesn't require sacrifice. Ready to upgrade? Explore the Trifox X8 here and join the aero revolution—your fastest ride yet awaits.
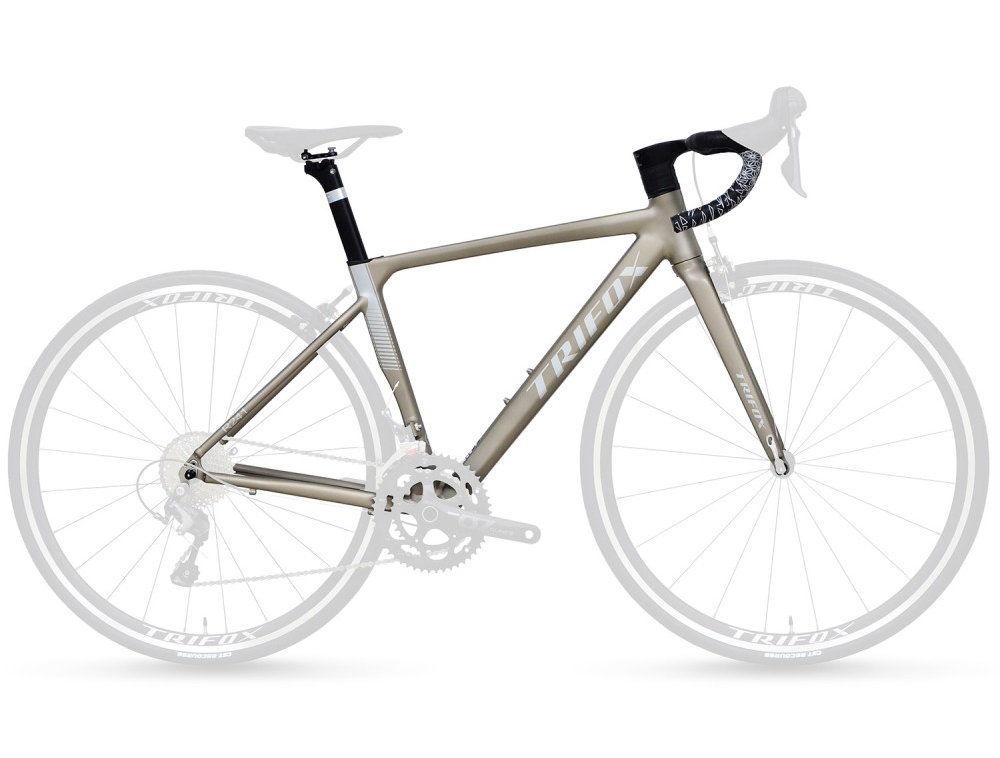
When choosing a road bike, frame material is a critical decision. Aluminum, once overshadowed by carbon fiber, remains a top choice for riders seeking performance, durability, and value. Let's explore why aluminum frames, like the Trifox 6061 Aluminum Alloy Road Frameset, are a smart pick for road cyclists.
Lightweight Strength
Aluminum alloys, such as 6061, strike an excellent strength-to-weight ratio. Modern engineering ensures these frames are light enough for climbing and sprinting, rivaling pricier carbon options. The Trifox frameset, for example, uses hydroformed tubing to optimize weight distribution without sacrificing stiffness—ideal for efficient power transfer during rides.
Durability Meets Affordability
Aluminum resists corrosion and handles daily wear better than carbon fiber, which can crack under impact. While aluminum may dent, high-quality frames like the Trifox model are built to endure rough roads and frequent use. Plus, aluminum’s lower cost makes it accessible for riders wanting premium features without the carbon price tag.
Ride Quality: Stiffness vs. Comfort
Historically, aluminum was criticized for a harsh ride due to its stiffness. However, advancements in frame design—such as tapered tubes, strategic butting, and compliant seatposts—absorb vibrations effectively. The Trifox frameset incorporates these innovations, offering a smoother experience without losing the responsive feel road cyclists love.
Performance Versatility
Aluminum frames adapt well to rim or disc brakes. The linked Trifox model features a rim-brake design, ensuring reliable stopping power and compatibility with lightweight wheelsets. This versatility appeals to traditionalists and riders upgrading older builds, as aluminum framesets allow customization for racing, endurance, or commuting.
Aesthetic Appeal
Beyond performance, aluminum frames boast sleek, modern aesthetics. The Trifox frameset’s clean lines and anodized finish prove that affordability doesn’t mean compromising on style.
Who Should Choose Aluminum?
- Budget-conscious riders: Maximize value without sacrificing speed.
- Beginners: A durable, low-maintenance entry into road cycling.
- Custom builders: Lightweight framesets like Trifox’s offer a solid foundation for personalized builds.
While carbon fiber dominates pro pelotons, aluminum remains a practical, high-performing alternative. The Trifox 6061 Aluminum Alloy Frameset exemplifies how modern engineering elevates aluminum’s strengths—delivering a race-ready ride at a fraction of the cost. Whether you’re chasing KOMs or weekend miles, aluminum proves it’s more than just a “starter” material.
Explore the Trifox 6061 Aluminum Alloy Road Frameset here.

Think carbon mountain bike frames are out of your budget? Think again. Trifox Bikes shatters expectations with the MFM200 Carbon MTB Hardtail Frame, offering pro-level performance at a jaw-dropping $227. This frame proves you don’t need to empty your wallet for lightweight durability and precision engineering. Let’s dive into why this hardtail is a steal.
Featherlight, Yet Tough as Nails
Crafted from high-modulus carbon fiber, the MFM200 weighs just 1,219 grams (size S), rivaling frames twice its price. Carbon's natural vibration-damping properties ensure a smooth ride, while the monocoque construction balances stiffness for power transfer and compliance for comfort. Worried about durability? Trifox uses advanced layup techniques and rigorous testing to ensure the frame withstands trail abuse, from rocky descents to hardtail climbs.
Trifox cuts costs by selling directly to consumers, bypassing middlemen. You’re not sacrificing quality—this frame includes modern features like internal cable routing, a tapered head tube, and a threaded bottom bracket (hello, easy maintenance!). It’s compatible with 29” or 27.5” wheels and supports 100-120mm forks, offering versatility for cross-country, trail riding, or bikepacking.
Built for Adventure
The geometry strikes a perfect balance: a 68° head angle keeps handling nimble, while a longer reach improves stability on descents. Whether you’re upgrading a dated bike or building a custom rig, the MFM200 pairs seamlessly with mid-range or high-end components.
Who Should Buy This Frame?
Budget-conscious riders: Max performance, minimal cost.
Upgraders: Transform an old bike with a modern carbon frame.
Carbon curious: Experience the ride quality without the premium price.
In a market where “affordable carbon” often feels like an oxymoron, the Trifox MFM200 delivers. Lightweight, durable, and versatile, it's a rare blend of value and performance. Ready to build your dream hardtail?


