


As cycling has become a popular mode of transportation and leisure activity, more and more people are investing in bicycles. While choosing the right bike is crucial for a comfortable ride, the importance of selecting the right bike seat pole should not be overlooked. The right bike seat pole helps to ensure that the bike fits your body correctly and mitigates unnecessary discomfort. In this blog post, we will discuss the importance of selecting the right bike seat pole.
1. Comfort
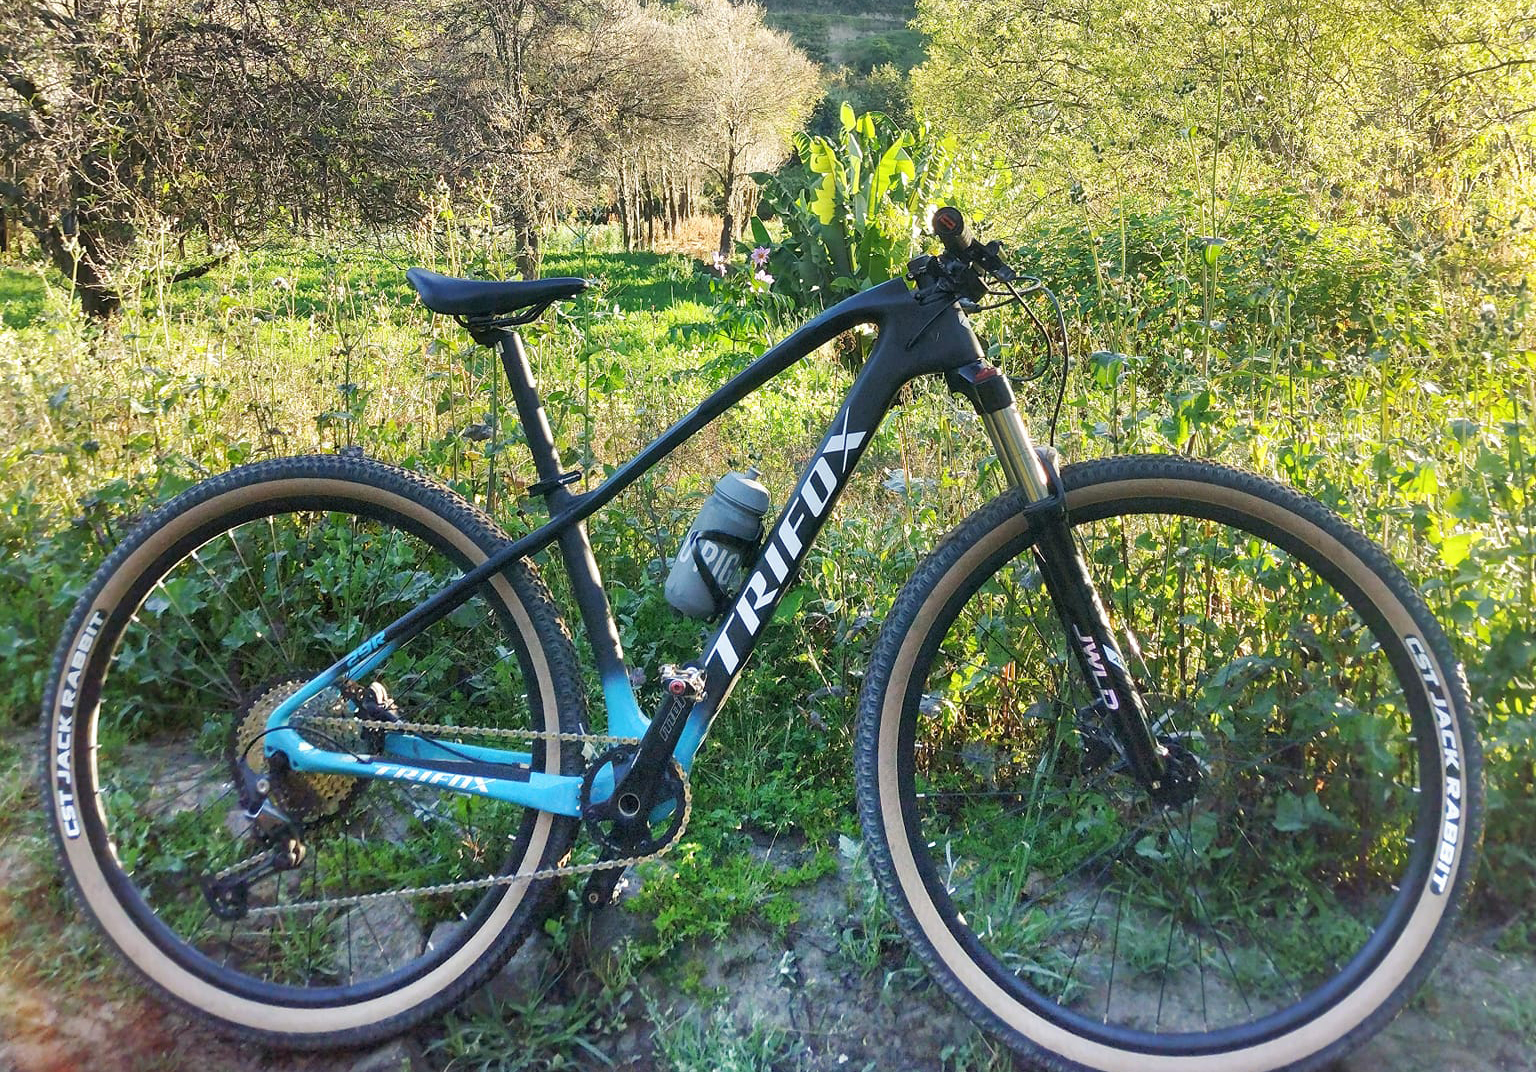
One of the main reasons why selecting the right bike seat pole is essential is to ensure a comfortable ride. A poorly chosen bike seat pole can create discomfort in your back, knees, and neck, leading to a painful riding experience. A good bike seat pole, such as the Trifox Carbon Layback MTB Seatpost CDS100, helps mitigate the impact of rough terrain and reduces the vibration that transfers from the road to your body, ultimately resulting in a more comfortable ride.
2. Durability
Bike seat poles made from inferior quality materials such as aluminum or steel can be susceptible to rust and corrosion. This can lead to a reduction in performance and a shorter lifespan for the bike seat pole. The Trifox Carbon Layback MTB Seatpost CDS100 is made from carbon fiber T800, which has excellent fatigue and corrosion resistance, making it a highly durable product.
3. Weight
Bike enthusiasts know that every gram counts when it comes to performance. The Trifox Carbon Layback MTB Seatpost CDS100 is a light product weighing only 190 grams, making it an excellent choice for racing enthusiasts. The carbon fiber material is known for its ability to reduce weight without sacrificing durability, making it a winning combination.
4. Style
While choosing the right bike seat pole is primarily about function over fashion, it's always a bonus when you can find a product that's both. The Trifox Carbon Layback MTB Seatpost CDS100 has a sleek and stylish appearance, with a UD matte finish and a black color that will complement any bike design.
5. Customizability
Different riders have different seat-height preferences, which is why the Trifox Carbon Layback MTB Seatpost CDS100 offers two diameters of seatpost, Φ27.2mm, and Φ31.6 mm. This customization allows riders to choose the option that best suits their body frame and bike design.
Choosing the right bike seat pole is a crucial element in ensuring a comfortable and enjoyable ride. When selecting a seat post, consider factors such as comfort, durability, weight, style, and customizability. The Trifox Carbon Layback MTB Seatpost CDS100 ticks all these boxes and is an excellent option for any rider looking for a combination of comfort, performance, and style.

Are you in search of a reliable and durable water bottle holder for cycling? Look no further than the Trifox Bike Water Bottle Holder CBC100. This carbon fiber bottle cage boasts a thick version style and is compatible with mountain bikes, road bikes, and gravel bikes.
In this comprehensive review, we will examine the top features of the Trifox Lightweight bottle cage CBC100, including its design, material, compatibility, weight, and sturdiness.
Design:
The CBC100 features a sleek, yet practical design with its thick version style. It measures 14 * 7.5cm / 5.5 * 3.0in (L * D), making it easy to slide in (or out) a water bottle while cycling. One of the key design features of the CBC100 is the inside of the cage, which is coated with a layer of rubber. This rubber layer helps to keep your water bottle securely in place while riding, preventing it from bouncing around or falling out completely.
Material:
This bottle cage is constructed from high-quality carbon fiber material - T800. This means that it is super lightweight (only 28g ± 2g) yet sturdy. The carbon fiber material ensures that the bottle cage remains corrosion-resistant and durable over time. It is also easy to clean, requiring just a simple wipe down after use to leave it looking as good as new.
Compatibility:
The Trifox Lightweight bottle cage CBC100 is compatible with a wide range of bike types, including mountain bikes, road bikes, and gravel bikes. This allows you to use it on your primary bike and any backups you may have. Moreover, it is also suitable for folding bikes.
Weight:
One of the major selling points of the Trifox CBC100 bottle cage is its weight. The cage is incredibly lightweight, which is beneficial for anyone who wishes to eliminate unnecessary weight from their bike or is looking to shave off some seconds from their cycling time. The cage weighs just 28g, making it one of the lightest bottle cages on the market.
Sturdiness:
Despite being a lightweight and sleek bottle cage, the Trifox CBC100 is also incredibly sturdy and durable. It can hold up to years of use and deformation, thanks to its carbon fiber material. You can confidently use this bottle cage on rough terrain without fear of damage or deformation. It does an excellent job of holding your water bottle in place, no matter how bumpy the ride.

Conclusion:
The Trifox Bike Water Bottle Holder CBC100 is undoubtedly one of the top choices for anyone in search of a lightweight, durable, and flexible bottle cage. Its carbon fiber construction provides strength and durability while maintaining its lightweight feature. It is easy to install on most types of bikes, and its thick version design ensures that your water bottle stays in place. Overall, the Trifox CBC100 is an excellent investment for anyone looking to improve their cycling experience.

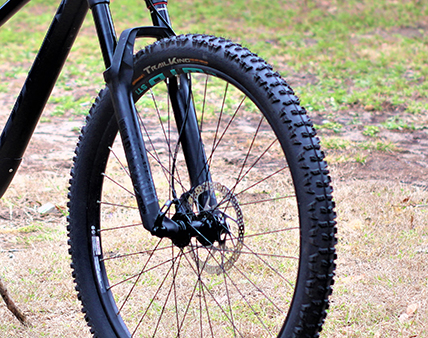
When it comes to mountain biking, one of the most crucial components of your bike is the fork. A good fork will make your ride smoother, absorb shocks, and enhance overall stability. The Trifox 29er Carbon Forks have been making buzz in the MTB world for their superb performance, lightweight structure, and stiffness. These forks are ideal for cross country, endurance, and trail riding, making them a desirable option for riders who seek speed, agility, and reliability.
The Material - Carbon Fiber T800:
One of the main highlights of the Trifox 29er Carbon Forks is the use of T800 carbon fiber, which is known for its high strength-to-weight ratio. This material is not only strong and durable but also incredibly lightweight, making it perfect for MTB racing. With a weight of only 530g (+/-15g), these forks will not weigh you down or hinder your speed. Additionally, carbon fiber is known for its ability to dampen vibration, which means that the Trifox 29er Carbon Forks QMK200 will offer a smoother ride.
The Style - Non-Tapered:
The Trifox 29er Carbon Forks QMK200 come in a non-tapered style, which means that the diameter of the fork remains consistent from top to bottom. This style offers greater stiffness and strength compared to tapered forks, meaning that you will experience less flex and better handling. Non-tapered forks are also easier to install and maintain, making them a popular choice among DIY bike mechanics.
The Weave - 3K:
The Trifox 29er Carbon Forks QMK200 features a 3K weave, which is a type of carbon fiber weave that is common in high-performance MTB components. This weave offers a good balance of strength, stiffness, and weight savings. Additionally, the glossy finish gives the forks a sleek and professional look. It is worth noting that while 3K carbon fiber is not the strongest or lightest type of carbon fiber, it strikes a good balance between performance and cost.
The Brake - Disc Brake:
The Trifox 29er Carbon Forks QMK200 are designed to work with disc brakes, which are becoming increasingly popular in the MTB world due to their superior stopping power and reliability. Disc brakes work by grabbing a rotor that is attached to the wheel hub, making them more efficient than traditional rim brakes. The fork features a disc brake mount on each leg, which means that it will work with most disc brake models. With the Trifox 29er Carbon Forks, you can expect consistent and reliable braking even in wet conditions.
The Fit - 29er Wheels:
The Trifox 29er Carbon Forks QMK200 are designed to fit 29-inch wheels, which are the standard wheel size for modern cross country and trail mountain bikes. The maximum tire width that can be used with these forks is 2.1 inches, which is suitable for most riding conditions. The fork rake or offset is 39mm, which is the distance between the steering axis and the hub. This offset affects the handling of the bike, with more offset providing more stability and less offset providing quicker handling.
Conclusion:
The Trifox 29er Carbon Forks QMK200 are a solid choice for MTB riders who want a lightweight, durable, and stiff fork that enhances performance and rideability. With its non-tapered style, T800 carbon fiber, 3K weave, disc brake compatibility, and 29er wheel fitment, these forks tick all the boxes for a great MTB fork. We highly recommend the Trifox 29er Carbon Forks for anyone who seeks a quality upgrade for their MTB.
As a mountain biker or bicycle enthusiast, you may find yourself in a situation where you need to convert your bike's quick-release hub to a thru-axle. While this may seem like a daunting task, it is actually quite doable with the right tools and knowledge. The benefits of a thru-axle include increased stiffness, improved handling, and better alignment between your wheel and frame.
So, if you're ready to make the switch, let's dive into how to convert a quick-release hub to a thru-axle.
Step 1: Identify your Hub Specs
Before you start the conversion process, you need to identify the specs of your hub. This includes the size and spacing of the hub, which will determine what kind of thru-axle you need. For example, some mountain bikes use hubs with a 135mm spacing and 9mm axle diameter. You'll need to find a thru-axle with the same specs in order for it to work with your bike. If you're not sure what specs you have, you can usually find this information through your bike's manufacturer or by measuring the hub yourself.
Step 2: Remove the Quick Release
The next step is to remove the quick release skewer from your bike. This can usually be done by unscrewing the end caps of your quick-release hub and gently pulling out the skewer. Make sure to keep any washers or spacers that may be attached to the skewer.
Step 3: Install the Thru-Axle
Now it's time to install your new thru-axle. Make sure it has the correct size and spacing for your hub, and determine the orientation of the threads. Some thru-axle designs have a lever or handle that allows you to tighten or loosen the axle by hand, while others require a tool. Follow the manufacturer's instructions for installation, being sure to grease the threads to prevent corrosion or seizing.
Step 4: Adjust your Disc Brakes
If you have disc brakes on your bike, you'll need to adjust the brake calipers to accommodate the new thru-axle. This may require loosening or removing the brake bolts and repositioning the caliper. Be sure to align the brake pads with the rotor correctly, and test the brakes thoroughly before riding.
Step 5: Test Ride and Adjust
After you've installed the thru-axle and adjusted your disc brakes, it's time to test ride your bike. Take it for a short spin around the block or a nearby trail, and check for any unusual noises or vibrations. If everything seems to be working well, continue to ride and make any necessary adjustments along the way.

Conclusion:
Converting your quick-release hub to a thru-axle may seem like a big undertaking, but it's actually a fairly simple process. By following these steps and using the right tools, you can improve the performance and handling of your bike with a few easy modifications. Remember to always consult the manufacturer's instructions and take your time to ensure a safe and successful conversion. Happy riding!
If you are a mountain biker, then you know that your handlebars are your main connection to your bike. That is why choosing the perfect handlebars is crucial for your performance, comfort, and safety. Handlebars come in various materials, shapes, and sizes, and each one has its own advantages and disadvantages. However, selecting the right handlebars can be overwhelming due to the vast options available.
1. Width
The width of your handlebars determines the control and stability you have while riding. The ideal handlebar width depends on your body structure, riding style, and the terrain you ride on. Generally, wider handlebars provide more control and stability, while narrow handlebars are ideal for technical riding. To determine the ideal width, stand up and measure the distance between your shoulder blades, then add 2-4 inches. This measurement will give you the perfect handlebar width for your body structure.
2. Material
Mountain bike handlebars are made of different materials, such as carbon fiber, aluminum, and titanium. Carbon fiber handlebars are the lightest and most expensive, but they offer the most shock absorption and comfort. Aluminum handlebars are the most popular choice among mountain bikers due to their affordability, durability, and stiffness. Titanium handlebars are light and strong, but they are the most expensive option. Choose the material that suits your budget and riding style.
3. Shape
Mountain bike handlebars come in various shapes, including flat, riser, and drop bars. Flat handlebars are ideal for cross-country riding and provide a more upright riding position. Riser handlebars are suitable for downhill riding and provide a more aggressive riding position. Drop bars are common in road cycling, but they are not recommended for mountain biking. Choose the shape that suits your riding style, terrain, and comfort.
4. Sweep
The sweep refers to the angle at which the handlebars bend back towards the rider. The sweep affects the hand position, wrist alignment, and comfort. Generally, handlebars with more sweep provide a more natural wrist position and are more comfortable for longer rides. However, too much sweep can affect steering precision and control. Choose the sweep angle that feels comfortable for your hand position and riding style.
5. Rise
The rise refers to the amount of distance the handlebars rise above the stem. The rise affects the riding position and comfort. Handlebars with more rise provide a more upright position and are suitable for cross-country riding. Handlebars with less rise provide a more aggressive position and are suitable for technical riding. Choose the rise that suits your riding style, comfort, and terrain.

Conclusion:
Mountain bike handlebars might seem like a small component of your bike, but they play a significant role in your performance, comfort, and safety. When choosing the perfect handlebars, consider your body structure, riding style, terrain, and budget. Test different handlebars before making a final decision, and don't hesitate to seek expert advice. With the right handlebars, you'll have more control, more comfort, and more fun on the trails.
If you're a cycling enthusiast, you’ve probably come across the terms freehub and freewheel, but how much do you know about them? Both freehub and freewheel are components of a bike’s drivetrain that enable the rear wheel to spin forward while allowing the pedals to remain stationary. While they serve the same purpose, they have significant differences that affect performance and compatibility.
1. Definition and function
A freewheel consists of a cluster of gears and cogs that thread onto the hub of the rear wheel, and the ratcheting mechanism that allows the wheel to spin forward without pedaling. It is a simple design that’s easy to maintain and service. In contrast, a freehub is a more complicated design that features a ratcheting mechanism that’s integrated into the hub of the rear wheel, which connects to the cassette. Instead of threading onto the hub like a freewheel, the cassette attaches to the splines on the freehub body. The freehub design not only provides better power transfer and durability but also offers more options for gear ratios.
2. Compatibility
One of the significant differences between freehub and freewheel is compatibility. Freewheels are commonly found on older bikes, while freehubs are a common feature on modern bikes. If you have an old bike and you want to upgrade to a freehub design, you may have to replace the wheel hub, and possibly the rear derailleur, shifters, and chain, to make sure all the components match. On the other hand, since freehub bodies are generally interchangeable, you can typically change the cassette to switch to a different gear ratio without having to replace the rear wheel.
3. Wear and Tear
Due to their simpler design, freewheels are generally more prone to wear and tear than freehubs. Over time, the ratcheting mechanism in freewheels tends to wear down, which can lead to skipping, uneven engagement, and even failure. Freehub bodies typically don’t suffer from the same wear and tear issues because they are located inside the hub shell where contaminants can’t easily access them. However, if a bearing fails or the pawls break, it’s more challenging to service or replace the freehub body.
4. Performance and Maintenance
In terms of performance, freehub systems offer better power transfer than freewheels because they have more engagement points where the rear hub and the cassette interact. They also provide more precise shifting and offer more gear ratio options. However, they are more complicated and harder to service compared to freewheels. Freewheels, on the other hand, are simpler and easier to maintain, but they don’t offer the same level of performance as freehubs.

Conclusion:
So, which is the better option for your bike, a freehub or a freewheel? Ultimately, it depends on your bike, budget, riding style, and preferences. If you have an older bike and want to stick with a simple and cost-effective design, a freewheel may be the way to go. On the other hand, if you want better performance, more gear ratios, and are willing to invest in a modern high-end bike, then a freehub is the better option. Remember, whichever option you choose, make sure to maintain and service your drivetrain components regularly to ensure smooth and efficient performance.
Bike wheels are one of the most important components of a bicycle, and the hub plays a crucial role in connecting the wheel to the frame. Choosing the right bike hub can make a huge difference in the performance of your bike, but this is a complex task that requires some technical know-how.
In this guide, we'll walk you through everything you need to know about bike hub compatibility and how it relates to your wheel and bike frame.
The first thing to understand is that bike hubs come in different designs and sizes, matching different bike frame specs and wheel types.
The most common types of bike hubs are quick-release (QR) hubs, thru-axle hubs, and bolt-on hubs. QR hubs are the most common type, found in road bikes, and have a skewer mechanism for quick release and attachment of the wheel. Thru-axle hubs are more common in mountain and gravel bikes and use a fixed axle that goes through the frame and wheel. Bolt-on hubs are less common, found in BMX-style bikes, and have a bolt-on mechanism instead of skewers or thru-axles.
Another important aspect to consider when choosing a bike hub is the spacing between the hub flanges. This measurement determines how wide the wheel can be, and thus how wide the frame must be to accommodate the wheel. Typically, road bike hubs have a narrower spacing of about 100mm or 130mm, while mountain bike hubs are wider, usually around 142mm or 148mm. Therefore, make sure you choose a hub that matches your frame spacing.
One of the most confusing aspects of bike hub compatibility is the axle diameter. The axle diameter is the thickness of the axle, and it can vary according to the type of hub and bike frame. The most common axle diameters are 9mm, 12mm, and 15mm, with some hubs offering 20mm or 24mm options. Again, make sure you choose a hub with the right axle diameter for your bike frame.
The last factor to consider is the compatibility of the hub with the wheel type. Wheels can be categorized according to their rim diameter (the outer diameter of the tire), and there are three main sizes: 26”, 27.5”, and 29”. Generally, hubs have a specific size that matches one of these wheel sizes, and it is important to choose a hub that matches the wheel size you have or plan to get.
Conclusion:
As you can see, choosing the right bike hub requires some careful consideration of several technical factors. However, taking the time to understand these factors will ensure that you get a hub that matches your bike frame, wheel, and riding style, and that will provide optimal performance and durability.
Whether you're a road rider or a mountain biker, make sure you consult the specs of your bike and wheels before choosing a hub, and don't hesitate to ask for expert advice if needed. Happy riding!
Are you looking to upgrade or replace your mountain bike hub but unsure how to install it properly? Worry not! We will provide a step-by-step guide to help you install your mountain bike hub and achieve a smooth, efficient ride.
Step 1: Gather the Necessary Tools and Materials
Before you begin, make sure you have the following tools and materials handy:
A new mountain bike hub
A spoke wrench
A truing stand (optional, but helpful for wheel alignment)
Grease and lubricant
Rim tape (if applicable)
Step 2: Remove the Old Hub
Start by removing the wheel from your bike and taking off the tire, tube, and rim tape (if present). Carefully remove the spokes connecting the old hub to the rim, taking note of the lacing pattern for future reference.
Step 3: Prepare the New Hub
Apply grease to the new hub's bearings and axle, ensuring smooth operation and reducing friction. If you've chosen a versatile hub like the Trifox M827 bicycle hub, make sure to select and install the appropriate end caps for your desired axle type (quick release or thru-axle).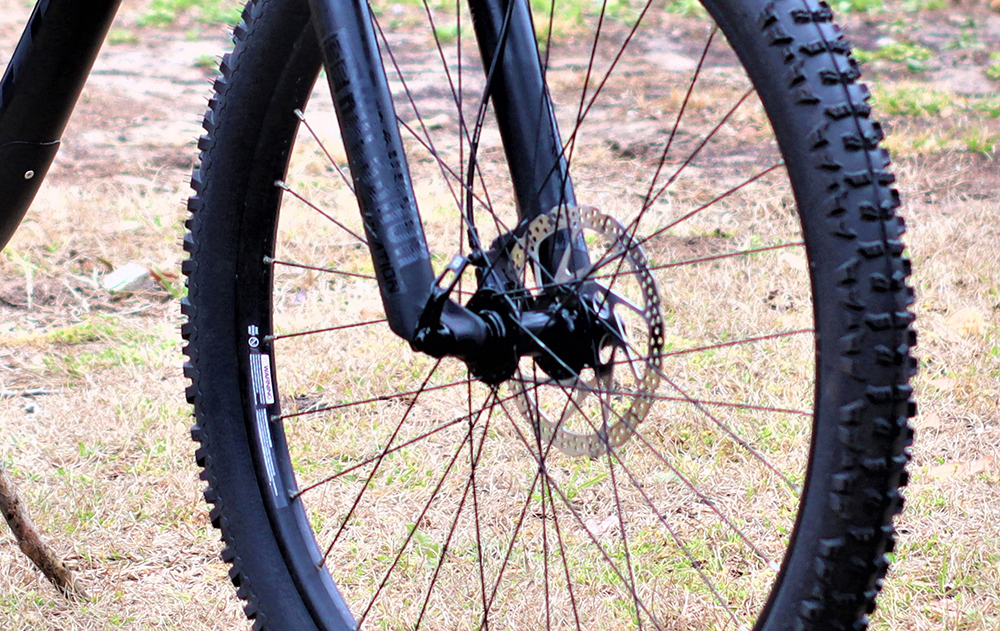
Step 4: Lace the Spokes
Following the lacing pattern you observed earlier, connect the new hub to the rim using the spokes. Make sure to tighten the spokes evenly and securely. A truing stand can be helpful during this process to ensure proper wheel alignment.
Step 5: Align and True the Wheel
Once the spokes are laced, check the alignment of your wheel. Adjust the spoke tension as needed to achieve a straight, true wheel. This process may require patience and precision, but it's essential for a smooth ride.
Step 6: Reinstall the Rim Tape, Tube, and Tire
With the new hub installed and the wheel aligned, reinstall the rim tape (if applicable), followed by the tube and tire. Inflate the tire to the recommended pressure.
Step 7: Mount the Wheel on Your Bike
Finally, mount the wheel back onto your bike, ensuring the axle is correctly seated in the dropouts. For hubs like the Trifox M827, make sure the end caps match your bike's axle type for a secure fit. Reattach any brake components and give your bike a thorough inspection before taking it for a test ride.
Trifox M827 hub installation can be a straightforward process when you follow these steps and pay attention to details. Choosing a high-quality, versatile hub can further enhance your biking experience by providing a smooth ride and easy adaptability to different axle types. Happy riding!


