The question haunts every rider considering an upgrade to carbon: "Can carbon handlebars break?" It's a valid concern fueled by stories of catastrophic failure. The direct answer is yes, like any material, carbon fiber has limits and can fail if misused, damaged, or installed incorrectly. However, the more important answer lies in understanding why failures happen and how proper knowledge transforms carbon from a perceived risk into one of the strongest, most reliable components on your bike. Let's separate myth from engineering reality.
The Strength of Carbon: Stiffness, Not Brittleness
First, it's crucial to understand carbon fiber's nature. A high-quality mtb bicycle handlebar like the Trifox RHB100 is not "brittle glass." It's a composite material—thousands of ultra-strong carbon filaments embedded in a resin matrix. This construction allows it to be engineered to be exceptionally stiff and strong in specific directions (like resisting bending from your weight or steering inputs) while being remarkably lightweight. Its strength-to-weight ratio far surpasses aluminum. The perceived fragility stems from its intolerance to two specific things: impact damage and improper clamping force.
The Primary Risks: Impact and Improper Installation
Most carbon handlebar failures can be traced to a few key causes:
1. Impact Damage (The Hidden Threat): A crash or even a simple tip-over can cause a compromising impact. Unlike aluminum which might dent, carbon can suffer internal delamination—hidden cracks or separations between the carbon layers. This damage severely weakens the structure, and a bar with internal damage can fail later under normal riding loads. Always inspect your bars thoroughly after any impact.
2. Over-Torquing (The Silent Killer): This is the #1 installation error. Carbon does not yield like metal. Using the same "feel" or tools you would on an aluminum bar is dangerous. Exceeding the manufacturer's specified torque rating (typically 4-6 Nm for faceplate bolts) can crush the carbon fibers, creating stress risers that lead to cracks. A calibrated torque wrench is non-negotiable for installing carbon components.
3. Under-Torquing & Slippage: Conversely, insufficient torque can allow the bar to slip in the stem. A rider may then overtighten in a panic, leading to damage. It can also create localized stress points from movement.
4. Using the Wrong Paste: Never use grease on carbon clamp interfaces. Always use a carbon assembly paste. This specialized compound increases friction without damaging the fibers, allowing you to achieve a secure hold at the correct, lower torque.

Safe Practices for a Lifetime of Performance
Following a few golden rules ensures your mtb cycle handlebar remains safe and reliable:
* Torque, Torque, Torque: Use a quality torque wrench on every bolt. Follow the manufacturer's specs precisely (check the RHB100's documentation).
* Inspect Religiously: Before every ride, visually inspect the bar, especially around the clamp area and any potential impact points. Look for cracks, chips, or deep scratches. If in doubt, replace it.
* Handle with Care: Avoid clamping the bar in a vise or using levering tools on it during bike work. Protect it from impacts in transit or storage.
* Use Compatible Components: Ensure your stem faceplate is smooth and clean, without any sharp edges or burrs that could score the carbon surface.
Understanding the Limits and Riding with Confidence
Carbon handlebars are designed to withstand the enormous forces of riding. They are tested to standards far exceeding normal use. The Trifox RHB100, with its integrated design and monocoque carbon construction, is engineered for this purpose. The risk emerges not from the material itself, but from misuse.
By respecting the material—investing in a torque wrench, using carbon paste, and performing regular inspections—you mitigate virtually all the risk. Carbon's reward is a stiffer, more responsive, and lighter front end that improves control and reduces fatigue. The goal isn't to fear carbon, but to understand and respect its unique requirements. When treated correctly, a carbon handlebar is not a liability; it's a high-performance asset you can trust for countless miles of confident riding.
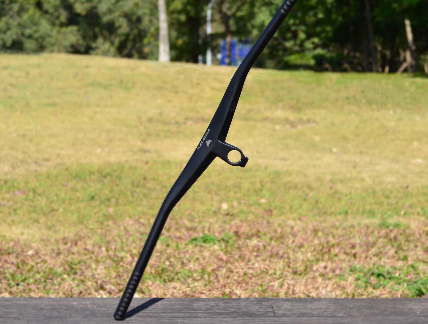
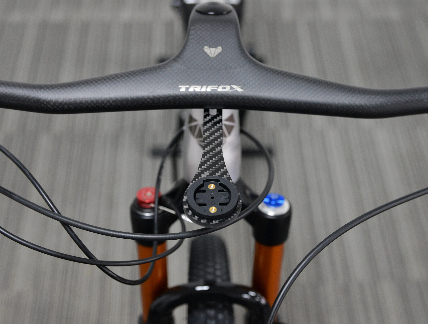
Finding the perfect bike computer mount can be frustrating. You’ve got your Garmin, Wahoo, or Hammerhead, but with countless handlebar specs and proprietary mounts, the fear of buying the wrong thing is real. This guide cuts through the confusion with a simple, two-step verification process to ensure the Trifox SBH100 is your perfect fit, turning compatibility from a gamble into a guarantee.
Step 1: The Handlebar Interface – Will It Fit My Bike?
The first check is your handlebar. The SBH100 is designed as a universal handlebar clamp, engineered to fit the most common road and mountain bike standards. It features a forged aluminum, 4-bolt clamp mechanism with a wide adjustment range, making it compatible with standard 31.8mm and oversized 35mm diameter handlebars without needing extra shims. This sleek, low-profile clamp attaches securely to your handlebar, stem, or even an integrated cockpit’s front plate, providing a clean and versatile mounting solution.
Step 2: The Computer Interface – Will It Hold My Device?
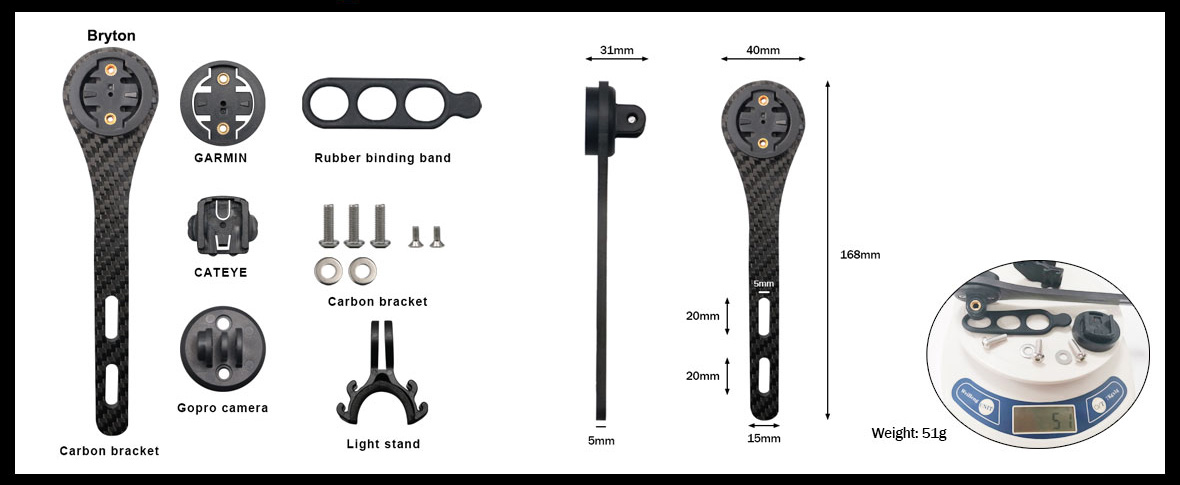
This is the core of compatibility. The SBH100 uses a universal “quarter-turn” interface, which is the industry-standard mounting system. This means it natively supports:
* Garmin: All EDGE series computers (520, 530, 830, 1030 Plus, 1040, etc.) use the quarter-turn system. Simply click your device into place.
* Wahoo ELEMNT: Models like the BOLT, ROAM, and original ELEMNT use a different, proprietary “slide-and-lock” system. For these, you would attach your Wahoo’s original mount onto the SBH100’s GoPro-style accessory threads (using the included adapter if needed).
* Hammerhead Karoo: The Karoo 2 also uses a quarter-turn mount, making it directly compatible with the SBH100.
Your Quick-Start Compatibility Checklist:
1. My handlebar/stem diameter is: 31.8mm or 35mm? ✅ SBH100 fits both.
2. My computer brand is:
* Garmin or Hammerhead: ✅ Directly compatible with the quarter-turn mount.
* Wahoo: ✅ Compatible by attaching your Wahoo mount to the SBH100’s accessory threads.
* Bryton, Cateye, iGPSPORT: ✅ These also commonly use standard quarter-turn or GoPro-style mounts, making them compatible.
Beyond the Computer: A True Multi-Mount
The SBH100's utility extends beyond your GPS. Its integrated GoPro-compatible accessory mounts (on the top and bottom) allow you to add a bicycle light mount (for lights up to 25mm in diameter) and an action camera simultaneously. This creates a clean, centralized cockpit, eliminating the need for multiple clamps and tangled zip ties.
At Trifox, our promise is a perfect fit. The SBH100 is precision-engineered from lightweight 3K carbon fiber and forged aluminum, with each interface tested for secure, vibration-free operation. We provide clear specifications and encourage you to reach out if you have any unique setup questions. Choosing the right mount isn't just about avoiding a mistake—it’s the first step to a cleaner, more focused, and more enjoyable ride where your data is always secure and in view.
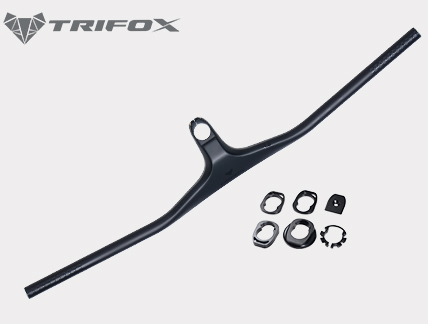
The sight of a clean, integrated cockpit is a thing of beauty—a seamless blend of form and function that promises aerodynamic gains and a clutter-free look. However, for many riders and mechanics, the thought of threading brake hoses and shift cables through a one-piece carbon mtb bicycle handlebar has been a source of dread, synonymous with hours of frustration, fishing with guide wires, and skinned knuckles. It doesn't have to be this way. The Trifox RHB600 is engineered from the ground up with a simple philosophy: performance should not come at the cost of serviceability. It proves that with thoughtful design, installing cables in a fully integrated bar can be a logical, even intuitive, process.
Engineered Pathways, Not Just Holes
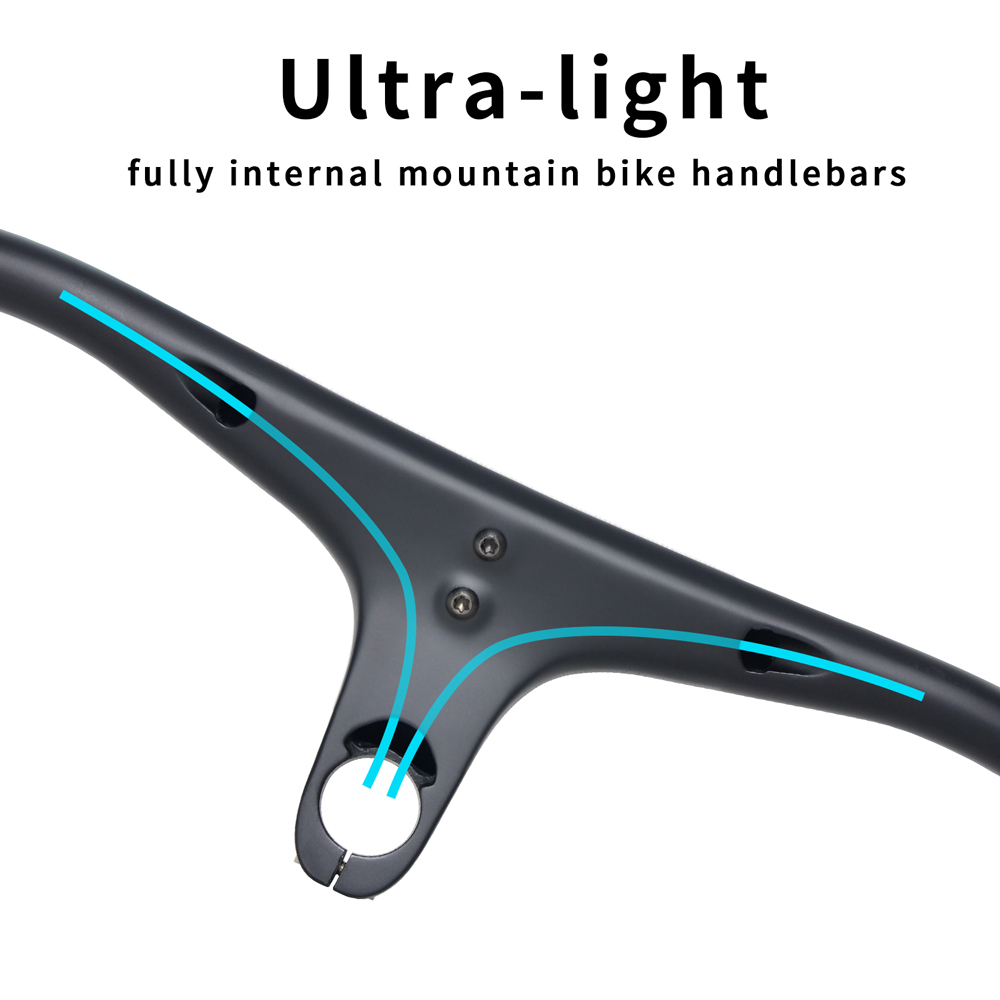
The journey to an easy installation begins before you even pick up a cable. The RHB600 features dedicated, oversized internal channels that are molded directly into the carbon structure during manufacture. Unlike retrofitted holes or tight, winding paths, these channels are designed with a consistent diameter and smooth internal finish. This isn't just an empty space; it's a precisely engineered guideway that naturally directs cables and hoses from the stem entry point to their exits at the bar ends and lever clamps. The path is clear, logical, and free of sharp edges or unnecessary turns that cause snagging.
Clear Access Points
Ease of access is critical. The RHB600 is designed with large, clearly defined entry and exit ports. The port at the stem clamp area is generously sized, allowing you to easily see and feed cables into the main channel. More importantly, the exit ports at the lever mounting areas are not just small holes, but are shaped to provide a clear, open path for the housing to emerge cleanly. This thoughtful opening eliminates the frustrating "blind fishing" exercise often associated with integrated bicycle bars, where you're trying to maneuver a flexible housing through a tiny, unseen opening.
Tool-Friendly Design
A truly user-friendly design doesn't stop at guiding the cable; it also considers how you get it there. The internal channels of the RHB600 are designed to be compatible with standard installation tools and techniques. Using a simple, flexible guide wire or a mechanic's cable becomes a straightforward task. You can feed the wire through one port and confidently pull it out the other, knowing the smooth channel will guide it without catching. Once the guide is through, attaching your brake hose or shift housing and pulling it back through is a simple, one-person operation. This design respects the mechanic's time and skill, turning a complex job into a series of simple, logical steps.
Clean Finishing Details
The final touch is in the finishing details. The RHB600 includes specially designed, removable rubber port covers and grommets. Once your cables are installed, these covers snap neatly into place, creating a clean, sealed, and professional finish that looks factory-perfect. They protect the entry points from dirt and moisture without requiring messy sealants or adhesives, making future maintenance or cable replacement just as simple.
In summary, the Trifox RHB600 redefines what an integrated cockpit can be. By prioritizing intelligent features like oversized, smooth channels, large access ports, and tool-friendly design, it removes the traditional pain points of internal routing. It demonstrates that the pinnacle of carbon integrated handlebar design isn't just about achieving a sleek look or low weight—it's about creating a component that is both high-performance and genuinely practical to live with. The RHB600 doesn't just make cable installation possible; it makes it intuitive, transforming a daunting task into a satisfying part of building your dream bike.
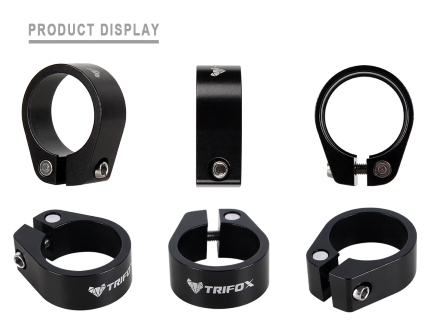
Every cyclist has experienced that sinking feeling—literally. You’ve set your saddle to the perfect height, only to find it has slowly slipped down mid-ride, disrupting your pedaling efficiency and comfort. This common frustration points directly to a small but critical component often taken for granted: the seatpost clamp. Far from being just a simple fastener, a well-engineered seatpost clamp is a cornerstone of a safe, efficient, and enjoyable ride.
The Primary Role: Security and Precision
The fundamental job of a bike seat post clamp is deceptively simple: to securely fasten the seatpost inside the frame's seat tube, preventing any movement. However, "secure" doesn't mean "crushingly tight." A quality clamp achieves a vice-like grip through intelligent design, not just brute force. It must distribute clamping pressure evenly around the circumference of the seatpost to prevent damaging carbon fiber posts or deforming thin-walled aluminum. This ensures your carefully dialed-in saddle height and angle remain exactly where you set them, mile after mile, climb after climb.
Beyond Tightening: Engineering for Performance
Modern clamps, like the Trifox SC35, are engineered with specific goals:
* Material & Weight: Made from lightweight yet strong materials like CNC-machined aluminum, they add minimal weight while offering maximum strength and corrosion resistance.
* Bolt Mechanism: A single high-quality bolt (often titanium or stainless steel) with a precise thread allows for accurate torque application. Using a torque wrench to tighten to the manufacturer's specification is crucial—it prevents under-tightening (slipping) and over-tightening (damage).
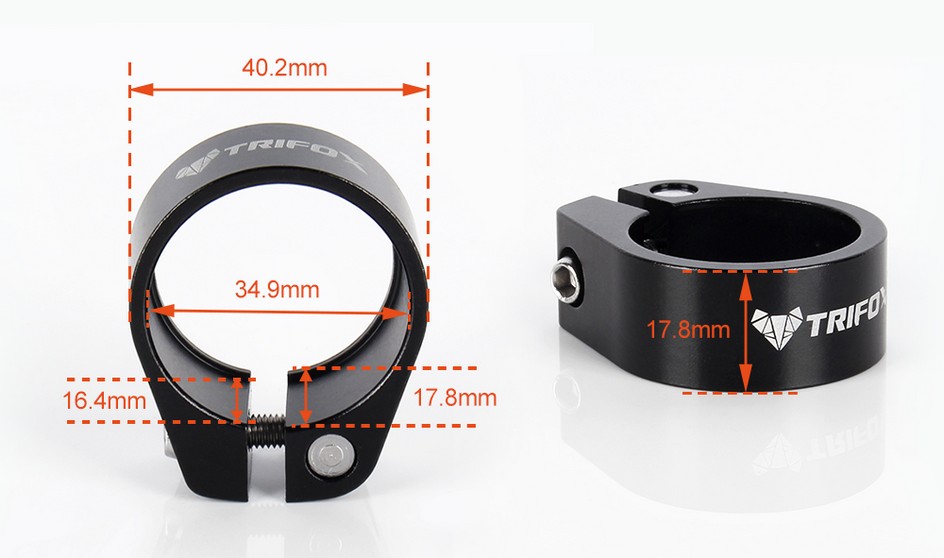
* Design & Interface: The clamp's inner diameter must perfectly match your frame's seat tube. Designs vary from classic single-bolt bands to sleek, low-profile models that integrate cleanly with the frame's aesthetics.
Choosing the Right Clamp: A Matter of Fit
Selecting a clamp isn't one-size-fits-all. You must know two key measurements:
1. Seat Tube Diameter: The outer diameter of your frame's seat tube where the clamp sits (common sizes are 31.8mm, 34.9mm, etc.).
2. Seatpost Diameter: The outer diameter of your seatpost itself.
Mismatching these can lead to an insecure fit or damage. For carbon frames and seatposts, it's especially important to use a clamp designed to distribute pressure over a wider area to avoid stress concentrations.
A Small Upgrade, A Significant Impact
Neglecting your seatpost clamp can lead to a wobbly saddle, inconsistent riding position, and in worst cases, damage to your frame or a sudden saddle collapse. Upgrading from a basic stamped steel clamp to a precision-machined model like the Trifox SC35 enhances reliability, safety, and peace of mind. It’s a small, affordable component that plays an oversized role in holding your perfect ride together, ensuring that your connection to the bike remains solid, secure, and set exactly how you like it.
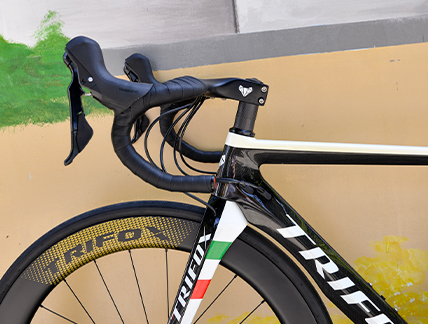
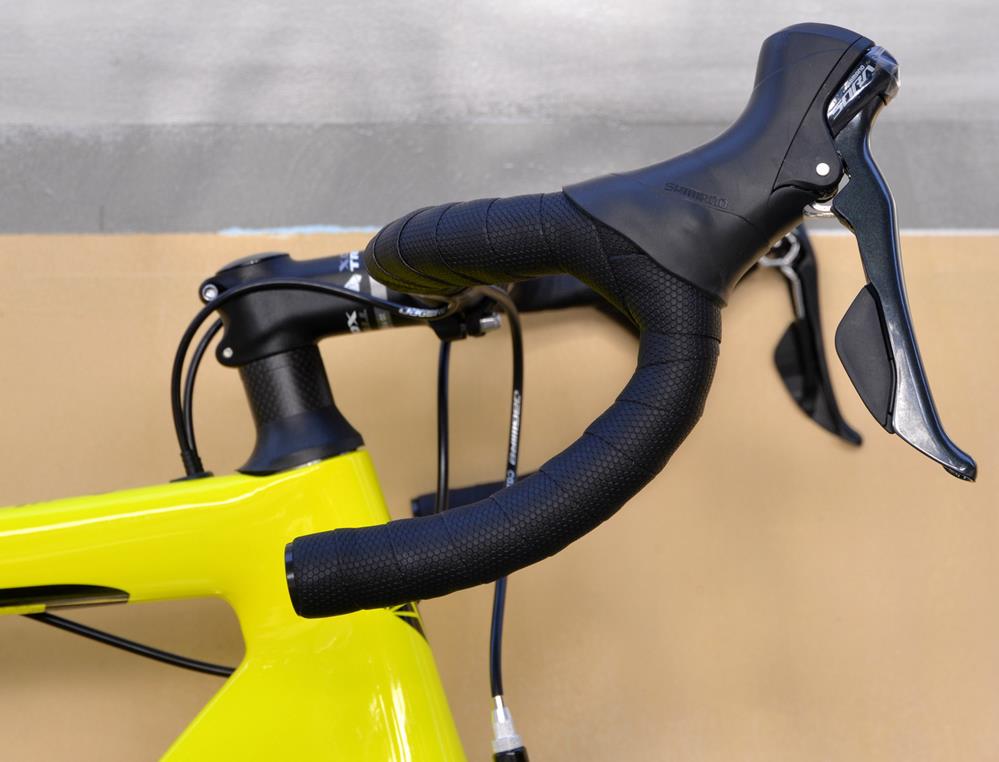
When considering performance upgrades, riders often think of wheels, groupsets, or aero bars. Rarely does a humble roll of bike handlebar tape make the list. Yet, your hands are one of only three contact points with your bike, and this thin layer of material directly influences control, comfort, and safety. It’s time to stop seeing bar tape as a cosmetic accessory and start recognizing it as a fundamental component of your cockpit.
The Core Functions: Grip, Damping, Protection
The primary functions of quality handlebar grips are immediate and tangible:
* Secure Grip: On wet days, during sprints, or on rough roads, a tacky, textured surface prevents your hands from slipping, ensuring precise steering and brake control.
* Vibration Damping: Road buzz and high-frequency vibrations travel from the tires, through the frame and fork, and into your hands. Quality tape with a padded layer (like EVA foam) acts as a crucial filter, absorbing these shocks to reduce hand numbness and arm fatigue on long rides.
* Impact Protection: In the event of a minor tip-over or crash, a well-padded tape provides a valuable layer of cushioning for both your handlebars and your palms.
Choosing the Right Tape: Key Factors
Choosing the right tape means balancing several key factors based on your riding style:
* Material & Construction: The Trifox BHT100 tape, for example, uses a smart dual-material design: a soft EVA foam base for excellent shock absorption, topped with a durable PU leather surface. This combination provides the comfort of foam with the easy-clean durability and secure grip of synthetic leather. Other common materials include natural cork (classic, eco-friendly), gel inserts (maximum comfort), and silicone (superior wet-weather grip).
* Thickness & Texture: Thicker tape generally offers more cushioning but can slightly reduce bar feel. Texture—from smooth to heavily patterned—affects grip in dry and wet conditions. The BHT100's PU leather surface offers a reliable, multi-condition grip.
* Durability & Maintenance: Sweat, sun, and frequent handling take their toll. Synthetic materials like PU leather are highly resistant to wear, UV damage, and are easy to wipe clean, making them a practical, long-lasting choice for everyday riders.
The Importance of Proper Installation
Even the best tape underperforms if installed poorly. Proper installation is key to comfort, looks, and longevity:
1. Start at the bar ends, ensuring the end plugs are securely in place first.
2. Wrap outward from the drops toward the stem, maintaining consistent, firm tension and an even overlap (usually 1/3 to 1/2 of the tape's width).
3. Finish neatly at the stem using the provided finishing tape for a professional, secure look that won't unravel.
Ultimately, investing in and properly installing a quality bike handlebar tape like the Trifox BHT100 is one of the most cost-effective upgrades you can make. It directly enhances the quality of every ride by improving your connection to the bike, fighting fatigue, and boosting confidence. Don't overlook this critical link between you and the road.
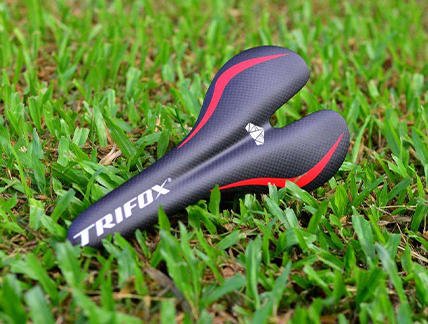
At first glance, a performance carbon saddle like the Trifox CS100 can seem intimidating. Its sleek, minimalist appearance and rigid full-carbon fiber construction stand in stark contrast to the plush, padded saddles many are used to. It's perfectly reasonable to wonder: "Will this be comfortable?" The answer lies in a fundamental shift in thinking. A performance cycling saddle is not designed to provide comfort through cushioning that you sink into. Instead, its core philosophy is support over softness. It aims to provide a stable, precise platform for your sit bones, freeing your legs to focus purely on pedaling power and efficiency. This isn't about passive comfort; it's about active, empowering performance.
Let's demystify what it really means to "require" a good position to use such a saddle effectively.
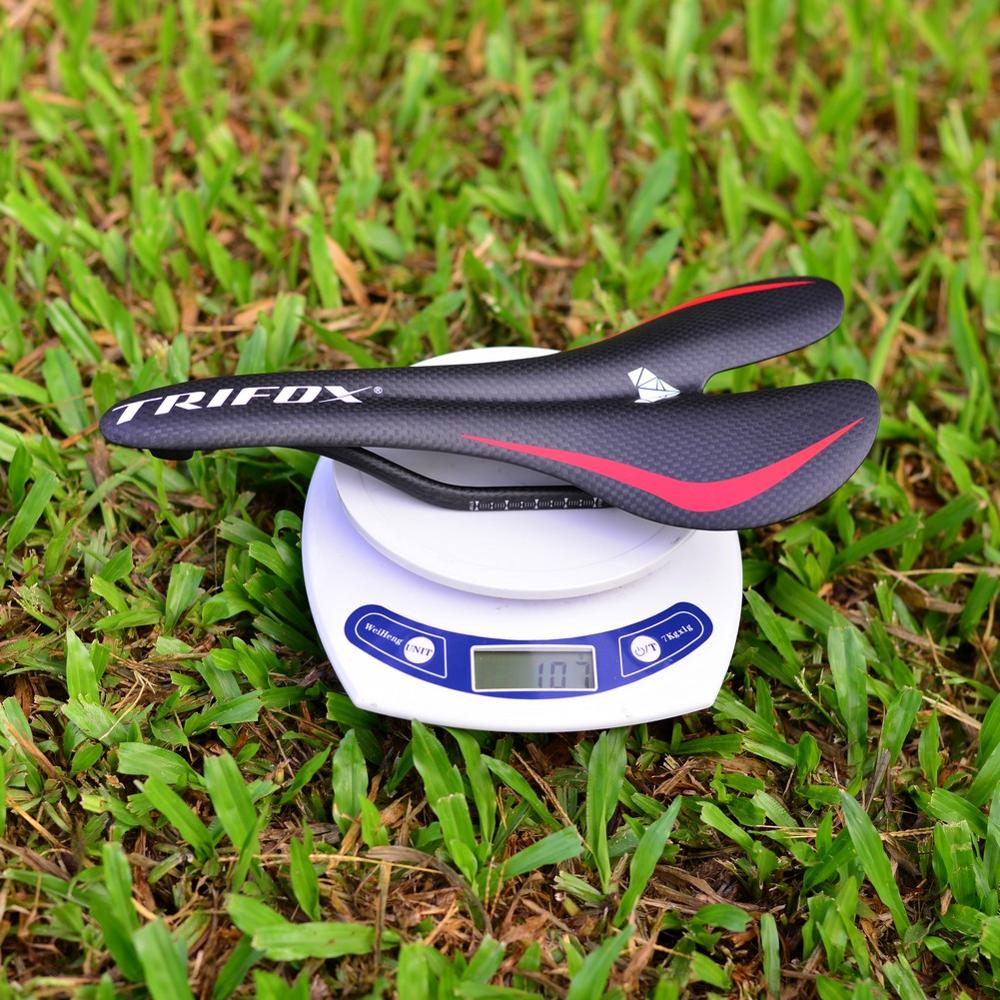
* It's About Stability, Not Core Strength: The requirement for good form isn't about needing pro-level fitness. It's about the ability to maintain a stable pelvis and avoid rocking side-to-side on the saddle. A firm, supportive platform like the CS100 actually aids this by giving your sit bones a clear, unwavering point of contact, helping you find and hold an efficient position more naturally.
* Precision Setup is a Feature, Not a Bug: Yes, achieving optimal comfort requires more precise saddle angle and fore/aft positioning. However, view this as the saddle's greatest tuning advantage. Because it provides immediate, unambiguous feedback, it acts as a precise micro-adjustment tool. Small changes yield noticeable differences, allowing you (or a bike fitter) to dial in your perfect position faster and more accurately than with a vague, forgiving saddle.
So, who is this type of bicycle saddle truly for? It’s an excellent match for the serious enthusiast whose rides regularly exceed 1.5 to 2 hours, who is chasing speed or efficiency gains, and who understands that long-distance comfort is achieved through proper support and fit—not by simply adding more padding. It’s for the rider willing to invest time in optimizing their bike setup. Conversely, it may not be the ideal choice for purely casual, upright riders or those who prefer a more relaxed, static seating position on the bike.
If the potential for a lighter, more efficient, and precisely supportive ride appeals to you, your logical next step is clear: prioritize a professional bike fit. A proper fit ensures your overall bike geometry and riding posture are correct. With that solid foundation established, you can then explore whether a performance carbon saddle is the right final piece of your setup puzzle. The Trifox CS100, with its sub-106g weight, ergonomic nose design to prevent numbness, and central vent for airflow, exemplifies this performance-oriented approach, offering a clear upgrade path for riders ready to make the leap.
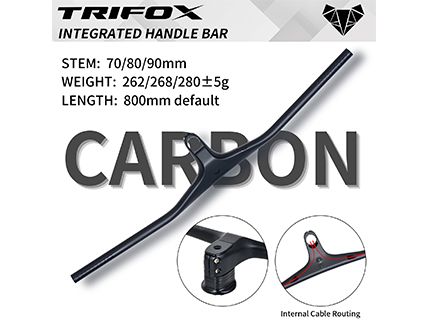
Let's be honest: the sight of a modern internal cable handlebar can be intimidating. The sleek, unbroken lines promise aerodynamic gains and a clean look, but they also whisper of complicated installations and future maintenance headaches. These concerns are valid, but they're also largely based on outdated experiences. Today's integrated cockpits, like the Trifox RHB600, are designed with the user in mind, transforming installation from a daunting task into a straightforward, confidence-building process.
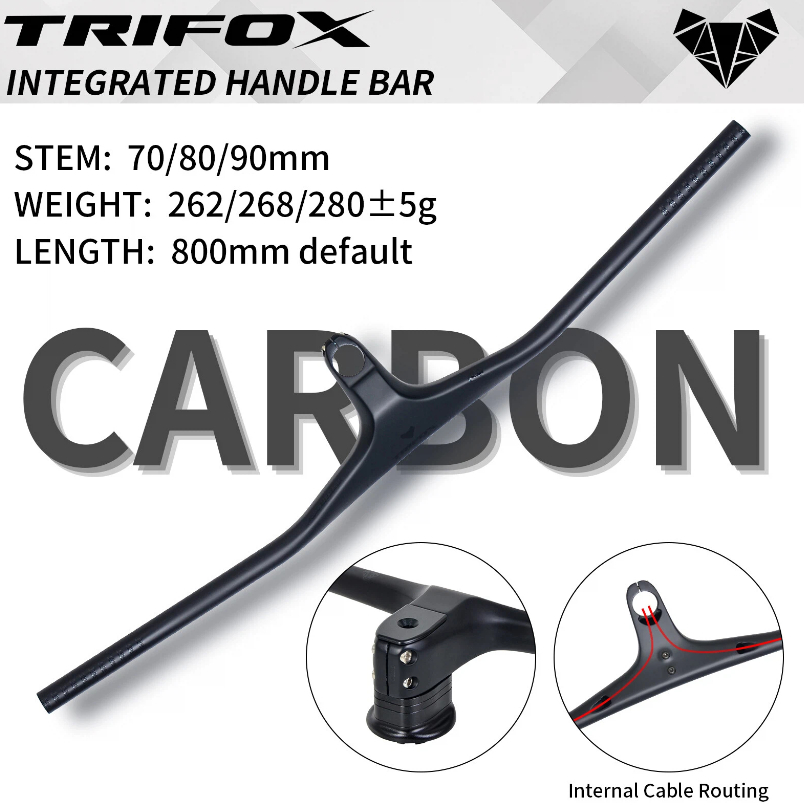
The key to success lies in understanding the systematic approach to installation. First and foremost: Torque and Tools Matter. This cannot be overstated. Carbon components require precise installation. For the RHB600 carbon mtb bar, we specify exact torque values for the stem faceplate bolts (typically 4-6 Nm) and the top cap pre-load bolt (typically 2-4 Nm). Using a quality torque wrench is not optional; it's essential to prevent slipping, overtightening, and potential damage. Always apply a thin layer of carbon assembly paste to the handlebar clamp area and the steerer tube to ensure a secure, non-slip interface. This simple step ensures your position stays put without damaging the carbon fibers.
The Bolt Layout Design of the stem section is engineered for ease and security. The RHB600 features a 4-bolt front-loading faceplate. This design allows you to easily place the handlebar, set your desired angle, and then evenly tighten the bolts in a cross pattern. This method ensures uniform pressure distribution, eliminating gaps or uneven clamping force that could lead to stress points or slippage. The included top cap and spacers provide the necessary flexibility to fine-tune your stack height before finalizing the headset preload, making initial setup intuitive.
Now, let's tackle the elephant in the room: Integrated Routing Simplified. The RHB600 is designed to make cable and hose installation as painless as possible. Key features facilitate this:
* Large, Accessible Ports: The entry and exit ports are generously sized, making initial threading much easier.
* Smooth Internal Channels: The interior of the carbon bar is molded with smooth guides to prevent hoses from snagging.
* Removable Port Covers: The sleek rubber grommets or port covers can be easily removed for routing and just as easily popped back in for a clean finish.
Think of it this way: We've done the hard part. The complex internal channels are precision-molded into the carbon structure during manufacturing. Your task is simply to guide the cables and hoses through a pre-designed, optimized path. Start by feeding a mechanic's cable or a dedicated guide wire through from the stem end, attach your housing, and pull it through. A little patience and the right technique make the process manageable for any home mechanic.
This focus on user-friendly design extends from installation to long-term Serviceability. The fully integrated design isn't a maintenance trap. Once set up, the system is incredibly reliable. Should you ever need to replace a cable or hose, the process is simply the initial installation in reverse. The design ensures that routine maintenance remains accessible.
Ultimately, the RHB600's installation process is a direct reflection of a user-centric design philosophy. By providing clear guidelines, thoughtful engineering in the bolt layout, and simplifying the internal routing path, we've turned a potential barrier into an opportunity. Following these steps doesn't just secure your components; it builds your confidence in the product. A proper installation is the first step in building trust with your new carbon mtb bar, transforming initial apprehension into the satisfying certainty of a secure, professional-grade setup that's ready for the trail.

Every cyclist knows the frustration: hitting a rough patch of trail or a pothole on the road, only to hear the dreaded *clatter* of a water bottle bouncing onto the asphalt. A lost bottle means lost hydration and a frustrating stop. This common failure point is why designing a carbon fiber bottle cage is a precise exercise in balancing two opposing forces: maximum grip and minimum weight.
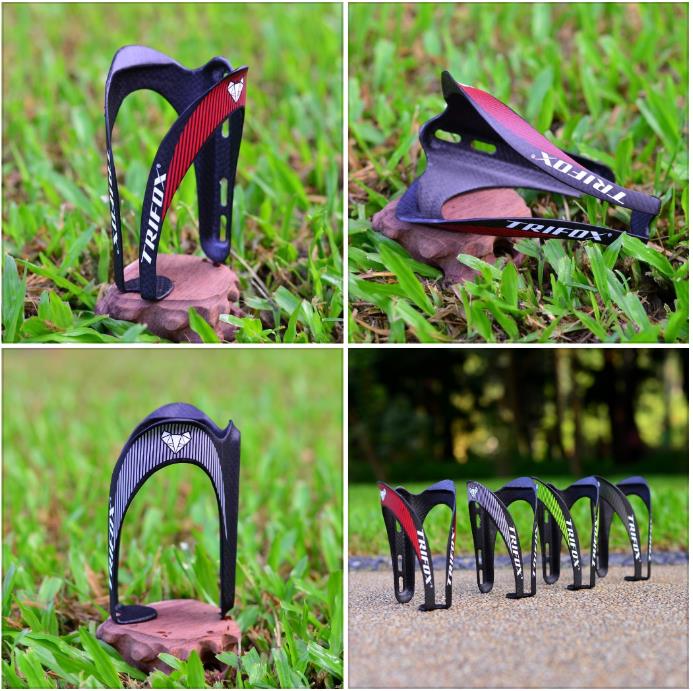
The quest for the lightest bottle cage often leads to minimalist designs that sacrifice security. Conversely, an overly tight, heavy cage can make retrieving and replacing a bottle a wrestling match mid-ride. The engineering challenge is to create a structure that uses material intelligently to lock a bottle in place without excess bulk.
At Trifox, we approach this through advanced carbon fiber layup and strategic geometry. Our bike bottle holder designs, like the CBC200, start with high-modulus carbon fiber. This material offers an exceptional strength-to-weight ratio, allowing us to create a cage that is incredibly light yet structurally rigid. The rigidity is crucial—it prevents the cage from flexing and loosening its hold over time or on rough terrain.
The true magic, however, lies in the shape. Grip isn't achieved by simply squeezing the bottle tighter. It's about intelligent contact points. We mold the cage arms with a specific concave curvature and textured inner surface. This shape cradles standard-sized bottles securely, creating even pressure distribution. The result is a firm hold that resists vertical bounce and lateral ejection, even when the bottle is half-full and at its most unstable.
Furthermore, the entrance and exit of the cage are carefully flared. This design consideration is critical for usability. A smooth, wide mouth allows for easy, one-handed bottle insertion and removal—a must during a hard effort—while the narrower mid-section provides the actual retention grip. This ergonomic detail ensures the cage is not just a static holder but a functional component of your ride.
The Trifox CBC200 exemplifies this philosophy. By optimizing the carbon weave and employing a unidirectional layup in high-stress areas, we shave every unnecessary gram without compromising the cage's integrity. It’s a testament to the fact that the lightest bottle cage doesn’t have to be the most fragile. Every contour, every fiber orientation, is calculated to contribute to both retention and overall bike weight savings.
Ultimately, a great carbon fiber bottle cage is an exercise in harmony. It must be light enough to be worth the upgrade, grippy enough to be utterly reliable, and smartly shaped for seamless use. It's not just about holding a bottle; it's about ensuring your hydration is always there when you need it, without a second thought. In the balance between Grip and weight, the winning formula is precision engineering, not compromise.
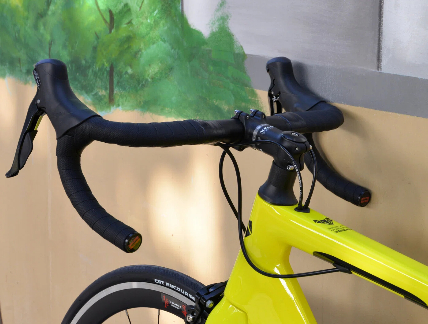
Upgrading your cockpit shouldn't feel like solving a complex puzzle. A stem that doesn't fit your handlebar can turn an exciting upgrade into a frustrating ordeal. This guide will demystify the key standards and explain how a versatile component like the Trifox Alloy Light Stem ABS300 is designed for broad, hassle-free compatibility.
The Core Standard: Handlebar Clamp Diameters
The most critical check is the stem-to-handlebar fit. The industry uses two main diameters:
• 31.8mm (The Universal Standard): The default for most modern mountain bike stems and road bike stems. It offers a great balance of stiffness and weight.
• 35mm (The Oversized Standard): Used on some high-end bikes for maximum stiffness.
The Trifox ABS300 features a 31.8mm handlebar clamp, making it instantly compatible with the widest range of handlebars.
Compatibility Checklist: What Works with the ABS300
Here’s a quick guide to what fits:
• Handlebars: Any standard 31.8 mm stem diameter bar (most MTB and road bars).
• Fork Steerer: Standard 1-1/8" (28.6mm) threadless forks.
• Shift/Brake Levers: All major brands (Shimano, SRAM). Levers mount to the bar, independent of the stem.
• Use: Designed for both mountain and road bikes.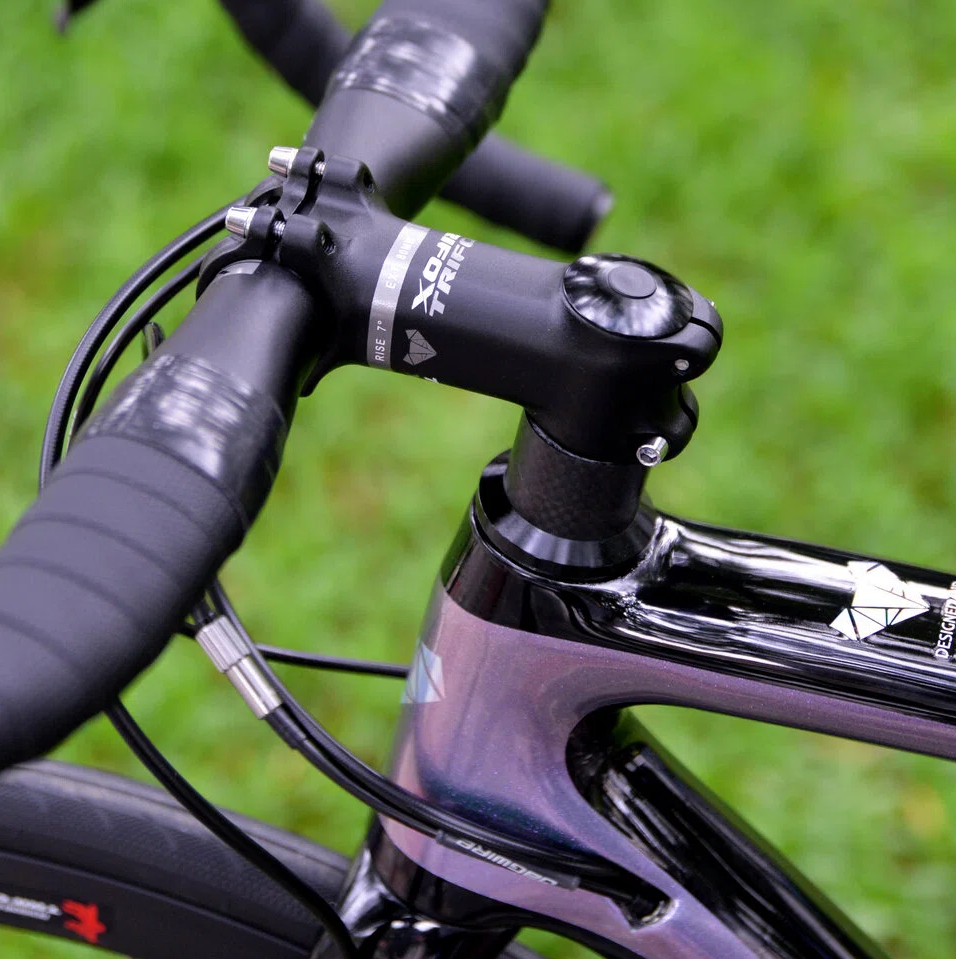
Precision Matters: The Role of Tolerances
Two parts listed as 31.8mm might not fit perfectly due to manufacturing tolerances (allowed margin of error). Low-quality stems with poor tolerances can lead to unsafe, uneven clamping. The Trifox ABS300 is precision CNC-machined with extremely tight tolerances. This guarantees a perfect, secure fit with standard bars—no shims, no guesswork, just safe and reliable performance.
Pro Installation Tips for a Safe Fit
1. Clean Surfaces: Wipe the bar and stem clamp with isopropyl alcohol.
2. Check Alignment: Center the handlebar in the stem.
3. Torque to Spec (CRUCIAL): Always use a torque wrench. Tighten bolts gradually in a cross pattern.
- For Aluminum Bars: Typically 5-6 Nm.
- For Carbon Bars: Use carbon assembly paste and torque to spec (check bar manual).
Conclusion: Compatibility Equals Confidence
Choosing a stem like the Trifox ABS300 eliminates compatibility guesswork. Its universal 31.8mm standard, precise manufacturing, and versatile design let you build with confidence, ensuring a safe and reliable connection between you and your bike for every ride.


