


Mountain biking is an exhilarating sport, offering riders a unique blend of adventure, fitness, and nature. However, the right equipment can make a world of difference in your riding experience. One such crucial component is the bike's crankset.
Understanding the Crankset
The crankset, often referred to as 'the cranks,' includes the bicycle's chainrings, crank arms, and bottom bracket. It's responsible for converting the force generated by your legs into motion that drives the bike forward.
Factors to Consider When Choosing a Crankset
1. Crank Arm Length
The crank arm length is the distance from the center of the bottom bracket to the center of the pedal spindle. Most mountain bikes come with a standard 170mm or 175mm crank arm. However, the ideal length depends on your leg length and the type of riding you do. Shorter cranks (165-170mm) are better for technical trail riding where ground clearance is essential, while longer cranks (175-180mm) can provide more leverage for climbing steep hills.
2. Chainring Size
The size of the chainring significantly impacts your bike's gearing. Larger chainrings offer higher gear ratios, suitable for fast riding on smooth surfaces. In contrast, smaller chainrings provide lower gear ratios, making it easier to pedal uphill or on rough terrain. Many modern MTBs feature a single (1x) chainring setup for simplicity and efficiency, but traditional double (2x) or triple (3x) setups are also available.
3. Material
Cranksets can be made from various materials, including aluminum, carbon fiber, and steel. Aluminum cranksets are common due to their balance between weight, strength, and cost. Carbon fiber cranksets are lighter and stiffer but usually more expensive. Steel cranksets are durable and affordable but heavier than the other options.
4. Compatibility
Ensure that the crankset is compatible with your bike's bottom bracket system and the number of gears on your bike. Also, consider the chainline (the distance from the centerline of the bike to the chainring) to ensure optimal drivetrain efficiency and minimal wear.
5. Brand and Price
Like any bike component, cranksets come in various brands and prices. More expensive models typically offer better performance and lower weight. However, mid-range options can often provide excellent performance at a fraction of the price.
Choosing the right crankset for your MTB can significantly impact your riding experience. It's worth spending time researching and understanding what works best for your bike, riding style, and personal preference.
Remember, the ultimate goal is to enhance your enjoyment and performance on the trails. So, choose wisely, and happy riding!


When it comes to cycling, understanding tire sizes can be a bit confusing. Different countries use different measurements, and sometimes the same size can be described in multiple ways. However, comprehending this aspect is crucial as it impacts your bike's performance, comfort, and safety. This article aims to simplify tire sizing for you.
The Basics of Bicycle Tire Sizing
Bike tire sizes consist of two numbers. The first represents the diameter of the wheel (also known as the bead seat diameter), while the second indicates the width of the tire. Both these measurements can be in inches or millimeters, depending on the standard used.
Inch Marking
Inch markings are commonly used in the US and UK, and they're typical for mountain bikes and some road bikes. An example of an inch marking would look like this: 26 x 2.0. Here, 26 is the approximate outer diameter of the tire in inches, and 2.0 represents the width of the tire in inches.
ISO/ETRTO Marking
The International Organization for Standardization (ISO) and the European Tyre and Rim Technical Organisation (ETRTO) use a different system. They measure the exact diameter of the bead seat (where the tire sits on the rim), not the outer diameter. They also use millimeters instead of inches. So, a tire that is 50-559 by ISO/ETRTO standards would have a width of 50mm and a bead seat diameter of 559mm.
French Marking
French markings are often found on older road bikes. They use millimeters for width but a unique French system for diameter. For example, a 700C tire is approximately equivalent to a 622mm bead seat diameter in ISO/ETRTO or a 28" tire in inch marking.
Understanding Tire Compatibility
Knowing your tire size is crucial when replacing tires or inner tubes. The diameter of the new tire must match the diameter of the existing one. The width, however, can vary slightly. A wider tire will offer more comfort and grip but might be heavier and slower. A narrower tire, on the other hand, will be lighter and faster but might offer less grip and comfort.
Decoding Other Tire Markings
Apart from size, you might also see other markings on your bike tire. These can include:
-TPI (Threads Per Inch): This refers to the density of the casing fabric. A higher TPI often means a lighter tire with lower rolling resistance but could be more vulnerable to punctures.
- PSI (Pounds per Square Inch): This is the recommended range of air pressure for the tire.
- Directional Arrows: Some tires have a specific direction of rotation for optimal performance and will have arrows indicating this on the sidewall.

Understanding tire sizing can seem complex initially, but once you get the hang of it, it becomes straightforward. Remember, choosing the right tire size for your bike can significantly impact your cycling experience, so take the time to understand what works best for you.
Cycling is an excellent way to maintain fitness, enjoy the outdoors, and even commute. No matter your reason for cycling, maximizing your performance on a bike can make your rides more enjoyable and efficient. Here's how you can achieve this:
1. Understand Your Bike
Before anything else, it's crucial to understand your bike and its components. Every part of your bike, from the frame to the tires, plays a role in how the bike performs. The better you understand these parts and their functions, the better you can manipulate them to enhance your performance.
2. Maintain the Right Posture
Your posture on the bike can significantly affect your performance. A proper cycling posture can help you pedal more efficiently, reduce fatigue, and prevent injuries. Keep your back straight, grip the handlebars in a relaxed manner, and position your knees directly over your feet while pedaling. Your elbows should be slightly bent to absorb shocks from the road.
3. Practice Regular Maintenance
A well-maintained bike performs better and lasts longer. Regular maintenance includes cleaning the bike, lubricating the chain, checking the tire pressure, and getting regular professional check-ups to ensure everything is in working order.
4. Train Consistently
Like any physical activity, consistency is key in cycling. The more you ride, the stronger and more efficient you become. Over time, your endurance will increase, allowing you to ride longer distances at higher speeds.
5. Stay Hydrated and Eat Right
Hydration and nutrition play a crucial role in your cycling performance. Always carry water with you on your rides. For longer rides, consider bringing energy bars or gels to maintain your energy levels.
6. Wear Proper Cycling Gear
Investing in proper cycling gear can also enhance your performance. Padded shorts can make long rides more comfortable, cycling shoes can improve your pedaling efficiency, and a good helmet is essential for safety.
7. Mind the Aerodynamics
The way you position yourself on the bike can affect your speed and energy efficiency. By lowering your body closer to the handlebars, you reduce the wind resistance, allowing you to ride faster with the same amount of energy.
8. Plan Your Rides
Having a clear plan for your rides can help you train more effectively. This includes setting goals for speed and distance, planning your route in advance, and varying your training to include different types of rides.
9. Rest and Recover
Rest is just as important as training. After a hard ride, give your body time to recover. This not only helps prevent injuries but also allows your muscles to grow stronger.
10. Choose the Right Bike
Finally, the type of bike you ride can significantly impact your performance. Different types of bikes are designed for different purposes. A road bike is ideal for speed on paved roads, a mountain bike is best for off-road trails, and a hybrid bike is a good all-rounder.

Trifox offers a selection of high-quality complete bikes that can cater to different cycling needs. Whether you're into road cycling, mountain biking, or triathlons, Trifox has a bike for you. Each bike is designed with attention to detail and built to enhance your cycling performance. Check out their collection [here]
In conclusion, improving your performance on a bike is about understanding how your bike works, maintaining it properly, training consistently, and giving your body what it needs to perform at its best. Happy cycling!

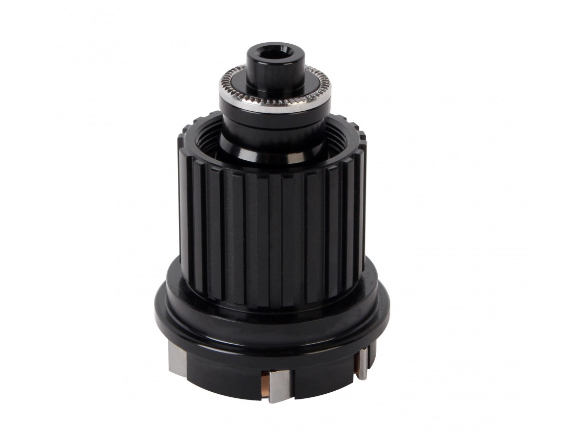
In the world of cycling, having the right equipment is crucial for a smooth and efficient ride. One such essential piece of equipment is the bike hub, which plays a pivotal role in the overall performance of your bicycle. But when it comes to compatibility with different cassettes, things can get a bit tricky, especially if you're using Shimano hubs.
Understanding the Role of the Bike Hub
Before we delve into the compatibility of cassettes and hubs, let's understand what a bike hub does. The hub is the centerpiece of your bike's wheels (front and rear), where the axle is mounted. It allows the wheel to spin freely while keeping it attached to the bike.
Can Other Cassettes Work on Shimano Hubs?
The answer to this question largely depends on the specific model of the Shimano hub and the type of cassette you're trying to use. Generally, most Shimano hubs are compatible with a range of cassettes from various manufacturers. However, it is important to check the specifications of the hub and the cassette to ensure they match.
For instance, a 10-speed Shimano hub will not work with an 11-speed cassette. Similarly, certain brands may design their cassettes to only fit onto their proprietary hubs.
Checking Compatibility
To determine if a particular cassette can work on Shimano hubs, consider the following steps:
1. Check the Speed: The number of speeds (i.e., gears) of the cassette should match that of the hub. A 10-speed cassette will fit a 10-speed hub, and so on.
2. Check the Brand: While Shimano hubs are generally compatible with cassettes from various manufacturers, some brands may have proprietary designs that only fit their hubs.
3. Check the Freehub Body: The freehub body is the part of the hub where the cassette mounts. Shimano uses a specific design for their freehub bodies, so check to ensure the cassette is compatible with this design.

Trifox Bike Hubs
If you're looking for high-quality bike hubs, consider checking out [Trifox Bike Hubs]. Trifox offers a selection of durable and reliable bike hubs designed to enhance your cycling performance. They offer both road and mountain bike hubs, designed to be compatible with a range of cassettes.
In conclusion, while many cassettes can work on Shimano hubs, it's always important to check the specifics to ensure compatibility. Always remember, the right setup can significantly improve your cycling experience, offering you smoother rides and better overall performance
Happy cycling!

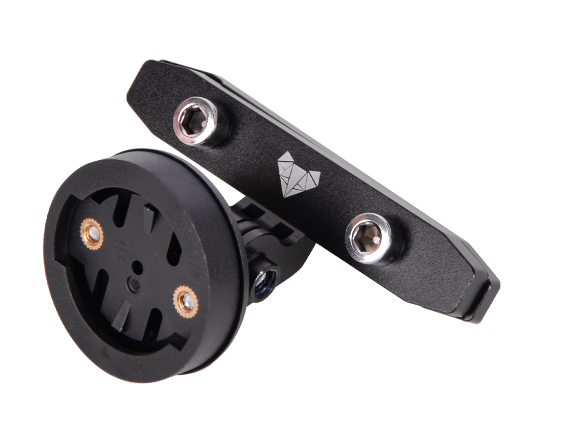
A critical yet often overlooked component of a bicycle is the tire valve. The valve serves as the gateway through which air enters your tires, ensuring they are adequately inflated for optimal performance and safety. However, not all valves are created equal. The length of the valve can significantly affect its compatibility with your bike's wheel.
Understanding Valve Types
Before we dive into determining the right valve length, it is important to understand that there are primarily two types of valves: Presta and Schrader. Presta valves are typically found on high-end bicycles and are thinner and longer. Schrader valves are wider, shorter, and are commonly found on car tires and less expensive bikes.
Determining the Correct Valve Length
When it comes to choosing the correct valve length, the depth of your bike's rim is the primary factor you need to consider. Here's a step-by-step guide:
1. Measure the Rim Depth: Use a ruler or a caliper to measure from the outer edge where the tire sits to the inner edge where the valve will go. This measurement is your rim depth.
2. Add an Allowance: To ensure that the valve protrudes enough from the rim for easy inflation, add an allowance to the rim depth. A good rule of thumb is to add 15mm if you're using a hand pump and 5mm for a track pump.
3. Choose the Valve Length: The total of your rim depth and the added allowance is the minimum valve length you should look for.
Tips for Choosing Bike Tire Valves
Here are some additional tips to keep in mind when choosing bike tire valves:
1. Consider Your Pump: Some pumps may not work well with certain types of valves. Ensure the valve you choose is compatible with your pump.
2. Check for Valve Extensions: If you have deep rims and are struggling to find long enough valves, consider using a valve extender. This accessory screws onto the top of a Presta valve to lengthen it.
3. Don't Go Too Long: While it's important to ensure the valve is long enough to inflate the tire easily, a valve that is too long can be cumbersome and may get damaged more easily.
In conclusion, determining the correct length valve for bike tires involves understanding the type of valve, measuring your rim depth, and adding an allowance for easy inflation. By ensuring you have the right valve length, you'll have a much easier time maintaining the correct tire pressure and enjoying your rides.

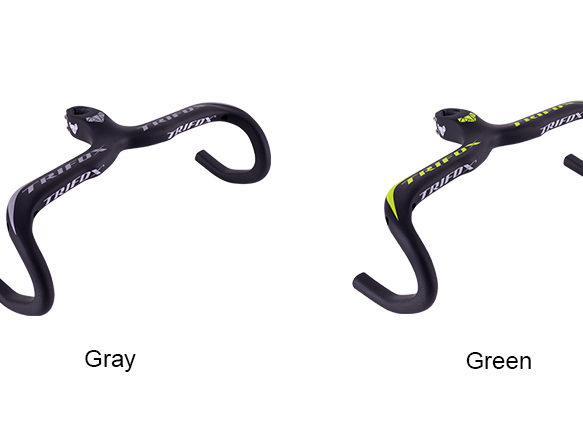
Bike handlebars play a significant role in your cycling experience, affecting your comfort, control, and overall ride quality. Among the various types of handlebars, road bent bars or drop bars are favored by many cyclists for their versatility and aerodynamics.
Understanding Road Bent Bars
Road bent bars or drop bars are characterized by their curved shape, which offers multiple hand positions. They're commonly found on road bikes and are designed for speed and efficiency. The unique design allows riders to switch between an upright position for relaxed riding and a lower position for improved aerodynamics.
Fitting a Road Bent Bar
Before you can enjoy the benefits of a road bent bar, you need to ensure it's fitted correctly. Here's a step-by-step guide:
1. Choose the Right Size: Handlebars come in various widths and depths. Choose a size that aligns with your shoulder width for optimal comfort and control.
2. Position the Handlebar: The angle at which the handlebar is positioned can affect your comfort and control. A common starting point is to align the bottom of the drops parallel to the ground, but this can be adjusted to personal preference.
3. Secure the Handlebar: Once positioned, secure the handlebar using the stem clamp. Ensure it's tight enough to hold the handlebar securely but not so tight that it damages the bar.
4. Attach the Controls: Finally, attach the brake levers and shifters. These should be positioned so they can be easily reached from both the hoods and the drops.
Adjusting a Road Bent Bar
Once your road bent bar is fitted, you may need to make adjustments to optimize comfort:
1. Adjust the Angle: If you find the default angle uncomfortable, try adjusting it slightly. A small change can make a big difference to your comfort.
2. Adjust the Controls: If reaching the brake levers or shifters is uncomfortable, they may need to be repositioned. This should be done gradually, making small adjustments and testing the feel each time.
3. Consider a Professional Fit: If you're struggling to find a comfortable setup, consider getting a professional bike fit. They can assess your riding style and body shape to determine the optimal setup.
In conclusion, fitting and adjusting a road bent bar can significantly improve your cycling experience. By ensuring the handlebar is the correct size, positioned correctly, and adjusted for comfort, you can enjoy the benefits of a road bent bar and enhance your rides.
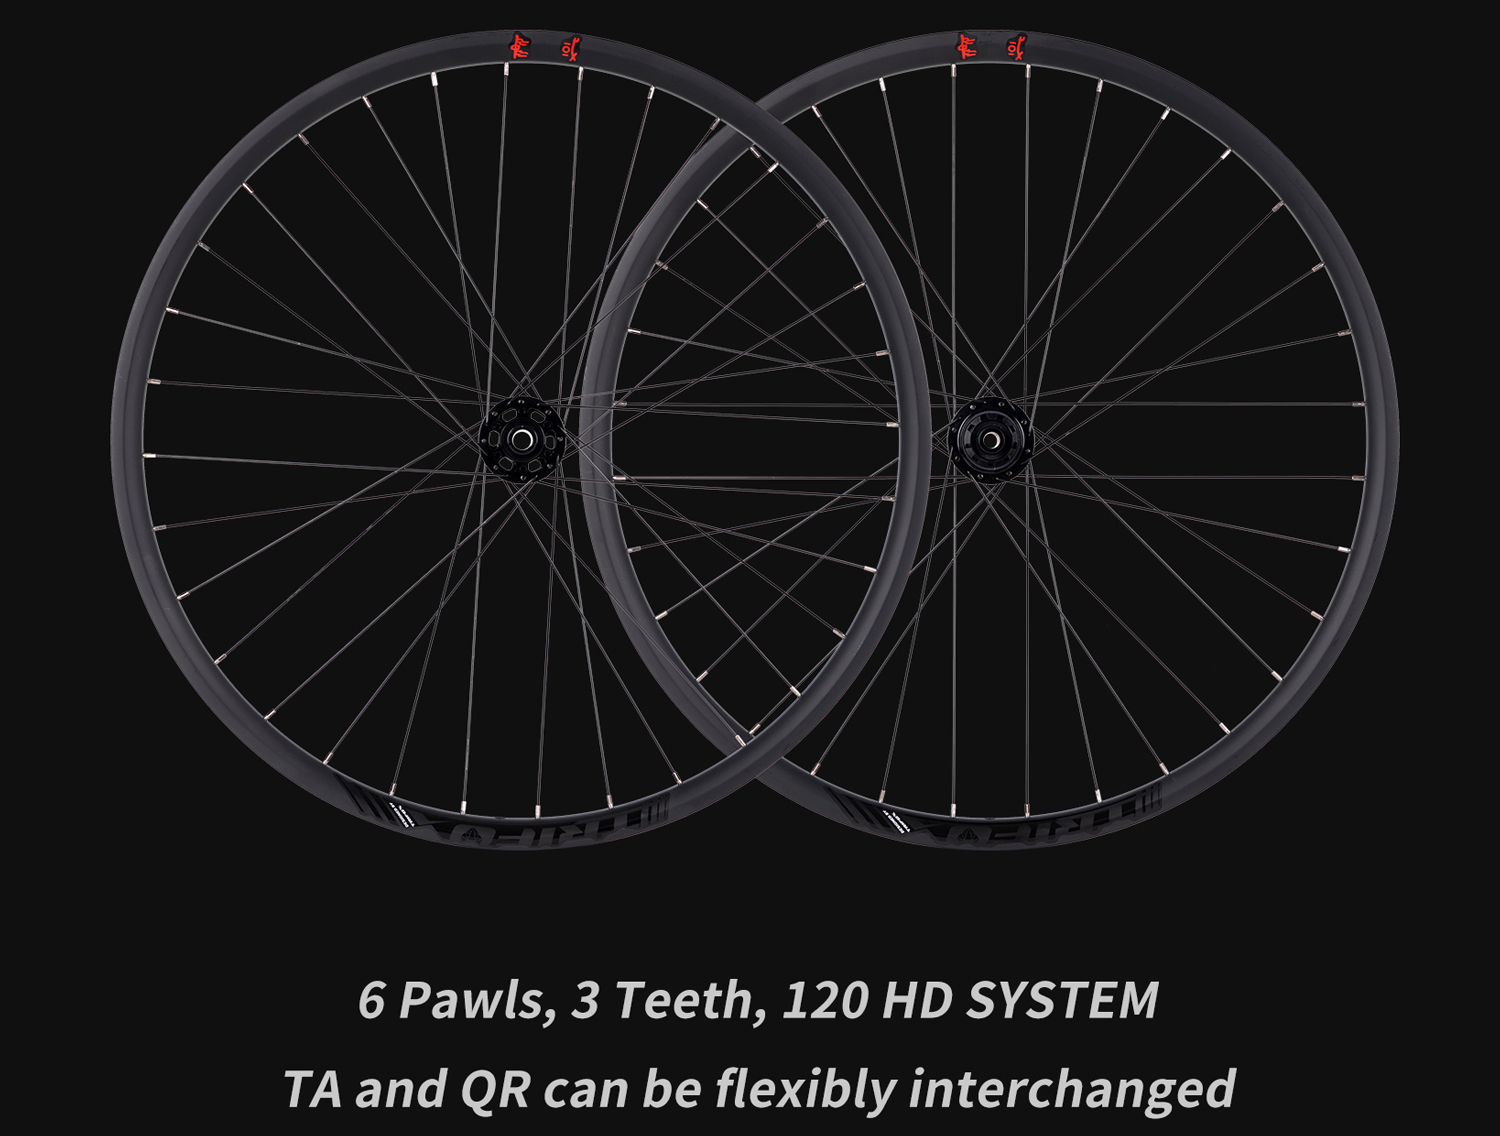
When it comes to enhancing your cycling performance, the type of wheels you choose can make a significant difference. One of the popular options among both professional and amateur cyclists are deep section wheels. This guide will walk you through how to select and use deep section wheels for your bicycle.
Understanding Deep Section Wheels
Deep section wheels are characterized by their larger rim depth, typically around 40mm or more. The deeper rim provides improved aerodynamics, allowing for faster speeds, particularly on flat surfaces. They're often made from carbon fiber to provide a balance between weight and strength.
Choosing the Right Deep Section Wheels
The process of choosing deep section wheels depends on several factors:
1. Riding Conditions: If you frequently ride in windy conditions, consider a shallower rim as deeper rims can catch the wind and affect stability. For calm, flat routes, a deeper rim can offer speed benefits.
2. Purpose: Are you racing, or is it for day-to-day use? For racing, especially on flat courses, deep section wheels can provide an edge. However, for everyday use, a shallower rim might be more versatile.
3. Weight: Lighter wheels are generally better, but not at the expense of durability. Carbon fiber deep section wheels like those offered by Trifox Bike provide a good balance.
4. Budget: As with any bike component, there's a wide range of prices. Determine what you're willing to spend before shopping around.

Using Deep Section Wheels
Once you've chosen your deep section wheels, it's important to use them correctly:
1. Installation: Ensure the wheels are properly installed on your bike. Incorrect installation can lead to performance issues and potential accidents.
2. Maintenance: Regularly check your wheels for signs of wear or damage. This includes checking the brake surface for wear, spokes for tension, and the wheel for true.
3. Riding Technique: Deep section wheels can feel different to ride, especially in windy conditions. Practice riding with them in various conditions to get a feel for how they handle.
4. Tire Pressure: Tire pressure can affect performance. Experiment with different pressures to find what works best for you and your new wheels.
In conclusion, deep section wheels can be a fantastic addition to your bicycle, offering potential speed benefits and an aggressive look. However, it's essential to choose the right wheels for your specific needs and use them correctly. With the right approach, you can maximize the benefits of these wheels and enjoy a smoother, faster ride.
Bicycles, one of the most versatile means of transport, come in various shapes and sizes. Each type designed with a specific purpose in mind, whether it's for commuting, racing, or off-road adventures. Understanding and classifying these bicycles can help you make an informed decision when purchasing a bike that suits your needs. Here's a guide to help you understand and classify different types of bicycles.
Road Bikes
As the name implies, road bikes are designed for riding on paved roads. They are usually lightweight with narrow tires and drop handlebars to allow for speed and efficiency. Within this category, there are subcategories like racing bikes, endurance bikes, and touring bikes. Racing bikes are built for speed with a focus on lightweight construction and aerodynamics. Endurance bikes prioritize comfort over long distances, while touring bikes are designed for carrying loads over long distances.
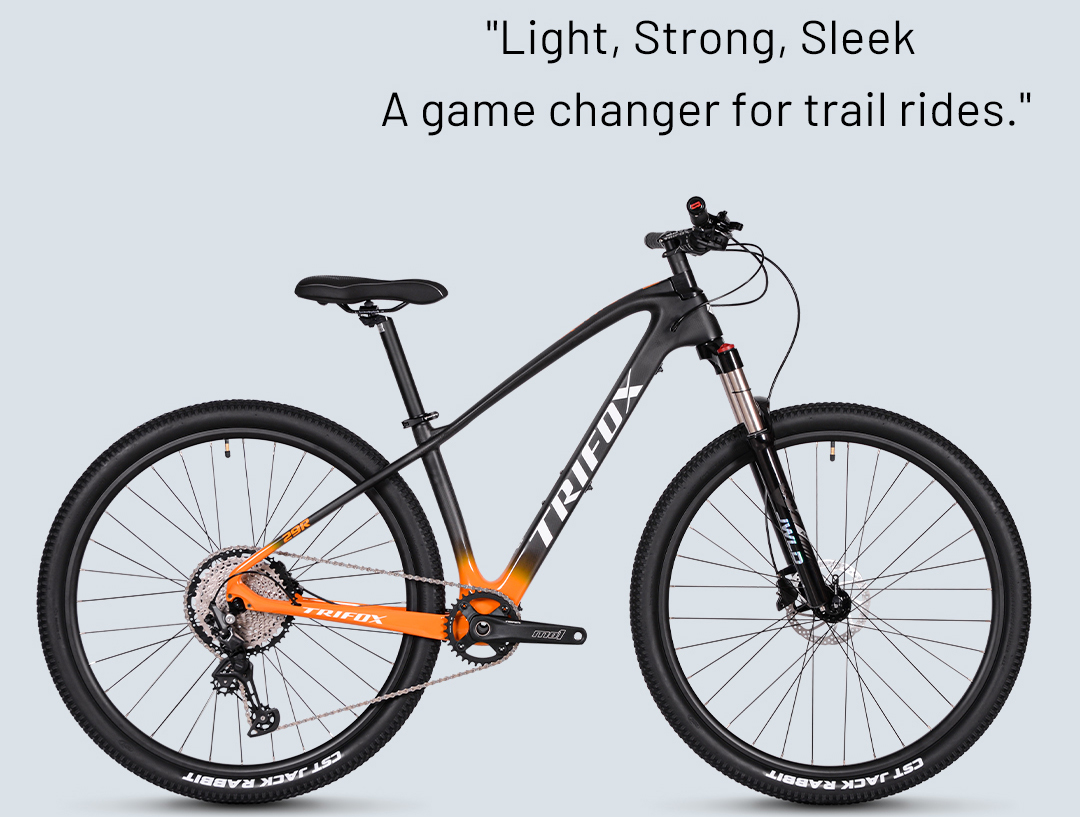
Mountain Bikes
Mountain bikes are built for off-road trails. They are characterized by wide, knobby tires for traction, and they have a suspension system to absorb shocks from rough terrains. There are various types of mountain bikes, including cross-country, trail, enduro, and downhill bikes, each designed for specific types of off-road riding.
Hybrid Bikes
Hybrid bikes combine the characteristics of both road and mountain bikes. They are versatile bikes that you can use for commuting, light trail riding, or casual cycling. They typically have flat handlebars for comfortable upright riding position and wider tires than road bikes for better stability and comfort.
Folding Bikes
Folding bikes, as the name suggests, can be folded for easy storage and transport. They are great for city dwellers who have limited storage space or for those who need to take their bike on public transportation.
Women's Bikes
Women's bikes are designed with the average woman's anatomy in mind. They usually have shorter top tubes and taller head tubes, which can provide a more comfortable riding position for many women. The size of the bike is also important, and for a woman who is 1.65m tall, a small to medium-sized bike would typically be suitable.
Bike Brands
There are numerous bike manufacturers out there, each with their own strengths. For instance, Trifox is a reputable brand known for their high-quality bikes. Whether you're looking for a road bike, mountain bike, or something else, Trifox has a range of options to choose from. You can explore their offerings on official store.

In conclusion, understanding and classifying bicycles can significantly enhance your cycling experience, whether you're a seasoned professional or a beginner. By determining what you want to get out of your bike, you can find the type that best suits your needs and preferences.

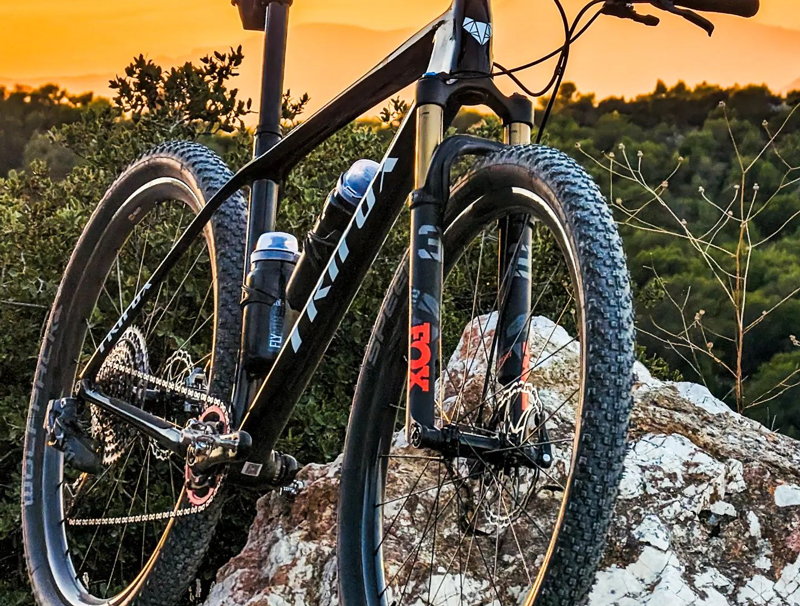
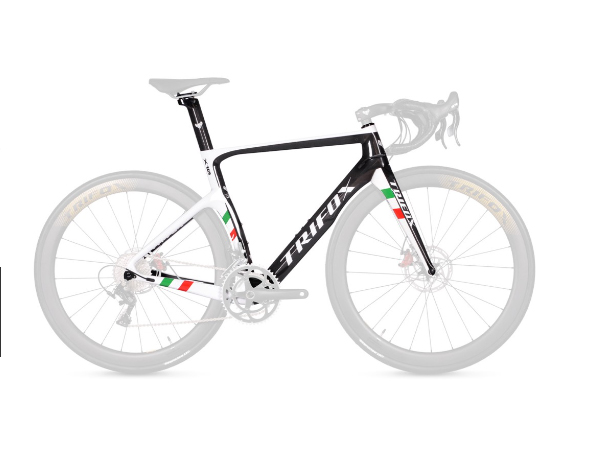
A road bike's performance, comfort, and handling are largely influenced by its frame. Therefore, choosing the right road bike frame is crucial for a satisfying and enjoyable ride.
Understanding Road Bike Frames
Road bike frames are the backbone of your bicycle. They not only support the rider's weight but also provide the structural integrity needed for the bike's components. Carbon fiber is a popular material for road bike frames due to its lightweight and high strength. It absorbs road vibrations, providing a smoother ride compared to aluminum or steel frames. A great example of a carbon road bike frame is offered by Trifox, known for its high-quality and performance-oriented bike frames.
Step 1: Evaluate the Material
The first step in comparing road bike frames is to look at the material. Carbon fiber frames are light, stiff, and absorb vibrations well, making them an excellent choice for serious road cyclists.
Step 2: Check the Geometry
The geometry of a bike frame affects how the bike handles and fits the rider. Racing frames usually have steep angles for quick handling, while endurance frames have more relaxed angles for comfort on long rides. Make sure to choose a frame that suits your riding style.
Step 3: Consider the Size
Size is another crucial factor. A frame that's too large or small can make riding uncomfortable and inefficient. Most manufacturers provide size charts based on rider height, but it's also important to consider other factors like inseam length and arm length.
Step 4: Look at the Design
Design features like aerodynamic shaping and integrated cable routing can also make a difference in performance. Some frames are designed with thin, flat sections to flex and absorb road shock for a smoother ride.
Step 5: Compare the Price
Finally, consider your budget. While carbon frames are generally more expensive than aluminum or steel, they offer superior performance and comfort. It's worth investing in a high-quality frame that will last you many years of riding.
Conclusion
Choosing the right road bike frame involves careful comparison and consideration of various factors. Remember, the perfect frame is one that suits your riding style, fits you well, and falls within your budget. By taking the time to compare different frames, you can find the perfect one for your needs and enjoy many happy miles on the road. So you can refer to the Trifox Carbon fiber road bike.


