



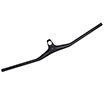
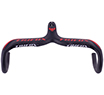
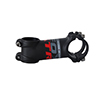
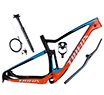
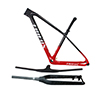
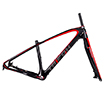





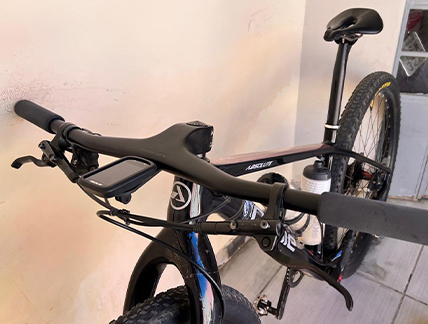
Modern XC racing demands a bike that feels like an extension of your body. Every input matters, every delay costs time, and every gram influences how you flow through a root garden or launch out of a pedal kicker. For years, riders chased these gains through separate high‑end bars and stems. Today, the next step has arrived: the fully integrated carbon cockpit. Here’s why more XC racers are making the switch and why the Trifox RHB200 represents a compelling case for your next build.
The Uncompromised Cockpit
Traditional bar‑and‑stem assemblies work, but they come with inherent compromises. The interface between the two components introduces a potential flex point. When you wrench the bike into a rocky switchback or power over a punchy climb, that interface can absorb energy that should be going into the trail.
An integrated carbon mtb handlebar eliminates this weak link. By molding the bar and stem as a single piece of continuous carbon fiber, manufacturers create a structure that can be tuned for exceptional stiffness without a corresponding weight penalty. This is the engineering reality behind the current trend: a one‑piece construction "increases stiffness by 20% compared to a previous bar‑and‑stem combination". What that means on the trail is sharper steering, quicker feedback, and a front end that goes precisely where you direct it, no lag, no vagueness.
For xc handlebars, this heightened precision is transformative. Modern XC courses are no longer smooth fire roads. They include technical rock gardens, off‑camber braking bumps, and steep chutes. Riders report that a truly stiff integrated front end "allows you to feel the trail more directly" and "builds confidence in corners." That confidence translates directly into speed.
Weight, Aerodynamics, and the Clean Cockpit Advantage
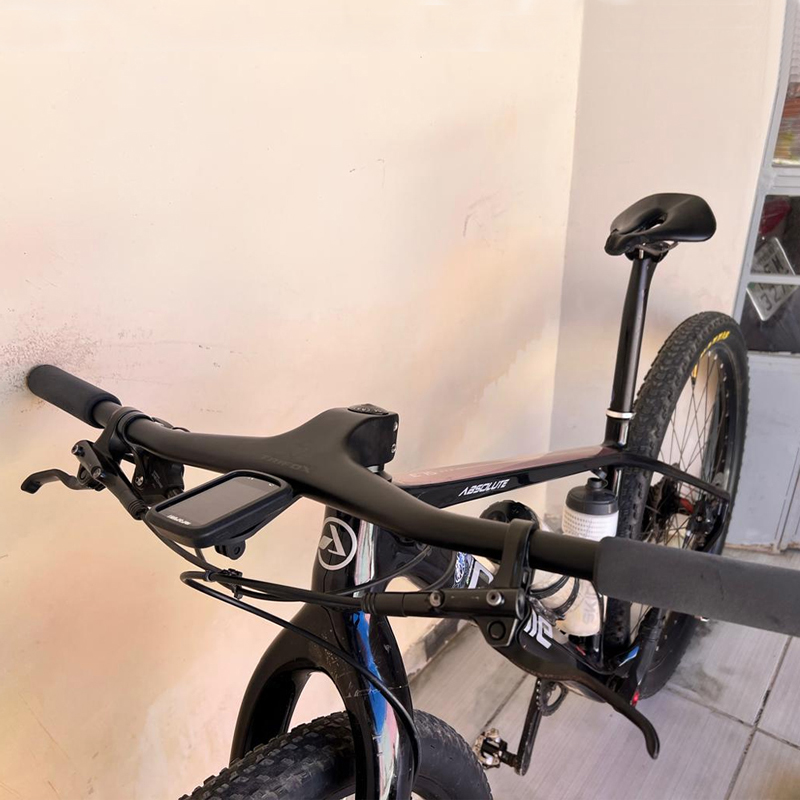
The weight savings of a well‑designed integrated bar are significant. By removing the material needed for overlapping clamps and a separate stem body, the RHB200 tips the scales at just 280 grams—impressively light for a full‑size cockpit. Riders upgrading from a mid‑range alloy bar and stem often save 50–100 grams right at the front of the bike. That’s weight that the fork doesn’t have to loft over obstacles and weight that your shoulders don’t have to manage over a multi‑lap race.
Integrated cockpits also clean up the front of the bike. Without a bulky stem faceplate protruding, the frontal area is reduced. This aerodynamic benefit may be marginal on a mountain bike, but in the wind‑exposed sections of a rolling XC course or during a crosswind, the reduction in turbulence is a free speed advantage. As one reviewer of integrated cockpits notes, integrated designs allow the bar and stem to act as "an aerodynamic extension of the frame, channeling airflow to improve efficiency and reduce resistance".
More practically, a clean front end means simpler mounting for lights, computers, and action cameras, with fewer cables snagging on brush or your gloves during a quick maneuver.
Feedback, Line Choice, and the XC Racing Advantage
Perhaps the most significant advantage of a high‑quality xc handlebars is the improvement in trail feedback. Riders transitioning from an older alloy setup often describe the sensation as "a direct pipeline to the trail." The one‑piece carbon construction transmits subtle changes in traction and terrain without the damping or deadening that can occur at the bar‑stem interface.
This feedback is critical for maintaining traction on loose climbs and for precisely placing the front wheel through rock gardens. One reviewer of a similar integrated bar noted that "it adequately maintains the same stiffness" as top‑tier aftermarket bars, while another described the upgrade as "completely exceeding expectations" with a "super lightweight and stiff" feel that made the bike feel "more alive".
For the serious racer, that sensation of being connected directly to the trail is worth the upgrade alone. A bar that keeps you feeling fresh and confident lap after lap is a bar that helps you place on the podium.
The RHB200: Integrated Performance for the Discerning Racer
The Trifox RHB200 is built for XC and aggressive trail use. Its T800 carbon fiber construction strikes the ideal balance between race‑ready stiffness and long‑ride compliance. The ‑17° stem rise and 9° backsweep place the rider in an efficient, forward‑leaning position that optimizes weight distribution for climbing and descending. This geometry is specifically dialed for riders who want to lay down power efficiently while maintaining the ability to maneuver through technical sections.
Available stem lengths from 80mm to 110mm and a cuttable 800mm width allow for precise fitment, accommodating a wide range of body types and riding styles. Weighing just 280g and constructed with a premium 3K carbon weave, the RHB200 is a direct competitor to integrated cockpits priced two or three times higher.
Riders who have installed the RHB200 report that the upgrade is immediately noticeable on the first ride: a lighter, stiffer, more confident front end. For the XC enthusiast who has already optimized wheels, tires, and suspension, the integrated cockpit is the next logical frontier. It’s a single upgrade that enhances control, reduces fatigue, and sharpens your connection to the trail—a combination that serious racers shouldn’t ignore.
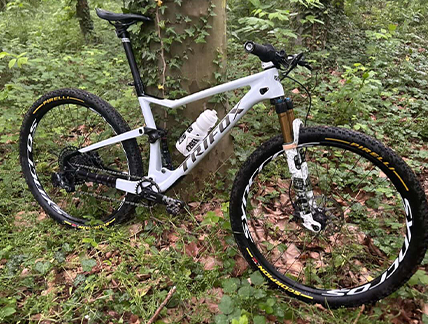
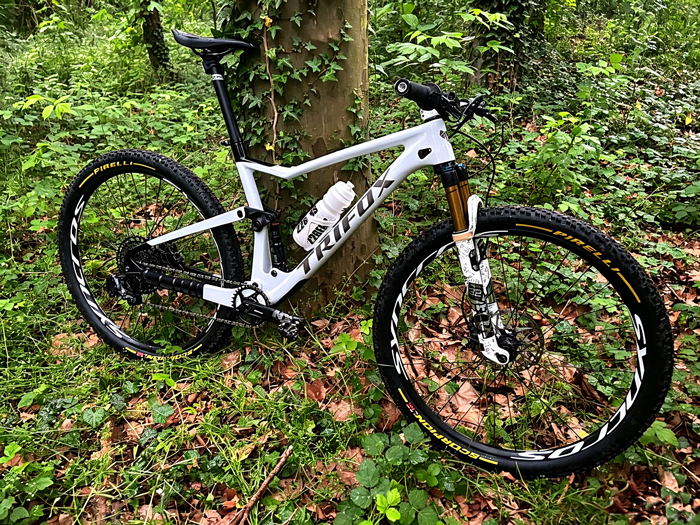
You have a budget in hand and a long list of components. The classic dilemma: should you invest first in the frame, or pour your money into a top‑tier rear shock? Choose wrong, and you risk wasted budget or a bike that never feels balanced. The answer is clearer than you might think: frame first, shock second. The frame is the foundation; the shock adds the finishing touch. Frame geometry defines the bike‘s character—XC efficiency, trail composure, or enduro aggression—while the shock simply needs to match that platform. If your budget allows a quality frame to start, the disc brake bike frame MFM100 is an excellent starting point, built with the engineering priorities that align with your riding goals.
Why Frame First?
A rear shock is not a universal component. Its critical dimensions—eye‑to‑eye length and stroke—are dictated entirely by the frame. Choose a frame first, and you immediately know which shock sizes you need. Spec a shock before the frame and you risk incompatibility, wasted money, or a shock that simply won’t fit. The MFM100 simplifies this by defining clear shock parameters (165mm eye‑to‑eye, 40/45mm stroke), so you can focus on tuning rather than guesswork.
Air vs. Coil: The Decision After the Frame
Once the frame is locked in, choosing the rear shock becomes a focused decision. Air shocks are the standard for XC and light trail use. They are lightweight, tunable with a simple pump, and suit varied terrain. Coil shocks offer superior small‑bump sensitivity and traction, but add weight. With the MFM100’s efficient, climb‑oriented kinematics, an air shock is the recommended match for most riders—keeping weight low while preserving pedaling efficiency.
MFM100: A Smart Foundation
The MFM100 is a T800 carbon full‑suspension frame featuring Boost 148x12mm rear spacing, a threaded BSA bottom bracket, and a proven four‑bar linkage. For this frame, the recommended shock dimensions are 165mm eye‑to‑eye and 40mm or 45mm stroke. For XC and marathon use, consider a Rockshox SIDLuxe or Fox Float DPS. For more aggressive trail riding, the Fox Float X or Rockshox Super Deluxe provide additional support and control without overwhelming the frame‘s intended travel range.
Room for Taller Riders: The 19‑Inch Frame Option
The MFM100 is available in multiple sizes, including a 19 inch bike frame (size L). This larger geometry offers a roomy reach and taller stack, accommodating riders from 180–195cm. Choosing the correct size first ensures your future shock upgrades won’t be hindered by fitment issues—investing in the right frame size upfront saves costly adjustments later.
Smart Building Priorities: A Quick Checklist
1. Choose the frame that matches your terrain and fit (e.g., MFM100).
2. Confirm shock dimensions from the frame spec (165 x 40/45mm).
3. Select shock type (air for XC/trail, coil for heavier descending).
4. Check mounting hardware (bushings, bolts) to fit the frame.
5. Set sag and rebound based on rider weight and trail conditions.
By leading with the frame, you avoid compatibility traps and build a bike that performs as a cohesive system. The MFM100 provides a reliable, modern disc‑brake platform that makes the rest of your build straightforward. Start with the foundation—everything else will follow.
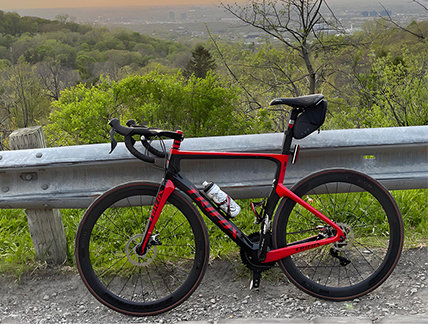
Carbon fiber frames have evolved dramatically over the past decade. Today, a truly modern carbon road bike is defined by three key standards: disc brakes, thru-axles, and tapered steerer tubes. The Trifox X10 carbon road bike frame embraces all three, delivering the performance, safety, and handling that today‘s riders expect. Here’s why each standard matters and how they work together on the X10.

Disc Brakes: All-Weather Stopping Power
The Trifox X10 is a dedicated disc brake frame, designed specifically for flat-mount calipers. Unlike rim brakes, disc brakes provide consistent stopping power regardless of weather conditions—wet roads, steep descents, or sudden obstacles. The flat-mount standard ensures a clean, integrated look with the frame’s aerodynamics. Disc brakes also allow wider tire clearance (the X10 accepts 700x25C tires, with compatibility for 28C), offering more comfort and grip without sacrificing the frame’s race-ready pedigree.
Thru-Axles: Stiffness and Precision
The X10 features 12x100mm front and 12x142mm rear thru-axles. Compared to traditional quick-releases, thru-axles thread directly into the frame, creating a much stiffer and more secure wheel-to-frame interface. This stiffness translates into sharper cornering, better tracking under hard braking, and zero disc rotor rub—a common nuisance on QR disc setups. The result is a bike that goes exactly where you point it, with no flex or hesitation. Thru-axles also make wheel installation consistent and repeatable, eliminating guesswork.
Tapered Steerer: Steering Confidence
The X10 employs a tapered 1-1/8” to 1-1/2” steerer tube. This wider lower diameter creates a dramatically stiffer interface between the fork and head tube compared to straight 1-1/8” steerers. The increased stiffness translates to more precise steering, less flex under hard cornering, and greater confidence on fast descents. For a carbon road bike frame disc brake, this is non‑negotiable for confident handling in all conditions.
Complete Integration: A Frame Built for Today
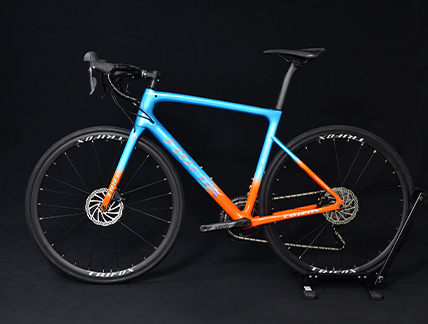
The X10 doesn’t stop at these three core features. It also includes full internal cable routing for a clean, aerodynamic profile, a threaded BSA BB68 bottom bracket for creak‑free reliability and easy maintenance, and progressive geometry across sizes from XS to XL. Crafted from T800 carbon fiber, it balances lightweight performance with the durability needed for all‑round use, making it a genuine contender for the best chinese aero frame value in its class. When combined with disc brakes, thru-axles, and a tapered steerer, the X10 delivers a complete platform that’s ready for fast group rides, gran fondos, and everything in between.
Walk into any bike shop or scroll through online listings, and you'll see road bikes divided into two distinct camps: race and endurance. One promises speed and aggression. The other promises comfort and distance. For years, the choice seemed simple—buy a race bike if you want to go fast, buy an endurance bike if you want to go far. But modern carbon engineering has blurred those lines. Today, many of the best entry level road bike options are proving that you don't have to choose between performance and comfort. Here's how race and endurance geometries differ—and why a balanced carbon frame might be the smartest choice for your body.
The Numbers That Matter: Stack and Reach
To understand bike geometry, you need to understand two critical measurements: stack and reach. Stack measures the vertical distance from the center of the bottom bracket to the midpoint of the top of the head tube. In plain English, stack determines how high or low your handlebars sit relative to your saddle. A taller stack puts you in a more upright position, reducing strain on your back and shoulders. A shorter stack lowers your torso, improving aerodynamics but requiring greater flexibility. Reach is the horizontal distance from the bottom bracket to the head tube. It determines how far you must stretch to reach the handlebars. These two numbers form the foundation of every bike's fit.
Race geometry typically features a lower stack and longer reach. This positions the rider in an aggressive, forward-leaning posture designed for cutting through wind and transferring maximum power to the pedals. Endurance geometry, by contrast, uses a taller stack and shorter reach, creating a more relaxed, upright position that reduces fatigue over long hours in the saddle.
What Race Geometry Feels Like on the Road
A pure race bike is engineered for one thing: speed. The frame uses a steeper head tube angle (often 73° or more), which delivers quick, precise steering—ideal for fast cornering and rapid direction changes in criteriums or spirited group rides. The seat tube angle is also steeper, typically around 74°, positioning your hips directly over the bottom bracket for efficient power transfer—a hallmark of climbing and racing-oriented geometry. A shorter wheelbase (the distance between the front and rear axles) makes the bike feel responsive and eager to change direction. The result is a bike that feels alive under power, accelerates with urgency, and carves through corners like a scalpel. However, this same responsive handling can feel twitchy and demanding for riders who aren't accustomed to aggressive positions. Riders with limited flexibility or lower back issues may find race geometry uncomfortable on longer rides, especially in the drops. The stretched-out position can cause hand numbness, shoulder tension, and lower back fatigue. Pros have the strength and flexibility to maintain these extreme postures for days on end. For the rest of us, a full-on race bike might make your rides worse, not better.
What Endurance Geometry Prioritizes Instead
Endurance bikes flip the priority list. Comfort comes first. The taller stack shortens the vertical distance from saddle to handlebars, allowing you to ride with a more neutral spine angle. The shorter reach brings the bars closer, reducing the need to stretch forward. Endurance geometry also typically includes a longer wheelbase, which enhances stability at speed and creates a more planted, confidence-inspiring feel on descents. Tire clearance is another hallmark of endurance design. Where race bikes often cap out at 25-28mm tires, many endurance frames accept rubber up to 32-35mm. Wider tires at lower pressures provide significantly more comfort and grip without sacrificing speed. Today's endurance bikes still climb and accelerate quickly, but the geometry is more forgiving, with a slightly taller stack and shorter reach that reduce strain on your back and shoulders. They're designed for real roads—potholes, chipseal, expansion joints—not just smooth tarmac. That makes them ideal for sportives, gran fondos, and the kind of mixed-surface riding that most cyclists actually do.
The Modern Middle Ground: When One Bike Does Both
The good news is that the line between race and endurance has blurred dramatically in recent years. Modern race bikes have become more stable and predictable at high speeds, largely thanks to lessons learned from gravel geometry. Longer wheelbases, lower bottom brackets, and wider tire clearances now make them far more versatile than their 2015 equivalents. And endurance bikes have shed their "slow and comfortable" reputation. They now feature race-proven designs with minor geometry adjustments, delivering responsive handling without the extreme positioning. A well-balanced carbon frame offers the sharp handling and efficient pedaling position of a race bike, making it a joy to push hard on climbs and through corners. Yet, it tempers this with a wheelbase and stack height that provide real-world stability and comfort for longer days in the saddle. The stack-to-reach ratio tells the comfort story. A ratio of around 1.42, for example, offers a position that's performance-oriented yet not impossibly low—allowing for a moderately aggressive drop without requiring extreme flexibility, bridging the gap between an all-out race bike and a relaxed endurance machine. This is the sweet spot for most riders: responsive enough for spirited group rides and racing, yet manageable enough for all-day adventures.
Who Is a Race Bike For?
A pure race bike is the right choice if you compete in road races or criteriums, prioritize aerodynamics and power transfer above all else, have above-average flexibility and core strength, are comfortable with a very low, stretched-out position, and don't typically ride more than 3-4 hours at a time. Race bikes are scalpel-sharp tools for a specific job: going fast. If that describes you, a race-focused frame will reward you.
Who Is an Endurance Bike For?
An endurance or all-road bike is the better fit if you ride for enjoyment rather than competition, frequently cover 4+ hours in the saddle, have experienced back, neck, or wrist discomfort on long rides, want to run wider tires for comfort and stability, or are newer to road cycling and still developing flexibility. Endurance bikes are designed for the real world—for the rider who wants to finish a century feeling good enough to do it again the next day. A study on bike fit and comfort found that many "serious" road cyclists were ruining their experience by forcing themselves into ultra-aggressive positions that their bodies weren't ready for. The easiest way to make yourself faster for longer is to be more comfortable. If you can't get comfortable on a bike and stay that way on the longest of rides, it's money wasted—no matter how fast it looks on paper.
Meet the Trifox SF-TA 2.0: A Carbon Road Bike That Bridges the Gap
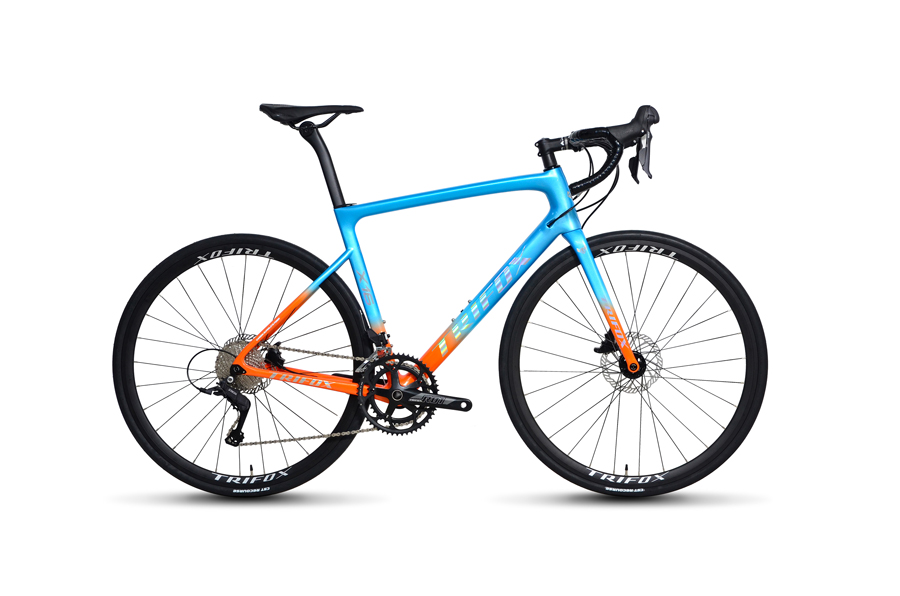
The Trifox SF-TA 2.0 is built around a T800 Toray carbon fiber frame, delivering a lightweight chassis (complete bike weight around 8.6kg/19 lbs) that feels responsive and efficient under power. The frame features modern standards: a tapered head tube for precise steering, flat-mount disc brakes for superior stopping power, and 12mm thru-axles for a stiff, secure wheel interface. The geometry is neither extreme race nor relaxed endurance. Instead, it's a highly capable all-rounder that satisfies the sportive rider, the club racer, and the enthusiast seeking one bike to do it all. The S-Ride 2x11-speed groupset provides reliable shifting, and the integrated hydraulic disc brakes offer confident, modulated braking in all conditions. The bike rolls on a quality aluminum wheelset with 40mm deep rims, and finishing kit like the carbon seatpost and alloy bars completes a thoughtful, performance-oriented build.
Making Your Final Choice
The bike industry has trained us to believe that "race" is better than "endurance"—that more aggressive is always more serious. That's marketing, not engineering. The right bike is the one that fits your body, matches your flexibility, and keeps you comfortable hour after hour. For the majority of riders—including many who consider themselves serious cyclists—a modern balanced geometry or well-designed endurance bike is the smarter choice. It will make you faster for longer because you'll actually want to stay in the saddle. The Trifox SF-TA 2.0 exemplifies this new paradigm: a genuine carbon fiber road bike with modern features, quality components, and a geometry that doesn't force you to choose between speed and comfort. If you're seeking an entry level road bike that offers real carbon performance without breaking the bank, or a best budget road bike that punches well above its price class, the SF-TA 2.0 is a compelling choice. Test ride. Pay attention to how your body feels after two hours. And remember: the fastest bike is the one you actually want to ride.
For years, mountain bikers believed you had to choose: an efficient climbing bike or a confident descending bike. A short-travel XC race machine would dance up climbs but leave you white-knuckled on steeps, while a long-travel bruiser could plow through anything but felt like pedaling a couch uphill. The compromise seemed inevitable — until modern carbon full‑suspension engineering changed the rules.
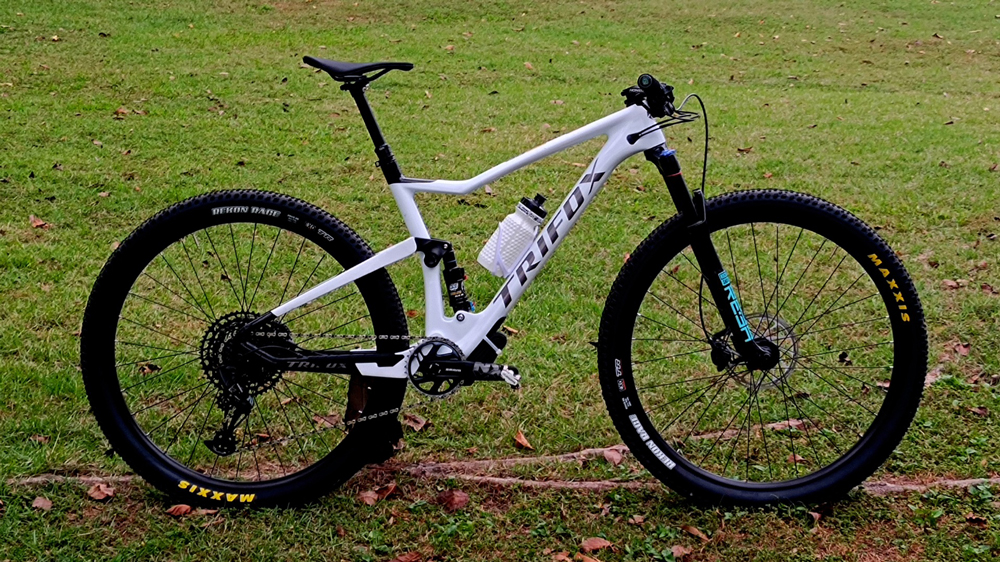
The Trifox MFM100 frameset is designed to deliver the best of both worlds. Whether you‘re chasing a podium in an XC race or enjoying an all‑day trail adventure, this T800 carbon platform proves you can have climbing efficiency and descending confidence in one bike.
Geometry: The Foundation of Versatility
A frame’s geometry determines how it responds to rider input. The MFM100 uses a carefully balanced 68.5° head tube angle and 74.7° seat tube angle — numbers that sit right in the sweet spot between XC urgency and trail stability.
The slightly slacker head angle (compared to traditional XC bikes) provides confidence on descents, keeping the front wheel planted and stable at speed. Meanwhile, the steeper effective seat tube angle places the rider directly over the bottom bracket for efficient power transfer on climbs. This combination creates a bike that climbs with authority and descends with composure — no compromises needed.
For riders in the market for a medium bike frame, the MFM100’s M size (17.5“) offers a 440mm seat tube and a generous 470.2mm reach, providing a spacious yet planted cockpit for riders from 170‑185cm. The proportional geometry across all four sizes (XS, S, M, L) ensures every rider gets the same balanced handling characteristics.
Suspension Kinematics: The Science of Simultaneous Efficiency
The real magic happens in the rear suspension. The MFM100 employs a Horst‑link four‑bar linkage, a proven design that separates pedaling forces from bump forces. The key is the anti-squat curve — a measure of how the suspension resists compressing under pedaling loads.
At the sag point (where the bike sits with a rider on board), the anti-squat is tuned high enough to resist pedal bob, keeping the bike stable and efficient during seated climbing. But deeper in the travel, the anti-squat tapers off, allowing the suspension to absorb impacts without harshness. Meanwhile, the anti-rise curve (which affects suspension behavior under braking) is tuned to keep the rear wheel active and glued to the trail even when you‘re grabbing anchors on a steep chute.
This sophisticated kinematics tuning is paired with a Trunnion‑mounted rear shock — a design that reduces friction and allows for a more linear, predictable suspension feel. The Trunnion mount eliminates long eyelets, saving weight and enabling cleaner frame lines, while improving small‑bump sensitivity for better traction on loose or choppy terrain.
Together, these design elements create a bike that climbs with the urgency of a hardtail (no wasted energy from pedal-induced bob) yet descends with the plushness and control of a bike with much more travel.
Carbon Construction: Where Stiffness Meets Compliance
Carbon fiber’s anisotropic nature is the final piece of the puzzle. Unlike aluminum, which has uniform stiffness in all directions, carbon allows engineers to orient fibers to be stiff exactly where needed and compliant exactly where desired.
In the MFM100’s T800 carbon layup, high‑modulus fibers are oriented along the downtube and chainstays to resist pedaling forces and prevent wasteful flex. Yet the same structure allows controlled flex in the seatstays, absorbing rear‑wheel impacts and reducing vibration transmitted to the rider. This selective stiffness is the reason a carbon full-suspension frame can feel both rigid under power and forgiving over rough ground.
The result is a frame that weighs just 2,235g (size M, including hardware) — impressively light for a full‑suspension chassis — yet provides the lateral rigidity needed for precise cornering and the vertical compliance that keeps you fresh hour after hour.
Boost Spacing and Modern Standards
The MFM100 fully embraces modern mountain bike standards. Boost 148x12mm rear spacing (with a 15x110mm fork interface) widens the hub flanges, creating a stiffer, stronger rear wheel that tracks more accurately through corners and resists flex under hard pedaling. Internal cable routing keeps the frame clean and protects hoses from trail debris.
Real‑World Rider Feedback
Riders who have built up the MFM100 consistently praise its balanced character. One owner noted the bike is “very fast and rigid … the suspension behaves very well, absorbing small irregularities in the terrain and it does not rock anything at all.” Another described it as “very reactive when you hit it with acceleration … the force you apply to the pedals goes directly to the wheels.” On descents, users report that the bike “tracks straight on steep, rocky runs” and stays composed under hard hits. This is the combination that makes a frame truly versatile: efficient power transfer for climbs and predictable, planted stability for descents.
Value: Premium Performance Without the Premium Price
Historically, a full‑carbon, full‑suspension frame with this level of engineering cost $2,000‑$3,000. The MFM100 disrupts that paradigm entirely. At just $899 (frequently on sale at $699‑$789 for certain sizes), it is a genuine best carbon frameset under 1000 — a full modern‑geometry, T800 carbon, Boost‑spaced chassis at a price normally reserved for high‑end aluminum frames.
To achieve this value, Trifox uses a direct‑to‑consumer model, eliminating retail markups. The result is a frame that punches well above its price class, offering the kind of balance between climbing and descending that typically requires spending two or three times as much.
Who Is This Frame For?
The MFM100 is the ideal platform for:
- Cross‑country racers who want efficient pedaling on climbs without sacrificing control on technical descents.
- Trail riders who cover varied terrain — climbs, descents, flow trails, and chunky sections — all in a single ride.
- Riders upgrading from an entry‑level hardtail, seeking the comfort and control of full suspension without a five‑figure investment.
- Value‑conscious builders who want a modern, capable, lightweight full‑suspension platform that won’t break the bank.
You no longer have to choose between a climbing bike and a descending bike. The Trifox MFM100 carbon full‑suspension frame proves that careful geometry, sophisticated suspension kinematics, and intelligent carbon layup can deliver the best of both worlds. It climbs with efficiency, descends with confidence, and offers exceptional value for riders who want a true one‑bike solution. Whether you‘re racing XC or exploring new trails, this frame is ready.
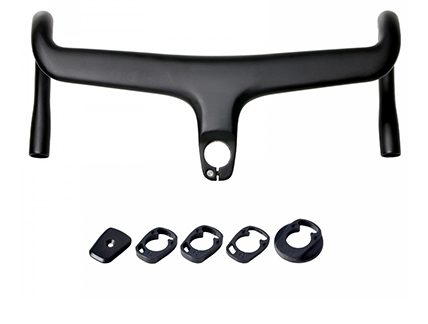
Upgrading your cockpit is one of the most effective ways to transform how your road bike feels beneath you. When it comes to choosing between carbon fiber and aluminum handlebars, the debate has been ongoing for years—and for good reason. Both materials have passionate advocates, and the “right” answer depends on your riding style, budget, and performance priorities. So where do the weight savings really land, and what does that extra cost actually buy you? Let’s break it down.
The Weight Reality: How Much Lighter Is Carbon?
Let’s cut straight to the numbers. On average, carbon handlebars weigh about 20–40% less than their aluminum counterparts. That translates to a typical aluminum handlebar falling in the 300–400 gram range, while a carbon bar often comes in between 200–300 grams. For a real-world comparison, many brands show a weight saving of around 100 to 150 grams when switching from aluminum to carbon.
Does that sound small? Consider this: saving 100 grams at the handlebars—the highest point on your bike—has a more noticeable effect on handling and climbing feel than saving the same weight from a bottom bracket or wheelset. Every gram you remove from the front end sharpens steering response and makes the bike feel more alive when you pull out of the saddle. For competitive cyclists, that difference matters. For the rest of us? It depends on how much you value that “lighter in the hands” sensation.
Beyond Weight: Vibration Damping and Ride Quality
Weight savings are just the beginning. Where carbon truly shines is in its ability to absorb high-frequency road vibrations—the constant “buzz” that gradually fatigues your hands, wrists, and shoulders over long rides. Carbon fiber can be engineered through precise fiber lay-ups to strike an optimal balance between stiffness and compliance, meaning you get a bar that’s stiff enough for precise cornering yet forgiving enough to smooth out rough pavement.
Aluminum, by contrast, transmits more road chatter directly into your hands. While modern alloy bars have improved significantly, they still lack carbon’s natural vibration-damping properties. For endurance cyclists spending hours in the saddle, that extra compliance translates directly to less fatigue and more enjoyment.
Fatigue Life and Durability: The Surprising Truth
Here’s something that might surprise you: carbon handlebars actually have a superior fatigue life compared to aluminum. Lab testing has documented that carbon’s fatigue resistance is roughly five times better than aluminum’s. Aluminum and other metals don’t exhibit an endurance limit—meaning even small repeated loads will eventually cause failure after enough cycles. Carbon, on the other hand, can withstand millions of stress cycles without degradation, provided it remains undamaged.
That said, carbon’s Achilles’ heel is impact damage. A hard crash or an over-torqued stem clamp can compromise a carbon bar in ways that aren’t always visible to the naked eye. Aluminum tends to bend or show obvious deformation before failing, giving you a clear warning sign. If you’re a rider who crashes frequently or prefers the peace of mind that comes with a more impact-resistant material, aluminum remains a compelling choice.
The Cost Equation: What You’re Paying For
This is where the rubber meets the road—or rather, where your wallet meets the handlebars. Carbon bars typically range from $150 to $500, while quality aluminum bars can be found for $30 to $150. That’s a significant premium, and it’s fair to ask whether the performance benefits justify the price.
For competitive racers and serious enthusiasts who spend countless hours training, the answer is often yes. The combination of weight savings, vibration damping, and fatigue resistance creates a tangible performance advantage. But for recreational riders or those on a tighter budget, modern aluminum handlebars offer excellent value without sacrificing too much. Many pro teams actually prefer aluminum bars for racing—not because carbon is unsafe, but because aluminum offers a better cost-to-performance ratio when you’re equipping an entire fleet of bikes.
What About Modern Aluminum?
It’s worth noting that aluminum handlebars have come a long way. Advances in alloy manufacturing now allow brands to produce bars that are lighter, stiffer, and even more aerodynamic than ever before. You can now obtain many of the aerodynamic benefits that were previously only possible with carbon, using an alloy bar. For road and gravel racers on a budget, this means high-performance cockpits are more accessible than ever.
Where Carbon Still Rules
Despite aluminum’s progress, carbon remains the undisputed champion in three key areas: aerodynamic shaping, fine-tuned compliance, and absolute minimum weight. Carbon can be molded into complex aero profiles that would be impossible—or prohibitively expensive—to achieve with metal. This is especially relevant for aero-integrated designs, where every watt of drag matters.
If you’re looking to shave every possible gram while maximizing aerodynamic efficiency, carbon is the only answer. For cyclists who prioritize a refined, fatigue-reducing ride feel on long days in the saddle, carbon’s vibration-damping properties are worth the premium.
Meet the DHB1000: A New Standard in Carbon Road Bars
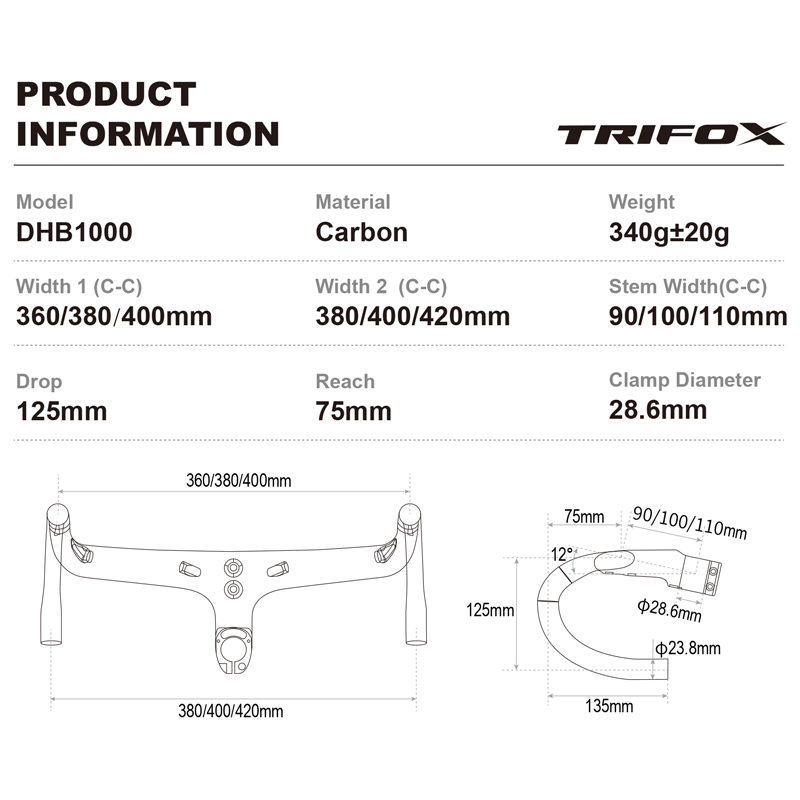
For riders ready to make the leap to carbon, the latest generation of integrated bars offers benefits that go far beyond simple weight reduction. The carbon road bars from Trifox represent everything carbon does best—lightweight construction, impeccable vibration damping, and a fully internal cable routing system that cleans up your cockpit and reduces aerodynamic drag. As an integrated one-piece design, it eliminates the traditional stem and faceplate interface, resulting in a stiffer, more responsive front end that transmits your inputs directly to the wheel. And with a sleek aero profile, every watt you produce goes forward, not sideways.
The Verdict
So, where do the weight savings—and the cost—really land? Carbon handlebars will save you roughly 100–150 grams compared to a quality aluminum bar, while offering superior vibration damping and exceptional fatigue resistance. You’ll pay a premium for those benefits, typically 2–4 times the cost of an equivalent alloy bar.
The choice comes down to your priorities: If you’re chasing every performance advantage, spending hours in the saddle, or simply love the feel of a premium cockpit, carbon handlebars road are worth every penny. If durability on a budget is your main concern, modern aluminum still delivers impressive performance at a fraction of the price. Either way, understanding where the real differences lie will help you make the right choice for your riding.
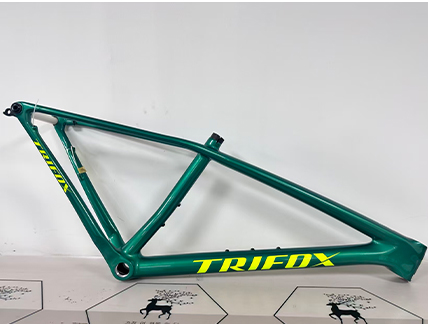
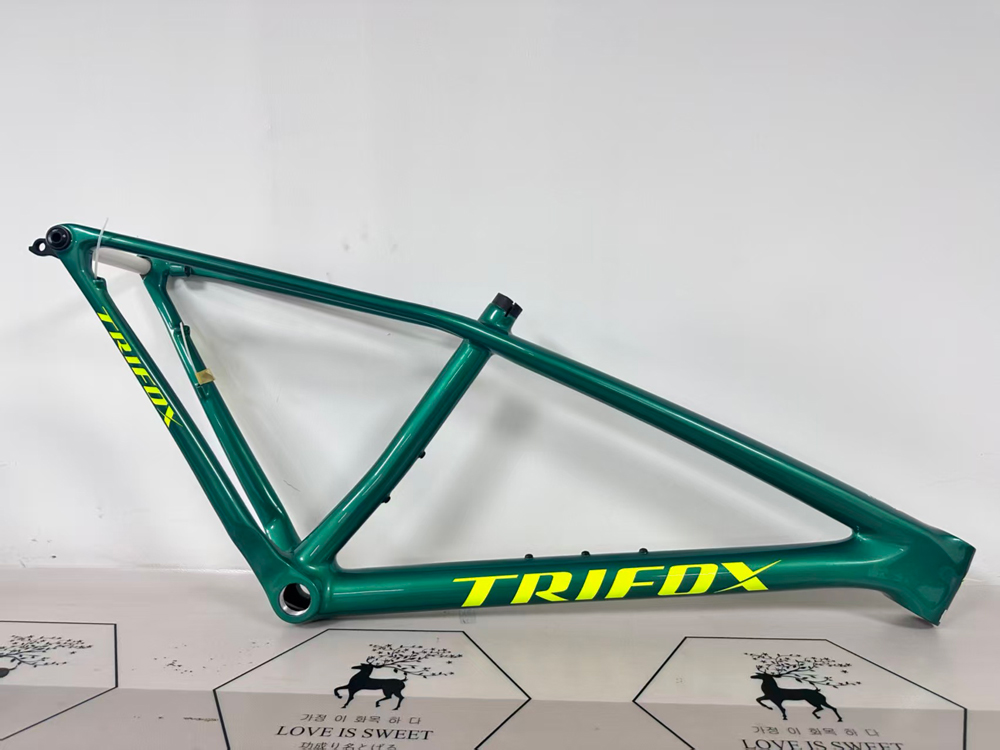
Trail chatter is the mountain biker’s silent enemy. The constant high-frequency vibration from roots, rocks, and rough ground doesn‘t just make your hands sore—it accelerates muscle fatigue, blurs your focus, and compounds over every mile. Many riders assume that only suspension can solve this. But the frame material itself plays a profound role. A carbon frame like the Trifox SDY20 17.5 bike frame (available in 15″, 17″, and 19″ sizes) transforms the ride experience not just through low weight, but through its unique ability to absorb trail vibration while maintaining pedaling efficiency. Here’s how modern carbon engineering achieves what metal simply cannot.
From Metal to Composite: A Fundamental Difference
Aluminum is a crystalline metal uniform in all directions. When vibration energy enters an aluminum frame, it transmits as a sharp, undampened shockwave directly to the rider. Steel is more compliant but heavier. Carbon fiber, however, is a composite. Thousands of individual fibers embedded in an epoxy resin matrix create a structure that can be engineered with different properties in different directions. This anisotropy is the key to carbon‘s vibration-damping advantage. The resin matrix acts as a microscopic damping agent. When high-frequency vibration enters the layup, energy is dissipated as heat within the resin and between fiber layers rather than being transmitted onward.
The Layup: Where Comfort Is Engineered
The magic of carbon isn‘t just the material—it’s how the material is arranged. A carbon frame is built from dozens of thin sheets (plies) of carbon fiber impregnated with resin, each laid at a specific orientation. By controlling the layup schedule—the number of layers, their orientation, and where they are placed—engineers can tune stiffness in one direction while allowing compliance in another. High-modulus fibers laid along the downtube and chainstays resist pedaling forces for crisp power transfer. Yet the same structure can allow controlled flex in the seatstays to absorb rear-wheel impacts, reducing shock transmitted to the rider before it reaches the spine. One study found that carbon fiber‘s damping properties enable road‑shock absorption efficiency of up to 92%, with comfort improvements of 41% on rough sections compared to less-engineered alternatives.
Carbon vs. Aluminum: The Ride Feel Difference
Aluminum offers excellent stiffness and affordability, but it doesn‘t absorb vibration as effectively, which can result in a harsher ride. Aluminum transmits “trail buzz” directly, leaving your hands and arms to absorb the punishment. This leads to faster fatigue and more difficult line-holding on loose terrain. Carbon’s natural damping filters out high-frequency vibrations, keeping you fresher and more in control. The Trifox SDY20, built with T800 carbon, exemplifies this balance. T800 occupies a sweet spot between entry-level T700 and ultra-stiff premium fibers, offering excellent stiffness for pedaling efficiency while retaining enough vertical compliance for real‑world comfort.
What T800 Brings to the Trail
T800 carbon has a higher tensile modulus (stiffer) than T700, allowing frame designers to use less material to achieve the same stiffness—or build a stiffer frame at the same weight. This translates to immediate power transfer and responsive handling when accelerating or climbing. More importantly for trail riders, T800‘s balance means you don’t sacrifice comfort for performance. The material is neither so flexy as to feel vague nor so rigid as to be harsh. Professional analysis confirms that T800 often provides a better balance of stiffness and vertical compliance than higher-modulus fibers like T1000. For riders seeking a 17.5 bike frame that climbs efficiently yet stays comfortable over long days, this precise blend of properties makes a tangible difference. Not all T800 is equal—quality control in fiber layup and resin application is critical—and Trifox‘s attention to this detail ensures the SDY20’s layup delivers consistent, predictable damping.
Making It Yours: Custom Frame Painting
A carbon frame‘s performance core is the same whether it wears subtle livery or bold colors. But personalization matters. Trifox offers custom bicycle frame painting options, allowing you to choose from multiple colors (the SDY20 is available in finishes such as Red, Green, and Glossy black). Whether finishing a stealth race build or a standout trail bike, custom paint doesn’t affect the engineering—it reflects your identity without compromising the frame‘s vibration-damping layup.
The Long‑Ride Payoff
Over hours in the saddle, vibration isn’t a minor inconvenience—it‘s a performance limiter. Carbon’s ability to reduce transmitted vibration means less muscle tension, clearer vision, and better bike control, especially in technical sections where staying loose matters. The rigid front triangle keeps steering precise, while the rear stays can be tuned to absorb just enough chatter to keep the rear wheel planted. That‘s the real magic of a well-engineered carbon frame: you stop thinking about the bike and start flowing with the trail. The Trifox SDY20 proves that carbon’s advantage isn‘t just about grams on a scale—it’s about how the material makes you feel on mile 30, mile 50, and beyond.
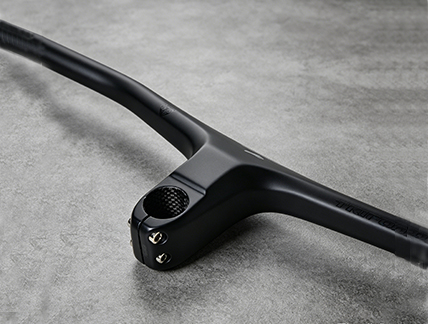
So you’ve bought a Trifox RHB600 carbon xc bars upgrade—and you’re staring at the box, wondering how not to turn that beautiful carbon cockpit into expensive scrap. Good news: integrated carbon bars aren’t as scary as they seem. You just need the right technique, a few essential tools and a little patience. This guide walks you through every step of installing your carbon fiber bar safely, without cracking it, crushing it or cutting too much off.
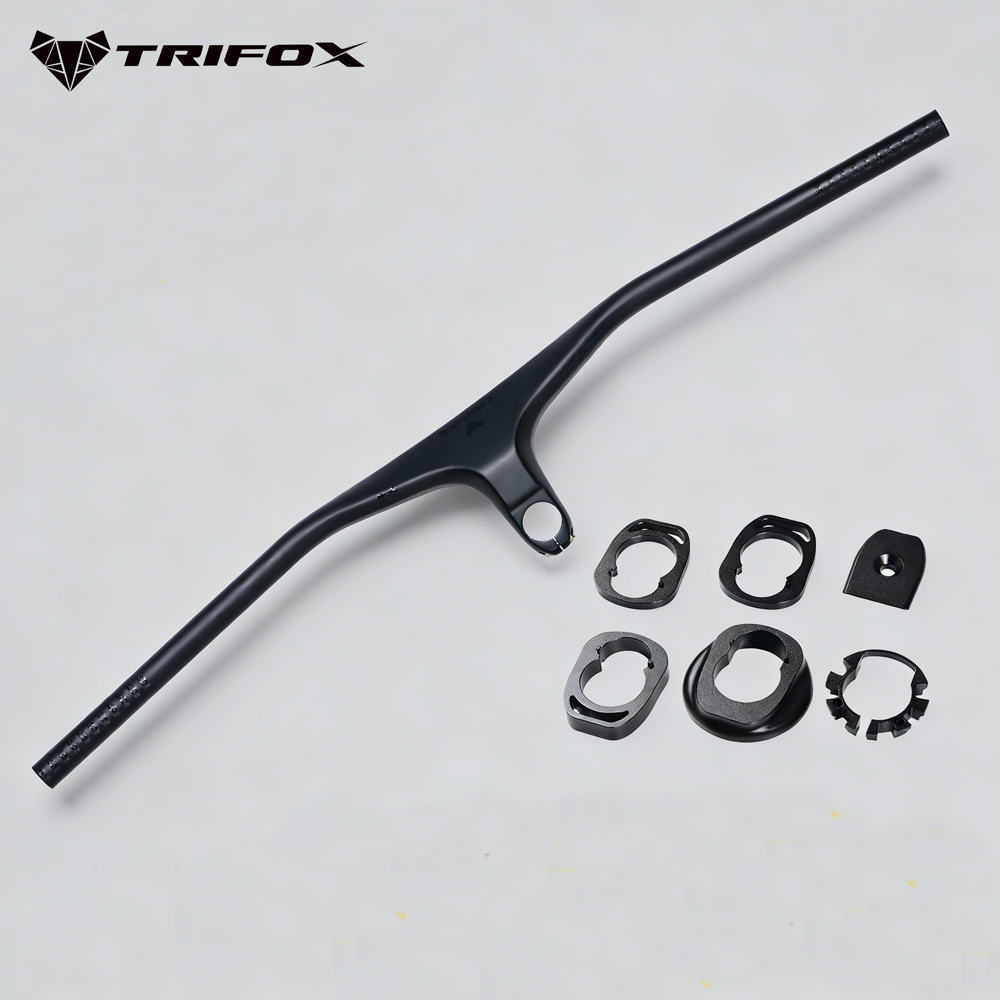
Before You Start: What You’ll Need
* Torque wrench (the single most important tool for carbon)
* Hex keys (4mm, 5mm)
* Carbon assembly paste (never grease!)
* Measuring tape or ruler
* Fine-tooth hacksaw with carbon blade
* Masking tape
* Fine-grit sandpaper (400 grit)
* Cable routing tool or safety wire (for internal routing)
* Safety glasses and soapy water (for cutting)
Step 1: Route the Cables First (Don’t Skip This)
The RHB600 is a full internal routing design. All brake hoses, derailleur cables and dropper housings run completely inside the bar and stem structure. That means you must route the cables before clamping anything.
Remove the port covers at the stem area and lever mounting points. Use a cable routing tool or a length of thin safety wire with a small hook bent at the end. Feed the wire from the stem entry port toward the lever exit port, attach the cable housing to the wire, then pull it through. Repeat for both sides. This step takes patience—but it’s far easier than trying to fish cables after the bar is clamped in place.
Tip: Use a few drops of isopropyl alcohol as lubricant to help housing slide through the internal channels.
Step 2: Check Bar Width Before Cutting
Most integrated bars come at a standard 800mm width. That’s wide for stability, but many riders prefer 760mm or 780mm for tighter singletrack. Before cutting, mount the bar loosely (without fully torquing) and sit on the bike. Feel whether your hands naturally fall slightly inside the grips. Remember: you can cut more off later, but you can’t add material back. Measure twice, cut once.
When you’re ready to cut: wrap masking tape around both sides at the cut mark to prevent carbon splintering. Use a fine-tooth hacksaw blade and keep the cut surface sprayed with soapy water to contain carbon dust (which is harmful to breathe). After cutting, smooth the raw edge with 400-grit sandpaper—never use a metal file on carbon.
Step 3: Apply Carbon Paste—Never Grease
Standard grease makes carbon surfaces slippery and risks over-torquing. Carbon assembly paste contains tiny particles that increase friction between components, allowing you to achieve a secure hold at lower torque. Apply a thin, even layer to the stem clamp area and the steerer tube contact points. Smooth with your finger. Don’t glob it on—a thin coat is all you need.
Step 4: Torque Correctly (This Is Non‑Negotiable)
The most common cause of carbon handlebar failure is over‑tightening. Use a calibrated torque wrench. General torque for carbon bar clamp bolts is 4–6 Nm, but always follow the manufacturer’s specific recommendation for your stem. Tighten the faceplate bolts in a cross pattern (X‑pattern), not all on one side first, to distribute pressure evenly. For control clamps (brake levers and shifters), use a lower torque—around 2–4 Nm. Overtightening these can crush the carbon tube.
If you don’t own a torque wrench, buy one before touching carbon components. It’s not optional.
Step 5: Final Check and Cable Trim
Once everything is torqued to spec, cycle the fork through its travel to ensure cables aren’t binding or pulling taut. Then trim excess housing at the lever and frame entry points, install end caps, and seal the internal routing ports with the included rubber plugs.
The Takeaway
Installing an RHB600 carbon xc bars is a step‑by‑step process that rewards patience. The key rules: route cables first, measure cuts carefully, use carbon paste, and always—always—use a torque wrench. Follow these steps and your carbon fiber bar will stay intact, silent and safe for thousands of trail miles. And if you’re unsure at any stage, a local bike shop can handle the installation for a small fee—still far cheaper than replacing a cracked carbon bar.
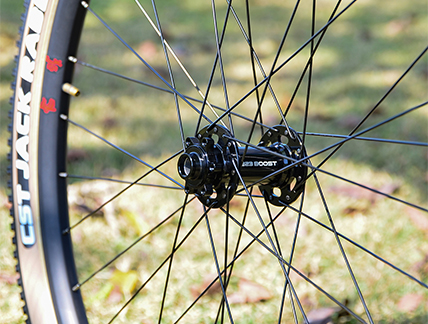
Whether you’re building a new mountain bike from the frame up or simply replacing a worn‑out set of hoops, wheel compatibility is rarely as straightforward as “it’s a 29er.” A modern MTB wheelset must align with your frame’s rear dropout spacing, match your brake rotor mounting standard, and support a tire width that suits your terrain. Overlook any of these three parameters and you risk anything from a subtle rotor rub to a wheelset that simply won’t fit. In this technical deep dive we break down the three pillars of MTB wheel compatibility: the Boost 148 rear hub, the 6‑bolt disc interface, and the 25mm internal rim width. We use the Trifox WM823 bicycle wheel as our reference example because it combines all three modern standards in one durable alloy package.
Hub Spacing: Why Boost 148 Has Become the Norm
The first and most critical compatibility check is the rear hub’s spacing, today measured by its “Over Locknut Distance“ (OLD). While older mountain bikes used 135mm quick‑release (QR) or 142mm thru‑axle spacing, almost every contemporary trail, enduro and cross‑country frame now requires **Boost 148mm** rear spacing. As the name implies, Boost adds 6mm to the overall hub width—3mm on each side—compared to the older 142mm standard. That seemingly small increase has a big mechanical benefit: it pushes the hub flanges farther apart, which allows the spokes to form a wider bracing angle. The result is a significantly stiffer, stronger rear wheel without adding extra material weight. According to early industry data, a 29˝ wheel built around a 148mm Boost hub achieves the same lateral stiffness as a smaller 27.5˝ wheel with a 142mm hub. Stiffer wheels track more accurately, resist flex under hard cornering and improve pedaling efficiency—exactly what you want on aggressive singletrack. The WM823 hub is built specifically for the **Boost 148x12mm** rear standard (front: 15x110mm), making it a perfect match for any modern hardtail or full‑suspension frame. The WM823’s rear axle attachment is a **thru‑axle**, which further increases stiffness by threading directly into the frame dropout rather than relying on a QR skewer. And if you are currently riding an older QR frame, the WM823 includes optional end caps that convert it to a 9x100mm (front) and 10x141mm (rear) QR, a versatile feature not found on many competing wheelsets.
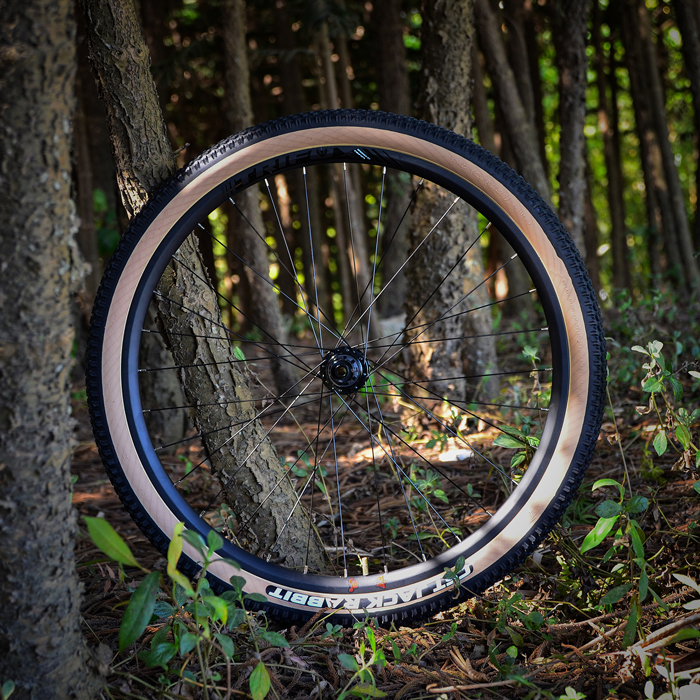
Rotor Mount: 6‑Bolt Remains the Trail‑Ready Choice
The second major interface is the disc rotor mount. Two standards dominate the MTB world: the traditional **6‑bolt (ISO)** pattern and Shimano’s proprietary **Center Lock** system. While both work perfectly well, each has trade‑offs that affect the mountain bike rider. Center Lock rotors are secured by a single lockring, which makes wheel installation and removal marginally faster, especially on the side of the trail. However, 6‑bolt rotors are far more common (especially at replacement time), generally slightly lighter, and easier to repair on the trail because no special tool is needed to remove a stuck lockring. The WM823 uses a **6‑bolt disc interface**, a choice that aligns perfectly with the demands of cross‑country and all‑mountain riding. The six bolts distribute clamping force evenly around the rotor, and repair is simple: you only need a 5‑mm hex key and an appropriately sized rotor—both can be found at almost any bike shop. The WM823’s braking system also accepts both Shimano and SRAM rotors (and most other brands), so you are never locked into a single component ecosystem.
Rim Width & Tire Compatibility: Matching Tire Profile to Trail
The third compatibility dimension is rim width, which determines how a tire sits once inflated. Too narrow a rim for a given tire will “lightbulb” the tire, rounding the tread contact patch and reducing grip. Too wide a rim can make the tire feel overly square, risking burping on low‑pressure setups. The industry standard for a **29er MTB wheelset** riding 2.2–2.4 inch tires is an internal rim width in the 25–30mm range. The WM823 hits right in the sweet spot with a **25mm internal width** and a **30mm external width**. This profile is engineered to support tires from 1.9 inches (for fast‑rolling XC rubber) up to 2.5 inches (for aggressive trail tread). The low 25mm rim depth further helps you run lower pressures without the risk of rim dings because the tire has a stable, broad platform to rest on. Lower pressure means more traction, better small‑bump compliance, and a much more forgiving ride over roots and rocks—all without adding appreciable weight. The WM823’s alloy rims are tubeless‑ready clinchers, making the switch to tubeless sealant simple and reliable.
Putting It All Together: Building a Compatible MTB Wheelset
Choosing a wheelset that aligns on all three dimensions—Boost spacing, 6‑bolt rotor mount and a modern internal rim width—eliminates most compatibility headaches before they arise. The Trifox WM823 mtb wheelset 29 was conceived as a turn‑key solution for today’s frames: a 148x12mm rear hub, a 15x110mm front hub, a 6‑bolt rotor interface, and a durable 25mm internal rim. The wheelset includes stainless steel Pillar spokes, 32 holes per wheel, and ceramic bearings. Each wheelset is backed by a two‑year warranty and supports rider weights up to 125 kg (275 lb). Ultimately, when you check the three compatibility boxes properly, you stop worrying about spec sheets and start enjoying a ride that is stiffer, more responsive and more capable wherever the trail leads.



