


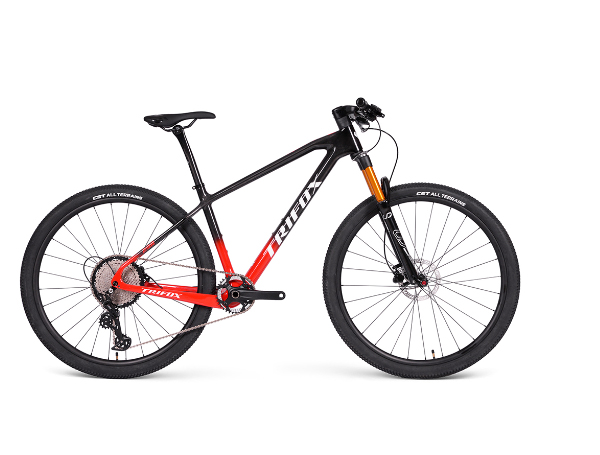
If you're looking to upgrade your off-road biking experience, investing in a light hardtail MTB (Mountain Bike) frame is the perfect place to start. A hardtail frame offers better power transfer and control compared to full suspension frames, which make them ideal for mountainous terrains, technical trails, and cross-country riding. However, with multiple models and brands on the market, it can be daunting to choose the ideal Lightest hardtail MTB frame for your needs.
1. Material
The frame's material plays an essential role in determining its weight, stiffness, durability, and comfort. The most common materials used for hardtail MTB frames include Aluminum, Steel, and Carbon Fiber. Steel is the heaviest, but it offers superior durability, smooth riding experience, and affordability. Aluminum is a popular choice due to its lightweight, stiffer ride, and affordability. However, it can be uncomfortable on rough terrain compared to steel. Carbon Fiber is the lightest and stiffest material, which offers unparalleled comfort, shock absorption, and speed. It's the most expensive option but ideal for professional riders or enthusiasts who want the best.
2. Geometry and Fit
The frame's geometry affects its handling, speed, and comfort. The ideal hardtail MTB frame should have a balanced geometry that offers stability, cornering, and speed. You should pay attention to the frame's Head Tube Angle, Top Tube length, Chainstay length, Bottom Bracket height, and seat angle. Also, ensure that the frame size fits your height and riding style. A frame that's too big or small can affect your balance, control, and safety on the trail.
3. Suspension
The hardtail MTB frame offers front suspension, which is essential for shock absorption and comfort. However, you should choose a suspension fork that complements your riding style, the terrain you ride in, and your weight. The suspension fork should have adjustable damping, compression, and rebound to maximize your performance. It would be best to choose a lightweight fork to reduce the overall weight of the frame. Look for forks made from Carbon Fiber or Magnesium.
4. Wheels and Tires
The wheels and tires are crucial components of a hardtail MTB frame, which affect your traction, speed, and comfort. The wheels should be robust and lightweight, with optimized spoke patterns to handle rough terrain and reduce weight. The tires should offer the right balance between traction, speed, and comfort. You should consider the type of terrain you ride in, weather conditions, and your riding style when choosing the tires.
5. Budget
Finally, you should consider your budget when choosing the ideal Lightest hardtail MTB frame. The frame's price varies based on the material, brand, features, and performance. You can find reliable yet affordable hardtail frames made from Aluminum or Steel. However, if you're an enthusiast or professional rider, investing in a Carbon Fiber frame can offer superior performance and riding experience.

Investing in a lightweight hardtail MTB frame can take your off-road biking to the next level. However, choosing the ideal frame requires careful consideration of various factors, including the material, geometry, suspension, wheels, tires, and budget. We hope this guide has equipped you with the knowledge to make an informed decision when choosing your next frame. Enjoy your next adventure!
Carbon Drive Mountain Bikes are known for their durability, lightness, and low maintenance requirements. The carbon fiber frame reduces the bike's weight while providing high levels of strength and stiffness to withstand various terrains. Therefore, caring for your carbon drive mountain bike is important for the longevity and performance of the bike.
1. Clean Your Bike After Every Ride: After every ride, it is essential to clean your carbon drive mountain bike. The bike gets covered in dirt, mud, and dust, which can clog the drivetrain and affect its performance. Use a mild bike cleaner to remove the dirt from the bike frame, chain, and gears. Use a soft-bristled brush to scrub the chain and gears, and rinse with water. Avoid using a pressure washer, which can damage the bike's bearings and seals.
2. Check the Carbon Drive System: The carbon drive system is the core of your mountain bike, and it is essential to regularly check the drive system for wear and tear. Inspect the chainring teeth for damage, check for any loose bolts, and ensure the chain tension is correct. Unlike a chain drive system, a carbon drive cannot stretch, and the belt's teeth cannot be replaced. Hence, it is essential to replace the carbon drive system every 10,000 miles or every three years of use.
3. Lubricate the Carbon Drive System: The carbon drive system does not require regular lubrication like a chain drive system. However, it is essential to lubricate the carbon drive system after cleaning the bike or when riding in wet conditions. Lubricate the belt's teeth and the pulleys using a silicone-based lubricant, which does not attract dust or dirt.
4. Store the bike correctly: Where and how you store your carbon drive mountain bike is vital for the bike's longevity and performance. Always store the bike in a dry and cool place, away from sunlight and moisture, which can cause the frame to weaken. Hang the bike using a wall mount or a bike stand, and ensure the bike is not leaning against anything. Place the bike upside down when cleaning or doing maintenance, but never when storing it.
5. Regular Service and Maintenance: Your carbon drive mountain bike requires regular service and maintenance to ensure it performs optimally. Take your bike to a professional mechanic for a service every six months or after over 500 miles of use. The professional will clean the bike, check and adjust the carbon drive system, chain, and gears, and check the bike's brake pads, rims, and tires. Regular service and maintenance save you money in the long run and keep your bike in excellent condition.

Caring for your carbon drive mountain bike is easy, and it doesn't require much effort, but it goes a long way. Simple steps, such as cleaning your bike after every ride, inspecting the carbon drive system for wear and tear, and storing it correctly, can keep your bike in top condition. Don't neglect the regular service and maintenance of your bike; it saves you money in the long run and ensures you have a bike that performs optimally. By following the tips above, you can take good care of your carbon drive mountain bike and enjoy your next ride in top condition.

Mountain biking is a thrilling sport but can be tiresome when the ride is bumpy and rough. A good quality suspension system is integral to making your ride smoother and more comfortable, especially for beginners in the sport. Even experienced riders will tell you that the right suspension setup on your frame can make all the difference in ensuring that you have a great time on the trails.
1. Choose a Frame Suspension System That is Suitable for You
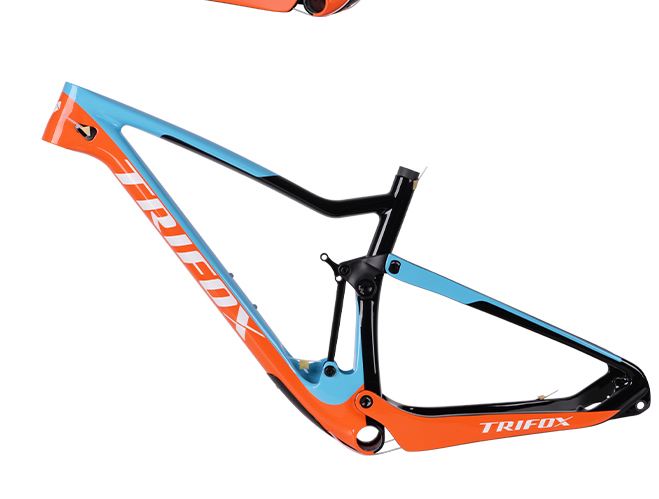
The first step in setting up your frame suspension is to choose a suitable setup that caters to your needs. Full suspension frames have a linkage system that connects the rear triangle to the shock and can give you greater comfort when riding over rough terrain. On the other hand, hardtail frames have a single suspension fork in the front and are good for riders who follow smoother terrain. The type of frame you select will depend on your riding style and the type of terrain you usually ride in.
2. Set Your Sag
The sag determines how much compression your bike experiences when you sit on it. The ideal sag should be set at 25-30% of your total shock stroke. This is important because it provides a good balance between responsiveness and a smooth ride. To set your sag, start by inflating your rear shock to its recommended pressure, hop on your bike with all your gear on, and cycle slowly and steadily for about 10 meters. Ask someone to assist you in measuring the distance between the seal of the shock and the o-ring. Adjust the air pressure in the shock accordingly until you achieve the desired sag.
3. Adjust Your Compression Damping
Compression damping controls how much your suspension will compress when your bike hits a bump, and slow down when it rebounds. Turning the dials on your shock and fork damper will adjust the compression damping, providing you with a stiffer or softer ride. Experiment with different settings until you find something that suits your riding style and the terrain you're riding in. It's important to note that a stiffer setting will help with climbing, while a softer setting will provide a smoother ride on downhill sections.
4. Adjust Your Rebound Damping
Rebound damping is responsible for controlling your bike's bounce rate after hitting a bump. Setting the rebound damping properly will prevent your bike from bouncing uncontrollably or rebounding too slowly. Too much rebound damping will make it feel harsher, while too little rebound damping will make it feel unstable. Adjust the rebound damping knob to find the appropriate level of resistance. Start by compressing your suspension fully, then release it and watch it rebound. A slow-motion rebound is a sign that you need to increase your rebound damping, while a fast rebound indicates that it's too high.
5. Regular Maintenance Checks
Now that you've set up your frame suspension, it's time to enjoy your smooth ride. However, you should remember that maintenance is key in keeping your suspension in good condition. Clean and lubricate your suspension periodically, check your air pressure, and make sure there isn't any oil leaking from the shocks. These maintenance checks will prevent early wear and tear on your suspension system, and give you a longer lifespan.
A frame suspension can make all the difference in ensuring a smooth and comfortable ride when mountain biking. Setting up and adjusting your frame suspension is relatively easy, and experimenting with different settings will help you find the perfect fit for your riding style and the terrain you're riding in. Don't forget to keep up with regular maintenance checks to ensure that your suspension lasts you a long time.
By doing so, you'll enjoy a more comfortable and confident riding experience that'll make you want to hit the trails time and time again.

Wrapping bar tape on your road bike is not just about aesthetics; it is an essential aspect of bike maintenance. Proper bar tape wrapping not only enhances the overall look of your bike, but it also makes the handlebars more comfortable to hold, improves grip, and reduces vibrations from the road. However, many road riders struggle to wrap their bar tape without it looking messy or uneven.
Step 1: Remove old bar tape
Before you start, it's important to remove your old bar tape and clean your handlebars. You can use rubbing alcohol and a clean cloth to remove any dirt or adhesive residue left from your old tape. Remember to take note of how the old tape was wrapped as it will serve as a guide when you're wrapping the new tape.
Step 2: Start at the Bottom
When wrapping your handlebars, start from the bottom. Hold the bar tape at the bottom of the handlebars, leaving enough excess for wrapping around the bar's end. Begin the first turn by wrapping slightly diagonally upwards, making sure the tape overlaps each time. Ensure the tape is tight enough to stay in place but not so tight that it impedes the brake lever functionality.
Step 3: Overlap and Secure
Once you reach the handlebar's top, slide the extra bar tape under the brake levers and wrap it diagonally downwards. Overlap each turn on the previous one and ensure that the tape is tight and even along the bar. When you reach the end of your handlebar, wrap the excess tape tightly around it and secure with electrical tape or a bar plug.
Step 4: Repeat on the Other Side
Repeat the above steps with the other side of the handlebar. Make sure you keep equal tension on both sides to provide balance and comfort while cycling. If you want to achieve a more professional look, wrap the tape in an opposite direction on the second side.
Step 5: Finishing Touches
After completing the wrapping process, inspect the handlebars, ensuring there are no uneven or exposed areas. If any section needs adjustment, make the necessary corrections right away. Finish by trimming any excess bar tape with scissors or a blade, but be careful not to cut the bar tape.
Perfectly wrapping bar tape on your road bike is not rocket science; it requires patience, attention to detail, and practice. With this guide, you'll be able to wrap your bike's handlebars confidently, knowing that you're doing it correctly. Always remember to remove the old tape, start at the bottom, overlap and secure, repeat on the other side, and finish with trimming. With time, you'll be able to complete the wrapping process effortlessly, and your road bike will look and feel comfortable, safe, and stylish. Happy cycling!

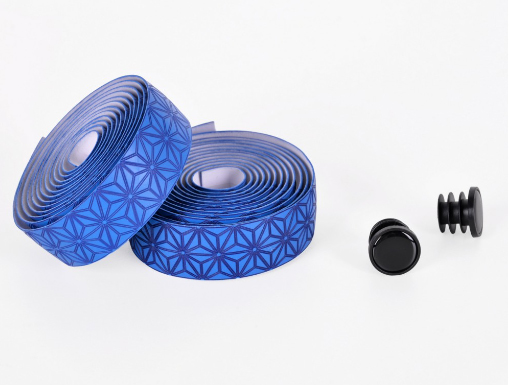
As a cyclist, the safety of your ride is paramount. While you may pay attention to various safety aspects, handlebar end plugs may have escaped your notice. Handlebar end plugs, also known as bar end plugs, are those small nubs that fit snugly at the end of your handlebars.
Now, the big question is - are handlebar end plugs necessary, or are they just another accessory to spend money on? In this blog post, we will explore why handlebar end plugs are important and whether they are necessary or not.
Firstly, let’s talk about the function of handlebar end plugs. Their primary purpose is to prevent your handlebars from injuring you or someone else during an accident. Without end plugs, your handlebars’ open ends can become serious hazards. In case of a crash, the bar ends can impale you or other riders (or pedestrians), causing severe injuries. These accidents are not uncommon and can lead to catastrophic consequences. The handlebar end plugs can help prevent such injuries efficiently.
Another significant function of handlebar end plugs is to keep dirt and debris from collecting inside the handlebars. When you don’t use end plugs, dirt, dust, and moisture can get into the handlebars, causing corrosion and damaging the inner parts. In such cases, expensive repair or even replacement may become necessary. Handlebar end plugs can prevent this from happening, saving you money in the long run.
Moreover, handlebar end plugs can also help keep your handlebar tape in place. When you wrap tape around the handlebars, the plugs help to keep it from unwrapping or tearing. Besides, handlebar end plugs can add an extra layer of grip to the handlebars. This added grip can be utilized for various activities like cross-country rides, mountain biking, or even during a bumpy terrain. This grip can be crucial in many situations, allowing you to keep firm control over your bike.
Conclusion:
So, are handlebar end plugs necessary? The answer is an absolute yes! Bar end plugs offer protection and keeping you and other riders safe from bar impalement. They keep moisture and debris from getting into your handlebars, ensuring they are in good working condition. They can add an extra layer of grip to your handlebars, making your cycling smoother and more comfortable.
Always remember, safety should always come first. If you haven’t installed handlebar end plugs, it is time to do so and safeguard your bike and your body. Stay safe, cycle with care!
Carbon bike frames have become increasingly popular in recent years for their lightness, stiffness, and aerodynamics. However, one of the biggest challenges with these frames is damage. Carbon frames can be vulnerable to cracks, chips, and dents, leaving riders to wonder if repair is a viable option.
Let's start with the pros of repairing a carbon bike frame. Firstly, repairing a carbon frame costs less than buying a new one. Carbon frames can be expensive, and repairing them can be a much more affordable option compared to buying a new one. Secondly, if you're attached to your bike, and it fits you like a glove, repairing it can be emotionally satisfying. Thirdly, repairing rather than replacing a carbon frame is environmentally friendly. It reduces the amount of waste created, which is a great way to help the planet.
While there are some pros of repairing carbon frames, there are also some cons you should be aware of. The first and most significant disadvantage is safety. When a carbon frame cracks, it’s hard to spot the damage, and fixing it can lead to further weaknesses in the structure. Moreover, the repair process can’t always be guaranteed and can only be as strong as the manufacturer’s original build. In essence, the structural integrity of the frame is compromised, making it unsafe. Additionally, repairing a carbon frame can be time-consuming, which can mean being without your bike for an extended period.
Another factor to consider when thinking about repairing a carbon frame is the type of damage. You should recognize that some types of damage can't be repaired. For example, a crushed tube, or a large hole caused by impact, are irreparable, and the only solution is a replacement. Lastly, aesthetic concerns should also be noted. After a repair job, there may be a visible patch that can be unsightly and be a constant reminder of the accident.
Repairing a carbon bike frame is a viable option for minor damage like chips and scratches, and it can be a cost-effective and environmentally friendly way to maintain your bike. However, you should note that repairing a carbon frame comes with some risks; it can compromise the structural integrity of the frame, making it unsafe.
Before you decide to repair your carbon bike frame, make sure you seek advice from an experienced bike mechanic or manufacturer to ensure it is safe to ride. And always remember that safety is paramount when it comes to bikes, especially with carbon bike frames
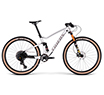
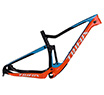
As a serious mountain biker, you know that having the right bike makes all the difference when it comes to performance and durability. One of the best ways to upgrade your bike is by investing in a high-quality carbon fiber frame. If you’re looking for the best Chinese full suspension carbon frame on the market, you won't find a better option than the Trifox Carbon Fiber Mountain Bike Frame MFM100. In this blog post, we’ll take a closer look at this impressive frame and the features that make it stand out from other frames on the market.
1. High-Quality Construction
The Trifox Carbon Fiber Mountain Bike Frame MFM100 is crafted from high-quality T800 carbon fiber. This material is renowned for its strength, rigidity, and lightweight construction. With this frame, you'll enjoy the perfect balance of strength and agility, enabling you to easily tackle tricky trails and challenging terrain with ease. Because of its lightweight construction, you can also expect to experience a significant reduction in the overall weight of your bike, resulting in improved performance and a more enjoyable riding experience.
2. Boost Design
The MFM100 frame features a Boost design with 148 x 12mm spacing. This innovative design allows for a stronger and stiffer rear wheel, which can better handle rough terrain and extreme conditions. You also have the freedom to accommodate up to a 2.35" tire size and enjoy ample tire clearance, which enables you to confidently tackle various off-road trails with ease.
3. 29er Wheels
The MFM100 frame features 29er wheels, which are known for their precision and agility. These wheels offer excellent maneuverability and control, allowing you to navigate the most intricate trails with ease. Whether you’re a seasoned pro or a beginner, these wheels are sure to impress you with their responsive handling and outstanding performance.

4. Head Tube Angle
The MFM100 frame also boasts 68.5°Head Tube Angle headset cups, providing the flexibility to fine-tune your bike's geometry for optimal handling. You can easily adapt the bike's geometry to your specific preferences, ensuring a personalized riding experience that's tailored to your needs. This allows you to have greater control and maneuverability over the bike, making it easy to tackle any kind of terrain.
5. Boost Technology
The Boost technology featured on the Trifox Carbon Fiber Mountain Bike Frame MFM100 offers a 148 x 12mm spacing, which enables wider hub flange separation. This results in a potentially stronger and more rigid rear wheel for enhanced performance. With Boost technology, you can enjoy better control and traction, better acceleration, and greater maneuverability even in the toughest terrain.
In conclusion, if you're looking for a highly durable and performance-oriented mountain bike frame, the Trifox Carbon Fiber Mountain Bike Frame MFM100 is worth considering. With its high-quality construction, Boost design, 29er wheels, and Head Tube Angle, you can enjoy unbeatable performance and unmatched durability. Whether you're a seasoned pro or a beginner, this frame is sure to impress you with its outstanding features, allowing you to take on any kind of terrain with confidence and ease. So why wait? Invest in this state-of-the-art bike frame today and get ready to enjoy a thrilling and unforgettable mountain biking experience.

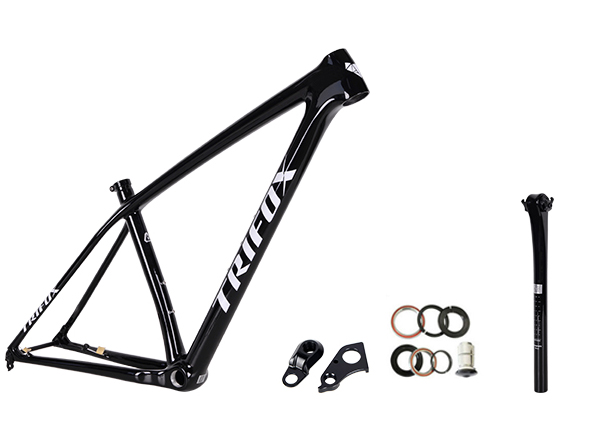
As cycling has become a popular mode of transportation and leisure activity, more and more people are investing in bicycles. While choosing the right bike is crucial for a comfortable ride, the importance of selecting the right bike seat pole should not be overlooked. The right bike seat pole helps to ensure that the bike fits your body correctly and mitigates unnecessary discomfort. In this blog post, we will discuss the importance of selecting the right bike seat pole.
1. Comfort
One of the main reasons why selecting the right bike seat pole is essential is to ensure a comfortable ride. A poorly chosen bike seat pole can create discomfort in your back, knees, and neck, leading to a painful riding experience. A good bike seat pole, such as the Trifox Carbon Layback MTB Seatpost CDS100, helps mitigate the impact of rough terrain and reduces the vibration that transfers from the road to your body, ultimately resulting in a more comfortable ride.
2. Durability
Bike seat poles made from inferior quality materials such as aluminum or steel can be susceptible to rust and corrosion. This can lead to a reduction in performance and a shorter lifespan for the bike seat pole. The Trifox Carbon Layback MTB Seatpost CDS100 is made from carbon fiber T800, which has excellent fatigue and corrosion resistance, making it a highly durable product.
3. Weight
Bike enthusiasts know that every gram counts when it comes to performance. The Trifox Carbon Layback MTB Seatpost CDS100 is a light product weighing only 190 grams, making it an excellent choice for racing enthusiasts. The carbon fiber material is known for its ability to reduce weight without sacrificing durability, making it a winning combination.
4. Style
While choosing the right bike seat pole is primarily about function over fashion, it's always a bonus when you can find a product that's both. The Trifox Carbon Layback MTB Seatpost CDS100 has a sleek and stylish appearance, with a UD matte finish and a black color that will complement any bike design.
5. Customizability
Different riders have different seat-height preferences, which is why the Trifox Carbon Layback MTB Seatpost CDS100 offers two diameters of seatpost, Φ27.2mm, and Φ31.6 mm. This customization allows riders to choose the option that best suits their body frame and bike design.
Choosing the right bike seat pole is a crucial element in ensuring a comfortable and enjoyable ride. When selecting a seat post, consider factors such as comfort, durability, weight, style, and customizability. The Trifox Carbon Layback MTB Seatpost CDS100 ticks all these boxes and is an excellent option for any rider looking for a combination of comfort, performance, and style.
Are you in search of a reliable and durable water bottle holder for cycling? Look no further than the Trifox Bike Water Bottle Holder CBC100. This carbon fiber bottle cage boasts a thick version style and is compatible with mountain bikes, road bikes, and gravel bikes.
In this comprehensive review, we will examine the top features of the Trifox Lightweight bottle cage CBC100, including its design, material, compatibility, weight, and sturdiness.
Design:
The CBC100 features a sleek, yet practical design with its thick version style. It measures 14 * 7.5cm / 5.5 * 3.0in (L * D), making it easy to slide in (or out) a water bottle while cycling. One of the key design features of the CBC100 is the inside of the cage, which is coated with a layer of rubber. This rubber layer helps to keep your water bottle securely in place while riding, preventing it from bouncing around or falling out completely.
Material:
This bottle cage is constructed from high-quality carbon fiber material - T800. This means that it is super lightweight (only 28g ± 2g) yet sturdy. The carbon fiber material ensures that the bottle cage remains corrosion-resistant and durable over time. It is also easy to clean, requiring just a simple wipe down after use to leave it looking as good as new.
Compatibility:
The Trifox Lightweight bottle cage CBC100 is compatible with a wide range of bike types, including mountain bikes, road bikes, and gravel bikes. This allows you to use it on your primary bike and any backups you may have. Moreover, it is also suitable for folding bikes.
Weight:
One of the major selling points of the Trifox CBC100 bottle cage is its weight. The cage is incredibly lightweight, which is beneficial for anyone who wishes to eliminate unnecessary weight from their bike or is looking to shave off some seconds from their cycling time. The cage weighs just 28g, making it one of the lightest bottle cages on the market.
Sturdiness:
Despite being a lightweight and sleek bottle cage, the Trifox CBC100 is also incredibly sturdy and durable. It can hold up to years of use and deformation, thanks to its carbon fiber material. You can confidently use this bottle cage on rough terrain without fear of damage or deformation. It does an excellent job of holding your water bottle in place, no matter how bumpy the ride.

Conclusion:
The Trifox Bike Water Bottle Holder CBC100 is undoubtedly one of the top choices for anyone in search of a lightweight, durable, and flexible bottle cage. Its carbon fiber construction provides strength and durability while maintaining its lightweight feature. It is easy to install on most types of bikes, and its thick version design ensures that your water bottle stays in place. Overall, the Trifox CBC100 is an excellent investment for anyone looking to improve their cycling experience.


