


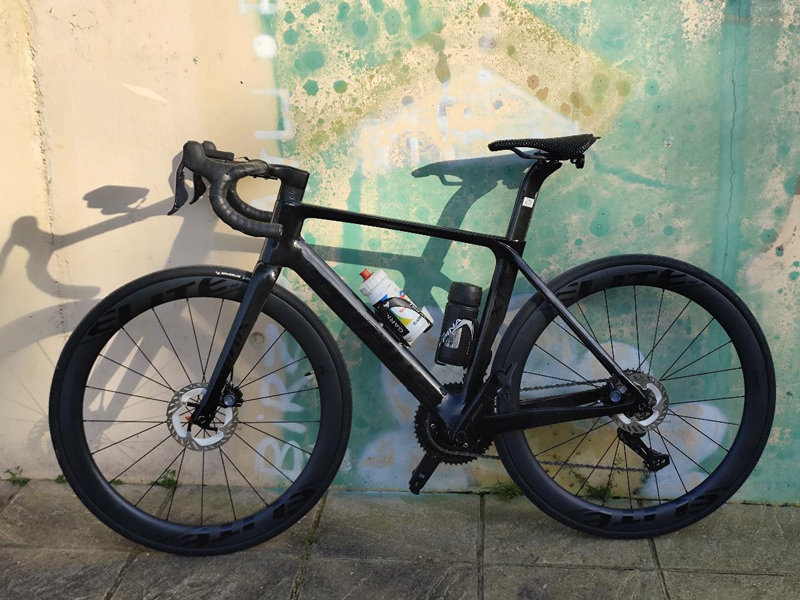
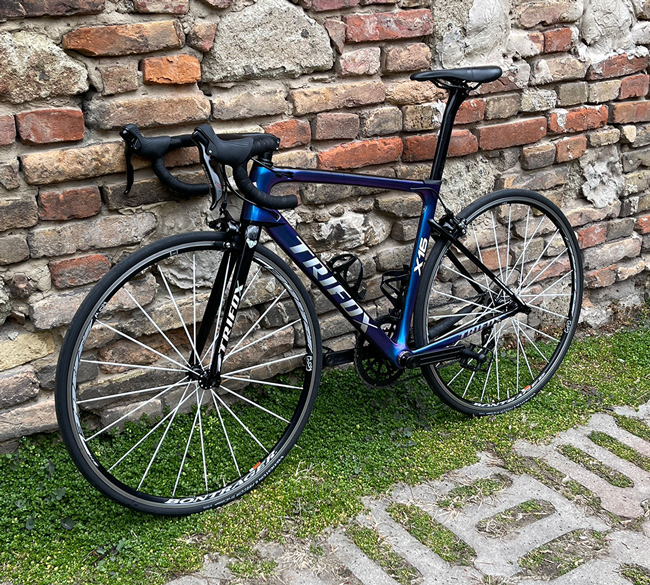
The days of cluttered cockpits and cables flapping in the wind are fading. Fully internal cable routing has become a hallmark of modern road bike design, and for good reason. The Trifox X11 carbon racing bike frame embodies this evolution, hiding every brake hose and gear cable inside the frame for a cleaner, faster, and more durable machine. Here are five reasons why a fully internal cable routing frame should be at the top of your upgrade list.
1. Genuine Aerodynamic Advantage
Exposed cables create turbulence. By routing cables internally, the frame presents a smoother surface to the wind, reducing drag. While the gains may seem small, they add up. Studies show that hiding a pair of brake lines can save around six seconds over 40km at 45kph. That's free speed—especially valuable for racers and time-trialists riding a integrated carbon road frame. Every watt saved counts when you're chasing a personal best.
2. Sleek, Uncluttered Aesthetics
Let's be honest: bikes look better without cables. Fully internal routing eliminates external cable guides and zip ties, creating a clean, streamlined appearance that enhances the overall design of the bike. The X11's T800 carbon frame, with its full internal routing through the headset, offers a truly integrated look. It’s the kind of detail that makes a bike stand out in the group ride and in the photos afterward.
3. Superior Cable and Housing Protection
Cables routed inside the frame are shielded from dirt, moisture, and road grime. This protection significantly reduces wear and corrosion, prolonging the life of your cables and housing. Less exposure to the elements means smoother, more consistent shifting and braking performance over time. For riders who train in all weather conditions, this is a major reliability benefit.
4. Reduced Maintenance
With cables protected from the elements, they stay cleaner for longer, reducing the frequency of replacement. The internal channels also allow for straighter cable paths, minimizing friction and the need for constant adjustments. While initial setup may require more care, the long-term result is a bike that requires less fettling and more riding.
5. Future-Ready Design and Resale Value
Fully internal cable routing is the new standard for high-performance road bikes. Frames like the X11, which feature full integration, including the included T47 bottom bracket, UDH hanger, and integrated drop handlebar, are designed to be compatible with the latest components and drivetrains. This forward-thinking design not only makes the bike more desirable to own but also helps maintain its resale value. It’s a bike built for the future, not the past.
Conclusion
The shift to fully internal cable routing is more than just a trend. It’s a meaningful upgrade that delivers tangible benefits: better aerodynamics, a cleaner look, improved cable protection, reduced maintenance, and a future-ready design. If you're in the market for a new carbon racing bike frame or an integrated carbon road frame, the Trifox X11 is a compelling example of how modern engineering can make your bike faster, cleaner, and more enjoyable to ride.

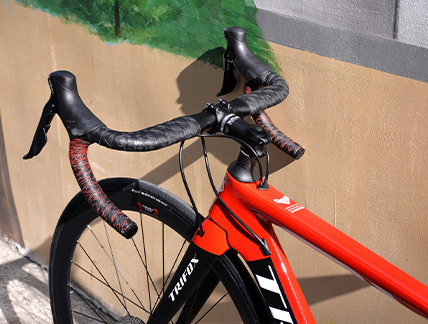
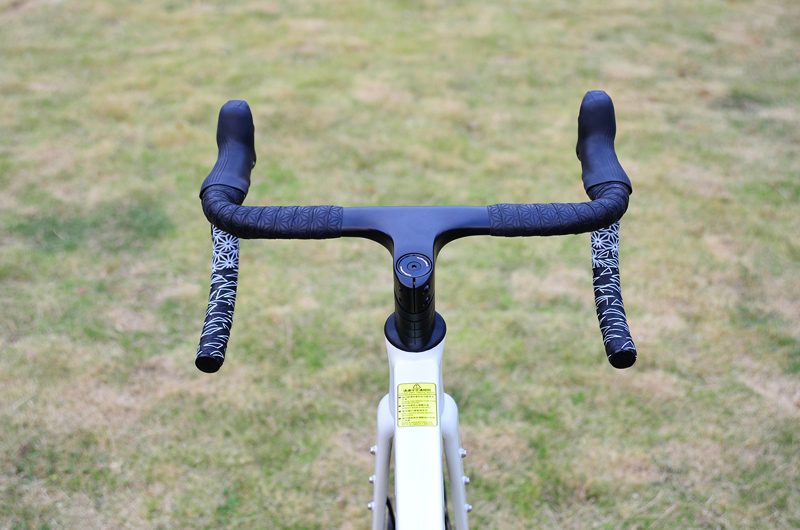
Your hands are one of only three contact points with your bike. Yet, handlebar tape is often treated as an afterthought—something to wrap on and forget about. The truth is, the right tape can transform your ride. It can reduce fatigue, improve control, and make even the longest days in the saddle feel more manageable. The Trifox BHT100 is designed to do exactly that. It’s a best road bike handlebar tape that balances comfort, durability, and grip—without breaking the bank.
What Makes the BHT100 Different?
The BHT100 uses a dual-layer EVA + PU leather construction. The EVA foam base provides the shock absorption that fights hand fatigue, while the PU leather outer layer delivers consistent, all-weather grip and resists wear. This combination is what sets it apart from single-layer tapes that either lack cushioning or wear out too quickly. It’s a tape that stays comfortable mile after mile, season after season.
Comfort That Lasts
Road vibration is the silent enemy of long rides. It creeps into your hands, arms, and shoulders, slowly draining your energy. The BHT100’s EVA foam core absorbs high-frequency vibration before it reaches your palms. This means less arm pump, less numbness, and more focus on the road ahead. Riders consistently praise the tape for its “good grip and cushioning,” noting that it stays firm and stretched even after extended use. Whether you’re grinding out a century or tackling steep climbs, the BHT100 keeps your hands fresher for longer.
Grip You Can Trust
A tape that’s comfortable but slippery is useless. The BHT100’s PU leather surface provides a secure, tactile grip in all conditions—dry or damp. The texture prevents your hands from sliding, even when you’re sweating hard or climbing in warm weather. This consistent grip reduces the tension you need to hold the bar, which in turn reduces fatigue. Less squeezing means more relaxed hands, better steering precision, and greater confidence on descents.
Durable and Easy to Install
Cheap tape peels, cracks, or loses its cushioning after a few rides. The BHT100 is built to last. Its waterproof adhesive strip helps the tape stay in place through rain and pressure-washing, and the included end plugs and finishing tape ensure a clean, durable wrap. Installation is straightforward, and the tape stays put without lifting or shifting. For riders who want a comfortable bike handlebar tape that doesn’t need constant replacement, the BHT100 is a smart investment.
A Smart Upgrade for Any Road Bike
At just $11.99, the BHT100 is one of the most cost-effective upgrades you can make[. It refreshes your cockpit, improves comfort, and enhances control—all for less than the price of a decent pair of cycling socks. Whether you’re a weekend warrior, a club racer, or a daily commuter, fresh tape is a simple way to make your bike feel new again. The BHT100 proves that you don’t need to spend a fortune to get premium performance.
Conclusion
Your handlebar tape is your direct connection to the road. Don’t settle for worn-out, slippery, or uncomfortable tape. The Trifox BHT100 delivers the grip, cushioning, and durability that serious riders demand. It’s a best road bike handlebar tape that punches well above its price point, and a comfortable bike handlebar tape that keeps you riding longer with less fatigue. Upgrade your cockpit today—your hands will thank you.
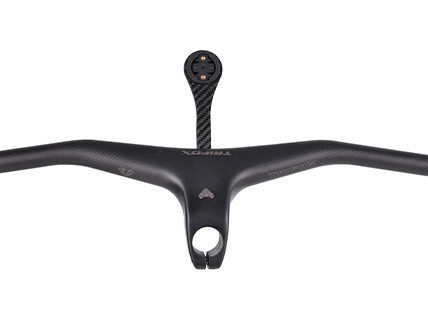
As modern bicycles become more aerodynamic and visually refined, integrated handlebars and cockpits have become increasingly popular among road, gravel, and mountain bike riders. These sleek systems improve cable management, reduce wind resistance, and create a cleaner appearance. However, they also present a challenge: where should you securely mount your cycling computer?
That's where a high-quality carbon computer mount comes in. Designed specifically for integrated handlebars, these mounts provide a lightweight, secure, and professional solution for displaying ride data exactly where you need it.
Why Integrated Handlebars Need a Dedicated Computer Mount
Traditional handlebar-mounted computer brackets often create clutter and may not fit well on modern integrated cockpits. Riders need a mounting solution that complements the design of their bike while maintaining easy access to important ride information.
A dedicated bike computer stem mount positions your cycling computer directly in front of the stem, creating a more natural viewing angle while keeping your handlebars clean and organized. This setup not only looks better but also improves safety by allowing riders to check speed, navigation, and performance metrics without taking their eyes too far off the road or trail.

The Advantages of Carbon Fiber Construction
Material choice matters when selecting a computer mount. Carbon fiber has become a preferred option because it combines exceptional strength with extremely low weight.
The TRIFOX SBH100 is constructed from premium 3K carbon fiber, providing an outstanding stiffness-to-weight ratio. Unlike heavier aluminum alternatives, carbon fiber adds minimal weight to your cockpit while maintaining excellent durability. It also helps reduce vibration, keeping your cycling computer stable even on rough roads and technical trails.
For performance-focused cyclists, every gram matters. A lightweight cockpit contributes to a more responsive bike while preserving the sleek appearance of an integrated handlebar setup.
More Than Just a Computer Mount
Today's riders often use multiple devices during a ride. In addition to a cycling computer, many cyclists rely on action cameras, bike lights, and GPS accessories.
The TRIFOX SBH100 goes beyond being a simple computer holder. Its versatile design supports major cycling computer brands such as Garmin, Bryton, CatEye, and iGPSPORT while also accommodating GoPro-compatible accessories and compatible bike lights. This makes it an excellent choice for riders looking to build a complete and organized cockpit system.
Whether you're training on the road, exploring gravel routes, or hitting technical trails, having all your devices mounted in one centralized location improves convenience and overall ride experience.
Ideal for Road and Mountain Bike Riders
While many cyclists associate computer mounts with road bikes, they are equally valuable for off-road riding. A secure mountain bike computer mount allows riders to monitor navigation, elevation, heart rate, and ride statistics without compromising control.
Mountain biking often involves rough terrain and constant vibration, making mount stability especially important. The rigid carbon construction of the SBH100 helps ensure that your cycling computer remains secure even during aggressive trail riding. Its centered position also improves visibility while maintaining a balanced cockpit setup.
What to Look for When Choosing a Computer Mount
When shopping for a computer mount for integrated handlebars, consider the following factors:
• Lightweight but durable construction
• Compatibility with major cycling computer brands
• Support for accessories such as cameras and lights
• Aerodynamic design
• Secure attachment system
• Vibration resistance
• Clean integration with modern cockpits
The SBH100 checks all of these boxes while offering the premium appearance expected from a carbon fiber component.
Benefits of an Aerodynamic Cockpit Setup
Modern cyclists increasingly focus on aerodynamic efficiency. By integrating your cycling computer neatly into the cockpit, a carbon computer mount reduces clutter and helps create a cleaner airflow around the handlebars. While the gains may seem small, every advantage matters during long rides, races, and endurance events.
Additionally, a well-organized cockpit improves the overall appearance of the bike, giving it a professional look often seen on high-end race machines.
Final Thoughts
As integrated handlebars become the standard on many modern bikes, choosing the right computer mount is more important than ever. A quality carbon mount enhances both functionality and aesthetics while keeping your cockpit organized and aerodynamic.
The TRIFOX SBH100 combines lightweight carbon construction, broad device compatibility, and clean integrated styling, making it an excellent upgrade for cyclists who want a more professional and efficient setup. Whether you're a competitive road rider, gravel adventurer, or trail enthusiast, investing in a premium carbon computer mount can significantly improve your riding experience.
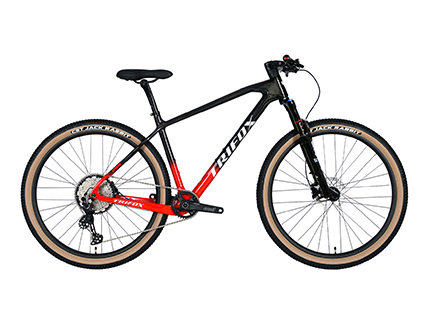
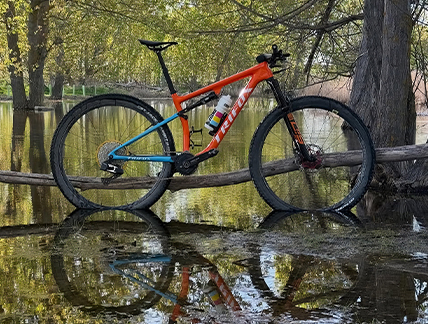
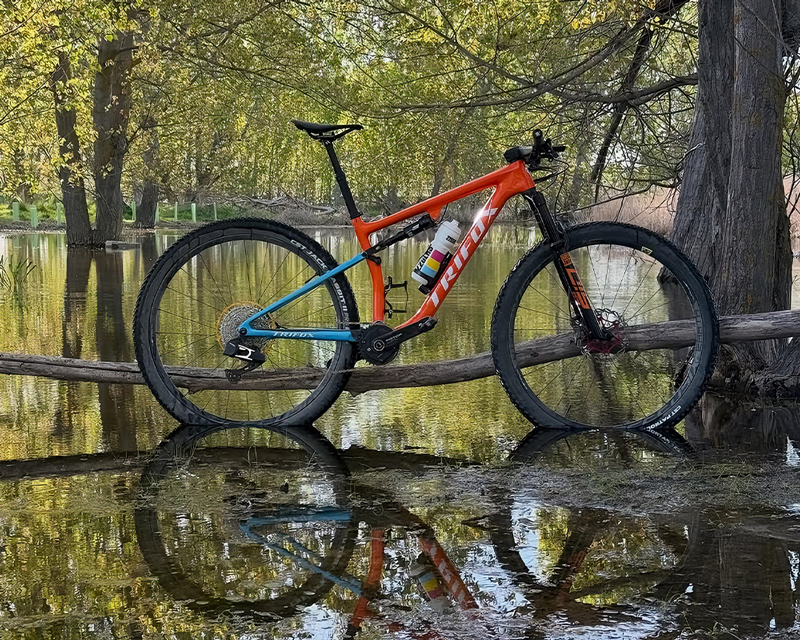
Mountain biking technology continues to evolve rapidly, with full-suspension bikes becoming increasingly capable and popular. However, despite the rise of complex suspension systems, the carbon hardtail mountain bike remains a favorite among riders of all skill levels. From cross-country racers to weekend adventurers, many cyclists still choose hardtails for their simplicity, efficiency, and exceptional riding experience.
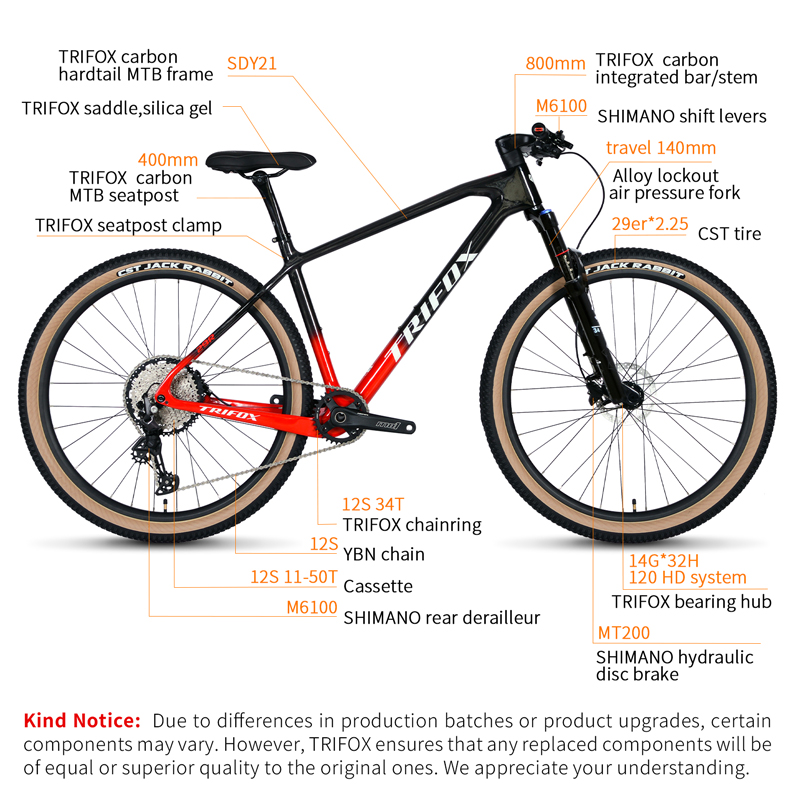
If you're looking for a bike that delivers speed, responsiveness, and outstanding value, the TRIFOX SDY21 may be exactly what you need.
The Enduring Appeal of Hardtail MTB Bikes
A hardtail MTB features a suspension fork at the front while maintaining a rigid rear triangle. This design offers several advantages that continue to attract riders around the world.
First, hardtail bikes are generally lighter than comparable full-suspension models. With fewer moving parts and a simpler frame structure, more of your pedaling power is transferred directly to the trail. This makes climbing easier and acceleration more responsive.
Second, hardtails require less maintenance. Without rear suspension pivots, bearings, and shock servicing, riders can spend more time riding and less time maintaining their bikes. For many cyclists, this simplicity translates into greater reliability and lower long-term ownership costs.
Lightweight Performance That Makes a Difference
Weight plays a significant role in mountain bike performance, especially during climbs and long-distance rides. That's why many riders prefer a lightweight hardtail mountain bike when tackling challenging terrain.
The TRIFOX SDY21 utilizes a high-quality carbon fiber frame that combines strength, stiffness, and low weight. The result is a bike that responds instantly to rider input while remaining durable enough for demanding trail conditions.
Whether you're sprinting out of corners, attacking steep climbs, or navigating technical singletrack, a lightweight carbon frame helps maximize efficiency and control.
Modern Features for Modern Riders
Today's hardtail bikes are far more advanced than those from a decade ago. The TRIFOX SDY21 incorporates several premium features designed to enhance both performance and aesthetics.
One standout feature is its fully internal cable routing. Internal cables not only create a cleaner and more professional appearance but also help protect cables from dirt, mud, and trail debris. This contributes to smoother shifting performance and reduced maintenance requirements.
The frame geometry is optimized for modern trail riding, providing stable handling on descents while maintaining efficient climbing characteristics. Combined with contemporary wheel and tire compatibility, the SDY21 delivers a balanced ride that feels equally comfortable on race courses and recreational trails.
Why Hardtails Are Ideal for Skill Development
Many experienced mountain bikers recommend hardtails because they encourage riders to develop better technique. Without rear suspension absorbing trail impacts, riders learn to choose cleaner lines, improve body positioning, and refine bike-handling skills.
These skills transfer directly to all forms of mountain biking and often make riders faster and more confident when they eventually move to other bike platforms.
For beginners, a hardtail can provide an excellent introduction to mountain biking. For experienced cyclists, it offers a pure and engaging riding experience that never goes out of style.
The Benefits of a Carbon Hardtail for XC and Trail Riding
Cross-country riders especially appreciate the efficiency of carbon hardtails. With no rear suspension energy loss, every pedal stroke contributes directly to forward momentum. This makes hardtails particularly effective for racing, endurance events, and long-distance trail adventures.
The carbon construction of the SDY21 also helps absorb minor trail vibrations while maintaining excellent frame stiffness. Riders benefit from a smoother ride without sacrificing the responsiveness that hardtails are known for.
The Smart Choice for Adventure
While full-suspension bikes certainly have their place, the carbon hardtail remains one of the most versatile and rewarding options available. Lightweight, efficient, durable, and easy to maintain, hardtails continue to deliver exceptional value for riders who want to maximize every pedal stroke.
The TRIFOX SDY21 combines modern carbon construction, full internal cable routing, responsive handling, and lightweight performance into one impressive package. Whether you're training for your next XC race, exploring local trails, or simply seeking a more efficient ride, this bike proves that sometimes the simplest solution is still the best one.
If you're ready to experience the benefits of a modern carbon hardtail, the TRIFOX SDY21 is prepared for your next adventure.

On any climb, gravity is your enemy. Every extra gram of bike weight demands more energy from your legs, slowing your progress and dulling the joy of the ascent. For cyclists who measure their rides in meters of elevation gain, the quest for a lighter bike is not vanity—it's physics. The Trifox X16TA lightweight carbon road bike frame is built with this reality in mind, offering a platform that transforms climbing from a struggle into a joy.
Weight: The Decisive Factor on Every Climb
The mathematics of climbing is simple: less mass requires less work to lift against gravity. The X16TA is crafted from T800 carbon fiber, a high-modulus material prized for its exceptional stiffness-to-weight ratio. This allows Trifox to create a frame that is both incredibly light and remarkably rigid. In the smaller sizes, the frame weight dips below the 1kg mark, a figure that places it in the company of frames costing significantly more. Shedding this much weight from the core of the bike yields immediate benefits: the bike feels eager to accelerate, responds instantly to changes in tempo, and makes steep pitches feel noticeably less daunting.
T800 Carbon: The Foundation of Performance
Weight savings alone do not make a great frame. The X16TA's T800 carbon fiber construction provides the perfect balance of stiffness and compliance. The bottom bracket and head tube areas are reinforced for maximum rigidity, ensuring that when you stamp on the pedals out of the saddle, every watt of power translates directly into forward momentum. There is no wasteful flex, no spongy feeling under load—just immediate, efficient acceleration. Yet the frame retains enough vertical compliance to absorb road vibration, keeping you fresher and more comfortable on long days in the saddle. It's this balance that defines a truly great climbing frame.
More Than Just a Climbing Frame
While the X16TA excels on the ascent, its capabilities extend far beyond the mountain passes. As a modern disc brake road bike frame, it features flat-mount disc brake compatibility and 12mm thru-axles front and rear. This setup provides consistent, powerful stopping power in all conditions and a stiff, secure wheel interface that inspires confidence on high-speed descents. The frame is designed to work seamlessly with both DI2 electronic and mechanical groupsets, offering broad compatibility for builders. With clearance for up to 25C tires (and compatibility with 28C), it can accommodate a wide range of wheelsets.
The geometry of the X16TA is tuned for responsive, race-oriented handling. With a progressive head tube angle and a compact wheelbase, the bike is agile and quick to change direction, making it a joy to ride on twisting descents and through fast-paced group rides. It's a frame that rewards an active riding style and encourages you to push your limits.
For the Rider Who Demands More
The Trifox X16TA is for the cyclist who understands that a great ride starts with a great frame. It's for the rider who seeks the thrill of lightweight acceleration, the precision of responsive handling, and the confidence of modern standards. Whether you're targeting a new personal record on your local climb, embarking on a multi-day sportive, or simply want a bike that feels alive beneath you, the X16TA is a lightweight carbon road bike frame that delivers. It is a testament to the power of modern carbon engineering, offering the performance of frames costing significantly more. By choosing the X16TA, you are choosing to ride higher and climb faster—every time you get on the bike.
The seatpost is a component most riders overlook—until they notice it. That slight discomfort on rough roads, the creak that develops after a year, or the bike weight that feels just a little too heavy. The choice between a carbon fiber and an aluminum seatpost comes down to balancing weight, comfort, durability, and cost. Here are the seven key differences to help you decide which is right for your ride.
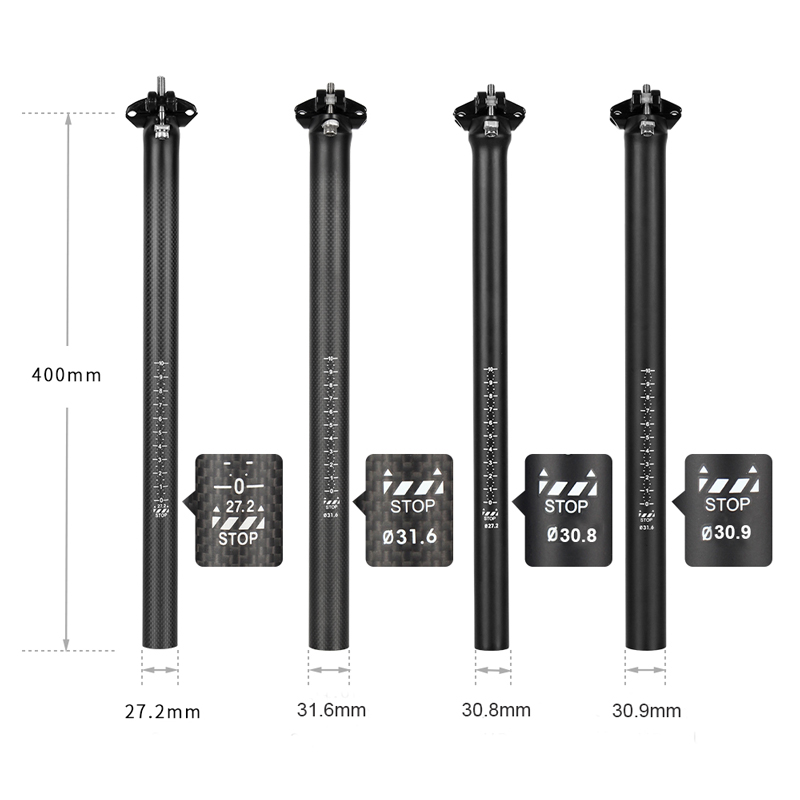
1. Weight
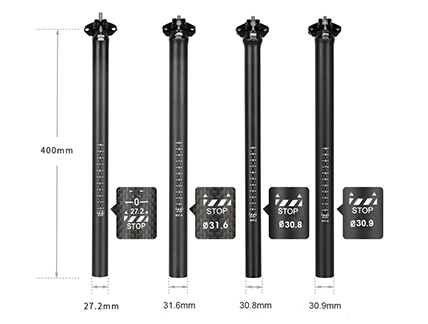
Carbon fiber is significantly lighter. A quality aluminum seatpost can weigh 220-300g. A carbon seatpost like the Trifox SLS21 tips the scale at just 160g (for the 30.8 x 400mm size), offering a weight reduction of 30-40% or more. That savings may seem small, but at the top of the seat tube, it reduces total bike weight and improves the bike’s overall feel.
2. Vibration Damping and Comfort
This is carbon’s strongest advantage. Carbon fiber naturally absorbs high-frequency “road buzz”—the vibration from rough pavement, chip seal, or gravel that causes fatigue over long miles. Aluminum transmits that vibration more directly, which can lead to numbness and discomfort. For long-distance road riders, gravel enthusiasts, or anyone seeking a smoother experience, carbon provides a meaningful increase in ride comfort.
3. Stiffness and Power Transfer
Both materials can be stiff, but carbon offers tunable stiffness. A well-designed carbon post can maintain the rigidity needed for efficient power transfer while still offering vertical compliance to absorb shocks. Aluminum is predictably stiff but cannot offer the same tuned flex characteristics.
4. Durability and Impact Resistance
Here, aluminum has the edge. Aluminum seatposts are tougher and can withstand direct impacts from rocks, crashes, or trail debris. If you regularly ride rocky terrain or subject your bike to hard use, aluminum offers peace of mind. Carbon can be damaged by overtightening or sharp impacts, though modern quality carbon posts are far more durable than early versions.
5. Installation and Maintenance
A carbon seatpost requires careful attention to torque specs and the use of carbon assembly paste (never grease). Carbon paste contains micro-grip particles that increase friction, allowing you to achieve a secure hold at lower torque to prevent slipping without crushing the carbon. An aluminum seatpost can be installed with standard grease and is more tolerant of minor torque variations. That said, an aluminum post in a carbon frame can corrode and seize over time, a problem carbon paste largely prevents. Either way, a torque wrench is recommended for both materials.
6. Aesthetics
Carbon’s UD matte or 3K weave finish looks undeniably premium. Aluminum posts typically have a painted or anodized finish. For builders who care about visual details, carbon offers a distinctive, high-end appearance.
7. Price and Value
Carbon costs more. A quality carbon seatpost typically ranges from $150 to $400, while aluminum options often run $50 to $150. The question becomes: is the weight savings and vibration damping worth the premium? For competitive riders, touring cyclists, or anyone spending long hours in the saddle, the answer is often yes. For casual or budget-conscious riders, aluminum remains a excellent choice.
Making Your Choice
If you prioritize durability and cost, aluminum is a reliable choice. If you value weight reduction, ride comfort, and a premium aesthetic—and you’re willing to install it correctly with a torque wrench and carbon paste—a carbon seatpost like the carbon fiber seatpost SLS21 delivers measurable benefits on every ride. The Trifox SLS21 is available in multiple diameters, including the popular 27.2mm seatpost size for Mtb,road and gravel bikes, and features a 400mm length, T800 carbon construction, and titanium hardware. Upgrading your seatpost is one of the most effective ways to improve both bike performance and rider comfort—without changing how your bike looks from 10 feet away.
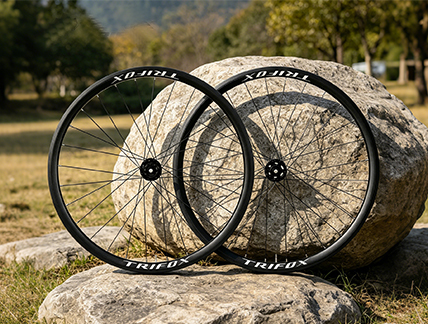
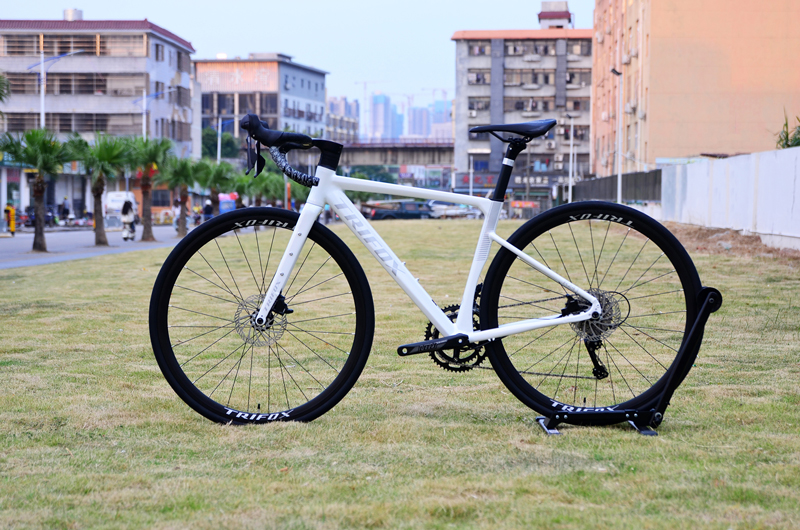
For years, road cyclists believed that narrow tires at sky‑high pressure were the only path to speed. That era is over. Today, riders understand that a wider rim — even by a few millimeters — fundamentally changes how a tire behaves. It reshapes the contact patch, lowers optimal pressure, and transforms ride quality. The Trifox AWT7 alloy disc brake wheelset is a perfect example of this modern philosophy. With its 14mm internal width, it’s engineered to do something simple but powerful: make your tires work better, so you ride faster, safer, and more comfortably. At an affordable price, it’s one of the best cheap bike wheelset options available for riders who want real performance without breaking the bank.
Rim Width Shapes the Tire, Not Just the Wheel
The rim isn’t just a hoop that holds the tire. Its internal width dictates the tire’s profile once inflated. On a narrow rim, a tire bulges into a light‑bulb shape — tall and narrow, with a small contact patch. This shape forces high pressure to keep the sidewalls stable, which translates into a harsh, unforgiving ride. A wider rim supports the tire’s sidewalls more effectively, creating a flatter, wider profile. This shape stabilizes the tread, reduces squirm, and dramatically increases the contact patch. As one industry analysis notes, “when the internal width of a rim reaches 21mm or more,” the contact surface rises considerably, enhancing redistribution of contact pressure and increasing lateral grip during cornering. The result is more predictable handling and better traction, especially on wet or loose surfaces.
The AWT7’s 14mm internal width is purpose‑selected for modern 25‑28mm tires. Rather than forcing a tire to bulge unnaturally, it creates a smooth, continuous surface from the rim to the tread. This profile improves stability when cornering and reduces the vague, wandering sensation that plagues narrow‑rim setups. Riders using the AWT7 on classic road routes have noted the wheels feel “planted” and “predictable” — a direct result of matching rim width to tire shape.
How Width Unlocks Lower Pressure and Higher Comfort
The most direct benefit of a wider rim is what it allows you to do with air pressure. A properly supported tire can be run at significantly lower pressures without risking pinch flats or rim strikes. According to wider rim research, using a 21mm internal width rim allows tires to be run at lower pressures, absorbing road vibrations more effectively and reducing the impact transmitted to the rider’s body and the frame. The AWT7’s 14mm width, while not as extreme as gravel‑oriented rims, hits the sweet spot for road use. It lets you drop pressure from the traditional 100‑120 psi range down to 80‑95 psi, depending on rider weight and tire choice. At these lower pressures, the tire flexes over road imperfections rather than bouncing off them. The result is dramatically reduced hand and saddle fatigue on rough pavement, longer chip seal, and worn asphalt.
This pressure flexibility also helps the tire maintain traction. A tire at lower pressure deforms around irregularities, increasing the effective contact patch. As one manufacturer explains, a wider internal rim maximizes tire support and grip, enhancing stability and comfort, and the lower pressure setup “absorbs road vibrations more effectively, therefore lowering the impact sent to the rider’s body.” That’s the difference between a bike that feels fragile on rough roads and one that inspires confidence mile after mile.
Alloy Efficiency Meets Budget‑Friendly Performance
Carbon wheels get the headlines, but alloy wheels like the AWT7 deliver 95% of the performance at a fraction of the cost. The AWT7’s 30mm rim depth offers a balance of aerodynamics and crosswind stability, while the 28 Pillar stainless steel spokes and welded aluminum construction provide the stiffness needed for efficient power transfer. Weighing approximately 1,956g per pair, the wheels are light enough for climbing yet durable enough for daily training. The 6‑pawl, 120‑point engagement hubs deliver crisp acceleration, and the disc brake compatibility ensures consistent stopping power in all weather. For riders seeking an affordable but capable bicycle disc wheel, the AWT7 represents exceptional value — a wheelset that doesn’t compromise on the fundamentals of ride quality.
The Bottom Line
Rim width isn’t a secondary spec. It’s a primary determinant of how your bike feels on the road. A 14mm internal width strikes a balance: wide enough to support the tire’s sidewalls and enable comfortable lower pressures, yet narrow enough to remain aerodynamically efficient for road use. The Trifox AWT7 alloy disc wheelset capitalizes on this design principle, delivering a ride that is stable, grippy, and noticeably more comfortable than traditional narrow‑rim wheelsets. For cyclists on a budget who refuse to sacrifice ride quality, the AWT7 is a smart upgrade that proves modern alloy engineering can rival carbon’s best traits — without the premium price tag.
You've invested in a beautiful new carbon frame – the Trifox X16TA, with its stunning chameleon blue and purple finishes, built for both men and women. It’s light, stiff, and fast. You carefully install the bottom bracket, route the cables, and fit the groupset. Then, you reach for your hex key to tighten the seatpost clamp. "Just a little extra for safety," you think. That single moment of over‑enthusiasm could be the beginning of the end for your expensive frame. Here’s why.
The Fragile Nature of Carbon Fiber
Carbon fiber is an anisotropic composite material. It is phenomenally strong in the directions it was designed for – typically along the length of the tubes to withstand pedaling and impact forces. But it is surprisingly weak and vulnerable to forces it wasn't designed for, such as the concentrated, crushing pressure of a clamp or a bolt head. While aluminum or steel bolts will stretch and deform before breaking, giving you a tactile warning, carbon fiber is rigid and unforgiving. As an engineer explains, carbon is “more susceptible to crushing and cracking when improperly set up. Simply put, the margin for error is much smaller”. It doesn't bend or give; it cracks, and once cracked, its structural integrity is compromised, often catastrophically and without warning.
The Risky Clamps and Bolts on Your Frame
Every bolt on your carbon bike has a precise torque specification, typically measured in Newton-meters (Nm). Ignoring these specs is a gamble. The most common points of failure include:
• The Seatpost Collar: This is the most frequent victim. Most manufacturers specify a torque of 4–6 Nm for seatpost clamps. Over-tightening it can crush the carbon seatpost itself, leading to a slipping saddle or a sudden, dangerous collapse. One mechanic notes that “a chronically slipping seatpost (even after tightening it down numerous times) is often the result of overtightening the clamp, damaging the carbon”.
• The Stem Faceplate and Steerer Tube: The stem bolts that clamp your handlebars and the steerer tube of your fork are also highly vulnerable. A stem-to-steerer clamp torque of 5–7 Nm is common. Over-torquing the stem bolts on a medium bike frame can crush the carbon steerer tube, leading to a loss of steering control. This is exacerbated by using an incorrectly sized or too-short expander plug, as the stem’s pinch bolts then have no internal support, making the steerer tube easy to crack.
• Bottle Cage Bolts: Even seemingly insignificant bolts pose a risk. Over-tightening a bottle cage bolt on a down tube can create a “stress riser.” This is a small area of intense localized stress that, over time and with road vibration, can propagate into a crack that travels through the carbon layers, potentially splitting the frame tube.
How to Build and Ride with Confidence
Protecting your investment in a high‑performance ladies bike frame or any carbon bike requires a change in mindset and technique.
• Invest in a Quality Torque Wrench: This is non‑negotiable. A “click‑type” torque wrench is the most common and user‑friendly option, providing an audible and tactile click when the set torque value is reached. As one industry expert warns, “overtightening components could result in damaging the carbon or even breaking the bolt” and using a torque wrench is vital for the weekend mechanic. For critical parts of a carbon frame, it's simply not worth the risk to work by feel alone.
• Use Carbon Assembly Paste: Never grease seatposts, handlebars, or steerer tubes. Grease lubricates the interface, artificially reducing friction and causing you to need to tighten the bolt more to achieve the same hold. Carbon assembly paste contains tiny abrasive particles that increase friction between two carbon surfaces, allowing you to achieve a secure, non-slip hold at a much lower torque. Ritchey, a leading component manufacturer, notes its friction-enhancing paste can “allow tightening torque to be reduced by up to 30%”.
• Clamp the Bike Correctly: When working on your bike in a repair stand, never clamp it directly by the frame tubes. A carbon tube “can be crushed if it's over-tightened”. Always secure your bike by clamping the seatpost. If you have a carbon seatpost, use a work-stand adaptor or a sacrificial alloy post.
Conclusion
The Trifox X16TA is a masterpiece of modern carbon engineering, offering a lightweight and responsive ride in a range of sizes and colors to fit a diverse range of riders, from those seeking a medium bike frame to those looking for a ladies bike frame. But its ultimate longevity and safety are in your hands. The immense strength of a carbon frame is precisely engineered. By respecting torque specifications, investing in the right tools, and using correct assembly compounds, you can ensure that your dream bike remains a source of speed and joy for many thousands of miles, not a heartbreaking lesson in mechanical sympathy.
The mountain bike industry has a habit of changing standards just when you think you’ve settled on a dream build. Rear axle spacing, derailleur hangers, tire widths—all have shifted over the past decade, often leaving older frames incompatible with newer, better components. If you’re investing in a disc brake bike frame today, you want to be sure it can accept tomorrow’s drivetrains, wheels, and tires. The Trifox TRAIL II PRO is engineered with three key modern standards: Boost 148mm spacing, a Universal Derailleur Hanger (UDH), and generous tire clearance. Here’s why those specs matter for the future.
Boost 148: The Foundation of Future Wheel Stiffness
Boost 148x12mm rear spacing has rapidly become the industry benchmark for mountain bikes. By widening the hub flanges compared to older 142mm or 135mm standards, Boost creates a significantly stiffer rear wheel through improved spoke bracing angles. This isn‘t just a performance upgrade—it’s a compatibility necessity. Nearly every modern frame, fork, and wheelset uses Boost spacing today, and the standard is likely to remain dominant for years. Choosing a non-Boost frame means limiting your wheel and hub options. The TRAIL II PRO’s Boost 148mm thru-axle dropout ensures you’ll have access to the best wheels on the market now and in the foreseeable future, from lightweight XC race hoops to rugged trail builds.
UDH: Your Gateway to Next-Generation Drivetrains
The Universal Derailleur Hanger (UDH) is arguably the most important future-proofing feature on any modern frame. Originally developed by SRAM, the UDH standardizes the derailleur mounting interface across all bikes. This has two profound benefits. First, it eliminates the hunt for frame-specific hangers—replacements are now universal. Second, and more critically, the UDH is the mandatory interface for SRAM’s revolutionary Transmission and Full Mount drivetrains. These next-generation systems mount the derailleur directly to the frame, bypassing a traditional hanger entirely for unmatched shift precision and crash durability. A frame with a UDH is compatible with all current derailleurs and ready for whatever full‑mount systems the future holds. The TRAIL II PRO’s UDH dropout ensures you won‘t be left behind as drivetrain technology evolves.
Tire Clearance: Room to Grow as Rubber Expands
Tire widths have been steadily increasing across all mountain bike disciplines. XC race tires that were once 2.1” are now routinely 2.4”, with 2.6” options appearing for more aggressive terrain. The TRAIL II PRO is designed with 29 x 2.25” as its official clearance, but real-world experience shows the frame can accommodate a 2.3” tire in dry conditions, and some owners have successfully mounted 2.4” rubber on standard rims. This generous clearance means you’re not locked into narrow tires as the industry trend toward wider, more capable rubber continues. Whether you want the grip of a 2.4” for loose races or the volume of a 2.6” for trail adventures, the TRAIL II PRO has the breathing room to adapt.
Built for Tall Riders Too: The 19‑Inch Frame Option
The TRAIL II PRO is available in 17” and 19” sizes. For taller riders, the 19 inch bike frame provides a roomy reach (470mm) and taller stack (606.1mm), accommodating riders from 175–190cm without compromising the frame’s progressive 67.5° head tube angle. Importantly, the future-proofing benefits—Boost, UDH, and tire clearance—scale across both sizes, ensuring tall riders enjoy the same long-term compatibility as their shorter counterparts.
Why These Standards Matter for Your Wallet
Buying a frame that anticipates future standards isn’t just about performance; it’s about value. A frame that can accept new drivetrains, wider wheels, and larger tires won’t become obsolete quickly. You can upgrade components piecemeal over years, breathing new life into the bike without replacing the chassis. The TRAIL II PRO’s T800 carbon construction, internal routing, and threaded BB68 bottom bracket further enhance its longevity. When you invest in this disc brake bike frame, you’re not just buying a bike for this season—you’re buying a platform that will remain competitive and compatible for seasons to come. Future-proof your build today.


