


The wait is finally over. Two of the most iconic colorways from Trifox—the sophisticated Titane and the vibrant Orange & Blue—have returned to the MFM100 lineup. These frames were previously some of the most sought-after configurations, and they are now back in stock for a limited time. If you've been waiting to build a carbon boost mtb frame that turns heads and conquers trails, this is your moment.

A Frame That Demands Attention
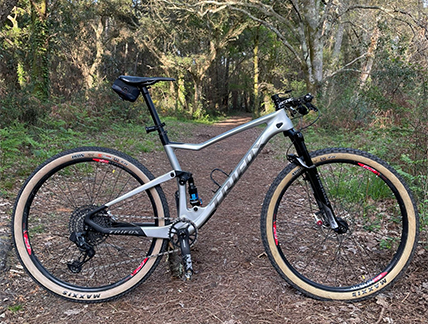
The MFM100 has always been more than just a full-suspension frame. It's a statement of intent. Built from high-quality T800 carbon fiber, it delivers the perfect blend of strength, rigidity, and lightweight performance. The Titane finish offers a sleek, understated elegance that looks fast even when standing still. Meanwhile, the Orange & Blue paint scheme is a bold, race-inspired design that announces your arrival on the trail. Both finishes are applied with the same attention to detail that defines every aspect of this frame.
Performance That Matches the Look
Underneath the stunning paint, the MFM100 is a serious carbon xc mountain bike frame designed for off-road enthusiasts who demand exceptional performance and durability. The frame features a Boost 148 x 12mm rear axle spacing, which provides a stronger and stiffer rear wheel for enhanced tracking and control. The 68.5° head tube angle and 74.7° seat tube angle deliver confident, capable handling that climbs efficiently and descends with composure. Whether you're racing XC or exploring rugged backcountry trails, this frame is built to perform.
The frame also features a Trunnion rear shock mount for efficient pedaling and an asymmetric design that ensures a smooth structure and unobstructed cable movement. Internal cable routing keeps the bike looking clean and protects cables from the elements. With clearance for tires up to 29 x 2.35″, the MFM100 is ready for a wide range of trail conditions. Available in four sizes—15.5″, 17.5″, 19″, and 20.5″—this frame fits riders from 150cm to 195cm.
Limited Stock – Act Fast
These colorways have a history of selling out quickly, and this restock is no exception. Riders who have built up the MFM100 consistently praise its "excellent quality" and "superior comfort". One reviewer described it as "very reactive when you hit it with acceleration … the force you apply to the pedals goes directly to the wheels." On descents, users report that the bike "tracks straight on steep, rocky runs" and stays composed under hard hits. If you want to experience the balance of climbing efficiency and descending confidence that this carbon xc mountain bike frame offers, don't wait.
Head to the product page now to secure your Titane or Orange & Blue MFM100 before they disappear again.
Links
Trifox MFM100 Carbon Full-Suspension Frame
Cable routing used to be simple: zip ties and external guides. Today, frame designers offer a spectrum of options, from fully exposed cables to completely hidden lines. For riders considering a new 29er Carbon MTB Mountain Bike Frame Hardtail, the choice between full internal and semi-internal routing can be surprisingly significant. Here's what you need to know.
What's the Difference?
Full internal routing means every cable and hose is completely enclosed within the frame from the cockpit to the exit points. On frames like the Trifox SDY21, cables enter through the headtube and travel through integrated internal channels, emerging only at the derailleur and brake caliper. Nothing is visible except the clean lines of the frame itself.
Semi-internal routing hides cables for part of the journey but leaves them exposed at certain points—often along the downtube or under the top tube, secured by clips or guides. The cables are tucked away but still visible and accessible.
The Case for Full Internal Routing
The primary advantage is aesthetics. A fully integrated cockpit creates a sleek, modern look that many riders find irresistible. Beyond appearances, full internal routing offers superior cable protection. Cables are shielded from mud, water, grit, and crash damage, which extends their lifespan and maintains consistent shifting and braking performance. The SDY21's T800 carbon construction and full internal routing exemplify this approach, combining ultra-lightweight performance with a clean, race-ready appearance.

Full internal routing also reduces aerodynamic drag. While the savings are modest—roughly 1 to 2 watts at competitive speeds—every advantage counts for racers and performance-focused riders. Additionally, internal channels can reduce cable rattle when properly guided, creating a quieter ride over rough terrain.
The Case for Semi-Internal Routing
Semi-internal routing's biggest strength is maintenance simplicity. When cables need replacing or brakes need bleeding, exposed sections are far easier to access. There's no fishing lines through frame cavities or struggling with internal guides. For home mechanics or riders who frequently swap components, this convenience is significant.
Semi-internal routing also reduces friction in the system. Shorter, straighter cable paths with fewer bends mean less resistance, which can translate to crisper shifting and lighter brake feel. Some riders also prefer the peace of mind of being able to visually inspect cables for wear or damage without disassembling the bike.
The Trade-Offs
Full internal routing isn't without downsides. Initial installation is more complex—threading hoses through internal channels requires patience and sometimes specialized tools. Some frames can also suffer from cable rattle if the internal guides aren't well-designed. And if a cable needs replacement mid-ride, you're out of luck—it's a workshop job.
Semi-internal routing, while more practical, exposes cables to the elements. Mud and grit can accelerate wear, and exposed lines are vulnerable to snagging on trail debris.
Which Should You Choose?
The decision comes down to your priorities. If you value clean aesthetics, maximum cable protection, and a race-ready look, full internal routing—as found on the SDY21—is the way to go. This ultra-lightweight carbon frame exemplifies the benefits of full integration: sleek appearance, protected cables, and the stiffness and responsiveness that come with modern carbon construction.
If you prioritize easy maintenance, lower friction, and the ability to swap components without hassle, semi-internal routing offers genuine practical advantages.
Both systems have their place. The SDY21's full internal routing, available in multiple colors including glossy red, black, and green, demonstrates that modern engineering can deliver the best of both worlds: stunning aesthetics and reliable performance. Choose the routing that fits your riding style—and your tolerance for cable maintenance.
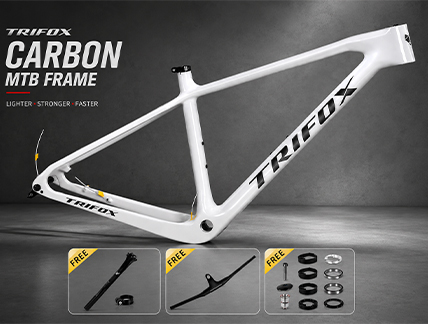
For mountain bikers seeking the ideal balance of speed, efficiency, and trail feel, the hardtail remains a compelling choice. And when that hardtail is crafted from high-quality carbon fiber, the benefits multiply. The Trifox MFM200 is a carbon hardtail mtb frame that embodies everything modern riders look for: lightweight construction, responsive geometry, and the durability to handle aggressive trail riding. Here’s why this 29er carbon hardtail deserves a spot in your garage.
The Carbon Advantage: Lightweight and Stiff
The MFM200 is constructed from T800 full carbon fiber, a material prized for its exceptional strength-to-weight ratio. Weighing in at just 1,239g for the 15.5″ frame, it is impressively light for a hardtail chassis. This low weight translates directly to the trail: quicker acceleration, easier climbing, and a bike that feels lively and responsive under power. But carbon isn’t just about saving grams. The T800 construction provides the stiffness needed for precise handling and efficient power transfer, ensuring every watt of effort is converted into forward momentum. Whether you're sprinting out of a corner or powering up a steep climb, the MFM200 responds with immediacy.

Modern Geometry for Confident Handling
The MFM200’s geometry is tuned for the demands of modern trail and XC riding. A 70° head tube angle provides a stable, confident feel on descents, while the 74.7° seat tube angle places the rider in an efficient pedaling position for climbing. The 440mm chainstays strike a balance between agility and stability, allowing for quick direction changes without sacrificing high-speed composure. The frame accommodates 29er wheels with tires up to 2.1″, offering the rollover capability and traction that 29-inch wheels are known for.
For riders seeking a 29er carbon hardtail frame that excels on diverse terrain, the MFM200's geometry delivers a balanced, predictable ride. It climbs with efficiency, descends with confidence, and handles technical sections with poise — a true all-rounder for the modern trail rider.
Internal Cable Routing and Modern Standards
The MFM200 features full internal cable routing, keeping cables protected from the elements and giving the bike a clean, sleek appearance. This design choice also simplifies maintenance and reduces drag, contributing to a more aerodynamic profile. The frame accepts a 31.6mm seatpost and uses a threaded BSA bottom bracket — a reliable standard that is creak-free and easy to service. The tapered head tube (1-1/8″ to 1-1/2″) provides a stiff interface for modern forks, enhancing steering precision. And with the ability to choose between Quick Release and Thru-Axle dropout options, the MFM200 offers compatibility with a wide range of wheelsets.
Versatility for Every Rider
Available in three sizes — 15.5″, 17″, and 19″ — the MFM200 fits riders from 150cm to 190cm. Whether you're a cross-country racer seeking a lightweight weapon for race day, a trail rider looking for a responsive and durable hardtail, or a rider upgrading from an entry-level bike, the MFM200 offers exceptional versatility. The frame is compatible with both single and double chainring drivetrains, and it can accommodate a dropper post for added descending control.
Value That Stands Out
At just $329 (regularly $639.99), the MFM200 is priced to compete with aluminum frames, offering the performance benefits of carbon at an accessible price point. It's an affordable entry into the world of carbon mountain biking, providing a high-quality foundation for a build that can grow with your skills. The 2-year warranty further underscores Trifox's confidence in the frame's durability.
Conclusion
The Trifox MFM200 is more than just a lightweight carbon hardtail frame. It's a thoughtfully engineered platform that combines modern geometry, quality materials, and thoughtful features to deliver a ride that is both efficient and engaging. Whether you're chasing podiums or simply exploring new trails, this carbon hardtail mtb frame provides the foundation for a bike that will inspire confidence and enjoyment for years to come. With its blend of performance, value, and versatility, the MFM200 stands as a compelling choice for any rider ready to experience the benefits of carbon.
As modern bicycles become more aerodynamic and visually refined, integrated handlebars and cockpits have become increasingly popular among road, gravel, and mountain bike riders. These sleek systems improve cable management, reduce wind resistance, and create a cleaner appearance. However, they also present a challenge: where should you securely mount your cycling computer?
That's where a high-quality carbon computer mount comes in. Designed specifically for integrated handlebars, these mounts provide a lightweight, secure, and professional solution for displaying ride data exactly where you need it.
Why Integrated Handlebars Need a Dedicated Computer Mount
Traditional handlebar-mounted computer brackets often create clutter and may not fit well on modern integrated cockpits. Riders need a mounting solution that complements the design of their bike while maintaining easy access to important ride information.
A dedicated bike computer stem mount positions your cycling computer directly in front of the stem, creating a more natural viewing angle while keeping your handlebars clean and organized. This setup not only looks better but also improves safety by allowing riders to check speed, navigation, and performance metrics without taking their eyes too far off the road or trail.

The Advantages of Carbon Fiber Construction
Material choice matters when selecting a computer mount. Carbon fiber has become a preferred option because it combines exceptional strength with extremely low weight.
The TRIFOX SBH100 is constructed from premium 3K carbon fiber, providing an outstanding stiffness-to-weight ratio. Unlike heavier aluminum alternatives, carbon fiber adds minimal weight to your cockpit while maintaining excellent durability. It also helps reduce vibration, keeping your cycling computer stable even on rough roads and technical trails.
For performance-focused cyclists, every gram matters. A lightweight cockpit contributes to a more responsive bike while preserving the sleek appearance of an integrated handlebar setup.
More Than Just a Computer Mount
Today's riders often use multiple devices during a ride. In addition to a cycling computer, many cyclists rely on action cameras, bike lights, and GPS accessories.
The TRIFOX SBH100 goes beyond being a simple computer holder. Its versatile design supports major cycling computer brands such as Garmin, Bryton, CatEye, and iGPSPORT while also accommodating GoPro-compatible accessories and compatible bike lights. This makes it an excellent choice for riders looking to build a complete and organized cockpit system.
Whether you're training on the road, exploring gravel routes, or hitting technical trails, having all your devices mounted in one centralized location improves convenience and overall ride experience.
Ideal for Road and Mountain Bike Riders
While many cyclists associate computer mounts with road bikes, they are equally valuable for off-road riding. A secure mountain bike computer mount allows riders to monitor navigation, elevation, heart rate, and ride statistics without compromising control.
Mountain biking often involves rough terrain and constant vibration, making mount stability especially important. The rigid carbon construction of the SBH100 helps ensure that your cycling computer remains secure even during aggressive trail riding. Its centered position also improves visibility while maintaining a balanced cockpit setup.
What to Look for When Choosing a Computer Mount
When shopping for a computer mount for integrated handlebars, consider the following factors:
• Lightweight but durable construction
• Compatibility with major cycling computer brands
• Support for accessories such as cameras and lights
• Aerodynamic design
• Secure attachment system
• Vibration resistance
• Clean integration with modern cockpits
The SBH100 checks all of these boxes while offering the premium appearance expected from a carbon fiber component.
Benefits of an Aerodynamic Cockpit Setup
Modern cyclists increasingly focus on aerodynamic efficiency. By integrating your cycling computer neatly into the cockpit, a carbon computer mount reduces clutter and helps create a cleaner airflow around the handlebars. While the gains may seem small, every advantage matters during long rides, races, and endurance events.
Additionally, a well-organized cockpit improves the overall appearance of the bike, giving it a professional look often seen on high-end race machines.
Final Thoughts
As integrated handlebars become the standard on many modern bikes, choosing the right computer mount is more important than ever. A quality carbon mount enhances both functionality and aesthetics while keeping your cockpit organized and aerodynamic.
The TRIFOX SBH100 combines lightweight carbon construction, broad device compatibility, and clean integrated styling, making it an excellent upgrade for cyclists who want a more professional and efficient setup. Whether you're a competitive road rider, gravel adventurer, or trail enthusiast, investing in a premium carbon computer mount can significantly improve your riding experience.
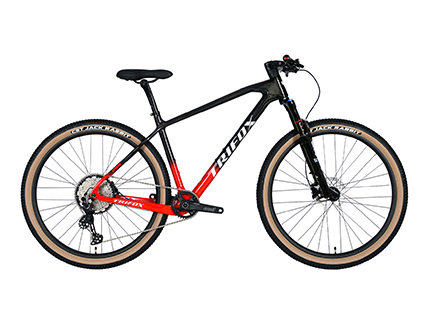
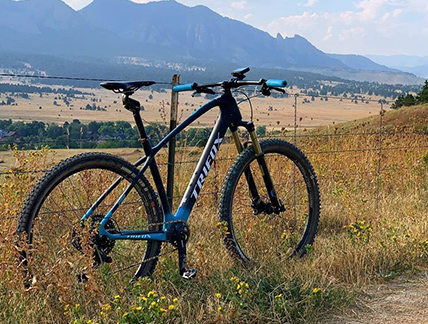
Mountain biking technology continues to evolve rapidly, with full-suspension bikes becoming increasingly capable and popular. However, despite the rise of complex suspension systems, the carbon hardtail mountain bike remains a favorite among riders of all skill levels. From cross-country racers to weekend adventurers, many cyclists still choose hardtails for their simplicity, efficiency, and exceptional riding experience.
If you're looking for a bike that delivers speed, responsiveness, and outstanding value, the TRIFOX SDY21 may be exactly what you need.
The Enduring Appeal of Hardtail MTB Bikes
A hardtail MTB features a suspension fork at the front while maintaining a rigid rear triangle. This design offers several advantages that continue to attract riders around the world.
First, hardtail bikes are generally lighter than comparable full-suspension models. With fewer moving parts and a simpler frame structure, more of your pedaling power is transferred directly to the trail. This makes climbing easier and acceleration more responsive.
Second, hardtails require less maintenance. Without rear suspension pivots, bearings, and shock servicing, riders can spend more time riding and less time maintaining their bikes. For many cyclists, this simplicity translates into greater reliability and lower long-term ownership costs.
Lightweight Performance That Makes a Difference
Weight plays a significant role in mountain bike performance, especially during climbs and long-distance rides. That's why many riders prefer a lightweight hardtail mountain bike when tackling challenging terrain.
The TRIFOX SDY21 utilizes a high-quality carbon fiber frame that combines strength, stiffness, and low weight. The result is a bike that responds instantly to rider input while remaining durable enough for demanding trail conditions.
Whether you're sprinting out of corners, attacking steep climbs, or navigating technical singletrack, a lightweight carbon frame helps maximize efficiency and control.
Modern Features for Modern Riders
Today's hardtail bikes are far more advanced than those from a decade ago. The TRIFOX SDY21 incorporates several premium features designed to enhance both performance and aesthetics.
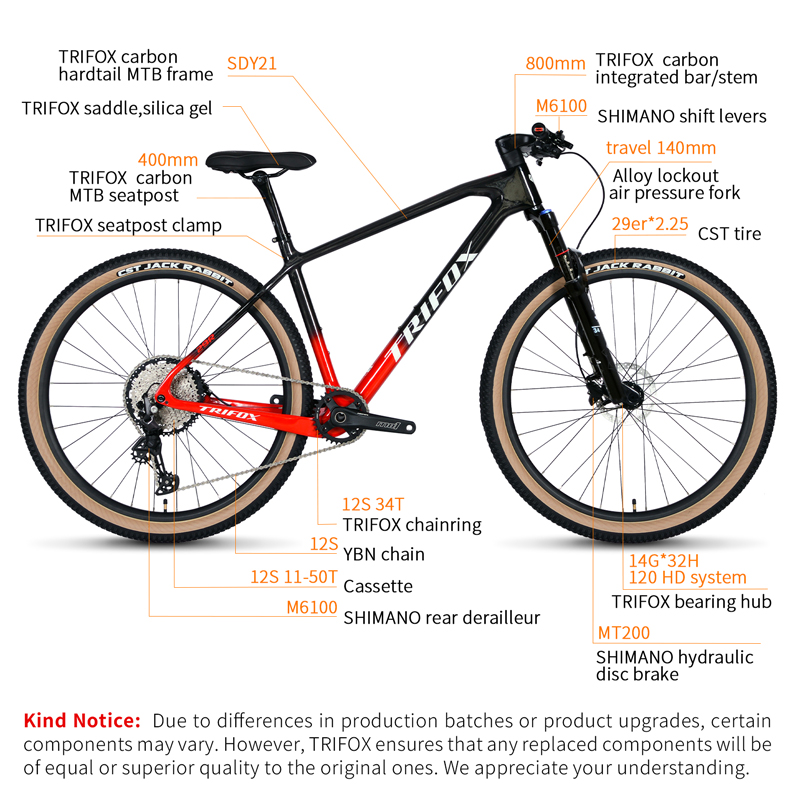
One standout feature is its fully internal cable routing. Internal cables not only create a cleaner and more professional appearance but also help protect cables from dirt, mud, and trail debris. This contributes to smoother shifting performance and reduced maintenance requirements.
The frame geometry is optimized for modern trail riding, providing stable handling on descents while maintaining efficient climbing characteristics. Combined with contemporary wheel and tire compatibility, the SDY21 delivers a balanced ride that feels equally comfortable on race courses and recreational trails.
Why Hardtails Are Ideal for Skill Development
Many experienced mountain bikers recommend hardtails because they encourage riders to develop better technique. Without rear suspension absorbing trail impacts, riders learn to choose cleaner lines, improve body positioning, and refine bike-handling skills.
These skills transfer directly to all forms of mountain biking and often make riders faster and more confident when they eventually move to other bike platforms.
For beginners, a hardtail can provide an excellent introduction to mountain biking. For experienced cyclists, it offers a pure and engaging riding experience that never goes out of style.
The Benefits of a Carbon Hardtail for XC and Trail Riding
Cross-country riders especially appreciate the efficiency of carbon hardtails. With no rear suspension energy loss, every pedal stroke contributes directly to forward momentum. This makes hardtails particularly effective for racing, endurance events, and long-distance trail adventures.
The carbon construction of the SDY21 also helps absorb minor trail vibrations while maintaining excellent frame stiffness. Riders benefit from a smoother ride without sacrificing the responsiveness that hardtails are known for.
The Smart Choice for Adventure
While full-suspension bikes certainly have their place, the carbon hardtail remains one of the most versatile and rewarding options available. Lightweight, efficient, durable, and easy to maintain, hardtails continue to deliver exceptional value for riders who want to maximize every pedal stroke.
The TRIFOX SDY21 combines modern carbon construction, full internal cable routing, responsive handling, and lightweight performance into one impressive package. Whether you're training for your next XC race, exploring local trails, or simply seeking a more efficient ride, this bike proves that sometimes the simplest solution is still the best one.
If you're ready to experience the benefits of a modern carbon hardtail, the TRIFOX SDY21 is prepared for your next adventure.

The excitement of the World Cup inspires millions of fans around the globe to embrace competition, endurance, and the pursuit of excellence. While football captures the world's attention, it's also the perfect time to start your own adventure on two wheels. Whether you're exploring forest trails, tackling technical climbs, or chasing personal bests, a high-performance mountain bike begins with the right frame.
For riders who demand lightweight efficiency and trail-ready capability, the xc full suspension bike frames from TRIFOX offer an outstanding balance of speed, control, and comfort.
Why Choose a Carbon Full Suspension MTB Frame?
Modern cross-country riding requires equipment that can handle diverse terrain while maintaining efficiency. A carbon fiber full suspension frame absorbs trail vibrations, improves traction, and reduces rider fatigue, allowing you to stay comfortable during long-distance adventures.
The TRIFOX TRAIL II PRO is engineered with premium T800 carbon fiber, delivering an impressive lightweight construction that helps riders accelerate faster, climb more efficiently, and maintain better control on demanding trails. Its optimized geometry and suspension platform provide confidence whether you're racing, training, or simply enjoying weekend rides.
Built for Cross-Country Performance
If you're searching for a reliable cross country bike frame, the TRAIL II PRO is designed specifically for modern XC riders.
Key features include:
• Premium T800 full carbon fiber construction
• Internal cable routing for a clean appearance
• UDH-compatible dropout design
• Boost 148mm rear spacing
• 29er wheel compatibility
• Rear shock compatibility with 190mm shock length
• Lightweight design ideal for XC racing and marathon rides
These features make the frame suitable for riders who want efficient power transfer without sacrificing comfort on rough terrain. The balanced suspension design helps maintain traction during climbs while remaining responsive on descents.

Turn World Cup Inspiration into Real Adventure
The World Cup celebrates teamwork, determination, and the drive to push beyond limits. Cyclists share those same values every time they hit the trail. Whether you're preparing for your next race or planning an unforgettable weekend ride, upgrading your bike with a quality carbon frame can transform your riding experience.
The TRIFOX TRAIL II PRO is available in multiple attractive color options, including the eye-catching Orange & Blue finish, making it a perfect choice for riders who want both performance and style. Combined with its lightweight construction and advanced suspension platform, it delivers the confidence needed to conquer challenging trails.
Why Carbon XC Frames Are Trending in 2026
As mountain biking continues to evolve, riders are increasingly choosing lightweight carbon platforms for improved efficiency and trail performance. A high-quality carbon mountain bike frame offers excellent stiffness-to-weight ratio, helping riders maintain speed on climbs while providing precise handling on technical sections.
Full suspension XC bikes have become more capable than ever, making them the preferred choice for marathon races, adventure riding, and competitive cross-country events. The TRAIL II PRO embodies these modern trends with a race-inspired design that remains comfortable for all-day adventures.
Ready for Your Next Ride?
As the World Cup inspires athletes worldwide, now is the perfect time to begin your own cycling journey. The TRIFOX TRAIL II PRO combines lightweight carbon technology, full suspension comfort, and XC-focused performance to help you ride faster, farther, and with more confidence than ever before.
Celebrate the spirit of competition, embrace adventure, and discover where the trail can take you with the TRIFOX TRAIL II PRO.
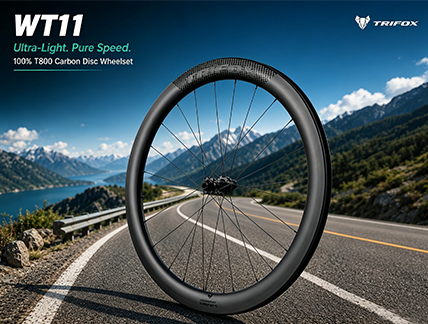
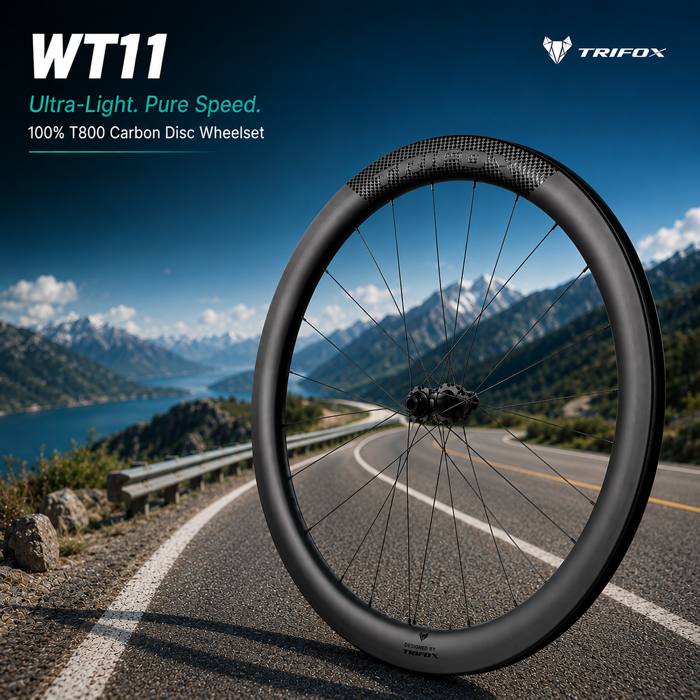
The debate between carbon and aluminum wheels is one of the most persistent in road cycling. Walk into any group ride, and you’ll hear passionate arguments for both sides. Some riders swear by the weight savings and acceleration of carbon. Others point to the durability and value of aluminum. The truth is simpler than the debate suggests: both materials have strengths, but they serve different riders, budgets, and priorities. Here’s how to decide which is right for you — and why the Trifox WT11 carbon disc wheelset represents a compelling case for carbon.
The Carbon Advantage: Weight, Stiffness, and Aerodynamics
Carbon fiber’s primary advantage is its exceptional stiffness-to-weight ratio. A well-engineered carbon wheelset like the WT11 can weigh as little as 1,526g for the 40mm depth (712g front, 814g rear), while many aluminum wheelsets of similar depth exceed 1,700–1,800g. That weight difference isn’t just a number on a spec sheet—it directly affects how the bike feels on the road.
Weight: The Most Noticeable Difference
Rotational weight matters more than static weight. Every gram at the rim requires more energy to accelerate than a gram elsewhere on the bike. Lighter wheels spin up faster, climb more easily, and respond more eagerly when you surge out of a corner or attack a short climb. A pair of lightweight carbon wheels like the WT11 can make a bike feel “like an absolute rocketship” compared to heavier aluminum wheels. Riders who have tested the WT11 consistently note that the wheels are “lightweight, well leveled and very easy to install”, with one reviewer calling them “probably the best bang for your buck”.
Stiffness: Power Transfer and Handling
Carbon’s higher stiffness-to-weight ratio means more efficient power transfer. When you sprint or climb out of the saddle, a stiff carbon rim resists flex, directing more of your energy into forward motion. This translates to sharper acceleration and more precise handling. Aluminum wheels tend to flex more under load, which some riders find comfortable, but it can feel less responsive under hard efforts. The WT11’s 100% Toray T800 carbon construction and 24 straight-pull Pillar spokes deliver the stiffness that performance-oriented riders demand.
Aerodynamics: Shaping the Wind
Carbon can be molded into complex aerodynamic profiles that aluminum cannot easily replicate. The WT11 offers four depth options—40mm, 45mm, 50mm, and 60mm—allowing riders to choose between lighter weight (40mm) or greater aero efficiency (60mm). Deeper carbon rims reduce drag at speed, saving watts on flat and rolling terrain. Aluminum rims of similar depth are often heavier and less aerodynamically refined.
Vibration Damping: A Smoother Ride
Carbon’s composite structure absorbs high-frequency road vibration more effectively than aluminum. The WT11’s T800 carbon construction helps filter out road buzz, reducing hand and arm fatigue on rough pavement. Riders often describe carbon wheels as feeling “smoother” and “more planted” than aluminum equivalents, especially on chip seal and worn asphalt.
The Aluminum Case: Durability and Value
Aluminum wheels have their own strengths. They are generally more affordable, more durable against impacts, and can be repaired more easily than carbon. A quality aluminum wheelset can handle potholes, curb strikes, and daily training abuse with less anxiety. For winter training, commuting, or riders on a tighter budget, aluminum remains an excellent choice. However, aluminum does have a fatigue life—over years of hard use, the material can develop micro-cracks that eventually lead to failure. Carbon, when undamaged, does not fatigue in the same way.
Braking: Disc Brakes Change the Equation
The move to disc brakes has removed one of carbon’s historical disadvantages: rim brake compatibility. Rim brake carbon rims require special brake pads and can suffer from reduced stopping power in wet conditions. With disc brakes, the braking surface is on the rotor, not the rim. The WT11’s Center Lock disc brake interface eliminates this concern entirely, delivering consistent, powerful braking regardless of weather or rim material. This makes carbon disc wheels a more practical choice for year-round riding.
Which Should You Choose?
The choice depends on your priorities and budget. Choose carbon if you value weight savings, stiffness, aerodynamics, and a smoother ride—and if you have the budget to invest in a quality wheelset like the WT11. Choose aluminum if you prioritize durability, repairability, and upfront cost, or if you ride primarily in conditions where wheel strikes are common.
For riders seeking a lightweight carbon wheels upgrade that delivers genuine performance without the premium price of big‑brand rivals, the Trifox WT11 offers a compelling value proposition. Weighing as little as 1,526g per pair, built with T800 carbon and Pillar spokes, and available in multiple depths to match your terrain, it’s a wheelset that transforms how your bike accelerates, climbs, and handles. At $439, it’s one of the most accessible entry points into genuine carbon wheel performance.

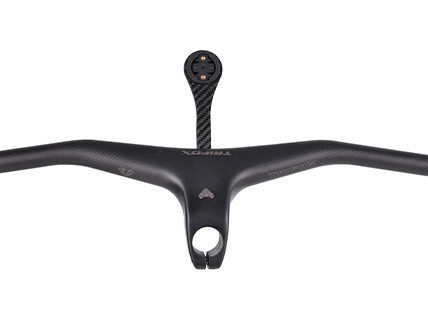
Your mountain bike's front end is where the trail meets your control. Every input you make—steering, leaning, weighting the front wheel—travels through the handlebar. If that connection is compromised by flex, weight, or a less-than-optimal interface, your handling suffers, and so does your confidence. Enter the carbon mtb cockpit upgrade, exemplified by the Trifox RHB100. By fusing the bar and stem into a single, continuous carbon structure, this integrated handlebar delivers measurable improvements in stiffness, weight, and steering precision—all of which translate directly to better handling and stability on the trail.

Enhanced Stiffness: The Foundation of Precision
Traditional bar-and-stem combinations have an inherent weak point: the interface where the stem clamps the handlebar. Even with perfect torque, that junction can allow micro-flex under load, dulling steering response and absorbing energy that should be directed to the front wheel. The RHB100 eliminates that weak link entirely. Its integrated, one-piece design (with a 6° rise and 40/50/60/70mm stem length options) creates an exceptionally stiff, direct connection between your hands and the fork. The result is “zero detectable flex” under load—whether you're pulling up for a manual or leaning into a high-speed corner. This rigidity instills confidence, especially on technical descents where precise steering input is critical.
Independent research supports this advantage. One study on integrated cockpits found that a one-piece design increases front-end stiffness by up to 20% compared to a separate bar and stem combination. A stiffer front end means your steering inputs are translated more immediately and accurately, allowing you to hold your line through rock gardens, root sections, and loose corners with greater control and less correction.
Reduced Weight: Agility and Reduced Fatigue
At just 244 grams for the complete bar and stem assembly, the RHB100 represents a significant weight saving over almost any alloy combination. A typical alloy bar and stem setup often weighs over 400 grams; some integrated carbon designs are up to 40% lighter than their aluminum counterparts. This reduction is immediately noticeable when you pick up the bike—and even more so on the trail.
A lighter front end feels more agile and easier to maneuver. It reduces the bike's overall rotational inertia, making it quicker to turn and easier to loft over obstacles. Furthermore, reduced weight at the handlebar contributes to less arm fatigue over long rides. A lighter setup demands less muscular effort to control, helping you stay fresher and more in control during marathon XC races or all-day trail adventures.
Optimized Geometry: Natural Control Position
The RHB100's geometry—6° rise and 6° backsweep—is designed to place your hands in a natural, comfortable position that enhances control. The backsweep aligns your wrists with your forearms, reducing strain and improving leverage when pulling up on the bars or weighting the front wheel. The rise brings the grips to a height that balances an aggressive riding posture with all-day comfort, allowing you to maintain a stable, centered position over the bike.
Clean Cockpit: A Professional, Uncluttered Feel
While aerodynamics are less critical on a mountain bike than a road bike, the RHB100's integrated profile does offer benefits. The lack of a protruding stem faceplate creates a smoother, more aerodynamic surface. More importantly, the clean lines provide a tidy cockpit for mounting a computer or light, contributing to a professional, finished look. The printed alignment marks on the bar also simplify setup and ensure your controls are positioned perfectly.
T800 Carbon Fiber: The Material Behind the Performance
The RHB100 is constructed from premium T800 carbon fiber, which offers an excellent strength-to-weight ratio. T800 carbon provides the rigidity needed for precise steering while offering enough compliance to mitigate trail buzz and fatigue. This balance is critical: you want a handlebar that is stiff enough to transmit steering inputs accurately but compliant enough to absorb high-frequency vibrations that cause arm pump and hand numbness. The result is a ride that is both precise and comfortable, allowing you to ride harder and longer.
Conclusion
Upgrading to an integrated carbon MTB handlebar like the Trifox RHB100 is one of the most effective ways to improve your bike's handling and stability. By eliminating the bar-stem interface, you gain a stiffer, more responsive front end. By shedding significant weight, you gain agility and reduce fatigue. And by optimizing the geometry, you gain a more natural, controlled riding position. For riders seeking a high-performance aero bicycle handlebars upgrade that delivers tangible on-trail benefits, the RHB100 represents a significant and worthwhile step forward.

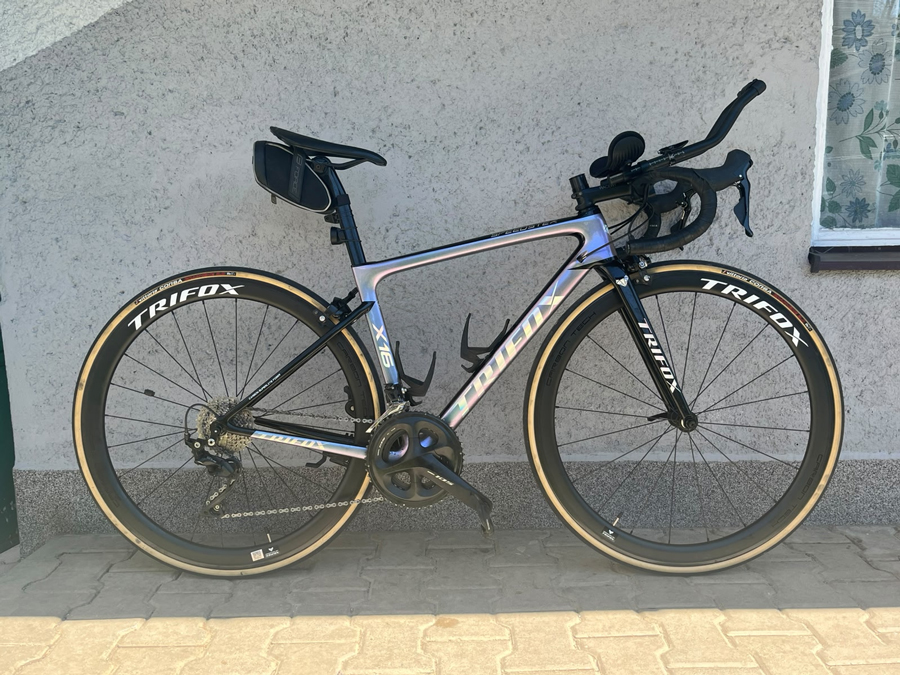
On any climb, gravity is your enemy. Every extra gram of bike weight demands more energy from your legs, slowing your progress and dulling the joy of the ascent. For cyclists who measure their rides in meters of elevation gain, the quest for a lighter bike is not vanity—it's physics. The Trifox X16TA lightweight carbon road bike frame is built with this reality in mind, offering a platform that transforms climbing from a struggle into a joy.
Weight: The Decisive Factor on Every Climb
The mathematics of climbing is simple: less mass requires less work to lift against gravity. The X16TA is crafted from T800 carbon fiber, a high-modulus material prized for its exceptional stiffness-to-weight ratio. This allows Trifox to create a frame that is both incredibly light and remarkably rigid. In the smaller sizes, the frame weight dips below the 1kg mark, a figure that places it in the company of frames costing significantly more. Shedding this much weight from the core of the bike yields immediate benefits: the bike feels eager to accelerate, responds instantly to changes in tempo, and makes steep pitches feel noticeably less daunting.
T800 Carbon: The Foundation of Performance
Weight savings alone do not make a great frame. The X16TA's T800 carbon fiber construction provides the perfect balance of stiffness and compliance. The bottom bracket and head tube areas are reinforced for maximum rigidity, ensuring that when you stamp on the pedals out of the saddle, every watt of power translates directly into forward momentum. There is no wasteful flex, no spongy feeling under load—just immediate, efficient acceleration. Yet the frame retains enough vertical compliance to absorb road vibration, keeping you fresher and more comfortable on long days in the saddle. It's this balance that defines a truly great climbing frame.
More Than Just a Climbing Frame
While the X16TA excels on the ascent, its capabilities extend far beyond the mountain passes. As a modern disc brake road bike frame, it features flat-mount disc brake compatibility and 12mm thru-axles front and rear. This setup provides consistent, powerful stopping power in all conditions and a stiff, secure wheel interface that inspires confidence on high-speed descents. The frame is designed to work seamlessly with both DI2 electronic and mechanical groupsets, offering broad compatibility for builders. With clearance for up to 25C tires (and compatibility with 28C), it can accommodate a wide range of wheelsets.
The geometry of the X16TA is tuned for responsive, race-oriented handling. With a progressive head tube angle and a compact wheelbase, the bike is agile and quick to change direction, making it a joy to ride on twisting descents and through fast-paced group rides. It's a frame that rewards an active riding style and encourages you to push your limits.
For the Rider Who Demands More
The Trifox X16TA is for the cyclist who understands that a great ride starts with a great frame. It's for the rider who seeks the thrill of lightweight acceleration, the precision of responsive handling, and the confidence of modern standards. Whether you're targeting a new personal record on your local climb, embarking on a multi-day sportive, or simply want a bike that feels alive beneath you, the X16TA is a lightweight carbon road bike frame that delivers. It is a testament to the power of modern carbon engineering, offering the performance of frames costing significantly more. By choosing the X16TA, you are choosing to ride higher and climb faster—every time you get on the bike.


